Vultr Storage Provider
This guide aims to help you set up a Vultr Object Storage bucket for storing site backups.
Start by signing in to your Vultr account.
Create Bucket
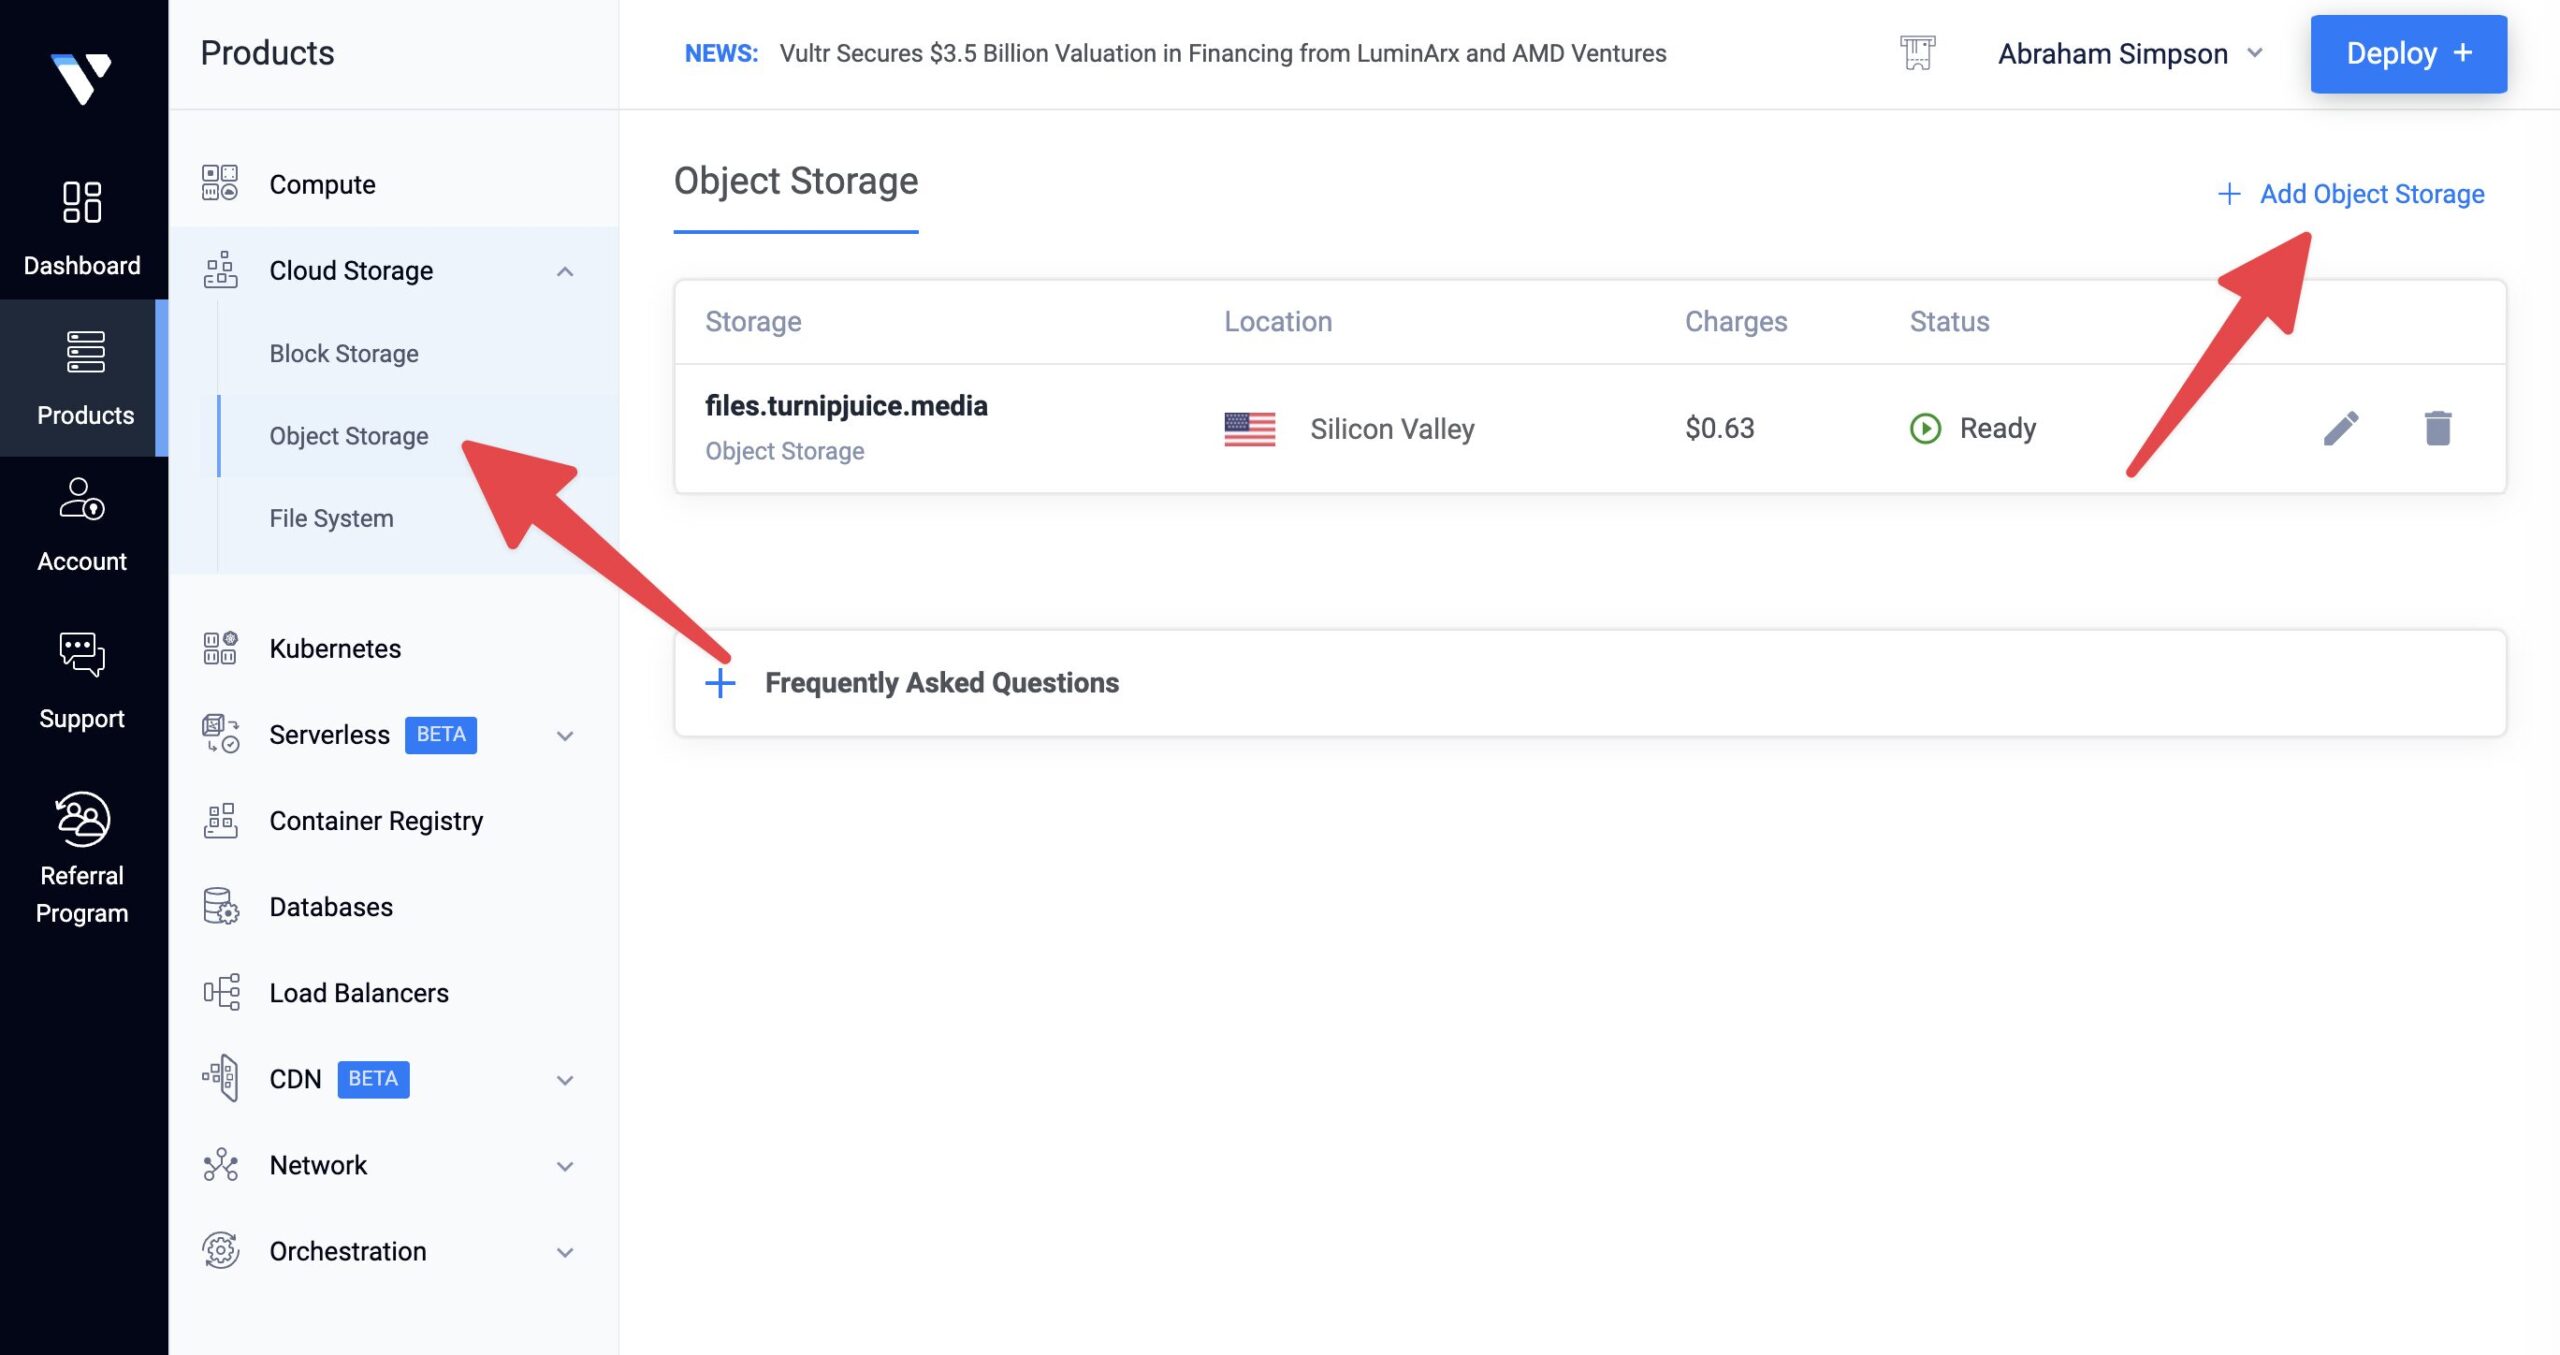
Once signed in, go to Cloud Storage > Object Storage. Once the page loads, click + Add Object Storage.

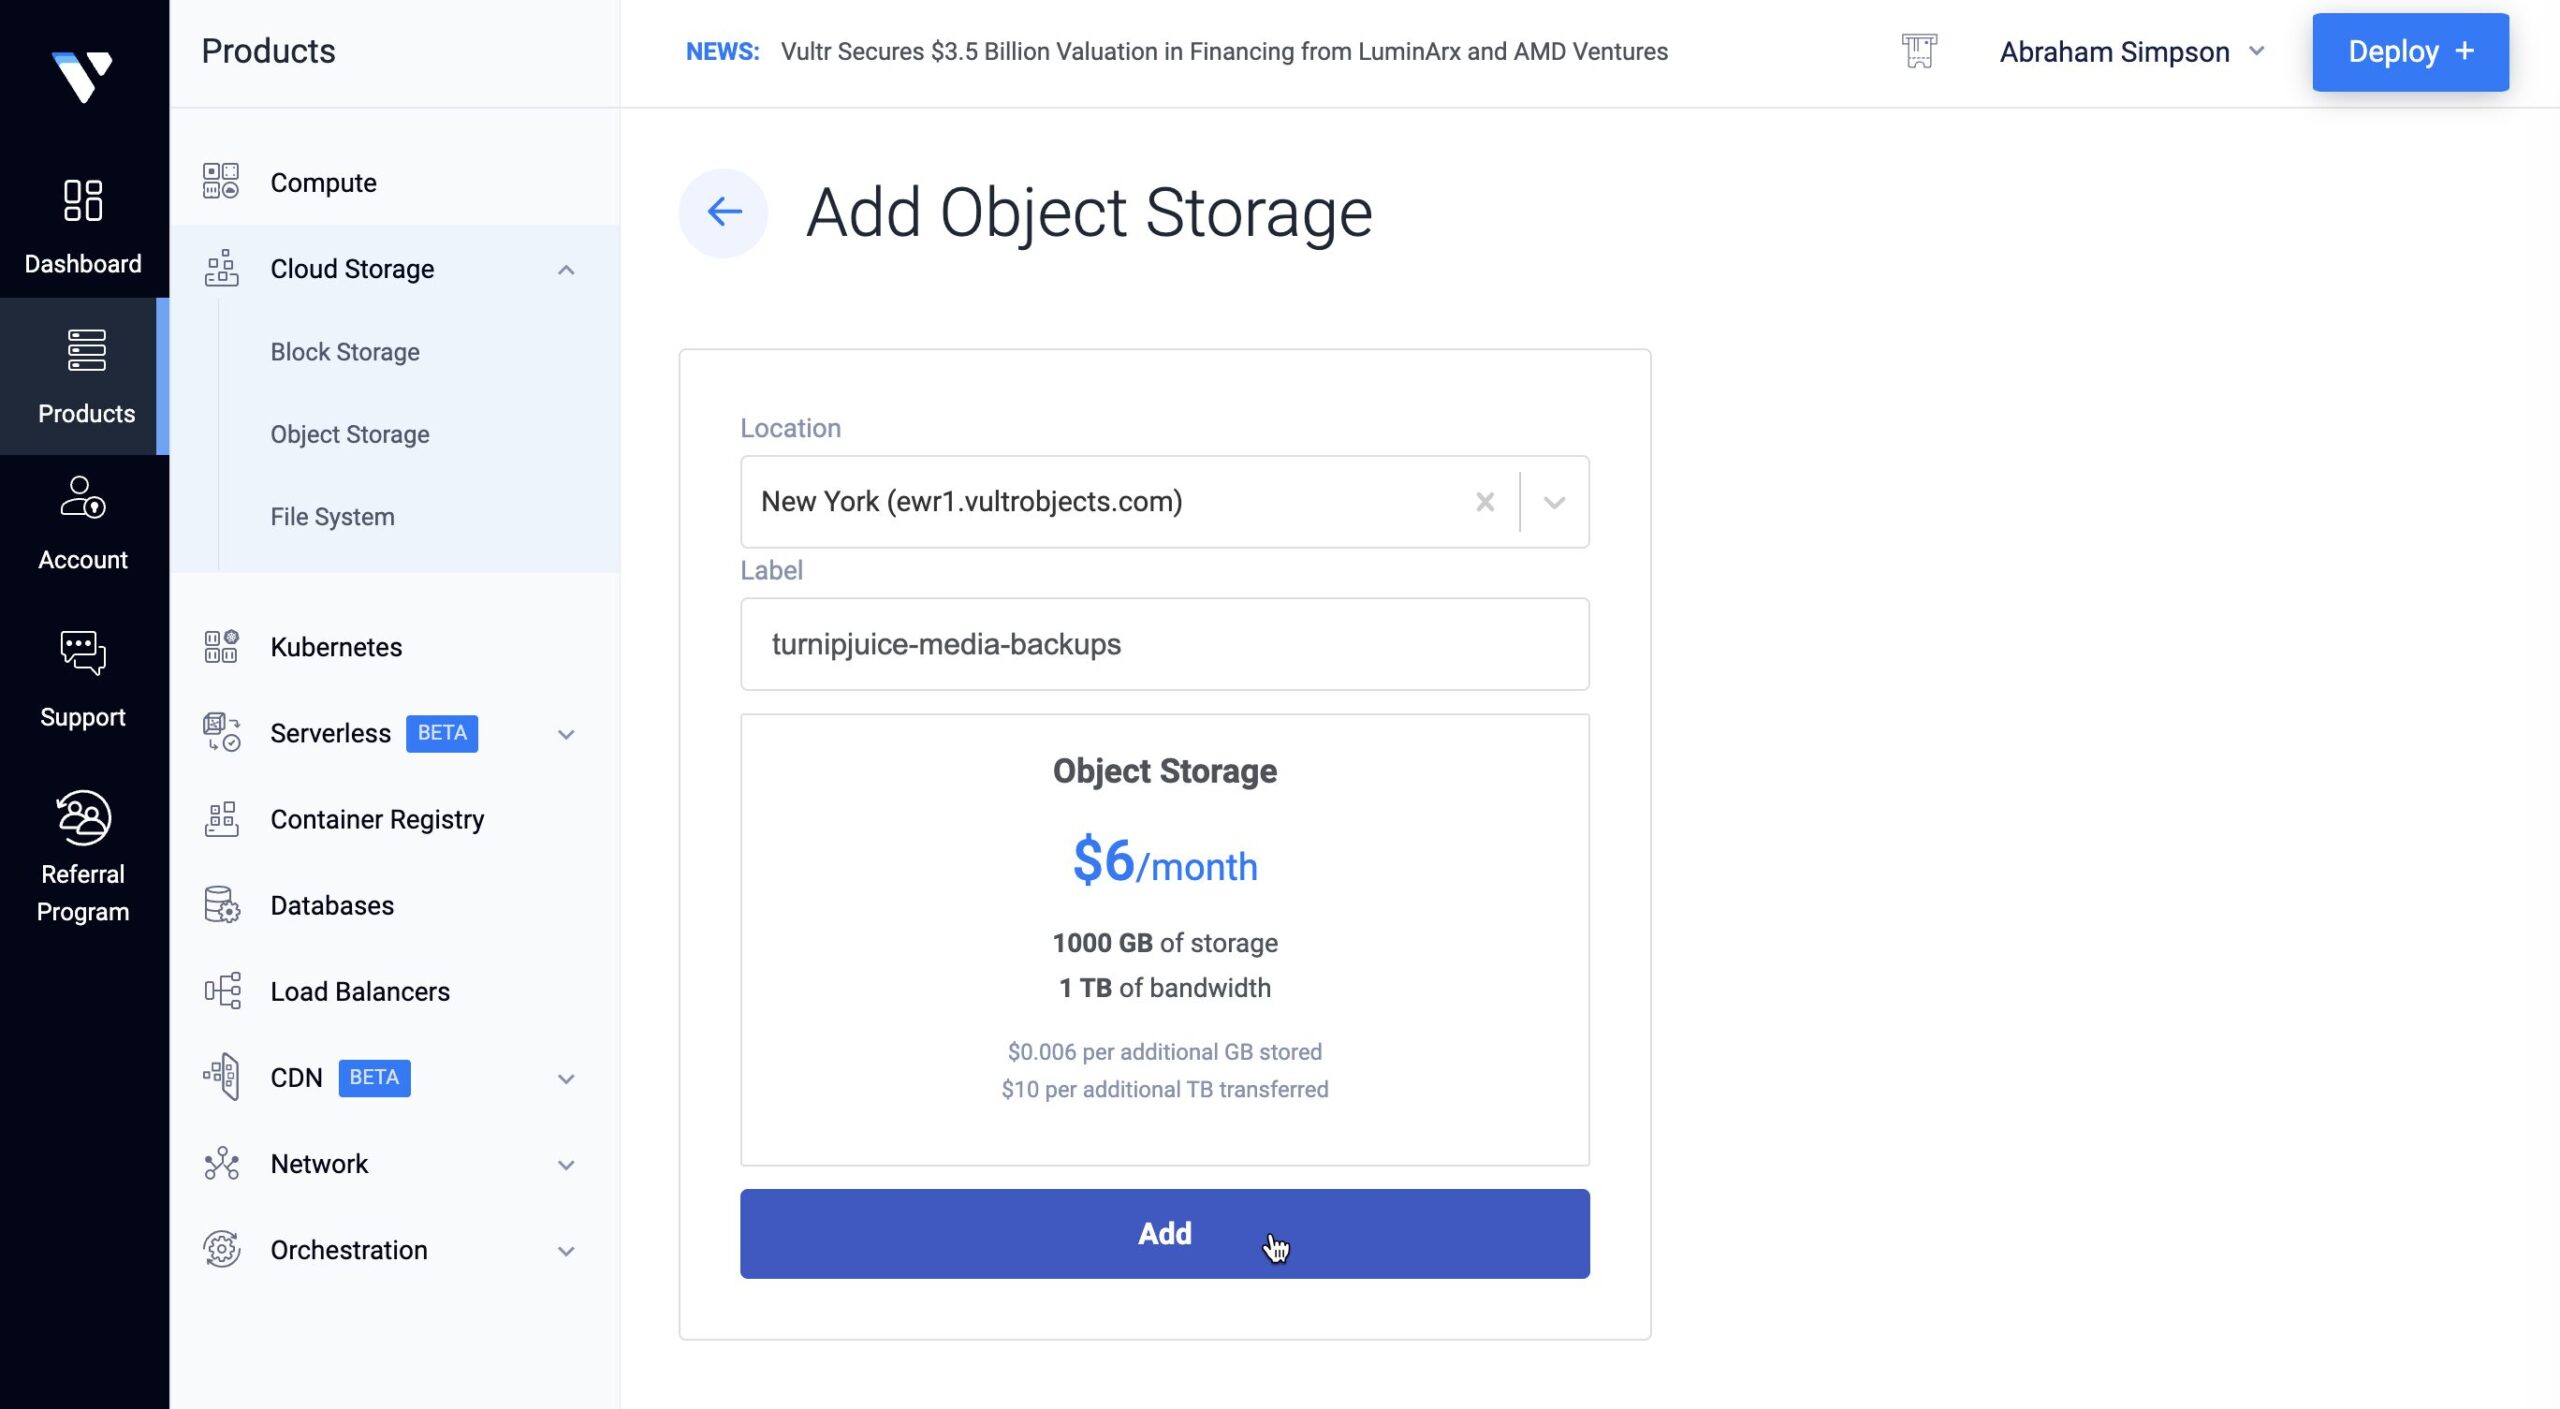
In this first step, you’re creating an object storage group. You can have many buckets inside an object storage group.
Choose a datacenter region that’s geographically close to your server location. This will improve the time it takes to copy backup files from your server to the Vultr bucket.
Enter a unique label for the group. If you’re planning to have multiple buckets for backups in this region for multiple servers and sites, you might label it “Site Backups” for example. Otherwise, you might want to name it the same name as your bucket. A good bucket naming scheme is “domain-backups” e.g. “turnipjuice-media-backups”.

Click Add.
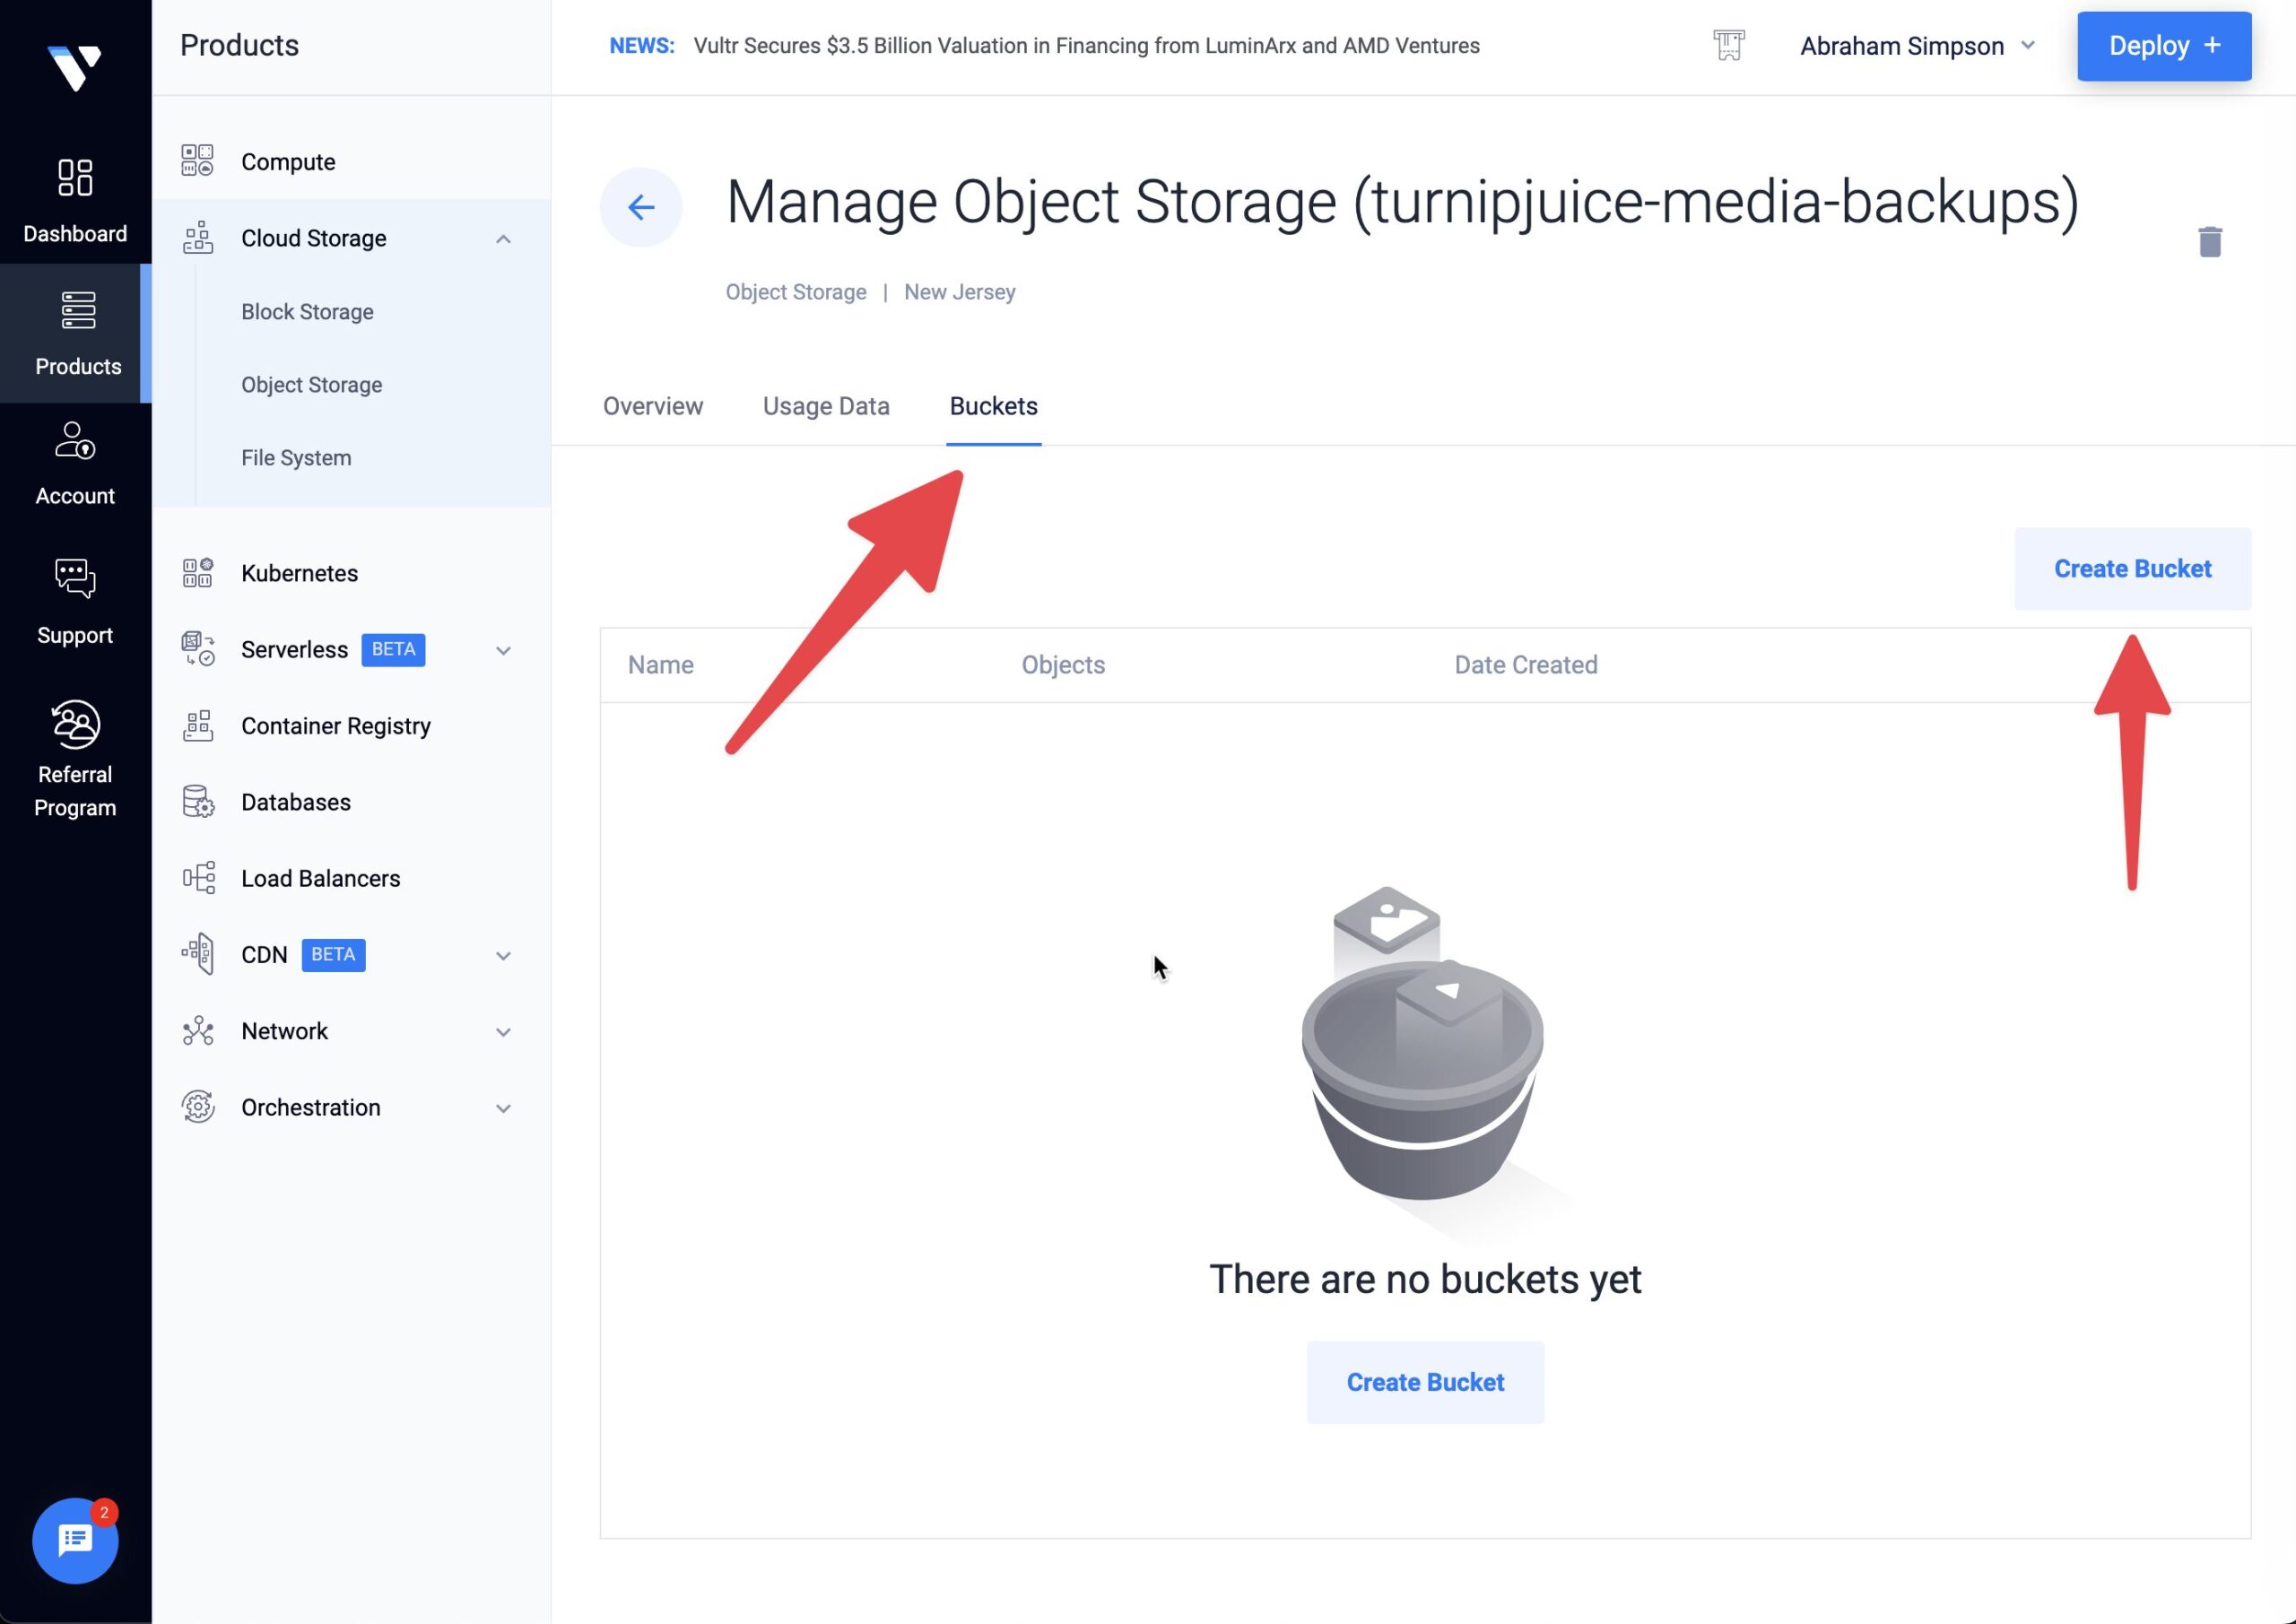
Once Vultr creates the object storage group and it’s ready, click on it. Now click the Buckets tab and then the Create Bucket button.

Enter the bucket name (e.g. turnipjuice-media-backups) and click the Create Bucket button. It’s fine to ignore the other options.
Copy Keys
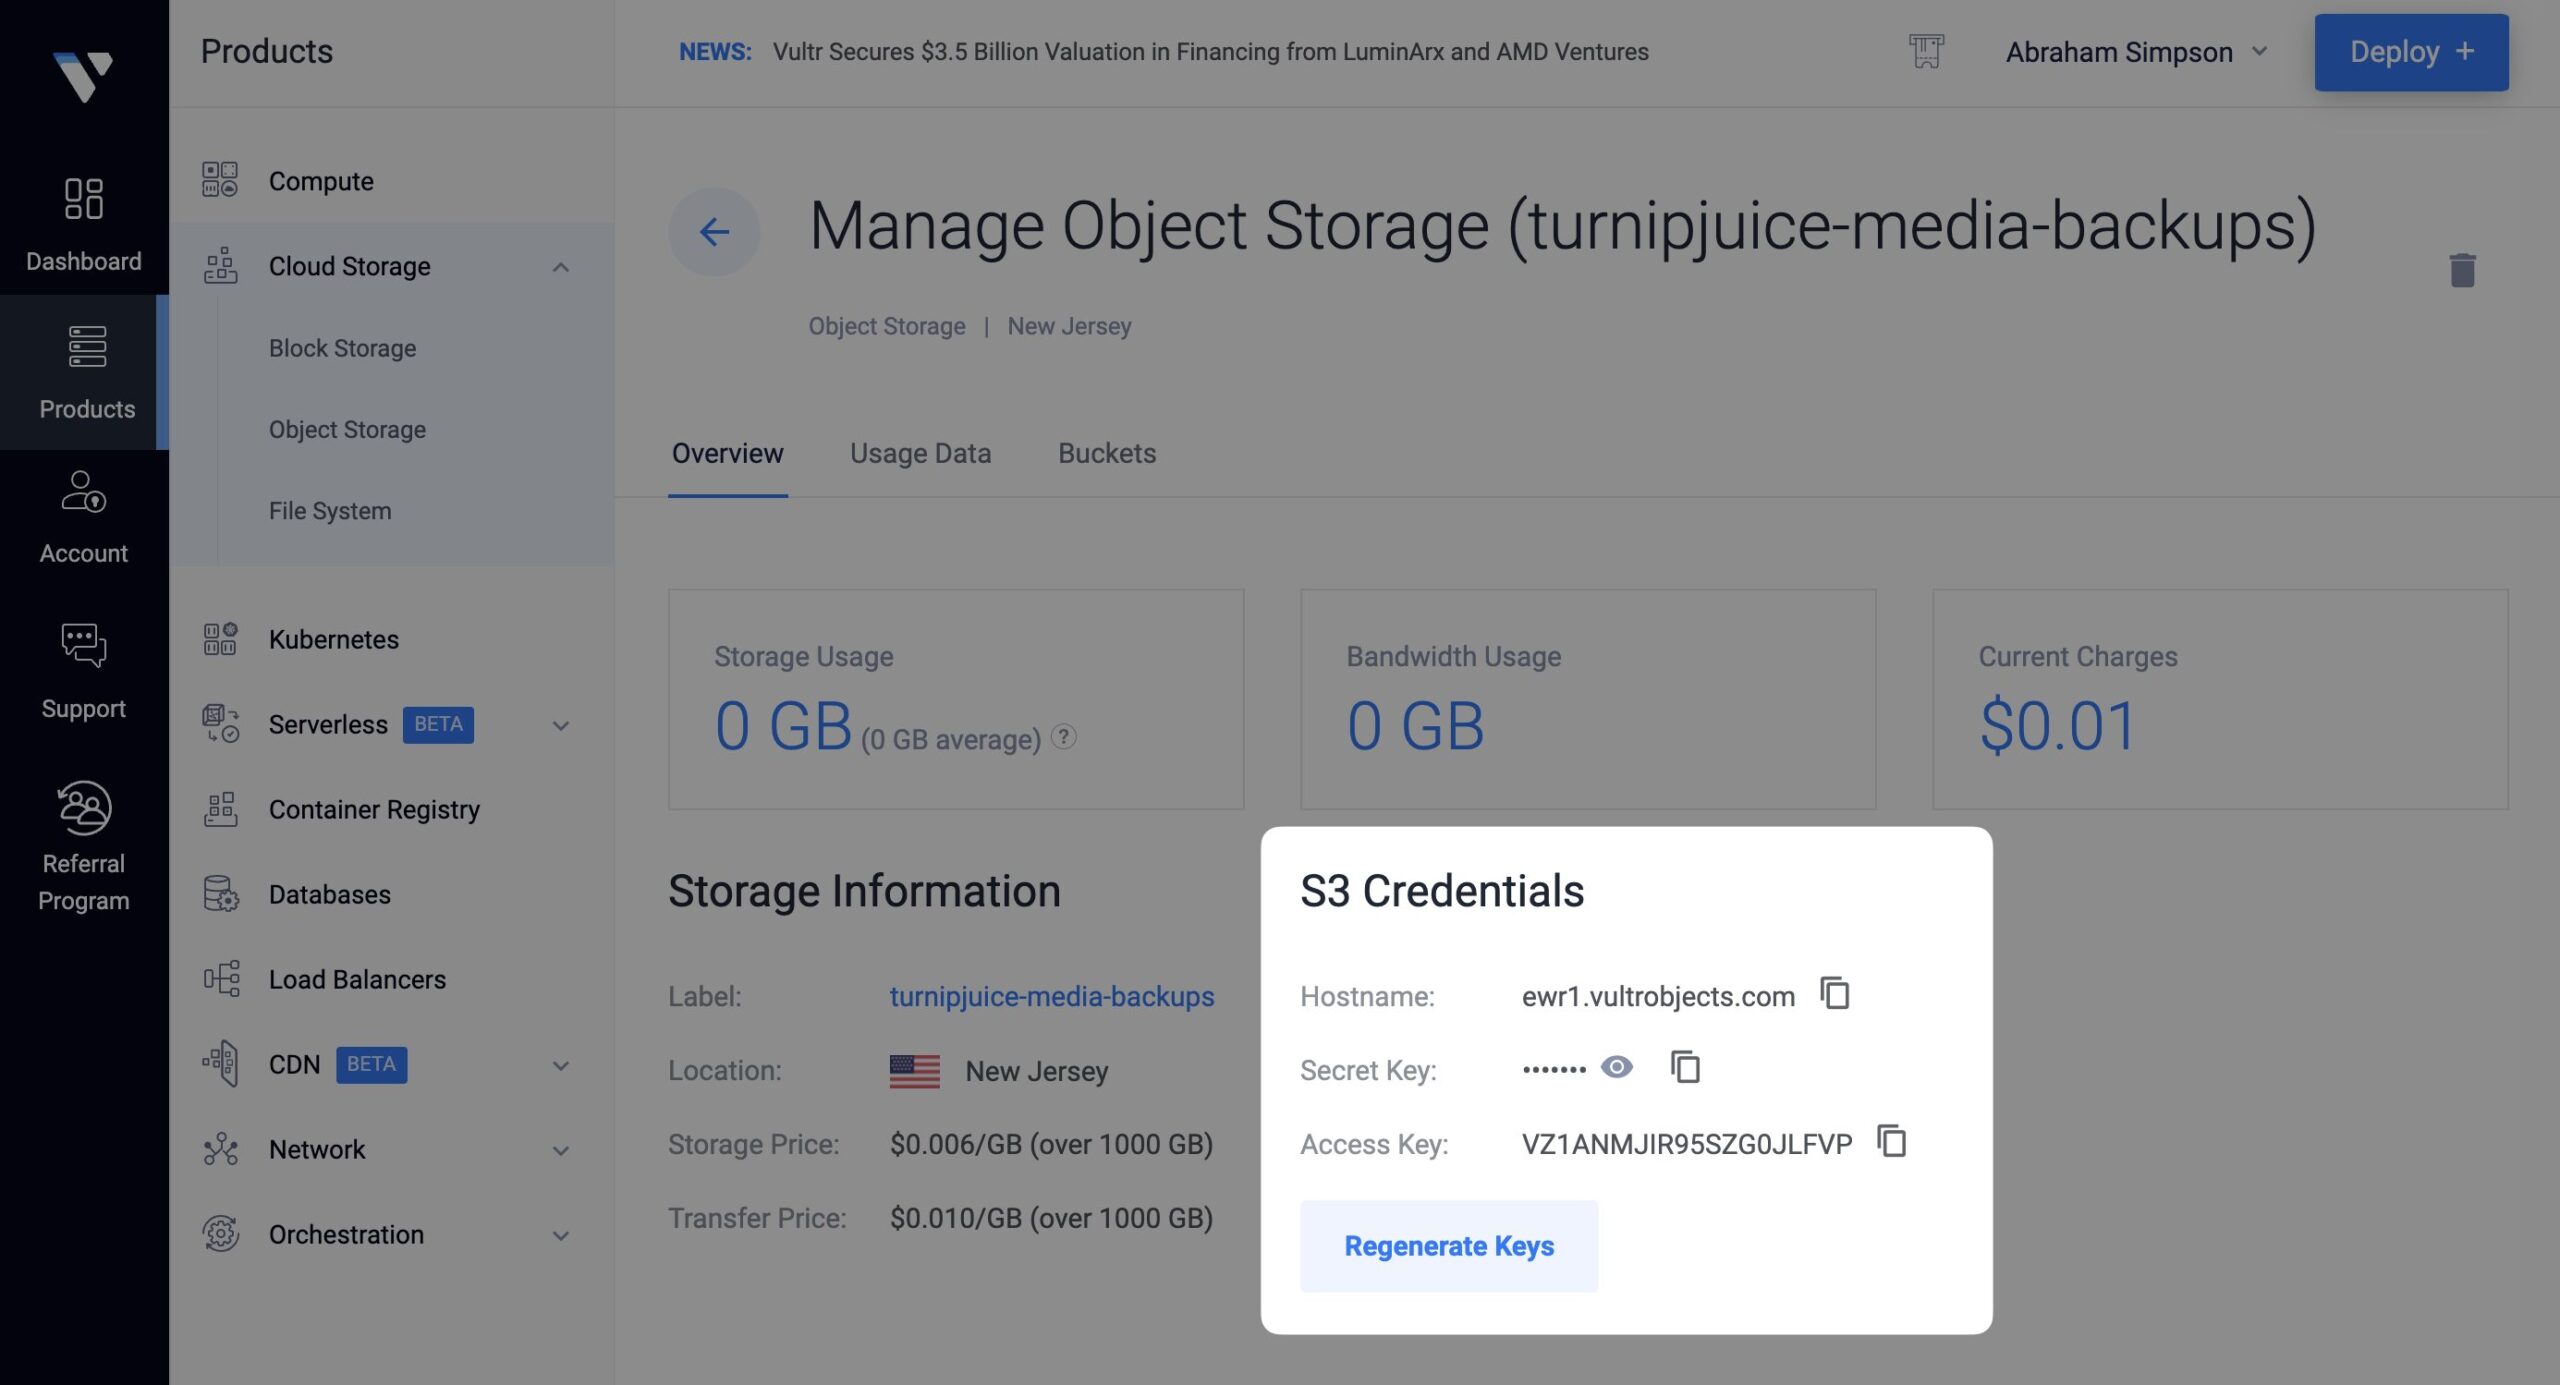
On the next screen you’ll notice the S3 Credentials section.

You will need to copy the Secret Key and Access Key when creating the Vultr backup provider in SpinupWP and that should be all you need.