There are often situations where you need to perform a disk space check on your Linux operating system. Whether you’re on a server or desktop, perhaps you saw a notification warning of your hard drive space running low or received a message from your server provider about disk space problems.
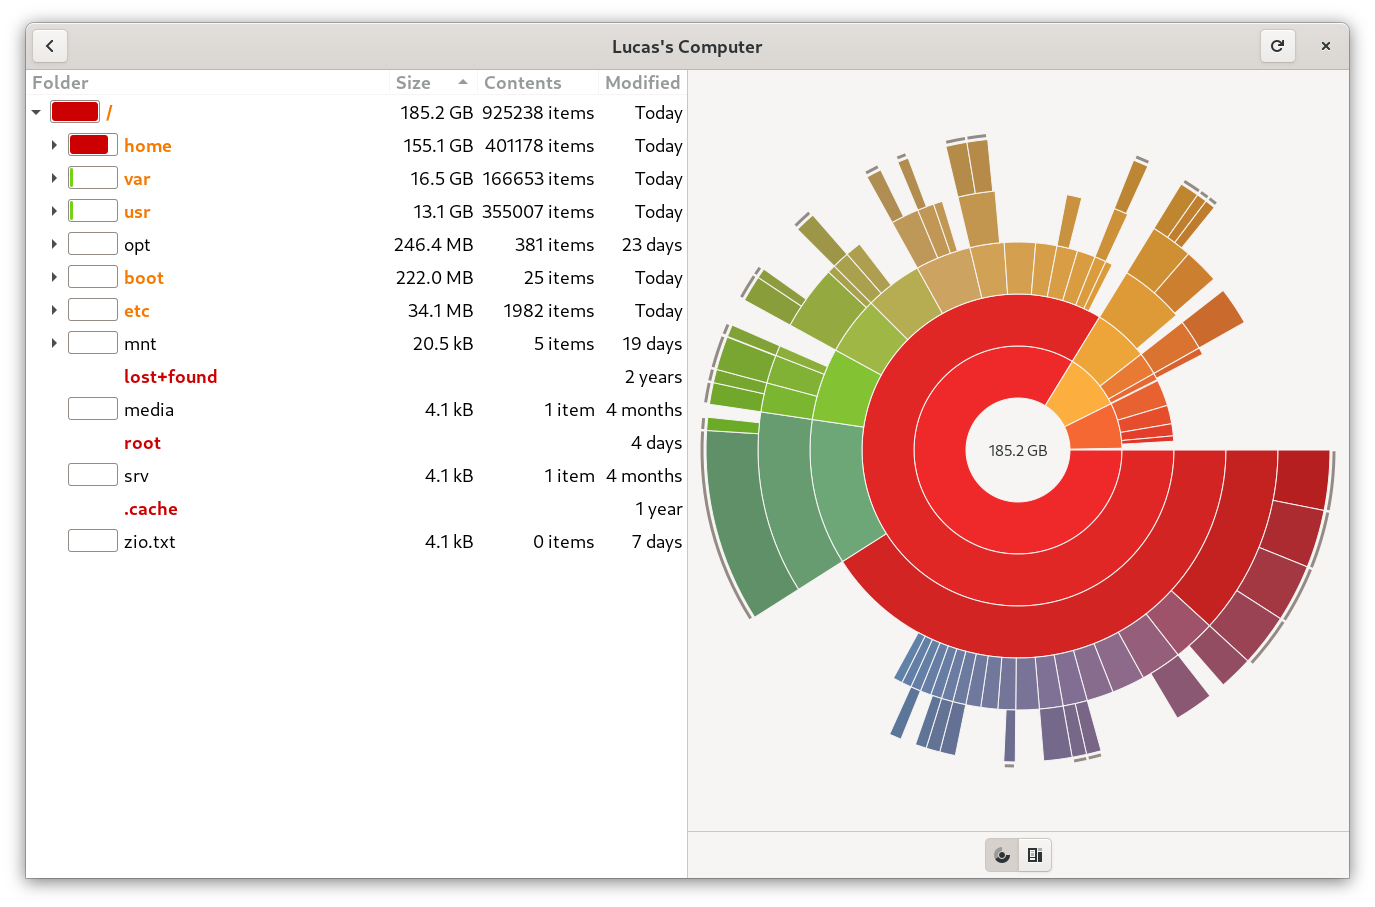
If you are on a desktop install of Ubuntu, you can use the Disk Usage Analyzer tool.

The problem with this tool is that if you have a larger hard drive to check, it can take a long time to run. Also, because it’s run as the currently logged in user, it doesn’t have access to all directory locations, so the disk usage problem could be in a place the tool can’t access.
If you’re managing a server, there’s no graphical user interface (GUI) tool like the Disk Usage Analyzer that shows you which specific directories, subdirectories, or files take up space on your file system. The disk space usage could often be unrelated to your website’s files and instead caused by software update caches, large log files, or other server-level related data.
Fortunately, with a bit of command-line knowledge, it can be pretty straightforward to hunt down what’s taking up space on your hard disk, whether you’re on a desktop or server version of Ubuntu.

The Disk Filesystem Command
Many online tutorials recommend the df command to use when checking for disk space usage on a Linux system. You can use this command to show disk usage and free disk space for a specific file system.
Here’s an example of the output generated when running the df command on an Ubuntu server. I’ve added the -h switch, so the space usage is showing in a human-readable format.
df -h
udev            474M     0  474M   0% /dev
tmpfs            99M  976K   98M   1% /run
/dev/vda1        25G  4.0G   21G  17% /
tmpfs           491M     0  491M   0% /dev/shm
tmpfs           5.0M     0  5.0M   0% /run/lock
tmpfs           491M     0  491M   0% /sys/fs/cgroup
/dev/vda15      105M  9.2M   96M   9% /boot/efi
/dev/loop0       56M   56M     0 100% /snap/core18/1885
/dev/loop1       71M   71M     0 100% /snap/lxd/16922
/dev/loop2       31M   31M     0 100% /snap/snapd/9607
tmpfs            99M     0   99M   0% /run/user/1003
The df command is excellent for listing all available hard drive mount points or if you know where the problem is. However, you will generally only need to examine the / mount when searching for disk space hogs. For these reasons, the du command is much more helpful.
The Disk Usage Command
All Ubuntu distributions have a disk usage (du) command. This command-line tool estimates the disk usage in a specified directory. It does this by first summarizing any directory tree (the hierarchy of directories) in the given directory, followed by a usage summary of all the files in that directory.
Knowing how to use this command with a specific set of options will help you isolate the disk space culprits.
Using the Disk Usage Command
Running the du command on a specific directory without any arguments will display the summary for that directory.
To ensure that the disk usage command has the required root user permissions to read the directories you are pointing it to, you can prefix any du command with sudo.
sudo du
Below is an example of the output you might get running the command to check the disk space on the home directory of a user on a SpinupWP server:
sudo du /home/hellfishmedia/
4       /home/hellfishmedia/.local/share/nano
8       /home/hellfishmedia/.local/share
12      /home/hellfishmedia/.local
1964    /home/hellfishmedia/files
8       /home/hellfishmedia/.ssh
9872    /home/hellfishmedia/logs/backups
21704   /home/hellfishmedia/logs
3040    /home/hellfishmedia/backups
1193740 /home/hellfishmedia/media
4       /home/hellfishmedia/.cache
1220492 /home/hellfishmedia/
In this example, we’ve added two additional directories, logs, and files, which we’ll use later to explain how to customize the du command.
Some things to note about this output:
- It traverses through the directory tree for the home directory, showing the path to each directory it finds and summarizes the total disk usage of that directory
- It then shows the total summary of the disk usage for the home directory
- It shows the size estimates in bytes, which is not helpful when looking for large files.
- It shows all files and directories, including dot-files, which are usually not disk space culprits
- It doesn’t order the results in any meaningful way
As you can imagine, running this on the server root (/) or inside your /sites/ directory on a SpinupWP managed instance will output a much longer and confusing list of directories and files. So we want to start filtering the results so that they are more valuable.
The first change we can make is to add the wildcard (*) character to the end of the directory being summarized:
sudo du /home/hellfishmedia/*
3040    /home/hellfishmedia/backups
1964    /home/hellfishmedia/files
9872    /home/hellfishmedia/logs/backups
21704   /home/hellfishmedia/logs
1193740 /home/hellfishmedia/media
This is much more useful data:
- it excludes the dot-files
- it does not return the total summary for the entire home directory
In this simple example, these results are better than the first set; you can see that the /home/hellfishmedia/media directory takes up a lot of the space. With larger result sets, it would be preferable to make those disk usage values more easily recognizable. It would also be ideal to only report on the top-level directories in the directory being checked and then drill down even further from there.
Adding Some Arguments
There are two arguments available to the du command that are helpful here.
The -h argument prints the sizes reported in human-readable format (e.g., 1K 234M 2G):
sudo du -h /home/hellfishmedia/*
3.0M    /home/hellfishmedia/backups
2.0M    /home/hellfishmedia/files
9.7M    /home/hellfishmedia/logs/backups
22M     /home/hellfishmedia/logs
1.2G    /home/hellfishmedia/media
Adding the -s argument limits the results to just the total estimates for the top-level directories in the home directory:
sudo du -sh /home/hellfishmedia/*
3.0M    /home/hellfishmedia/backups
2.0M    /home/hellfishmedia/files
22M     /home/hellfishmedia/logs
1.2G    /home/hellfishmedia/media
Filtering the Results
Being able to sort the output by size is another essential part of checking for disk space hogs. To do this, we can add a filter to the du output using the sort command. As its name suggests, sort allows you to sort lines of text files.
We use the pipe (|) character to send the du output to the sort command, and then add the -h and -r arguments to it to sort the data by human-readable numbers, and reverse the results, showing largest to smallest.
sudo du -sh /home/hellfishmedia/* | sort -hr
1.2G    /home/hellfishmedia/media
22M     /home/hellfishmedia/logs
3.0M    /home/hellfishmedia/backups
2.0M    /home/hellfishmedia/files
Putting It All Together
With this combination of du and sort commands, we can now dig into what is using the most disk space. From the previous example, we saw that the media directory was using up 1.2GB of space.
sudo du -sh /home/hellfishmedia/media/* | sort -hr
480M    /home/hellfishmedia/media/MoonandSeaHDFInalRender.mov
325M    /home/hellfishmedia/media/FreeSmokeYoutubeRender.mov
173M    /home/hellfishmedia/media/3d_ocean_render.mov
82M     /home/hellfishmedia/media/Earth_Zoom_In_Render.mov
48M     /home/hellfishmedia/media/MoonandSeaHDFInalRenderH264.mov
32M     /home/hellfishmedia/media/FreeSmokeYoutube.mov
21M     /home/hellfishmedia/media/3d_ocean_1590675653.mov
8.1M    /home/hellfishmedia/media/Earth_Zoom_In.mov
Now we can examine the media directory and see the list of files, from largest to smallest. For example, right at the top, the MoonandSeaHDFInalRender.mov takes up almost half of the 1.2GB disk usage we saw earlier.
This is a simplified example of how you would keep repeating this process as you discover the directories with significant total disk usage until you find the files taking up space. Let’s look at a more real-world example.
Hunting Space Hogs
Your first step will be to check the root directory of the hard disk:
sudo du -sh /* | sort -hr
Depending on your server’s hard disk size and the amount of disk space in use, this could take a little while. Below is a simplified example of what the output might look like:
19.8G   /sites
1.9G    /var
1.7G    /usr
503M    /snap
145M    /boot
12M     /opt
7.8M    /etc
4.0M    /cache
3.0M    /home
1.6M    /root
992K    /run
64K     /tmp
16K     /lost+found
4.0K    /srv
4.0K    /mnt
4.0K    /media
As you can see, the /sites directory is taking up 19.8GB of space and is probably where the problem lies. So your next logical step would be to update the command to report on the /sites directory:
sudo du -sh /sites/* | sort -hr
This command might return something like:
16.2G   /sites/site3.com
1.0G    /sites/site1.com
1.8G    /sites/site2.com
164M    /sites/site4.com
In this example, site3.com is taking up a whopping 16.2G of space. Next would be to see what’s happening inside /sites/site3.com:
sudo du -sh /sites/site3.com/* | sort -hr
You can continue running du in this way on subsequent folders until you find the culprit.
Sometimes, it might not be your /sites directory that’s taking up a lot of space. It might be some other directory, like /var or /tmp, that needs cleaning up. You can run the du command on these directories in the same way that you did for /sites, and keep drilling down until you find the problem:
sudo du -sh /var/* | sort -hr
sudo du -sh /tmp/* | sort -hr
Cleaning Up
Once you’ve found the offending directories or files taking up space on your server, you will want to figure out a way to move them off the server. If they are essential media files for one or more of your WordPress sites, you might want to consider offloading them to a cloud-based file storage service like Amazon S3.
If they are large log files or other files you are sure you don’t need, you can delete them from the server. Let’s look at two examples:
Example 1. Delete the debug.log file (location shown is where SpinupWP puts it by default):
sudo rm /sites/site3.com/logs/debug.log
Example 2. Delete the elementor directory created in the WordPress uploads directory by the Elementor plugin, which you previously uninstalled from a WordPress site.
sudo rm -rf /sites/site3.com/wp-content/uploads/elementor
Have you had disk space usage problems on your Ubuntu file system and resolved them with the du command? Got any other tips for how to improve the process? Let us know in the comments.


