Cloudflare R2 Storage Provider
This guide aims to help you set up a Cloudflare R2 bucket for storing site backups.
Start by signing in to your Cloudflare account.
Create Bucket
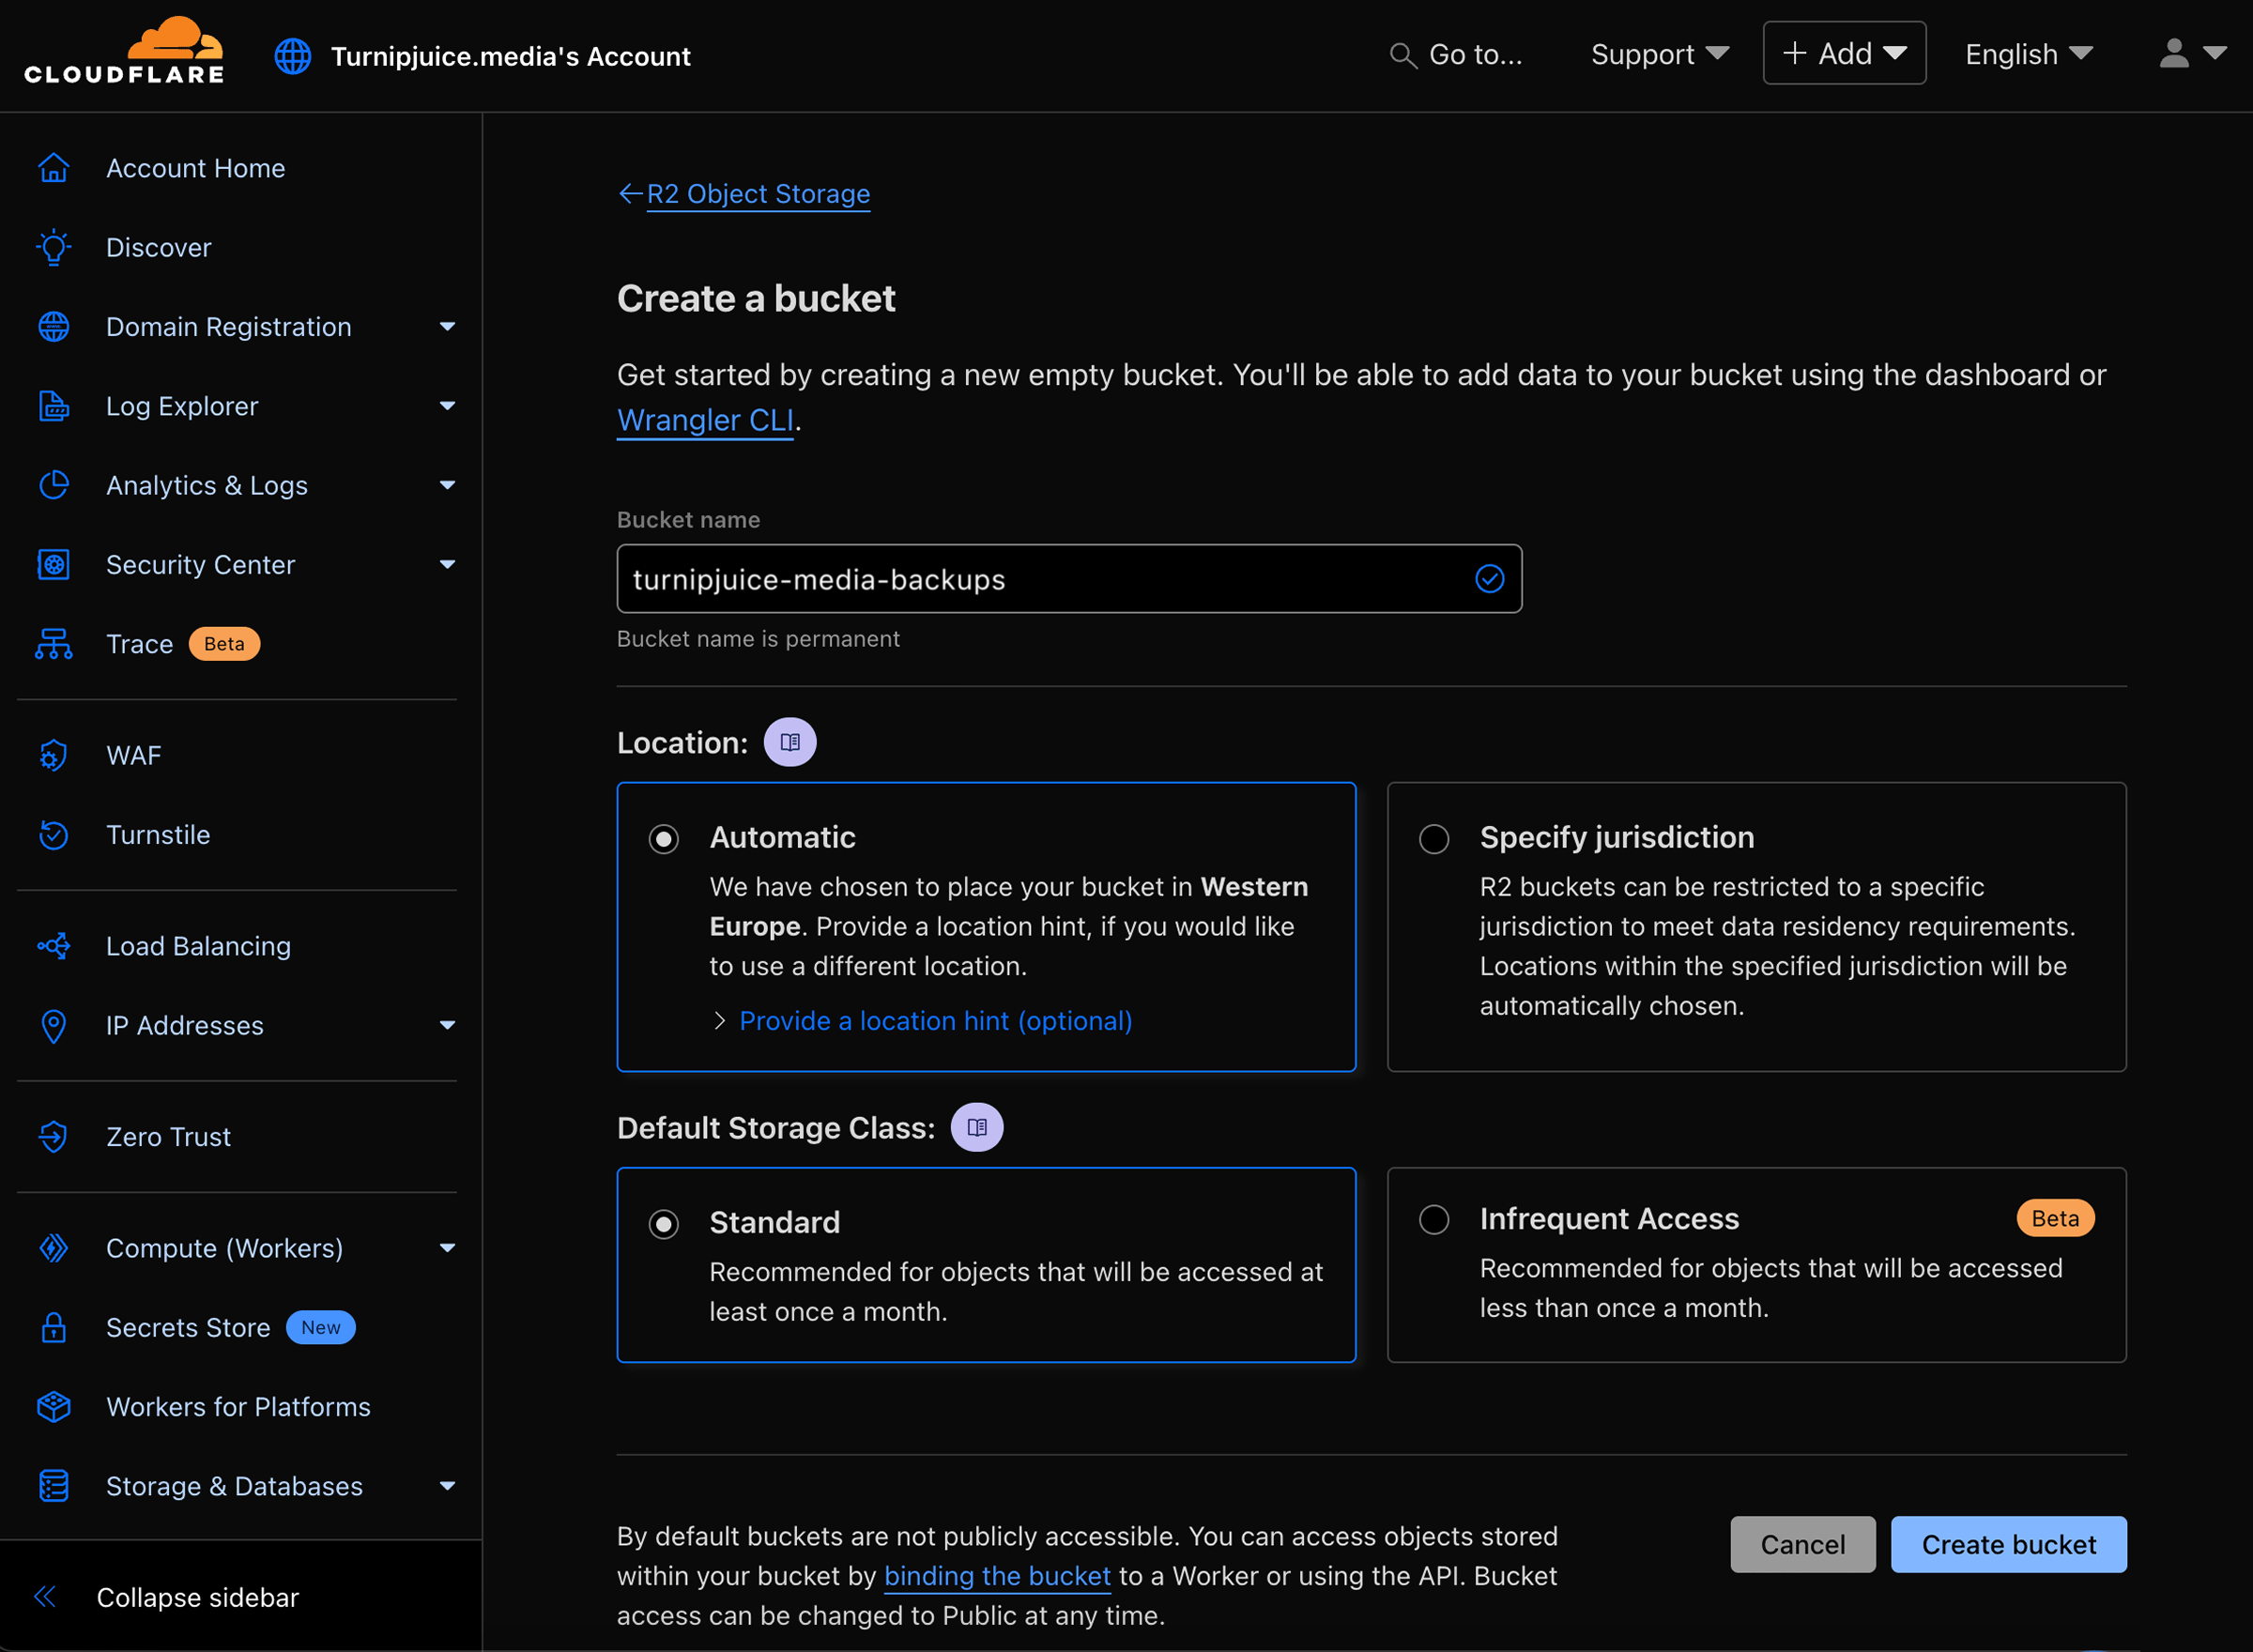
Once signed in, go to R2 Object Storage. Once the page loads, click Create Bucket.

Enter the bucket name (e.g. turnipjuice-media-backups) and click the Create bucket button. It’s fine to leave the other options as their defaults.

Copy Keys and Account ID
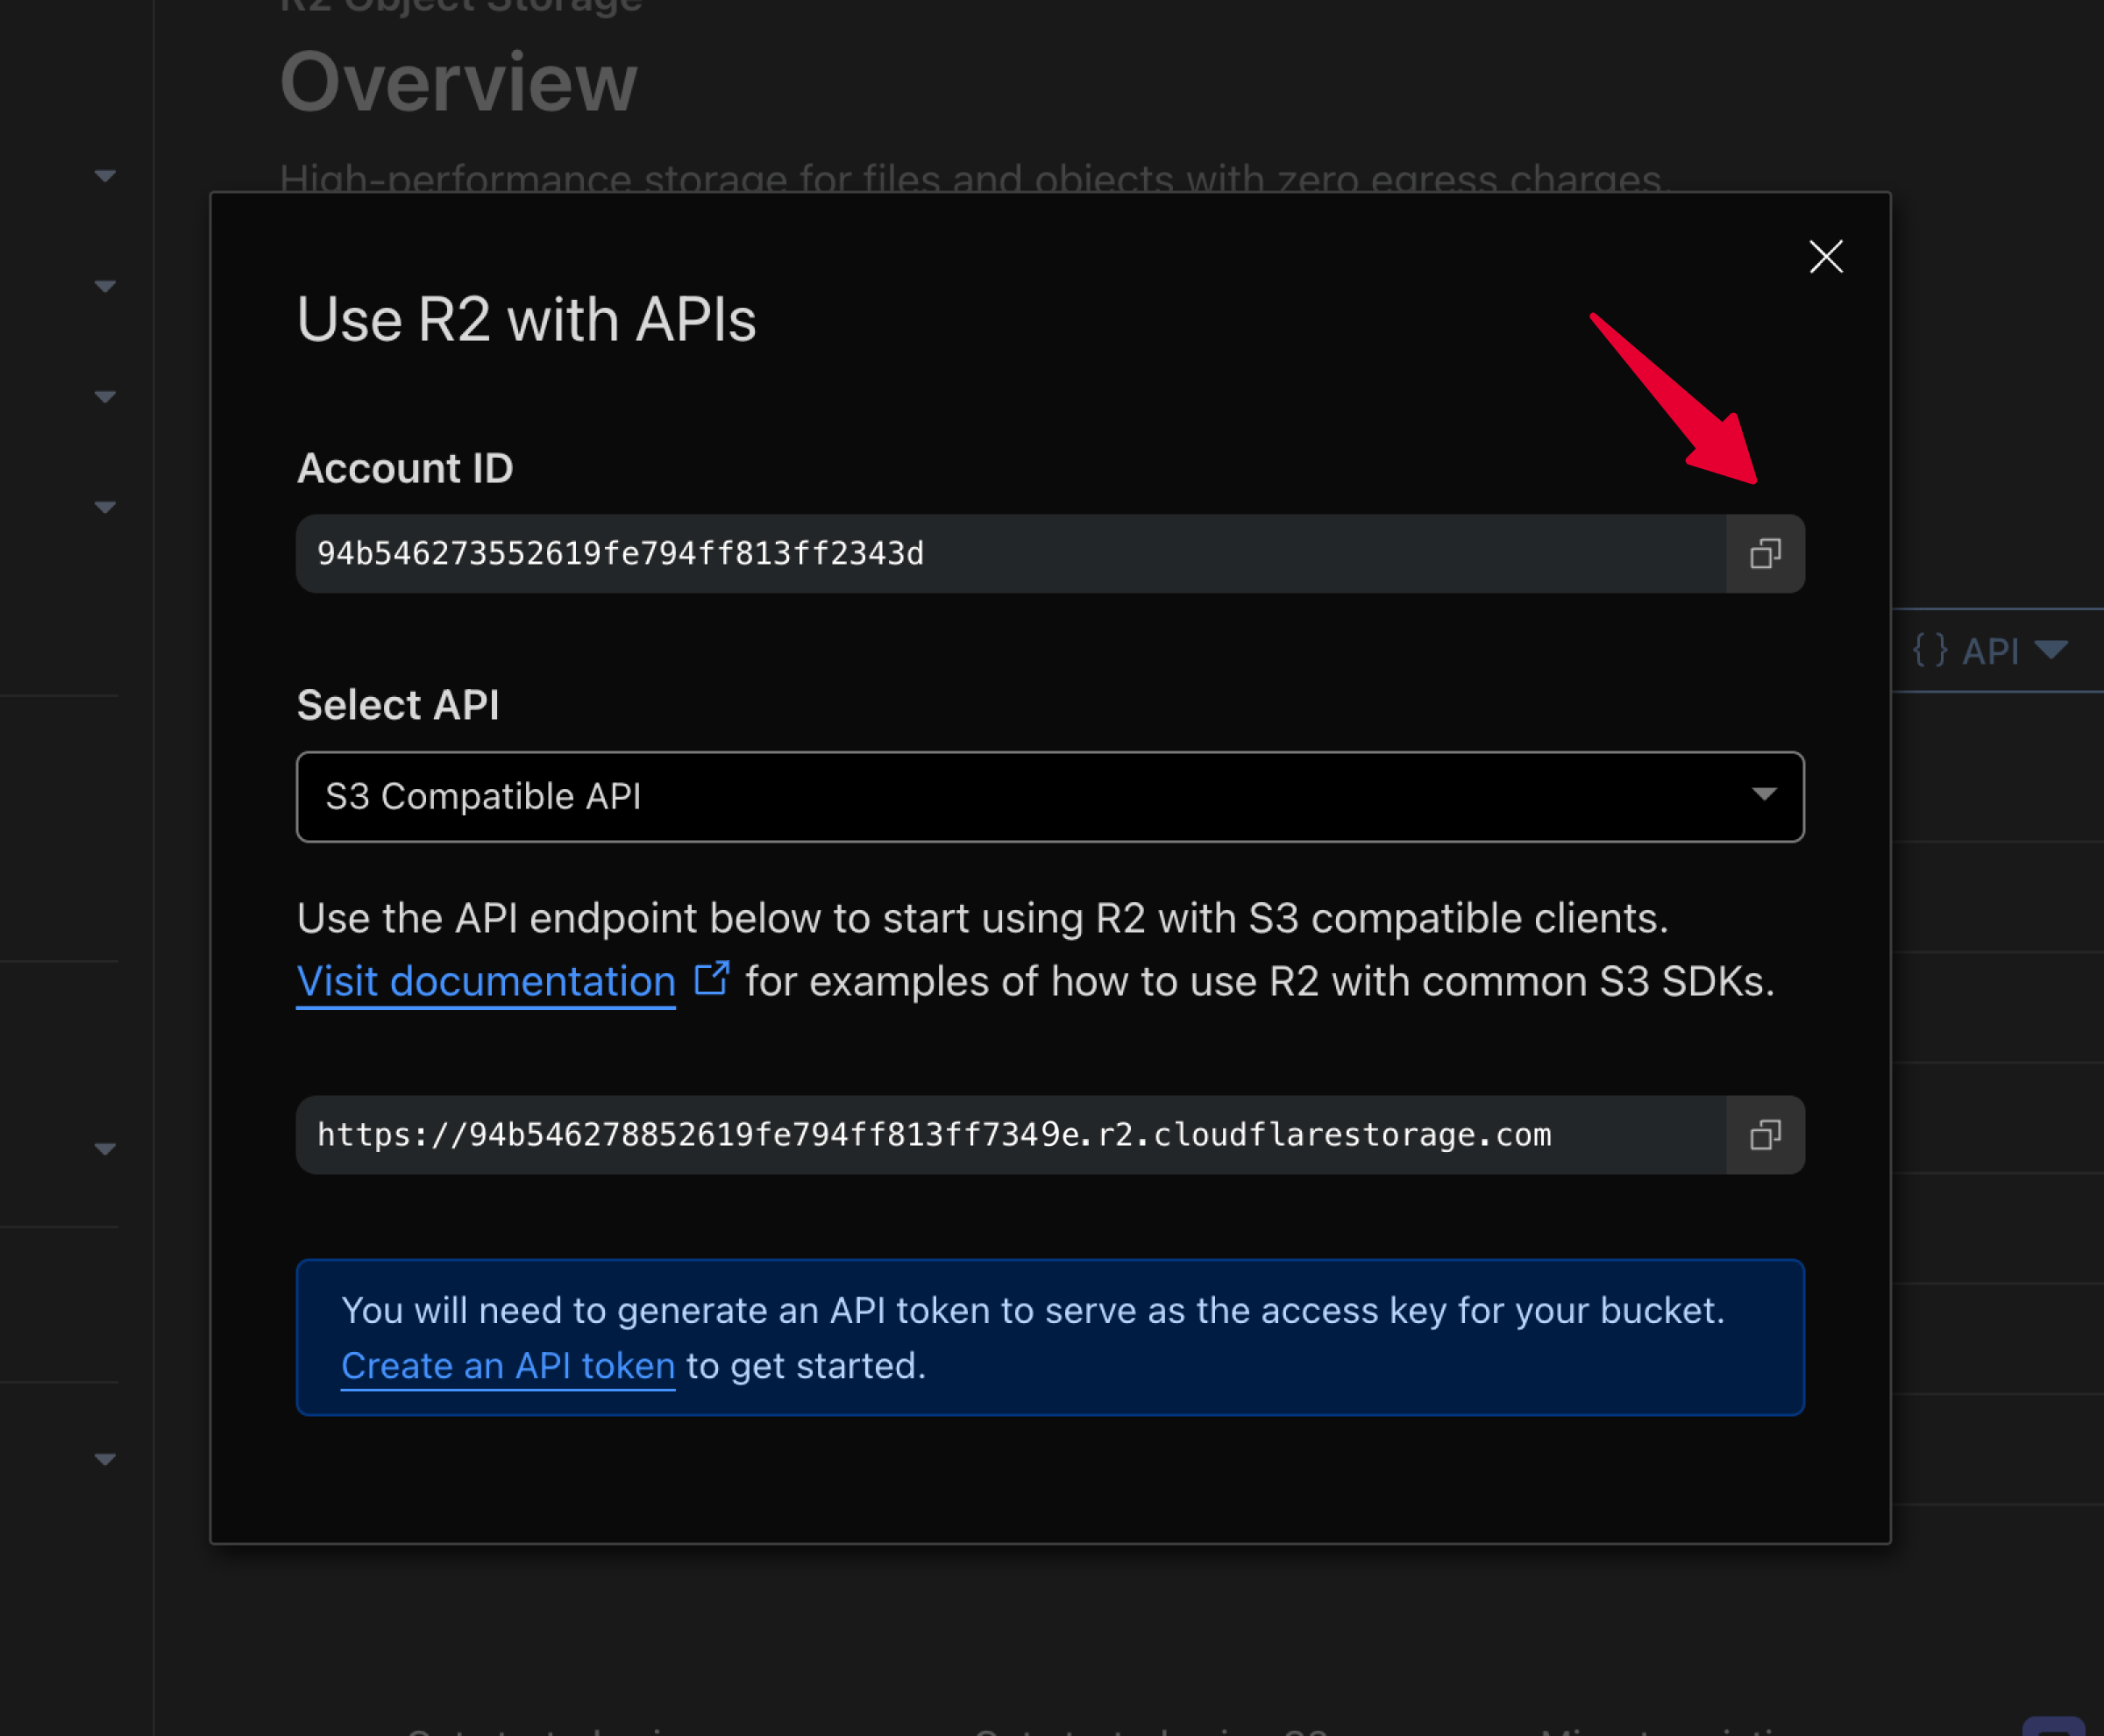
Go back to the R2 Object Storage page and click the API dropdown next to the Create bucket button. From the dropdown, select Use R2 with APIs and copy your Account ID for later.

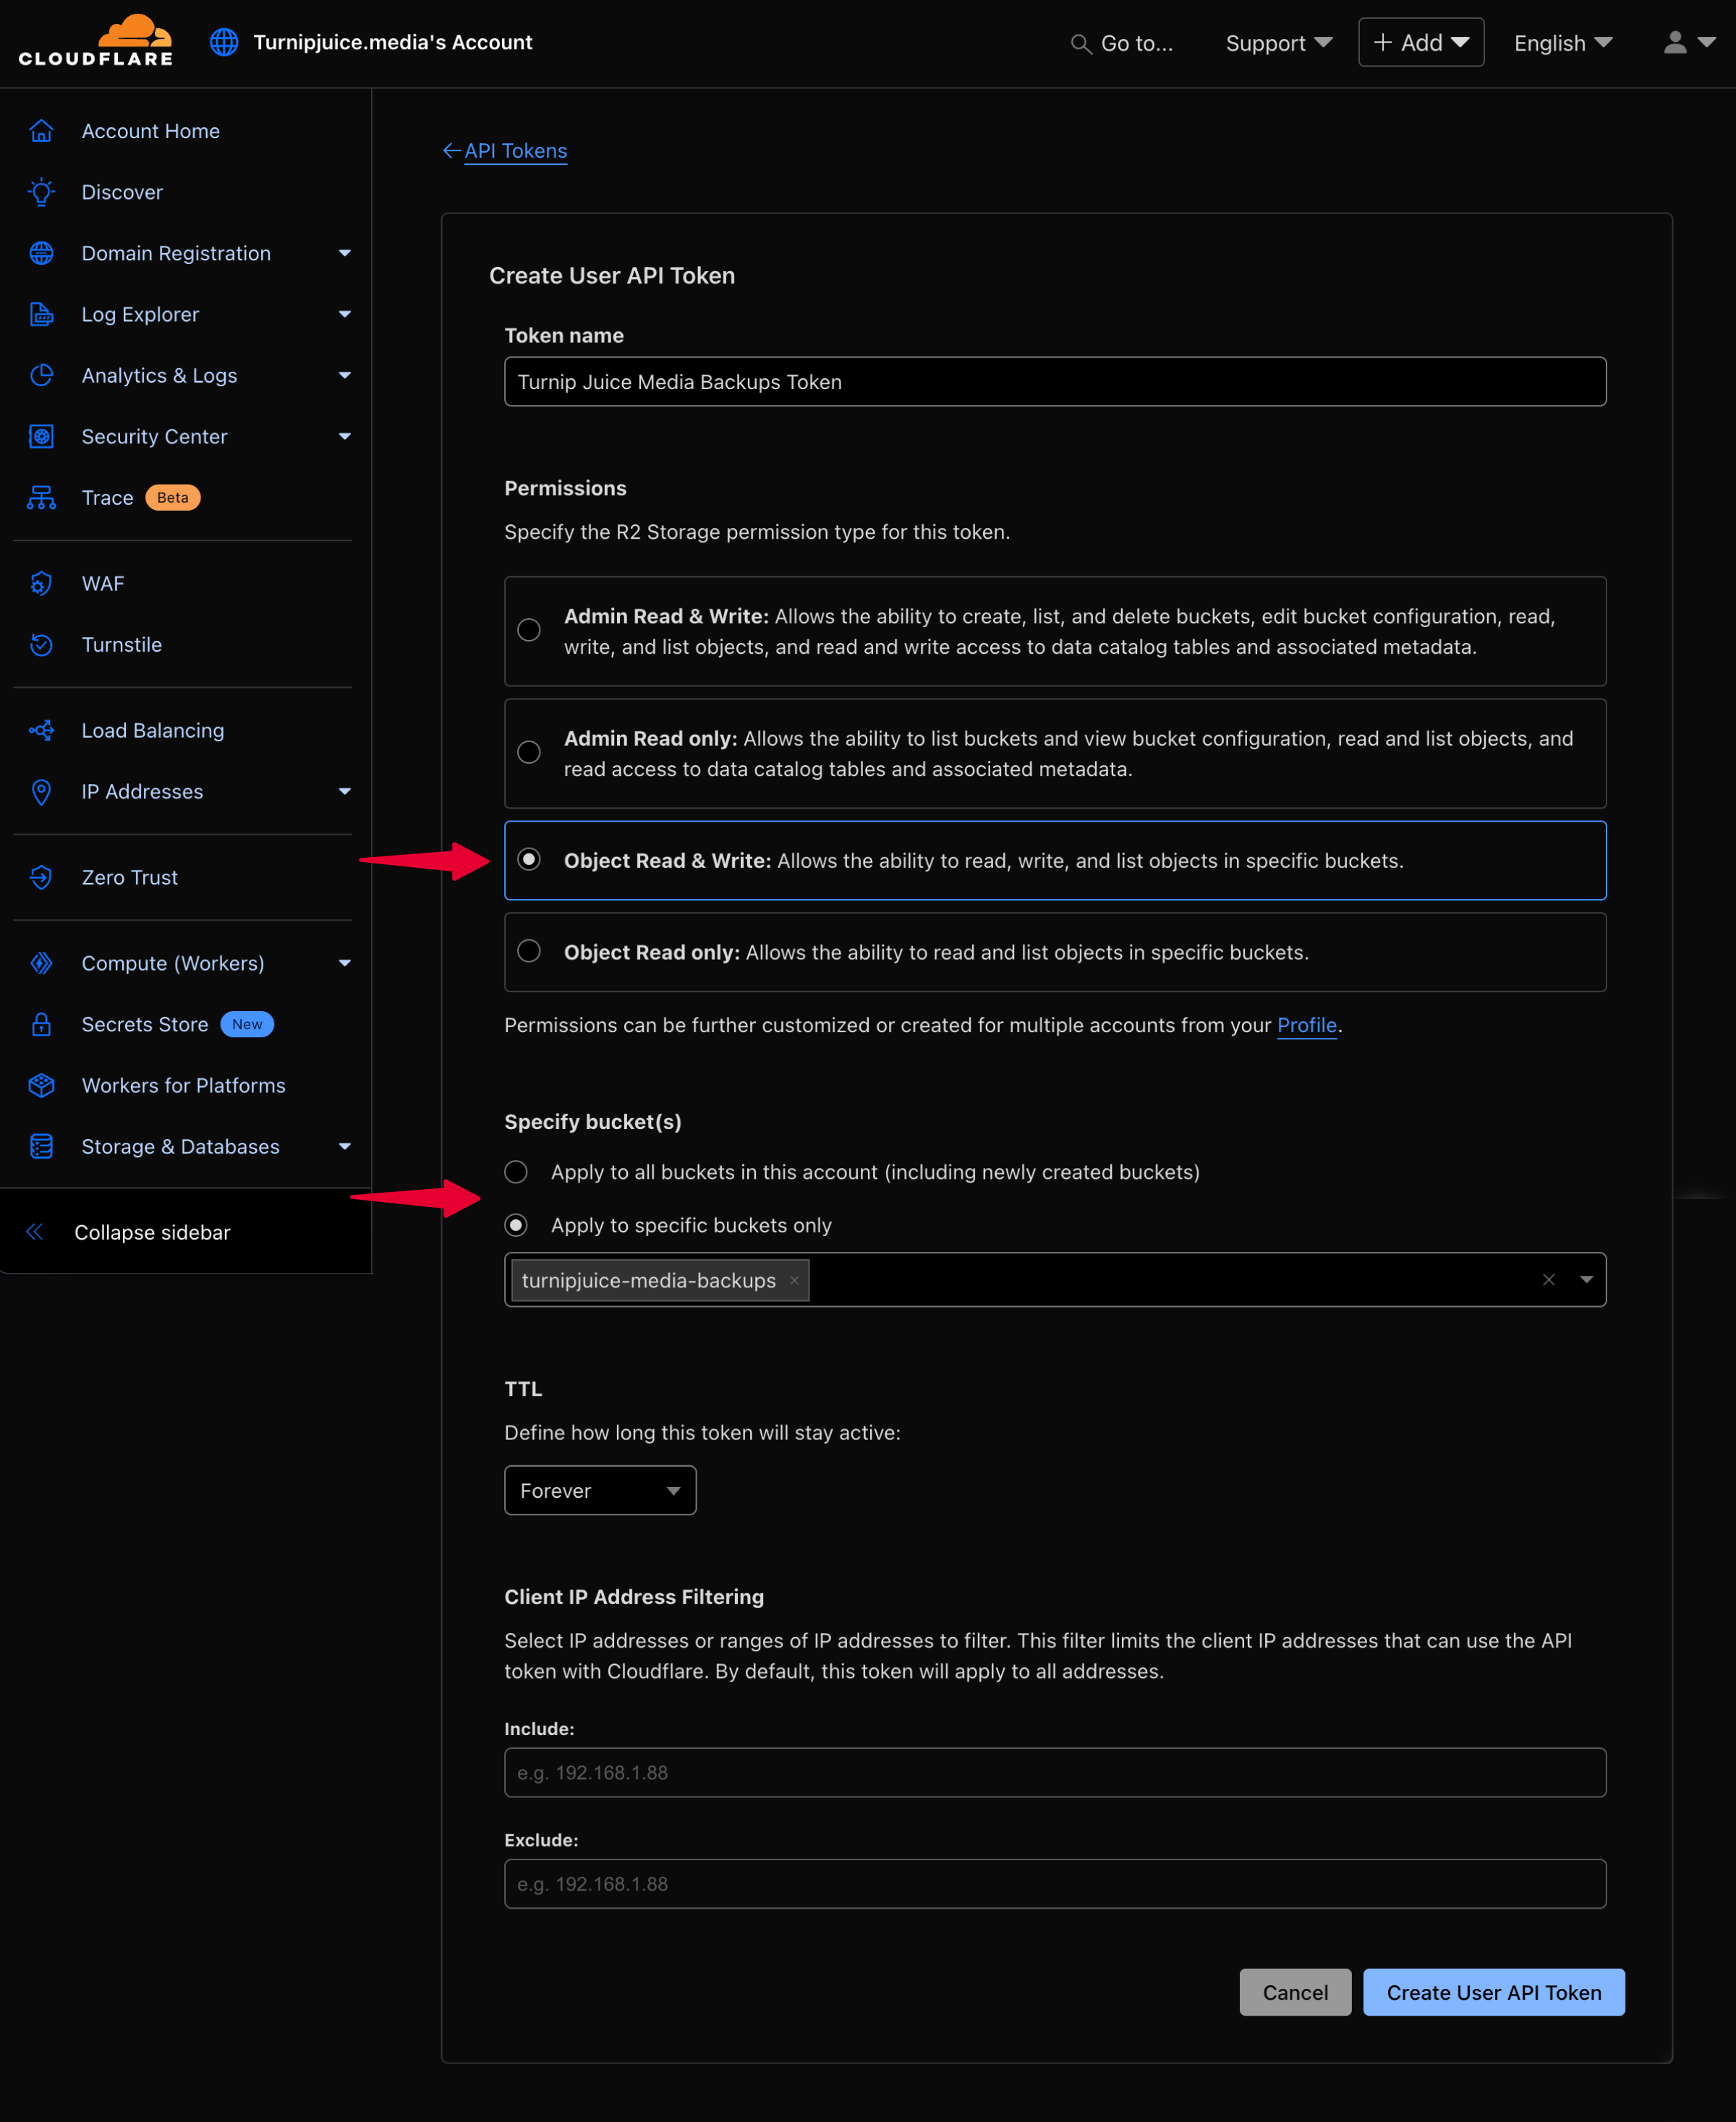
Open the same API dropdown again and select Manage API Tokens to create new credentials. Choose either an Account or User API Token, give it a unique name, and assign Object Read & Write permissions. Apply the permissions to your new bucket (recommended) or all buckets, then click on Create API Token

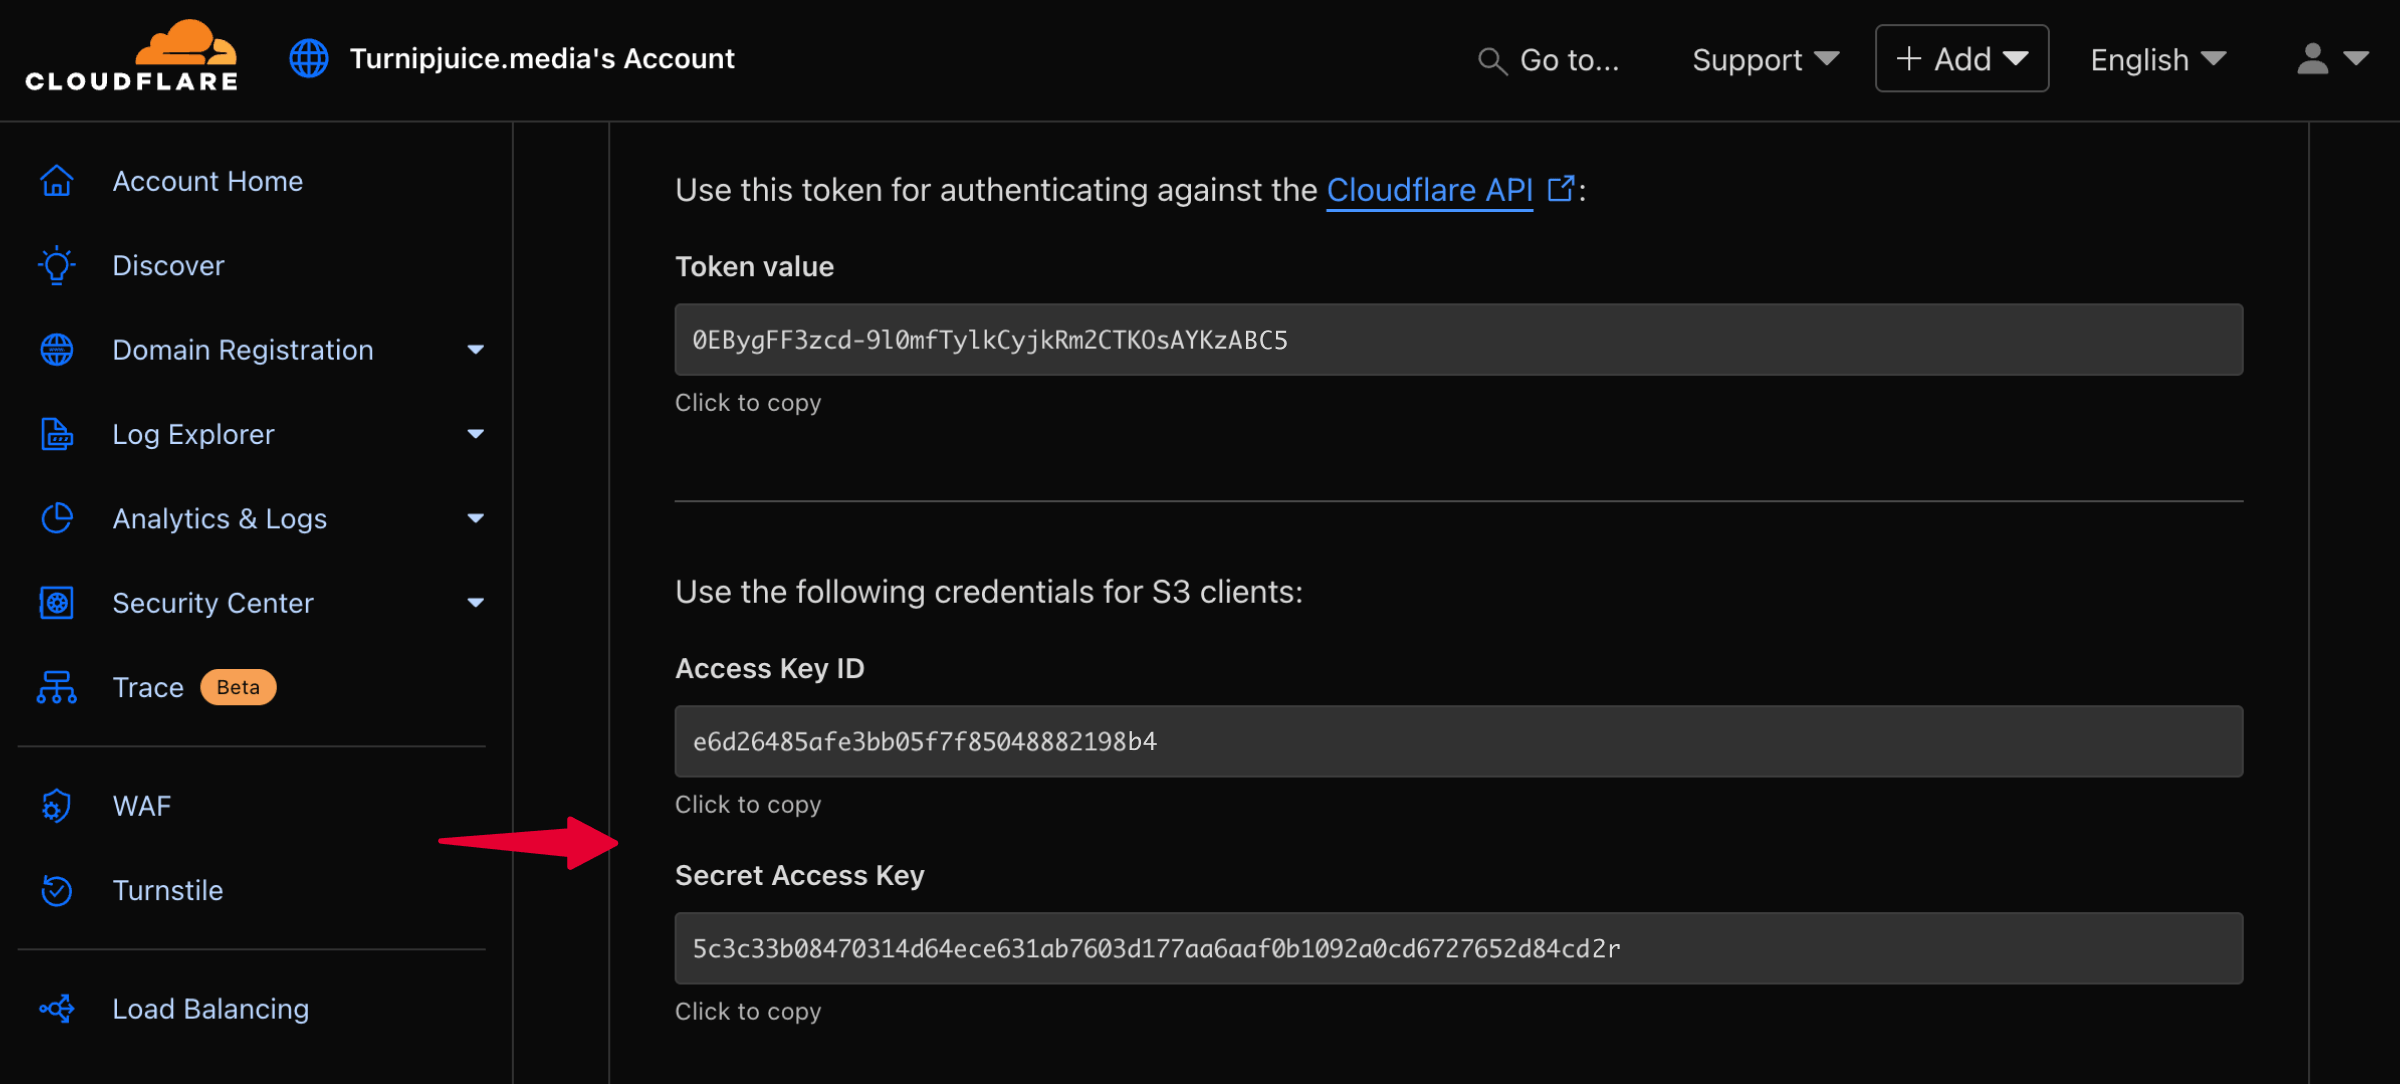
Once the token is generated, copy the Access Key and Secret Key. You will need the Access Key, Secret Key, and the previously copied Account ID when creating the Cloudflare R2 backup provider in SpinupWP and that should be all you need.
