Push-to-Deploy
Push-to-Deploy is the name of SpinupWP’s continuous deployment feature. It allows you to automatically deploy code to your site when you push code to a git repo.
How to Use Push-to-Deploy
To get started, you’ll need the following:
- A site managed in a Git repo.
- SSH access to that specific Git repo.
- A live SpinupWP server.
You can enable Push-to-deploy at the point of creating a site by selecting the Clone a Git Repository option.

Alternatively, you can enable Push-to-deploy via the Git tab in the site dashboard.

Either way, you will need to add the following details:
- The SSH path for your site’s Git repo. The Push-to-Deploy feature will use SSH to connect to the repository.
- The Git branch to push from. This is going to be
masterormainin most cases, but it’s important to get this correct, as you’ll encounter an error otherwise.
You can optionally add any post-deployment scripts you might need in the “Deploy Script” area, such as installing packages via Composer or building any front-end assets.
If you haven’t set this up already, SpinupWP will also require you to configure an SSH connection between Git and SpinupWP. Usually, this is done the first time you try to configure a site with Git details.
Once you’ve configured the Git details, enable Push-to-deploy by switching the Push-to-deploy toggle.
When you enable Push-to-deploy for your Git-enabled site a Deployment URL will be automatically generated for you. You will then need to configure your Git provider with this Deployment URL, which sends a POST request to this URL to trigger a deployment (normally after a push).
A deployment will pull the latest changes from your Git repository to the site on your server and run the deployment script afterward (if you have it configured).
Configure your deployment URL
Here are instructions for configuring your Deployment URL with some popular Git providers:
GitHub
At your GitHub repository navigate to Settings > Webhooks > Add Webhook.

- Enter the generated Deployment URL in the “Payload URL” field.
- Set the Content type to
application/json. - Leave the “Secret” field blank.
- Leave the other setting as their defaults.
After hitting Add webhook you can go back to configuring your site. The next time you push code to your repository a deployment should be automatically triggered in SpinupWP.
GitLab
At your GitLab repository navigate to Settings > Integrations.
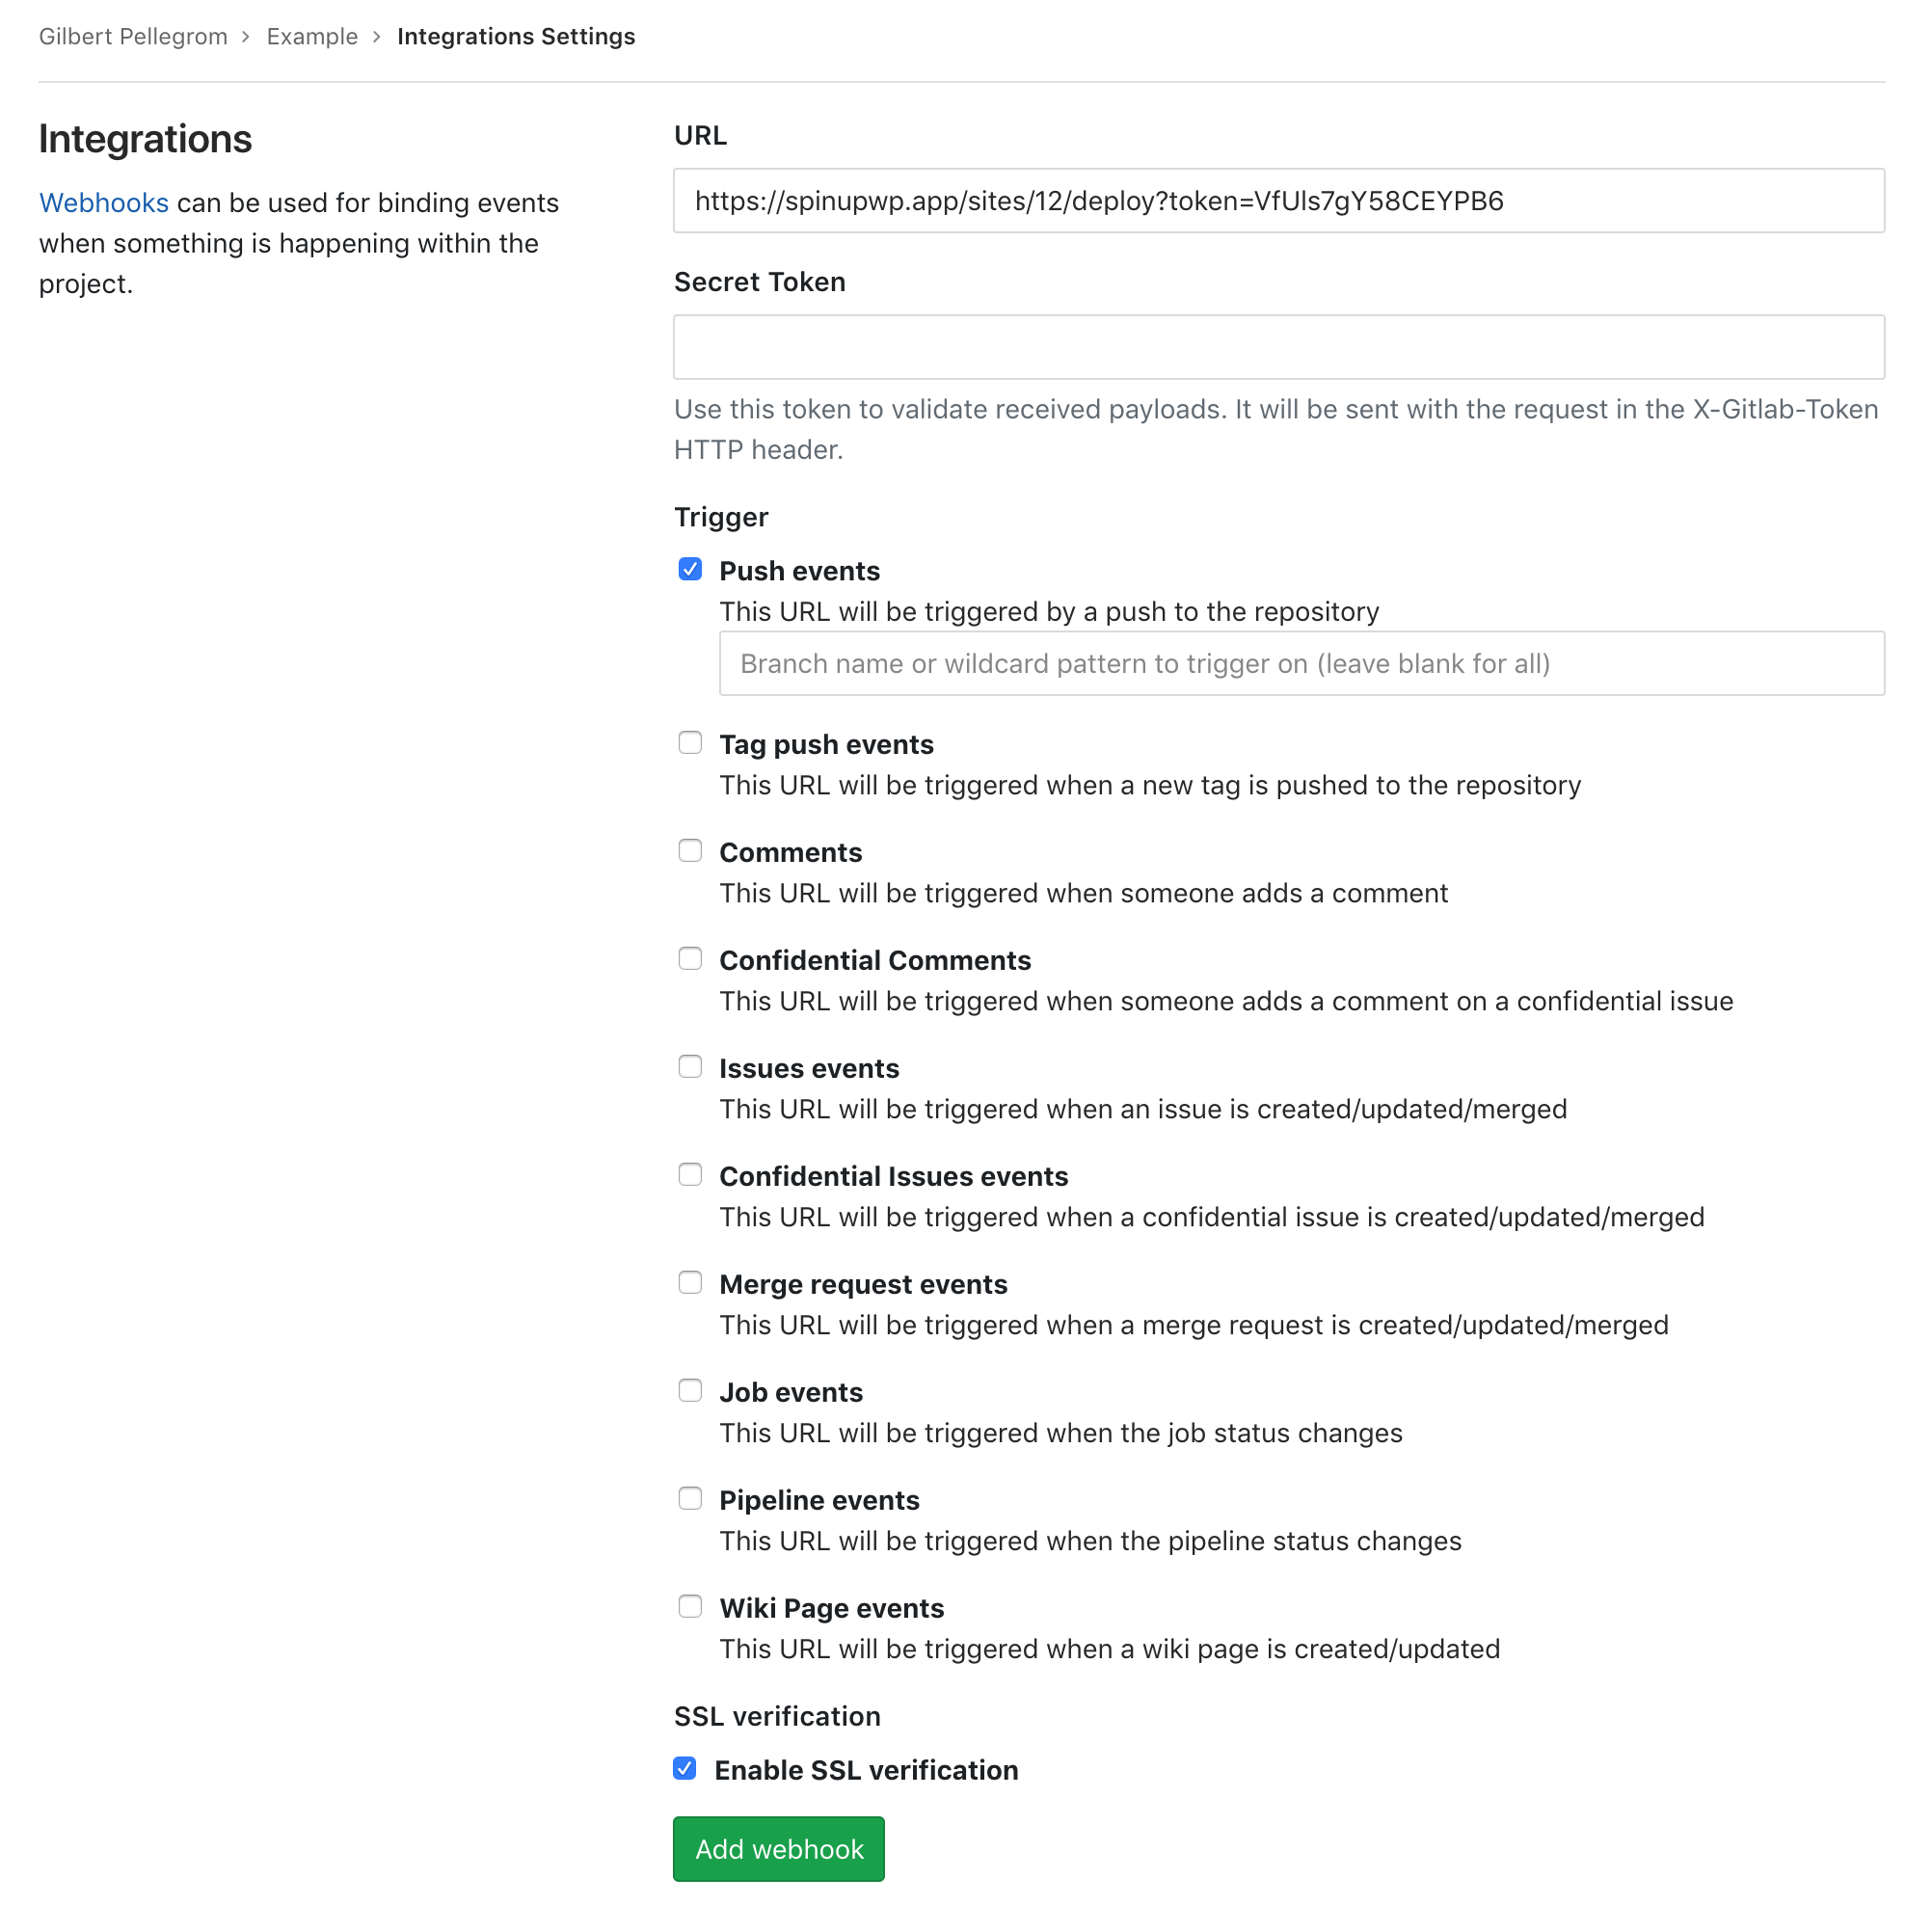
- Enter the generated Deployment URL in the “URL” field.
- Leave the “Secret Token” field blank.
- Leave the other setting as their defaults.
After hitting Add webhook you can go back to configuring your site. The next time you push code to your repository a deployment should be automatically triggered in SpinupWP.
BitBucket
At your BitBucket repository navigate to Settings > Webhooks > Add Webhook.

- Add a “Title”.
- Enter the generated Deployment URL in the “URL” field.
- Leave the other setting as their defaults.
After hitting Save you can go back to configuring your site. The next time you push code to your repository a deployment should be automatically triggered in SpinupWP.