Connect to Your Server via SSH on Windows
Unlike macOS or Linux-based distributions, Windows does not come with a built-in terminal application that you can use to access an Ubuntu server via SSH, using public/private key authentication. However, you can use an application called PuTTY to generate an SSH key and use it to connect to your server’s command line.
Download and Install PuTTY
To get PuTTY, browse to the download page and download and install the latest version.
Use PuTTYgen to Generate Your SSH Key
PuTTY has a bundled PuTTYgen application that allows you to generate your public and private keys. The quickest way to run PuTTYgen on Windows 10 is to click the Start button, type putty, and then select “PuTTYgen” from the results.

On Windows 10, PuTTYgen defaults to generating an RSA key of 2048 bits. For increased security, we recommend increasing this value to 4096.
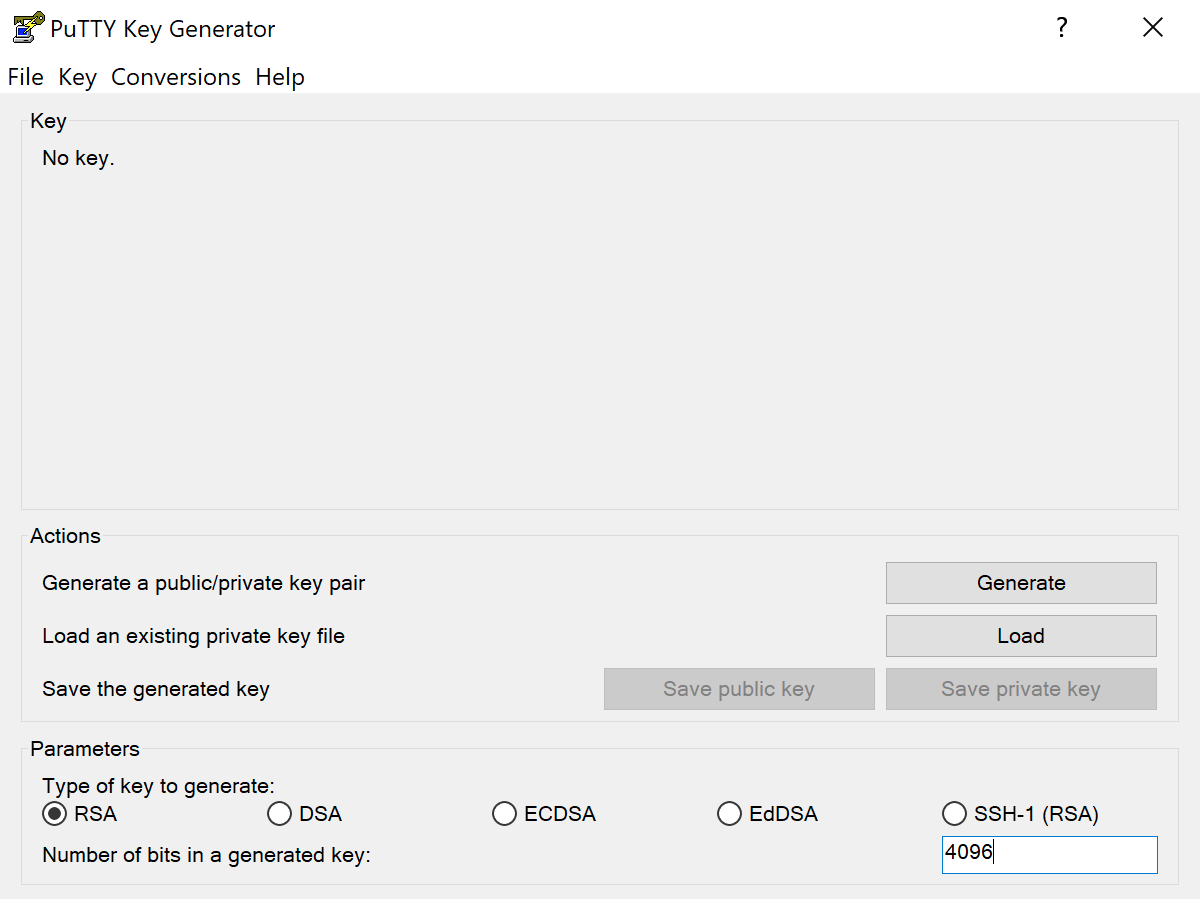
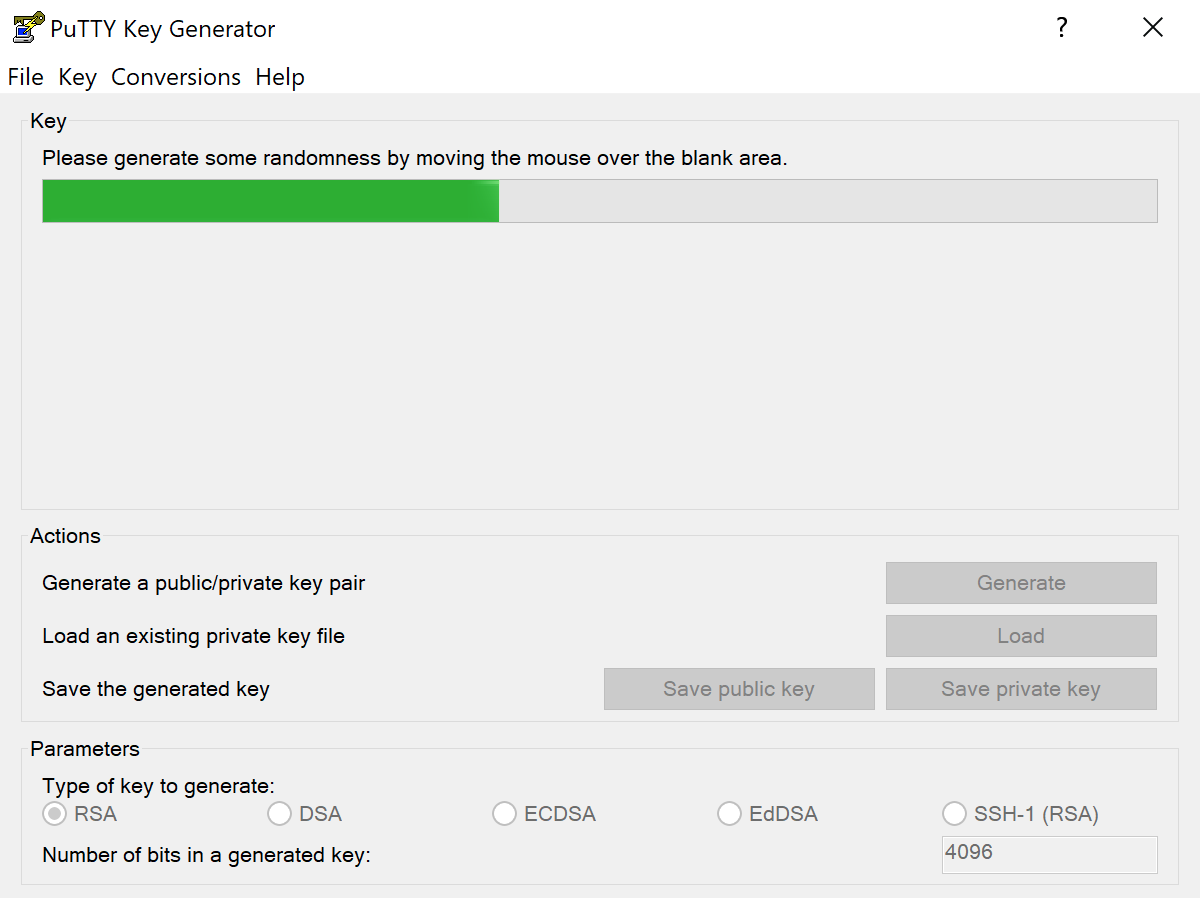
Click Generate. PuTTYgen will ask you to move the mouse over a selected area to generate the key.
Once the key generation has completed, PuTTYgen will populate the “Public key”, the “Key fingerprint”, and the “Key comment” values. At this point, it’s a good idea to enter and confirm a “Key passphrase”. You’ll use the passphrase when you authenticate using this key.
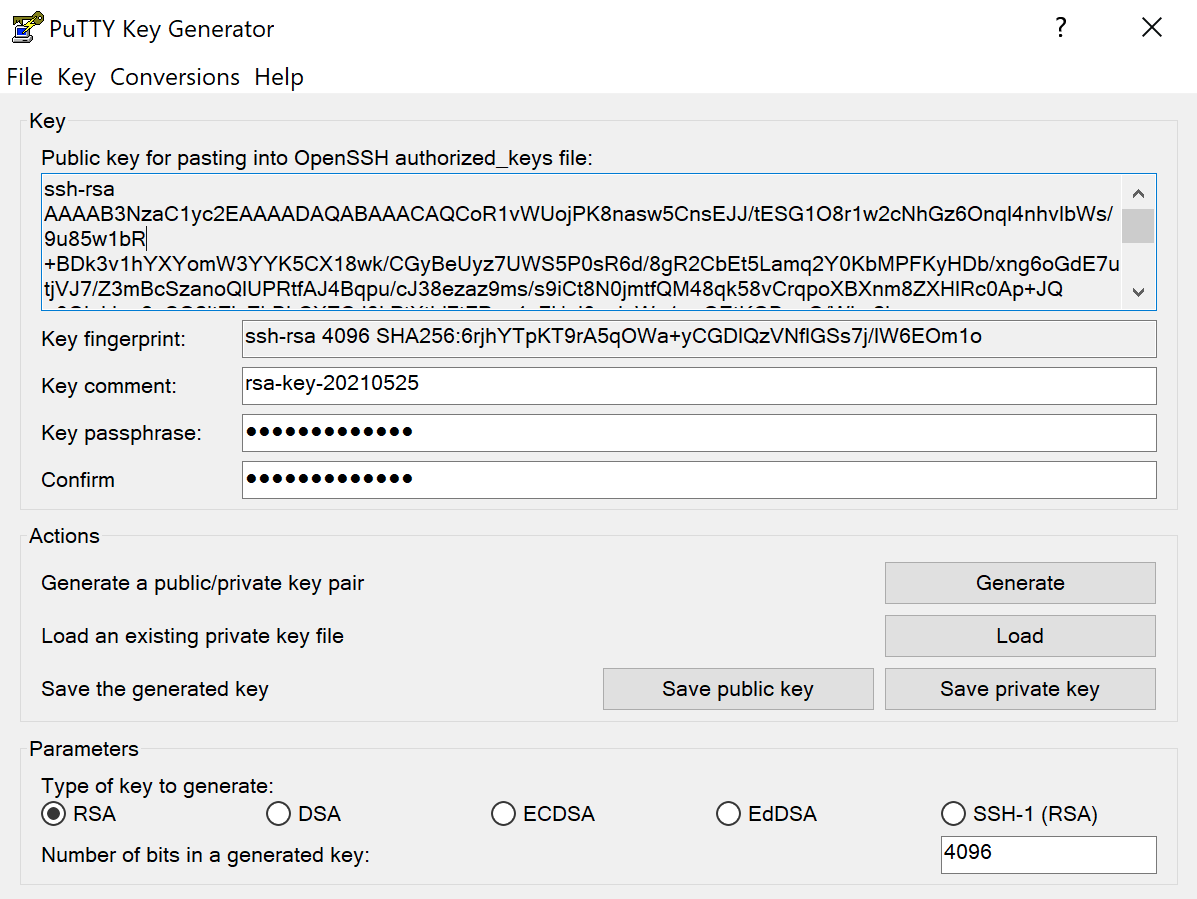
First, click the Save private key button, and store the private key as id_rsa.ppk. You can save this anywhere on the computer, either on your desktop or in your Documents folder. Your private key file should be treated as you would a password and never shared with anyone. If you need someone else to access your server, follow the steps in this doc to create a separate private key for them.
You can also click the Save public key button to save the public key to a local file, but this is unnecessary.
Add the Public Key to Your Spinupwp Sudo User
Before you can connect to the server, you will need to add the public key you just generated to your server, and then attach it to a sudo user. When adding the public key, use the contents of the PuTTYgen “Public key” text area or use the contents from the public key file if you saved it at the previous step.

Connect Using the Private Key
Once you have added your public key to your SpinupWP server and assigned it to a sudo user, you can set up PuTTY to SSH into the server.
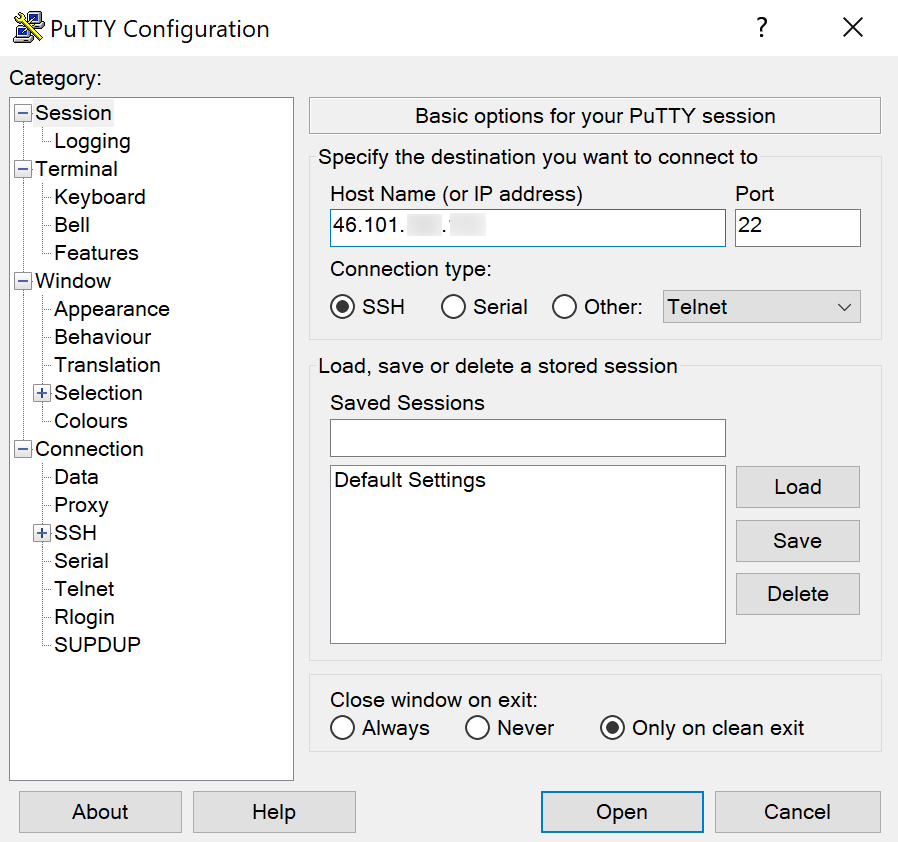
Open PuTTY and enter the server’s IP address in the “Host Name” field. If you have already configured your DNS and the domain name is pointing to the server, you can use that here.
Then, navigate to Connection > SSH > Auth under the “Category” tree on the left-hand side of the PuTTY screen.
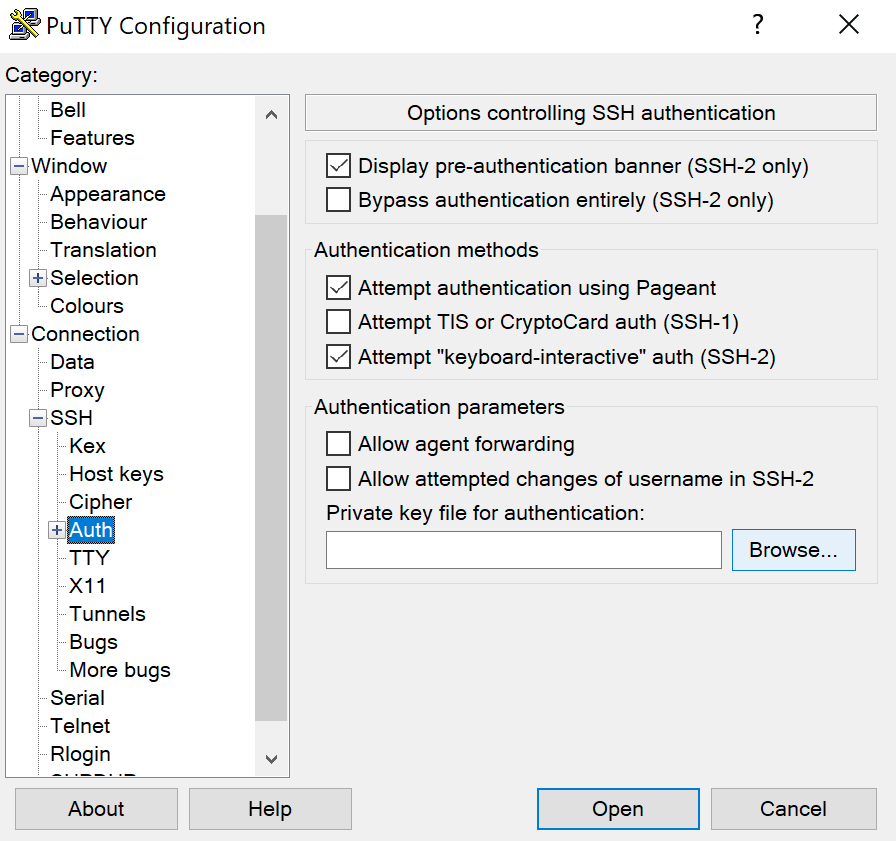
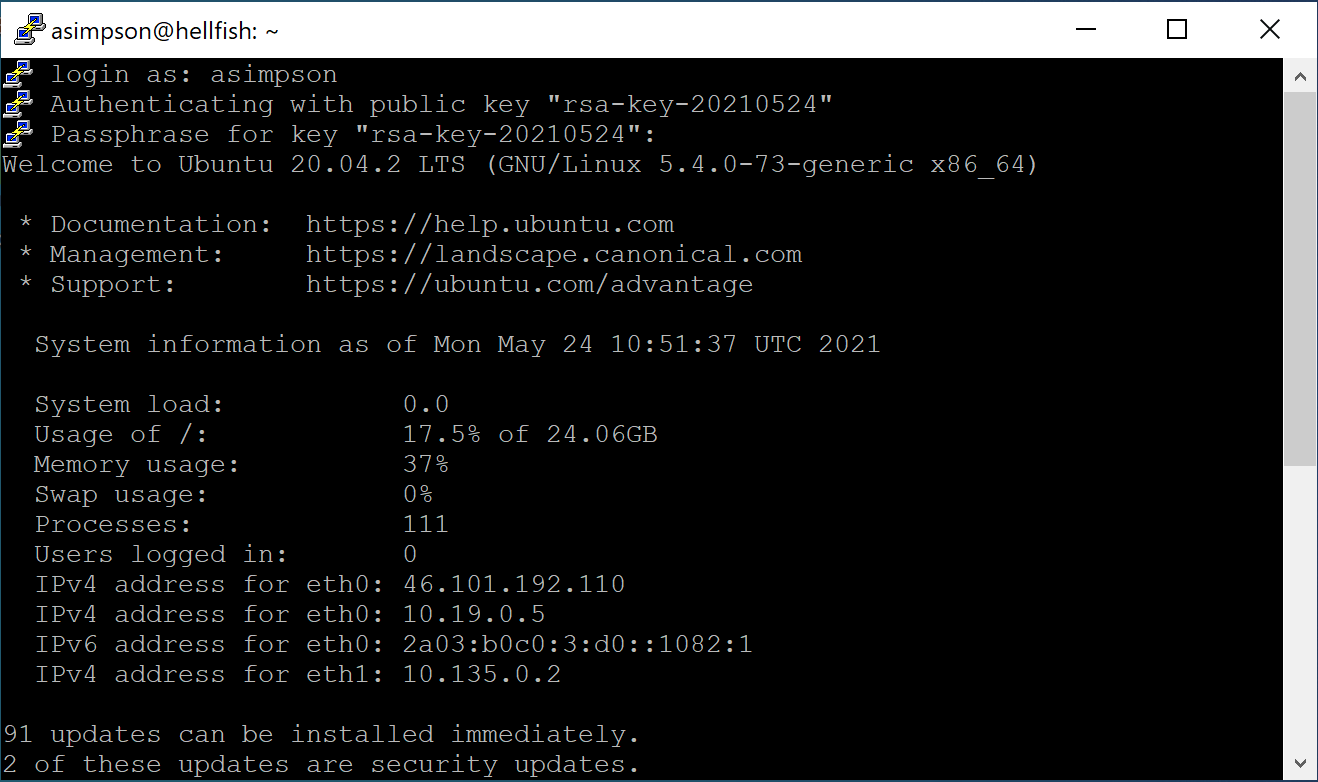
Click the Browse button, and select the id_rsa.ppk file you saved from PuTTYgen. You can then click Open to start the SSH session, which opens a terminal window.
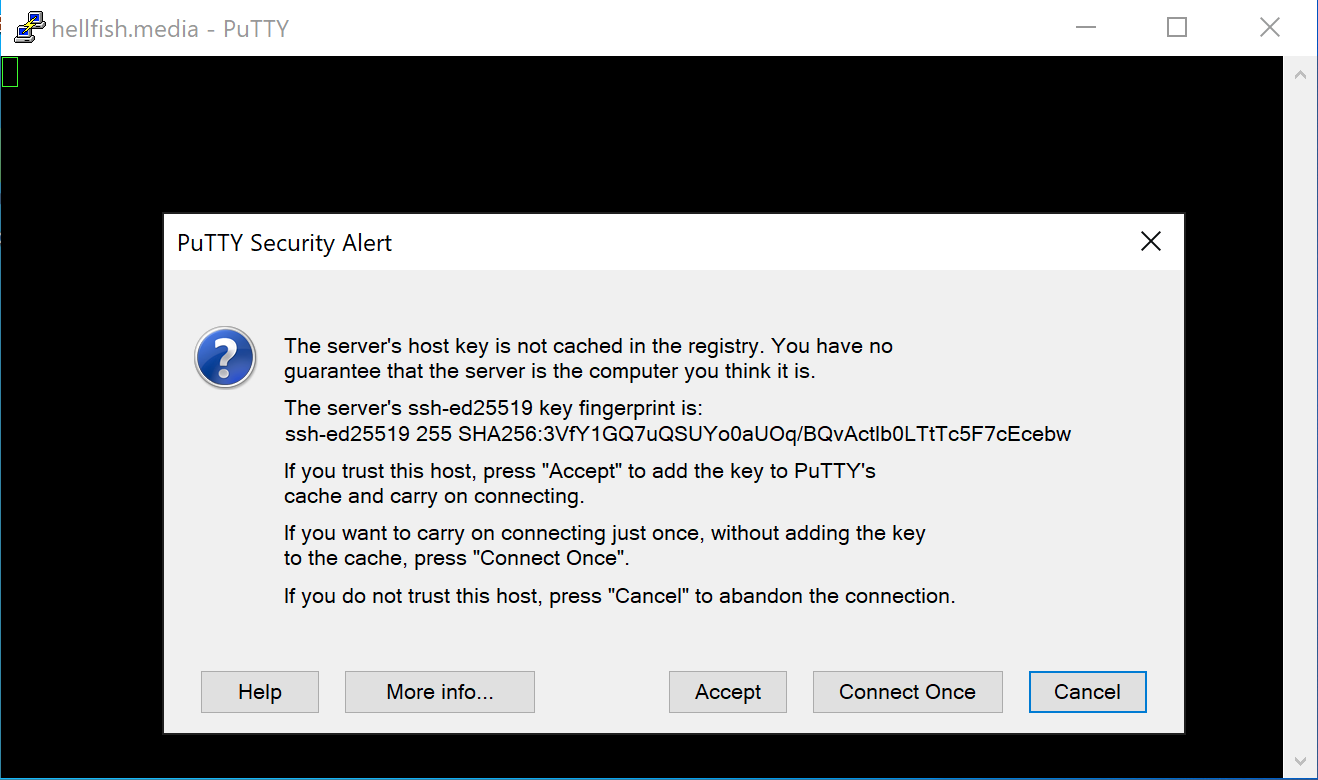
PuTTY will ask you to confirm if you would like to cache the server’s host key to your local registry. If you click Accept, the next time you connect, you won’t be asked this question again.
You will be asked to enter the sudo user’s username to log into the server and the passphrase for the public key you specified at the generation step. If everything is configured correctly, you will successfully log into your server.