Setting Up an Amazon Lightsail Managed MySQL Database and Adding It to SpinupWP
This guide will help you set up an Amazon Lightsail managed MySQL database for use with new servers set up by SpinupWP. By the end of this tutorial, you will have the database hostname, port, username, password, and database name you need to configure the managed MySQL database as an external database in SpinupWP.
We also have a doc for setting up a managed database server at DigitalOcean.
Amazon Lightsail is an abstraction of AWS and simplifies things a lot. We recommend using it over AWS unless you really want to learn the ins and outs of AWS, including all of its complexity.
Creating a New Amazon Lightsail Managed MySQL Database
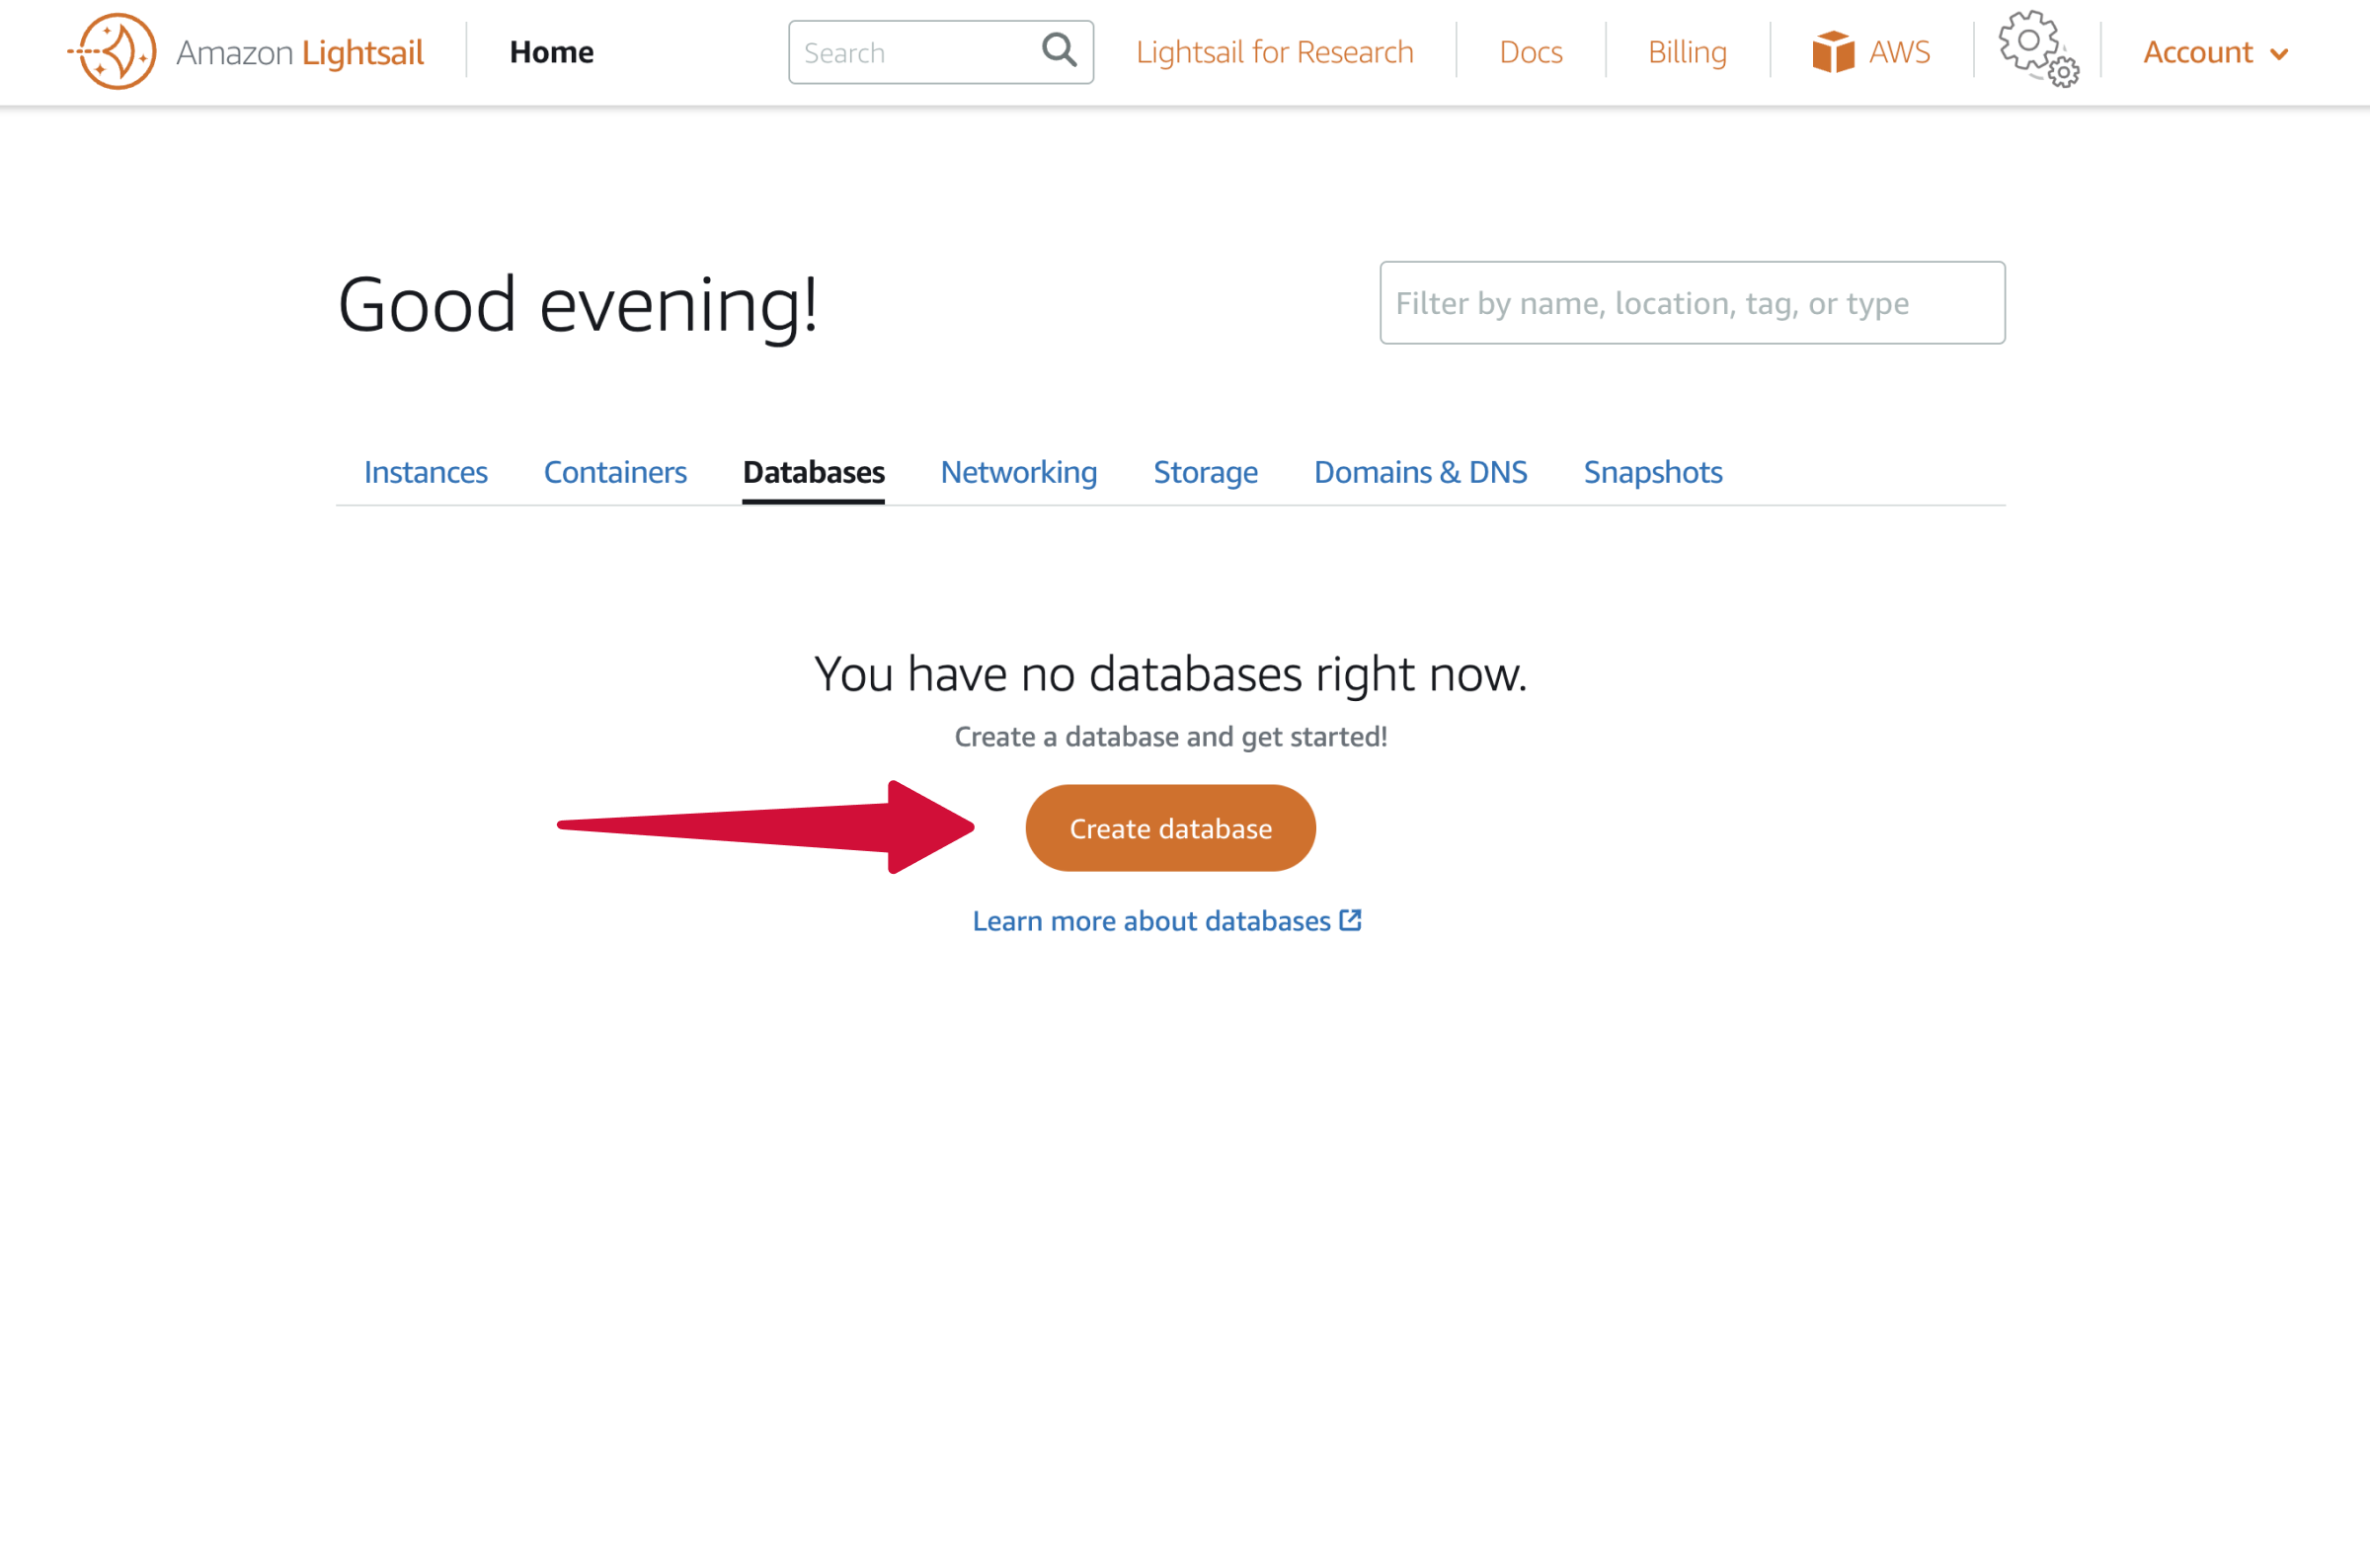
To create a new database server on Amazon Lightsail, visit lightsail.aws.amazon.com and login. Click on the Databases tab, and then click Create Database.
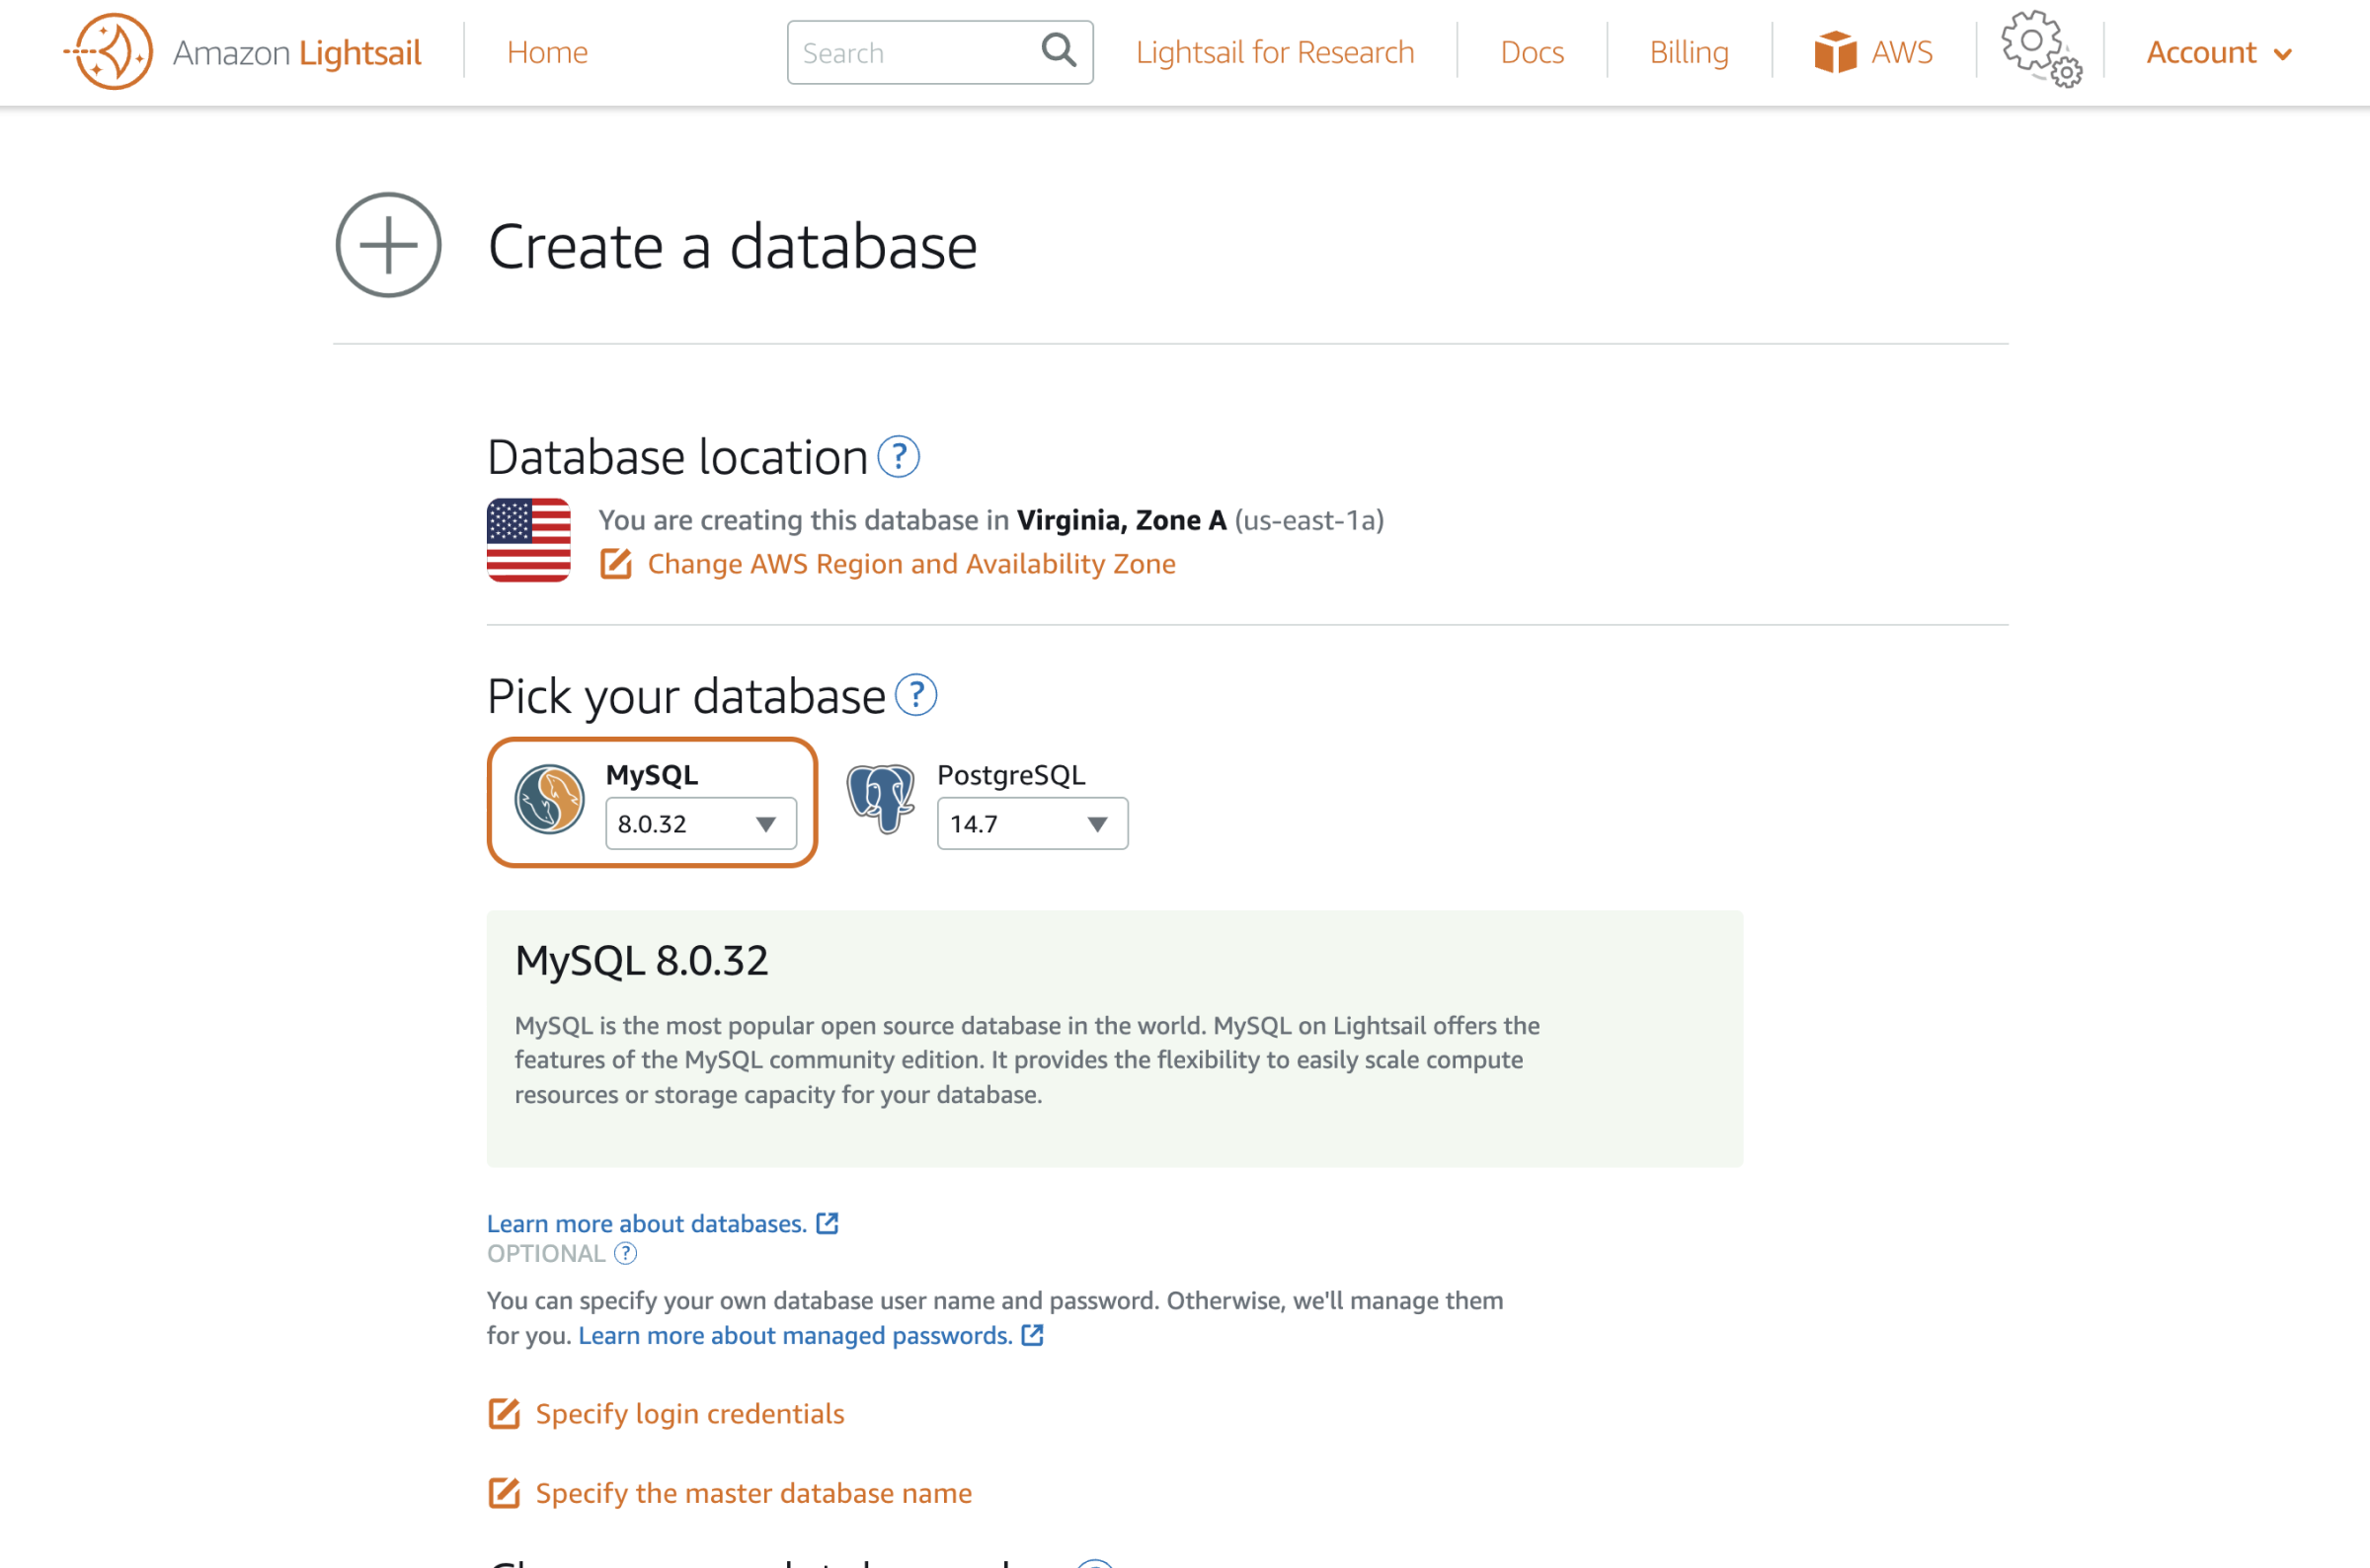
The first step is to choose the database location. Make sure that the location is the same as the Amazon Lightsail web server you have provisioned with SpinupWP that you want to connect to this external database.
Next is the database software. The default selection of MySQL 8 is correct. SpinupWP no longer supports older versions of MySQL and WordPress isn’t typically set up with PostgreSQL.
We recommend skipping the Specify login credentials and Specify the master database name options as the defaults are just fine.
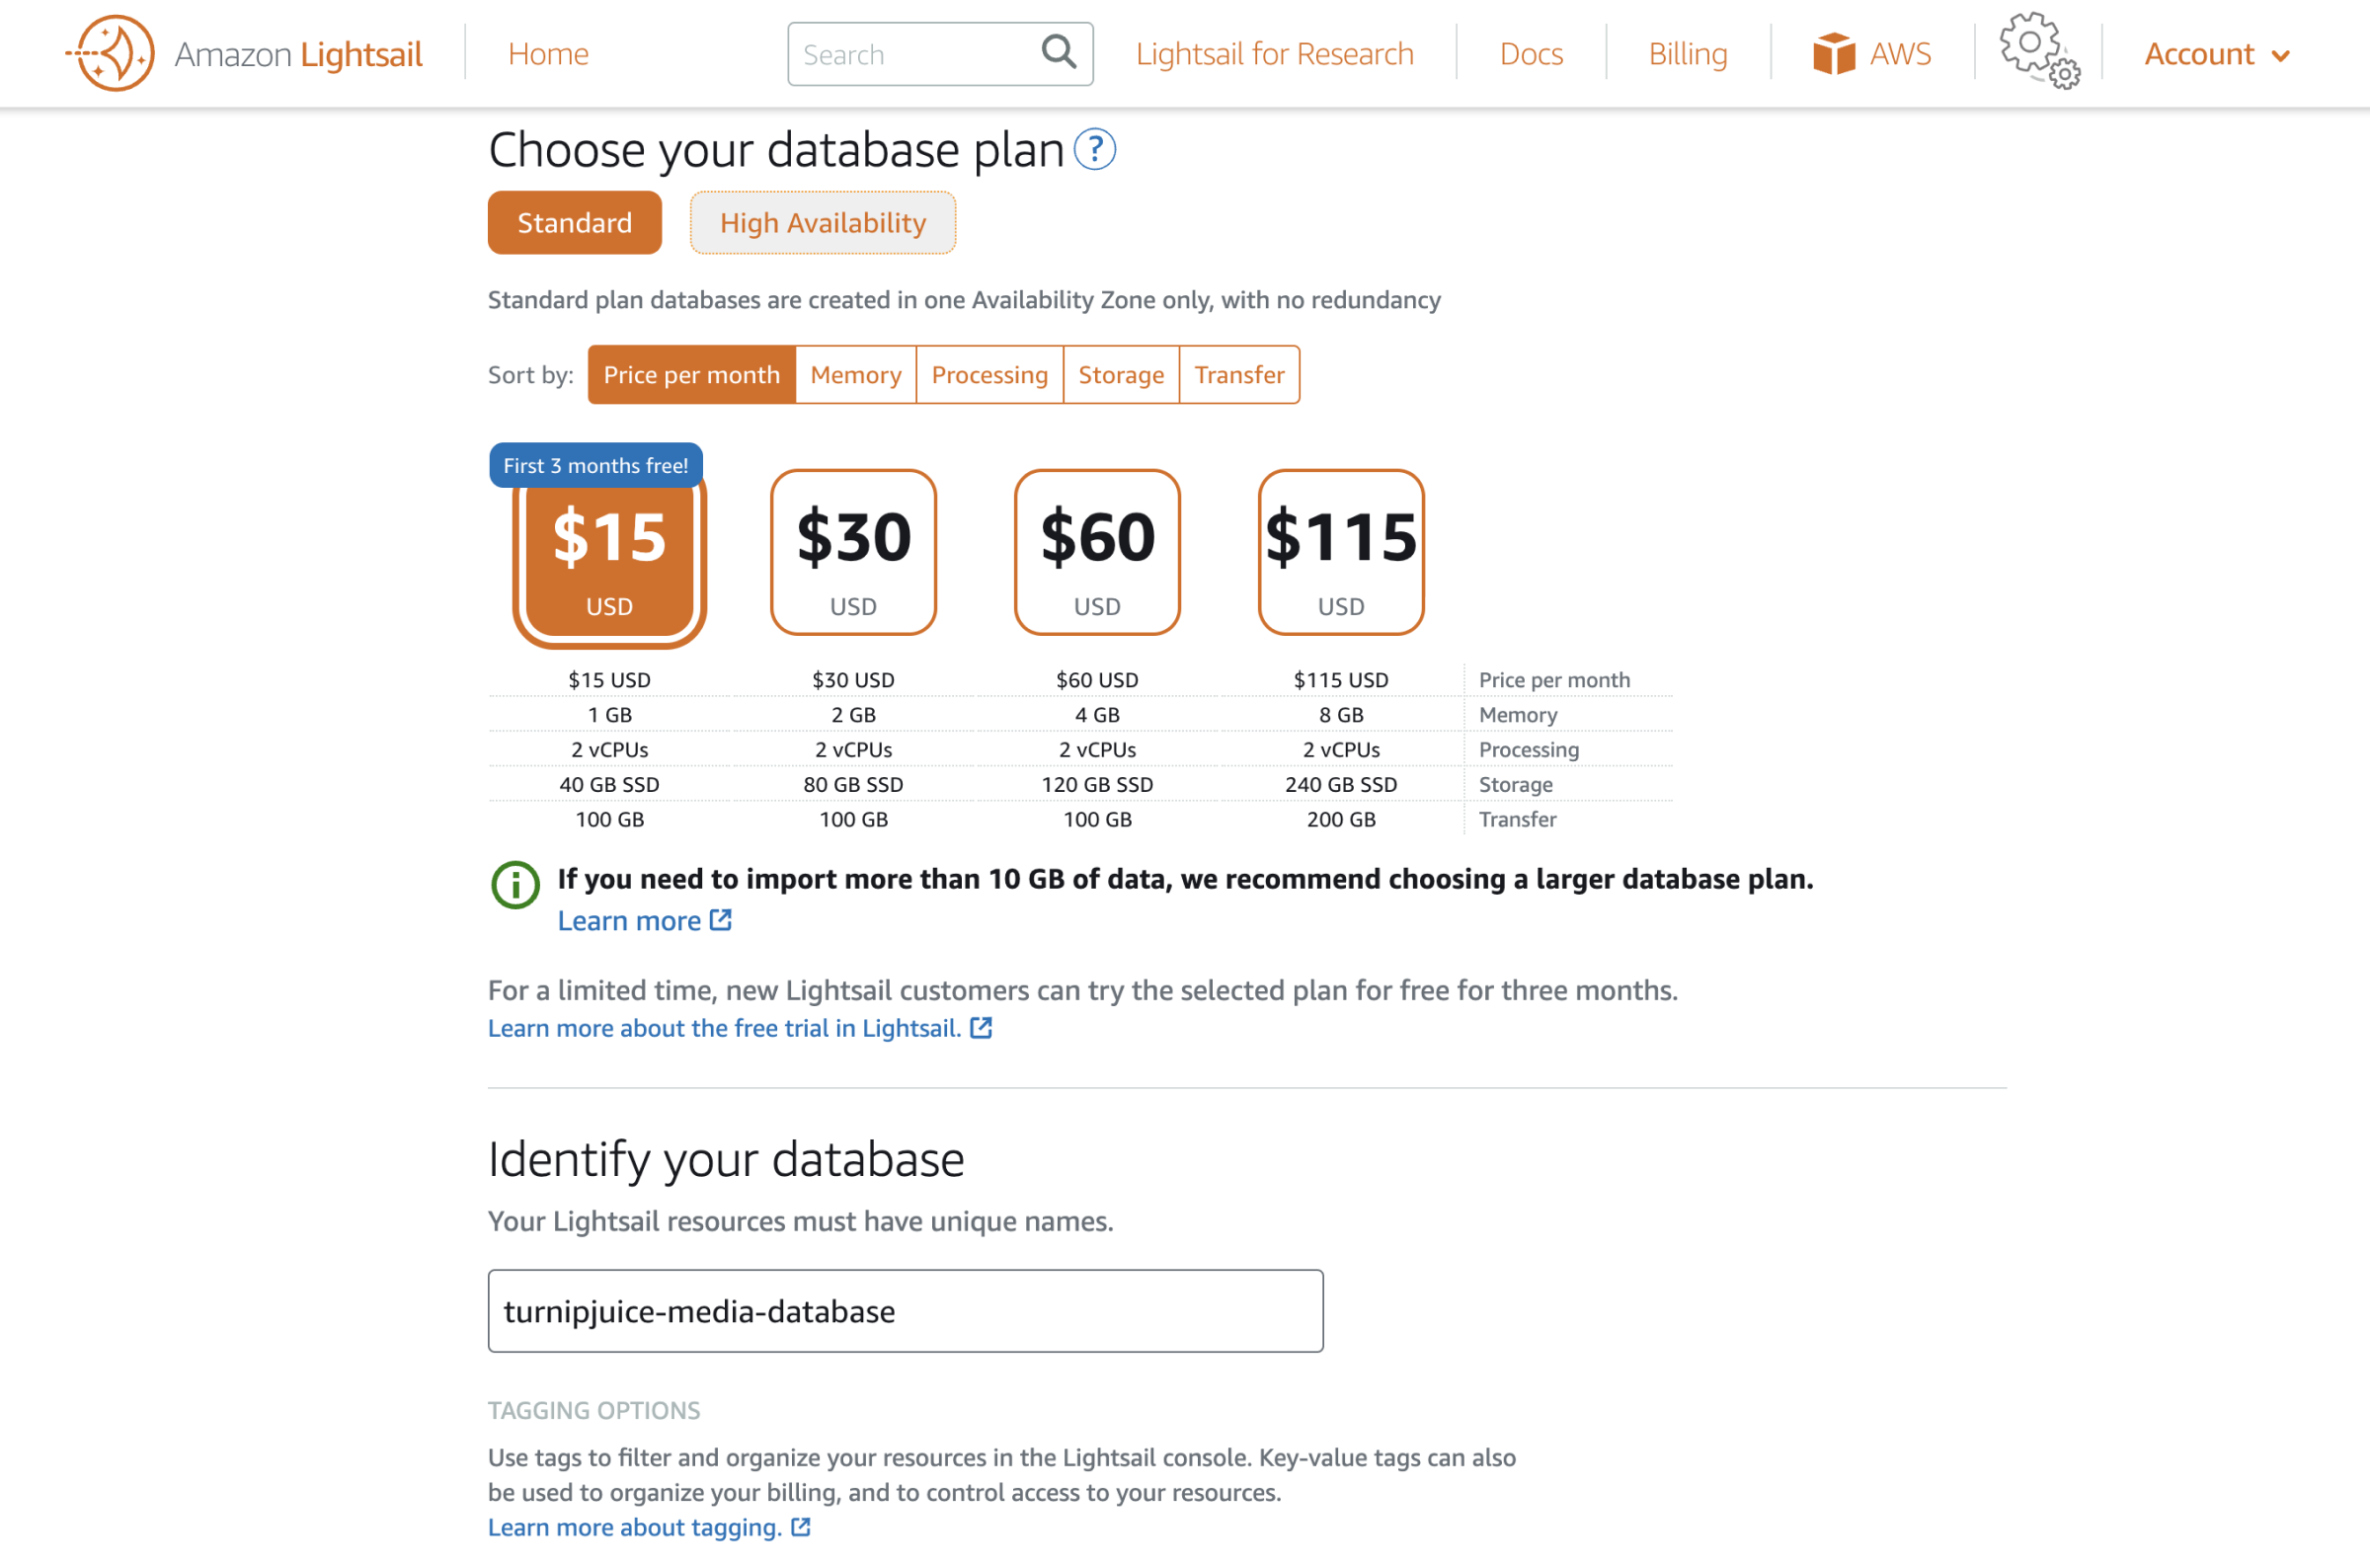
Next you can choose the database plan that meets your requirements. You can upgrade later, but it is a bit of a pain as you’ll need to create a new server from a snapshot and switch over to the new server. Ideally you will have a good idea of your needs.
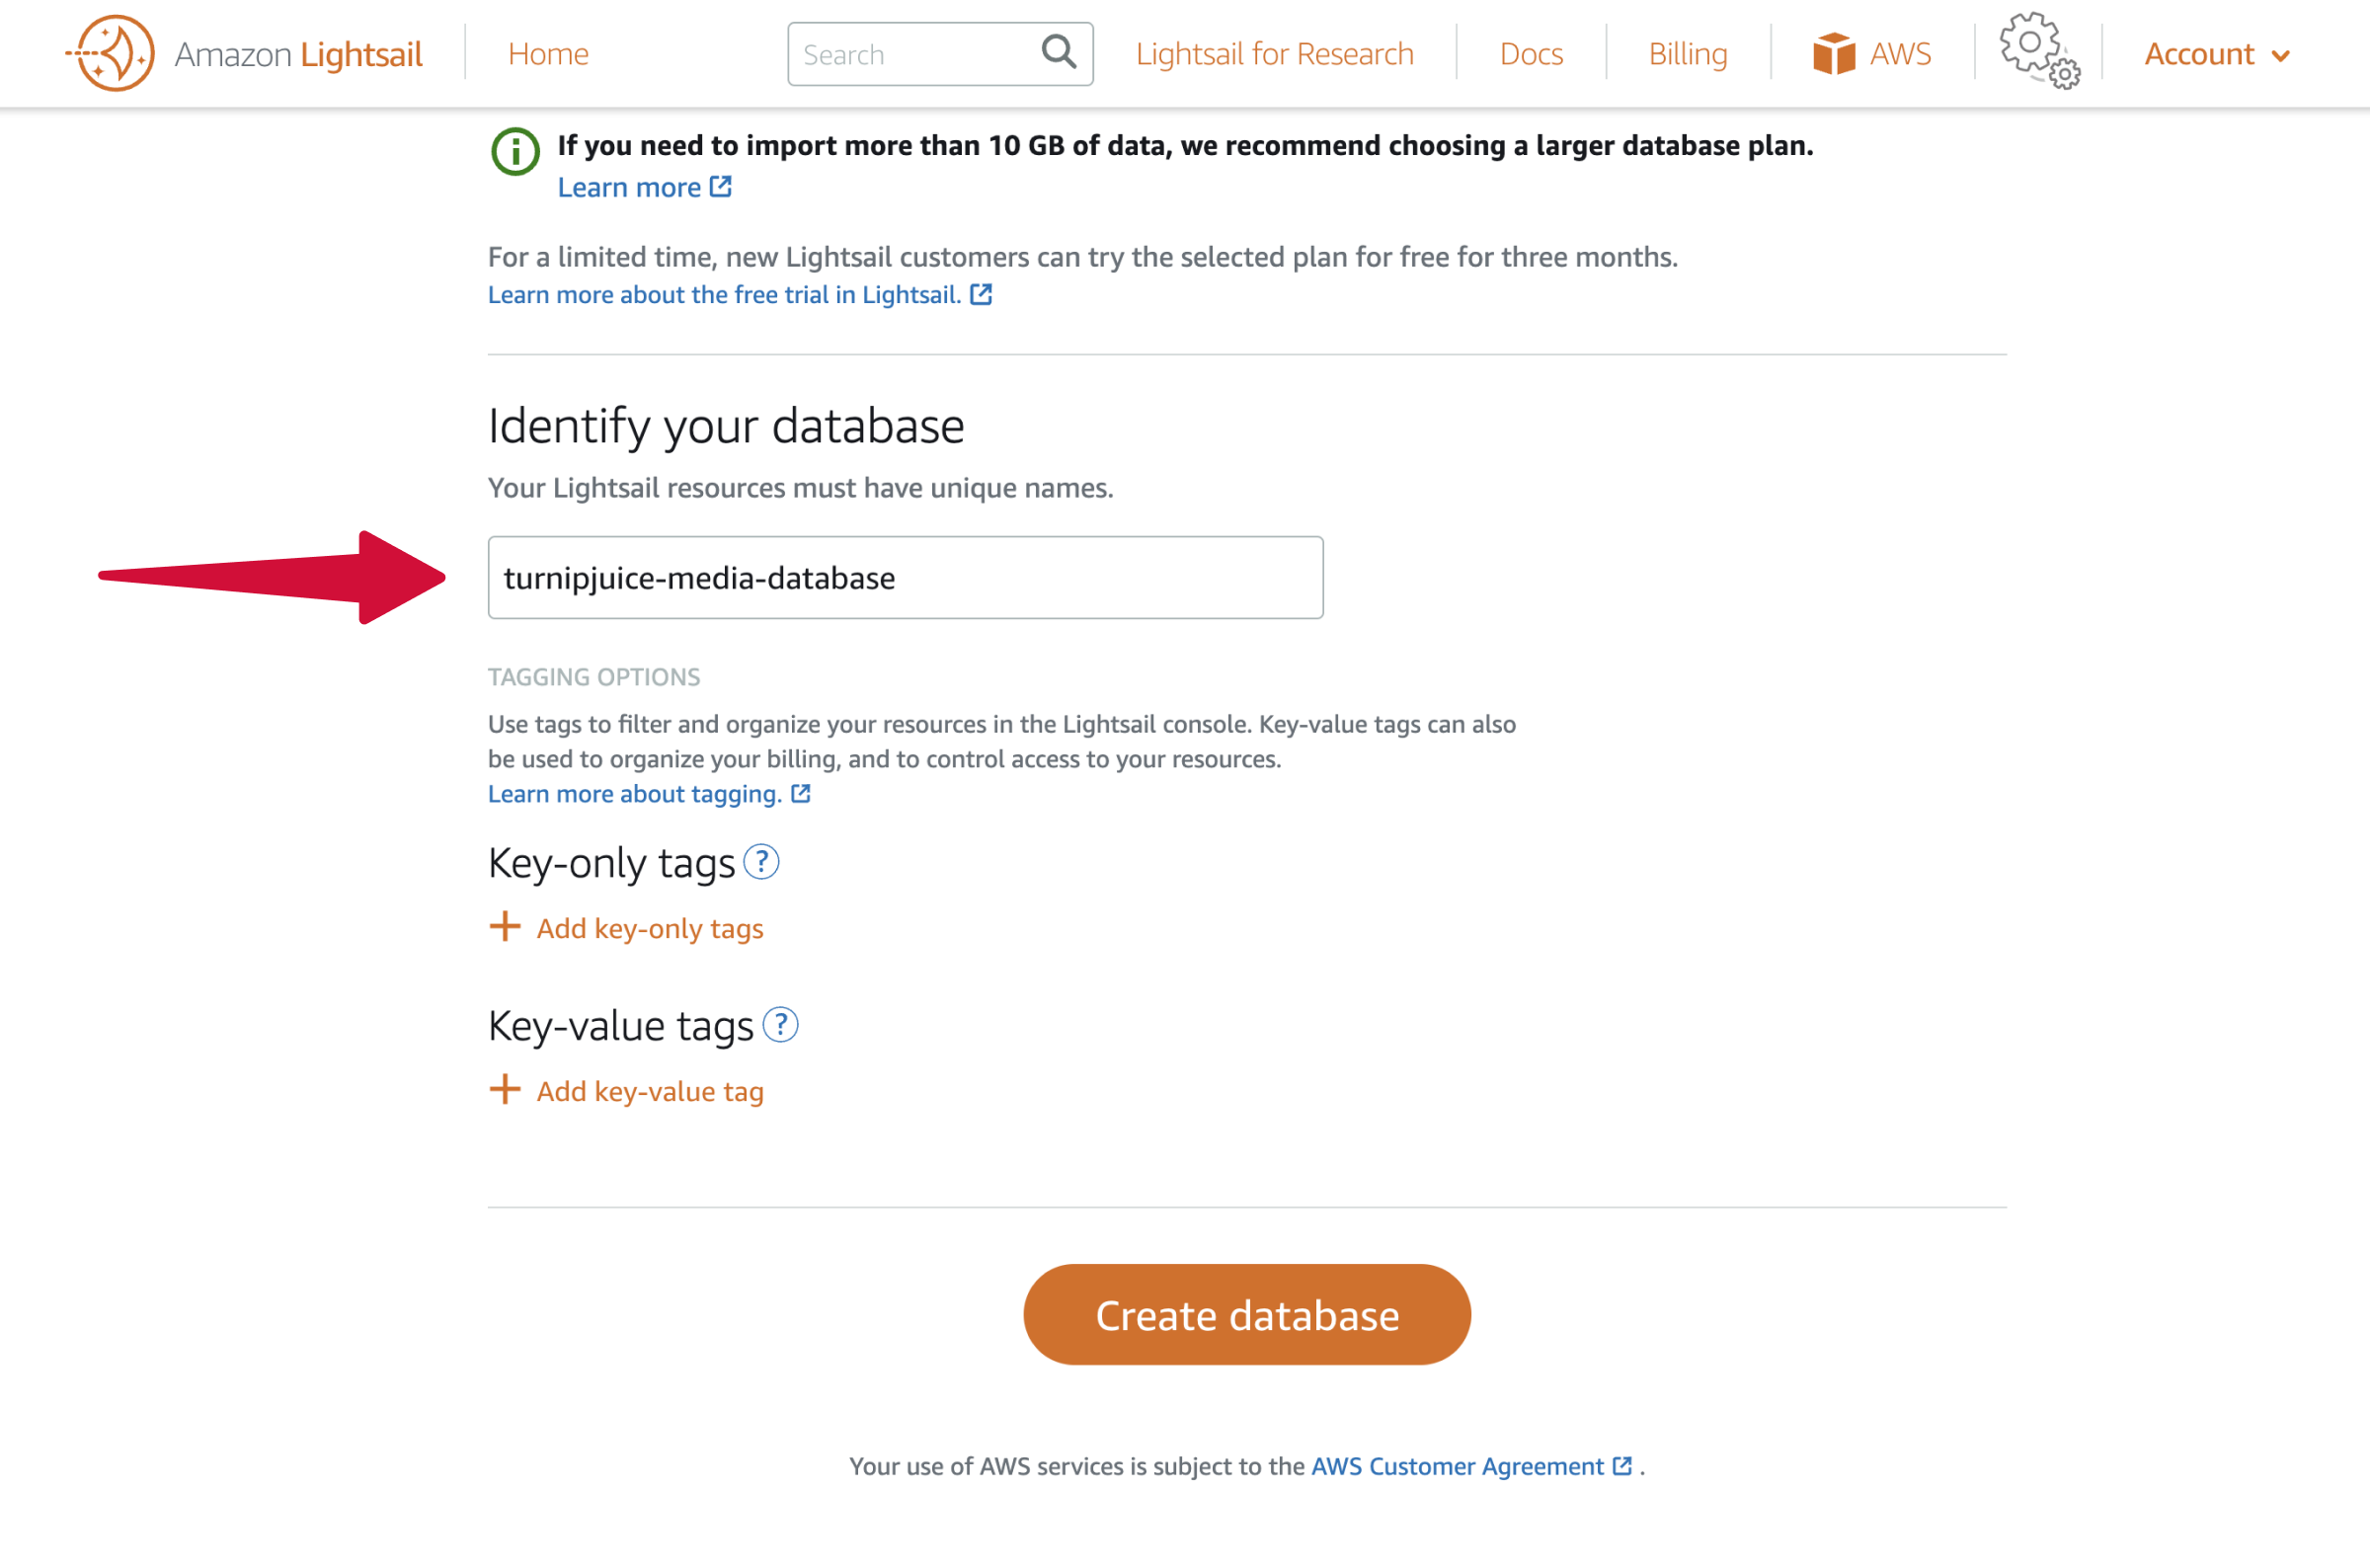
Finally, give your database a unique name, and click Create database. We typically use the domain name of the server for our server names, but you can use whatever you like.
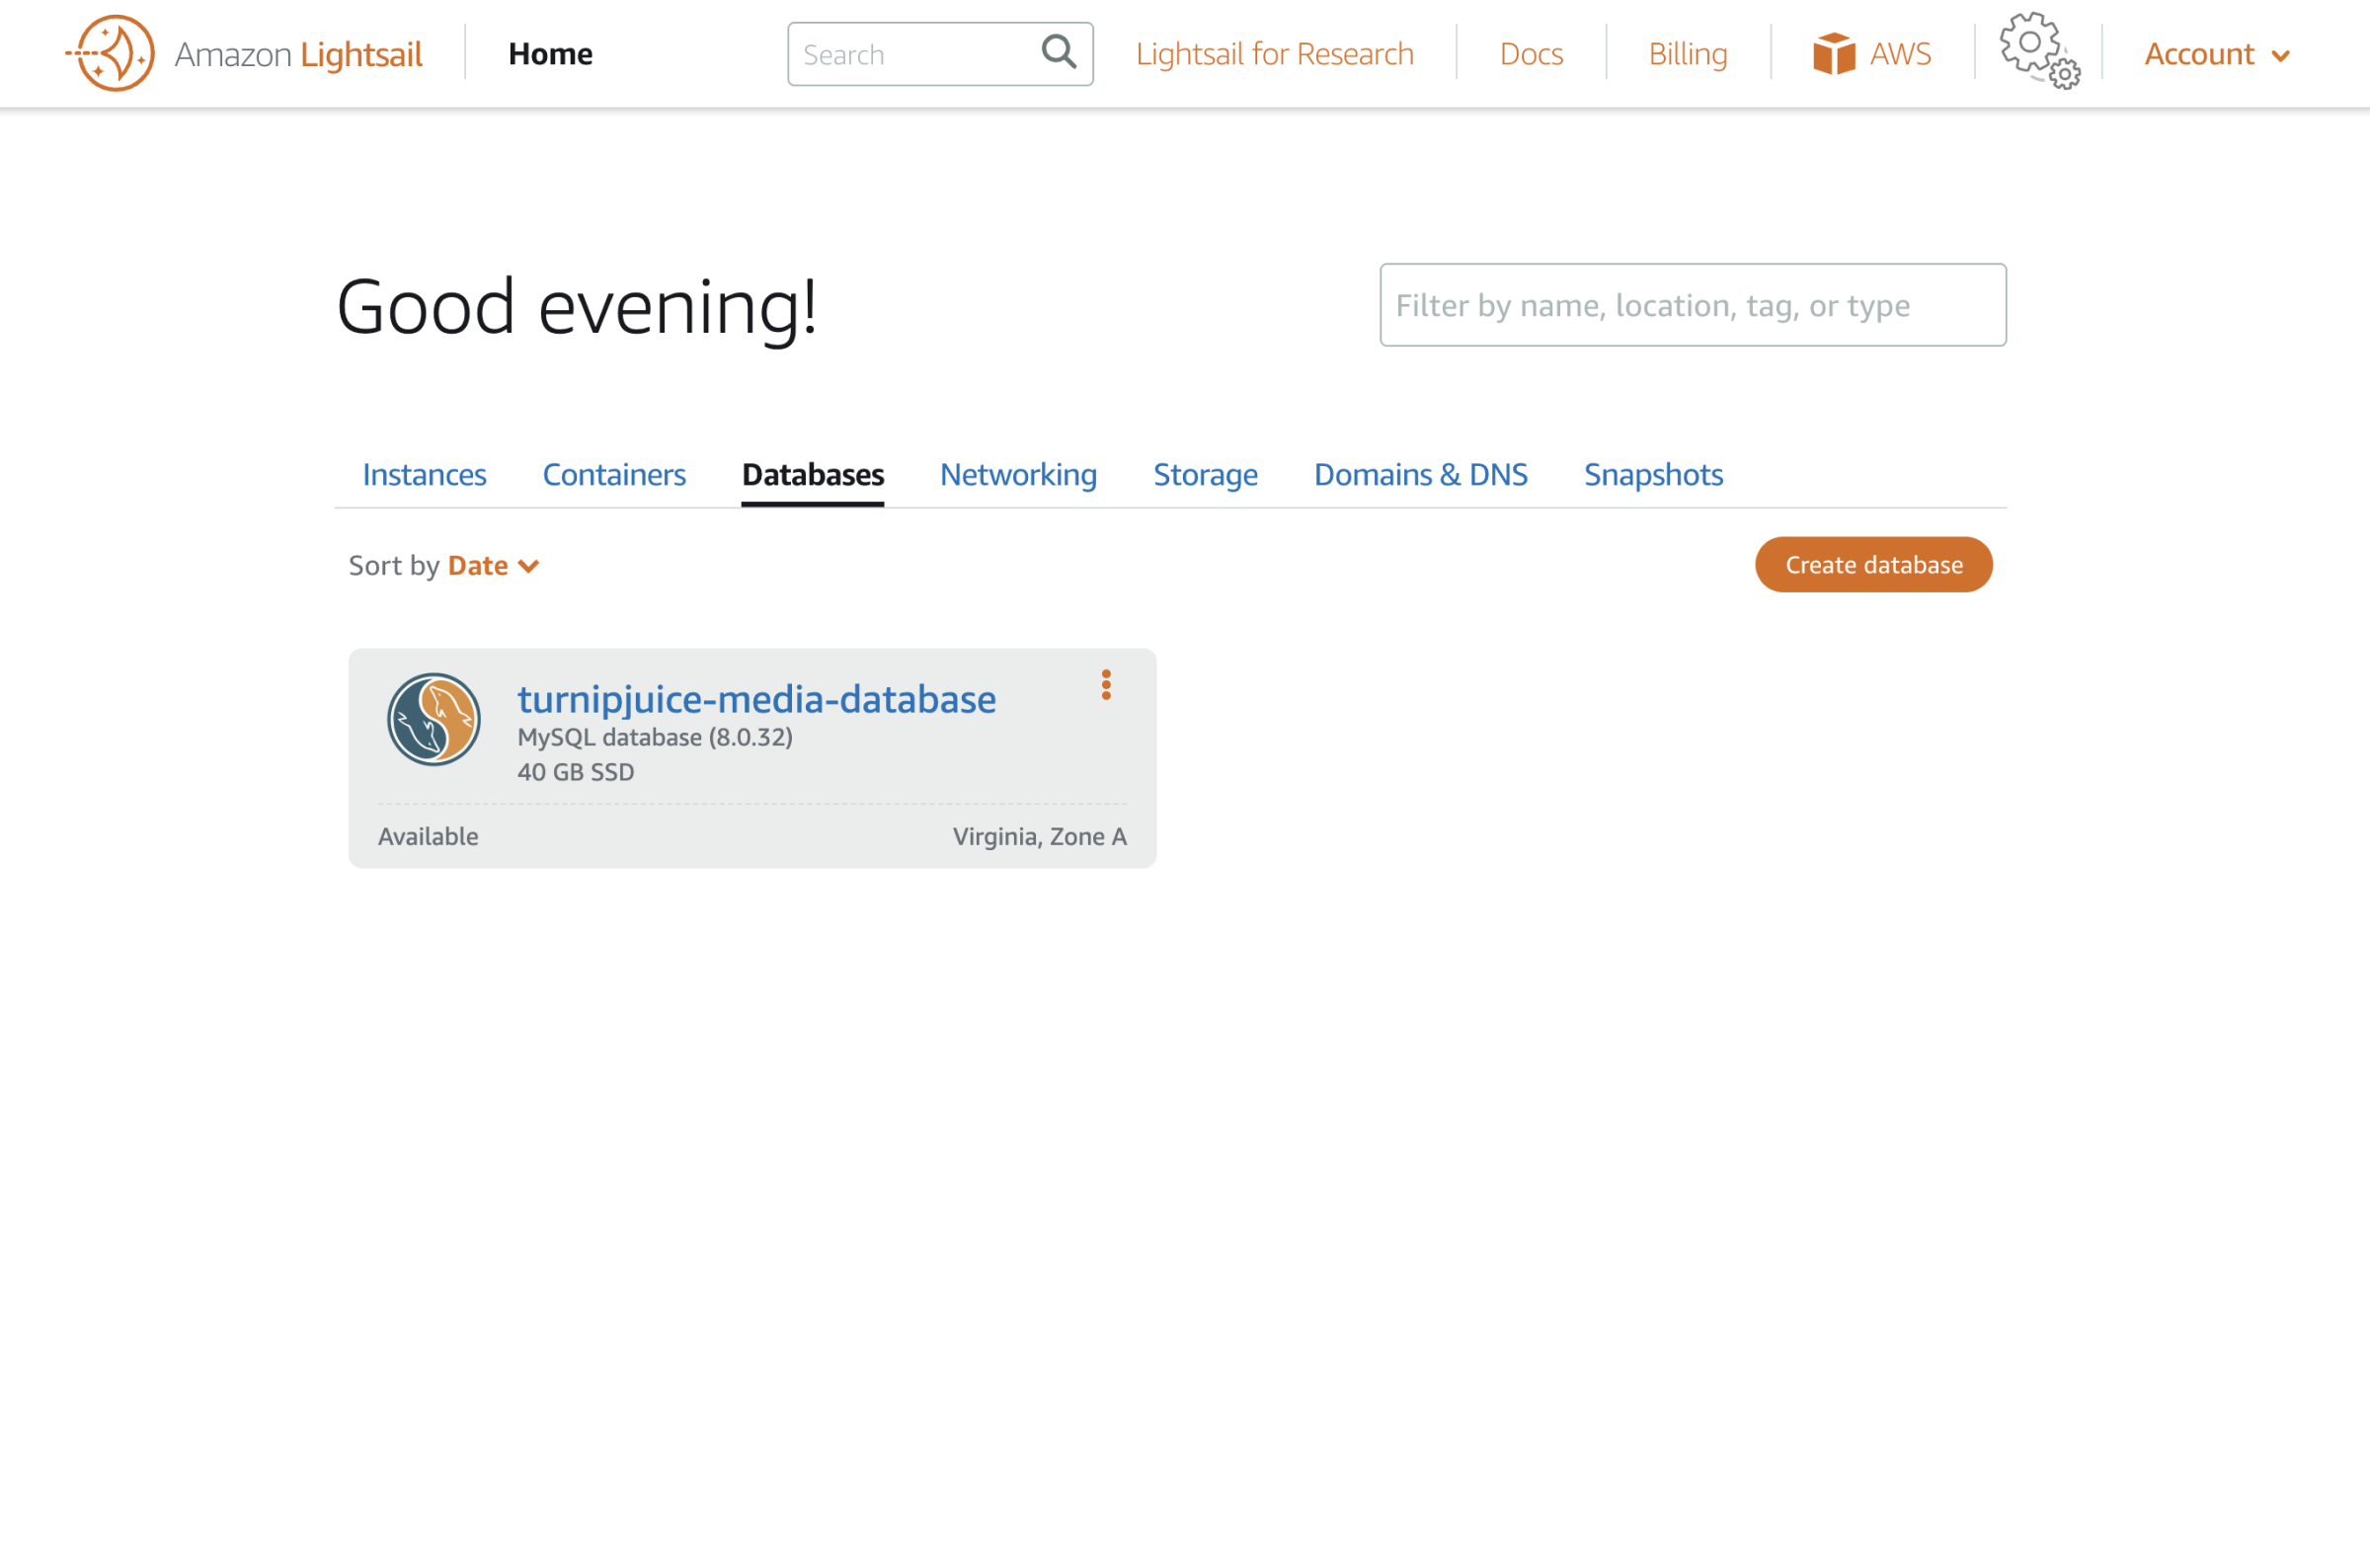
Once the database server has been created (this can take from 5-15 mins, depending on the plan chosen), you can click on it to view the connection details.
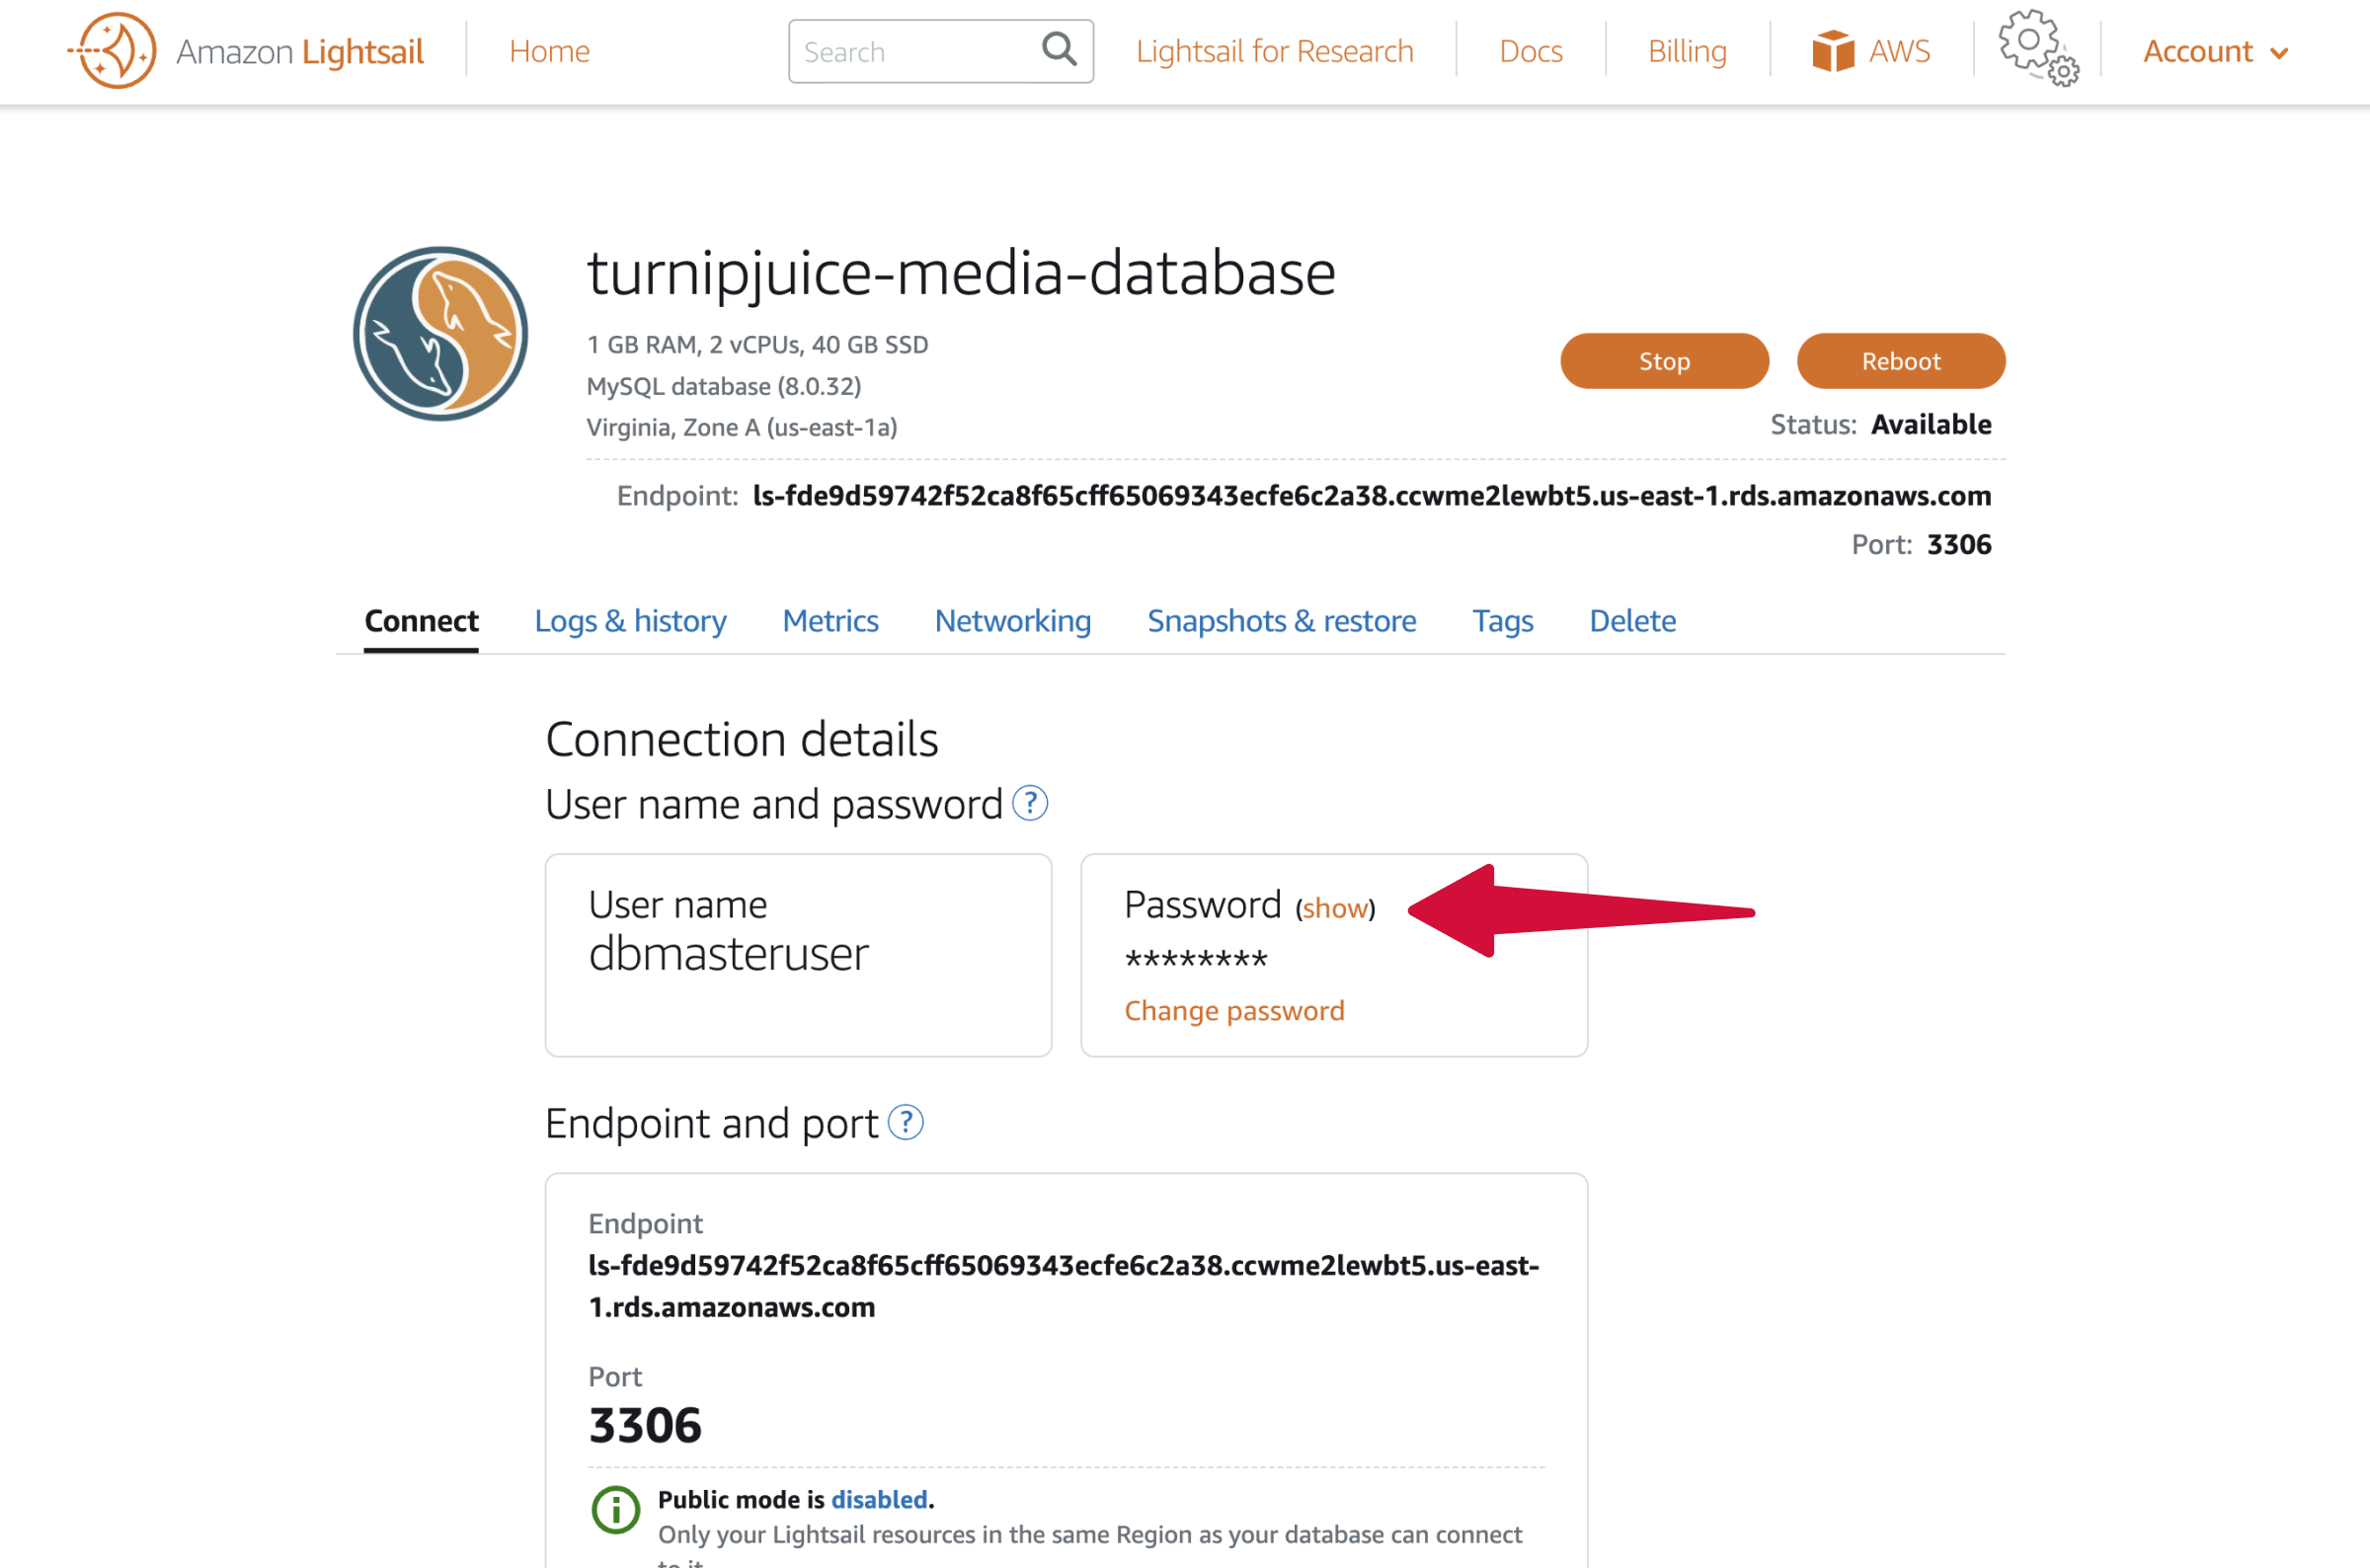
Under “Connection details” you’ll see the username and password that you’ll need for adding this database server as an external database in SpinupWP. The password is hidden, so click on the show link to view the password. You can also change the password from this screen.
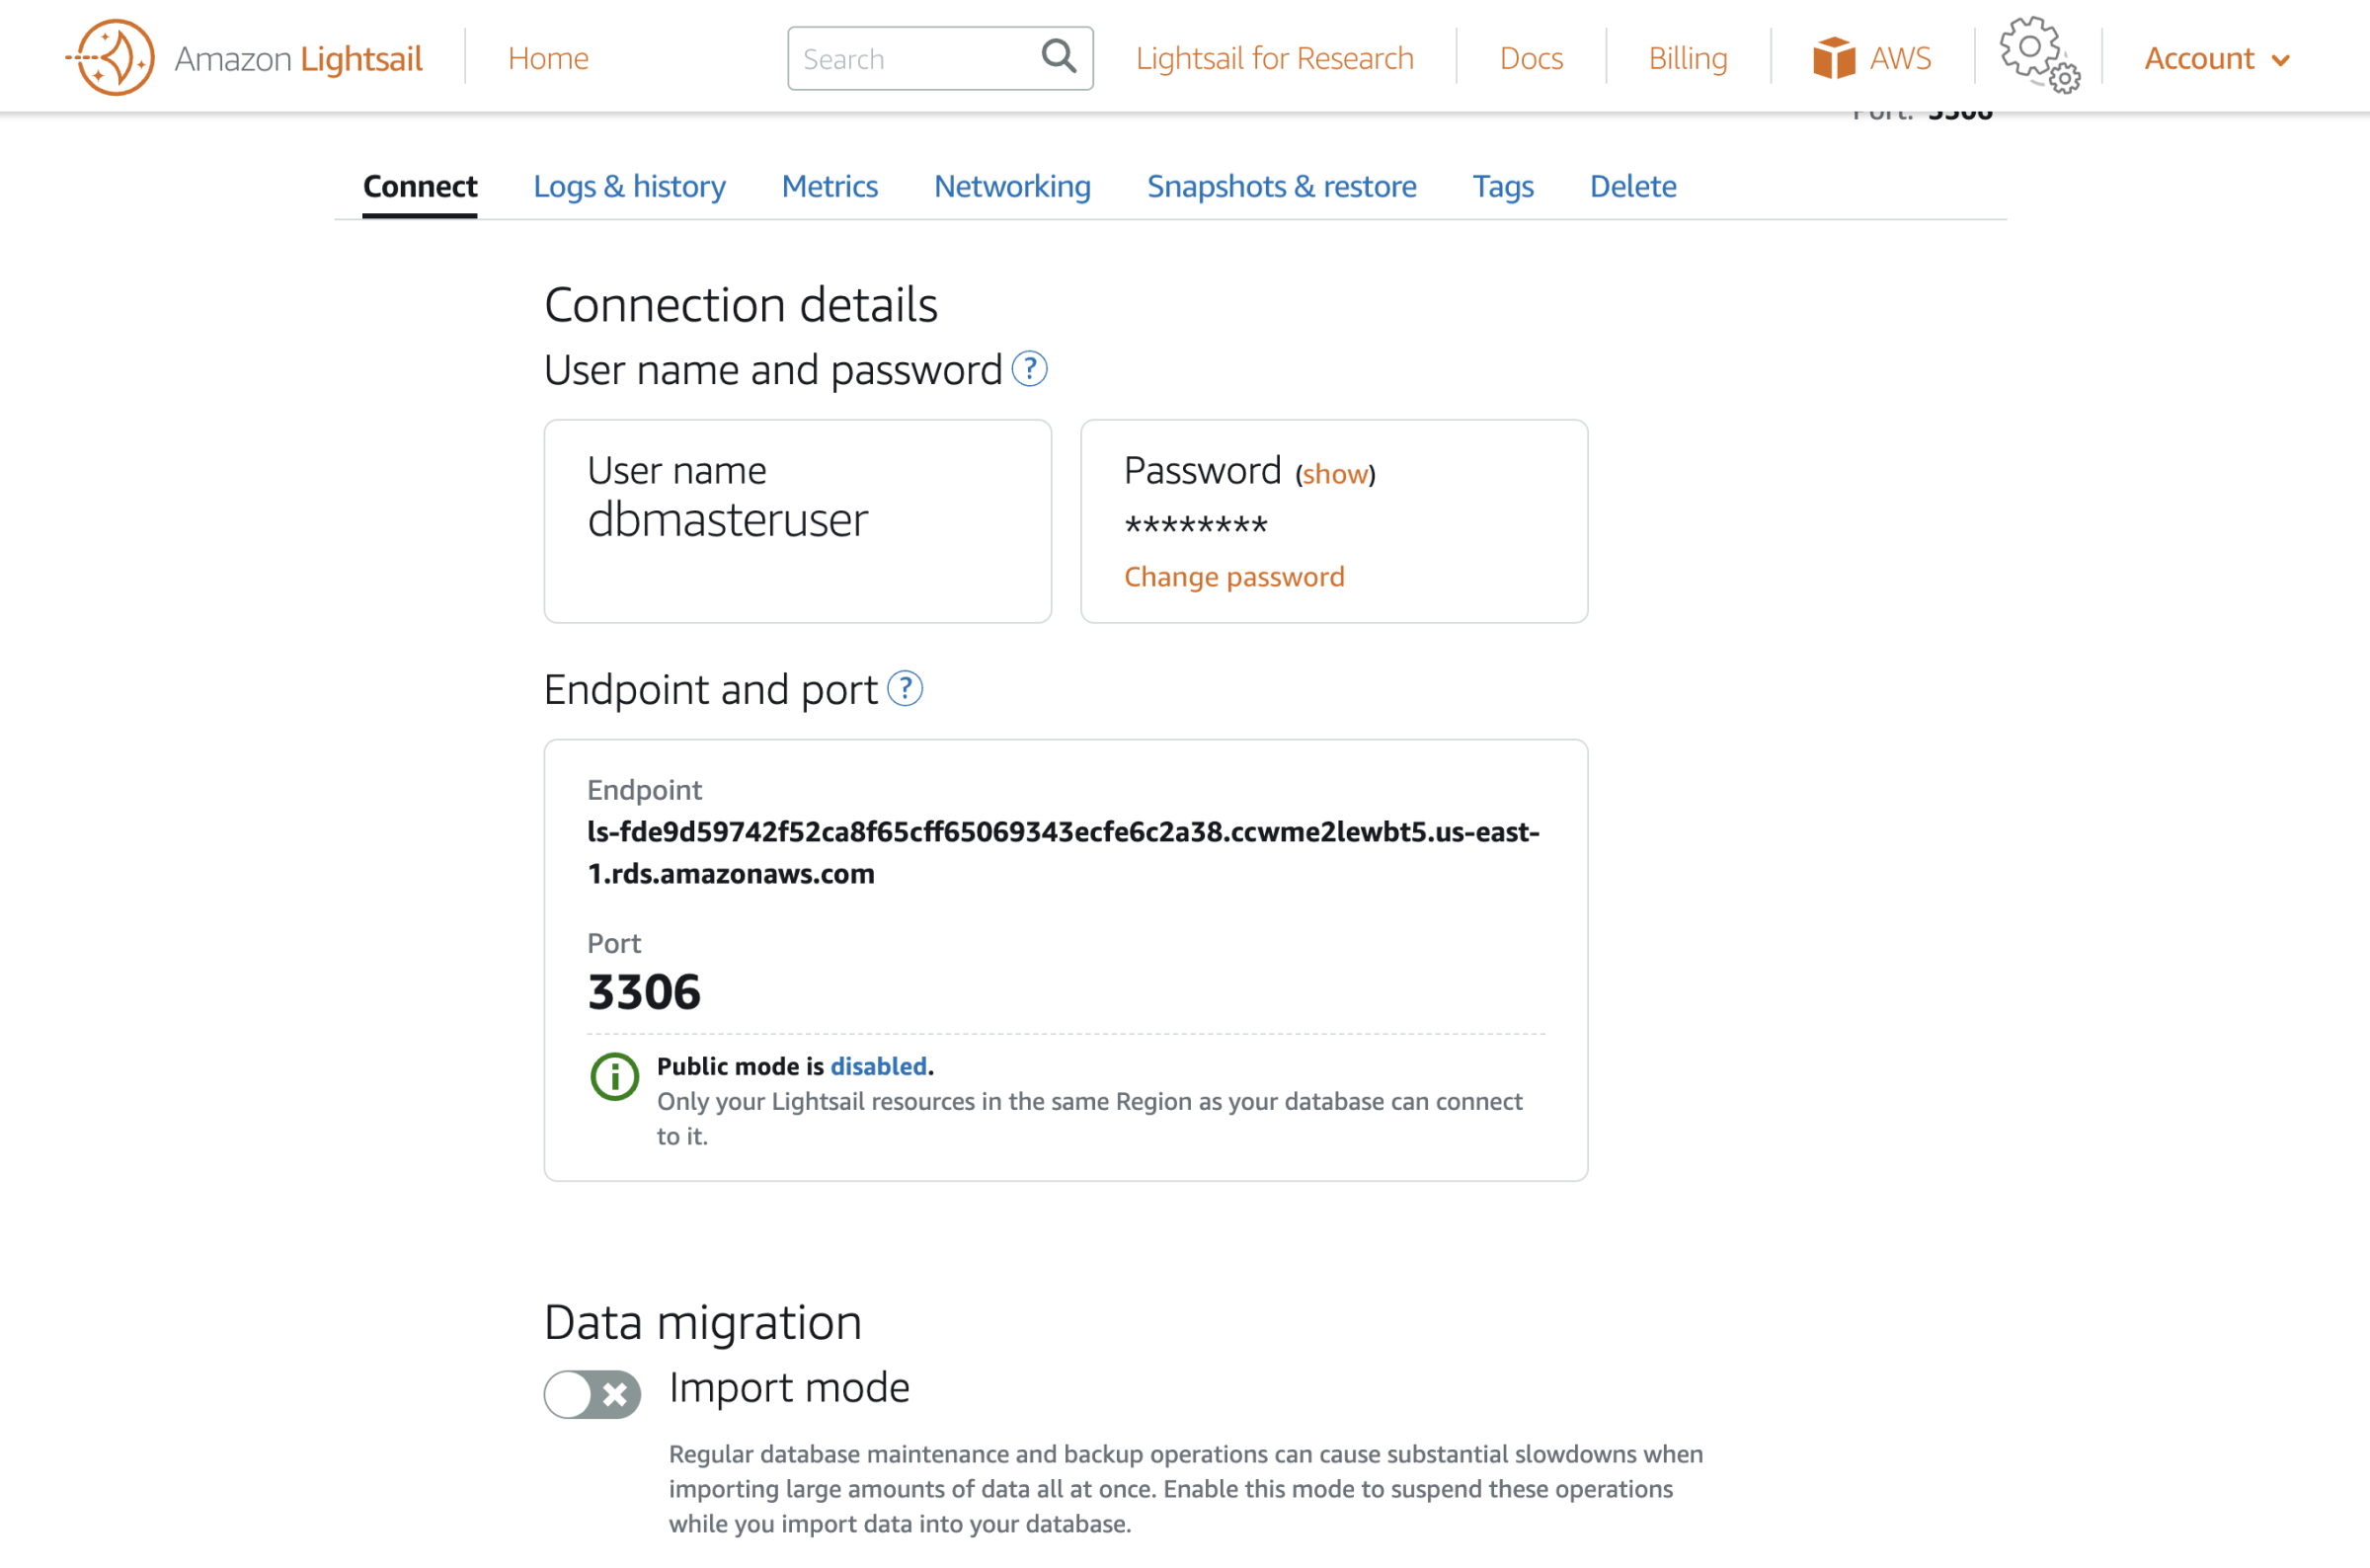
Under “Endpoint and port” you’ll find the hostname (what Amazon calls “Endpoint”) and port.
You should now have all the information you need to add this database server as an external database in SpinupWP.
You may wonder about the “Public mode is disabled” notice. It shouldn’t be necessary to enable public mode because you can connect to your database through your web server via an SSH tunnel. Enabling public mode exposes your server to a public network and greatly increases security risk so we highly recommend keeping public mode disabled.