Setting Up a DigitalOcean Managed MySQL Database and Adding It to SpinupWP
This guide will help you set up a DigitalOcean managed MySQL database for use with new servers set up by SpinupWP. By the end of this tutorial, you will have the database hostname, port, username, password, and database name you need to configure the managed MySQL database as an external database in SpinupWP.
We also have a doc for setting up a managed database server on Amazon Lightsail.
This article covers the following steps:
- Creating a New DigitalOcean Managed MySQL Database
- Only Allow Connections From Your DigitalOcean Instance
Creating a New DigitalOcean Managed MySQL Database
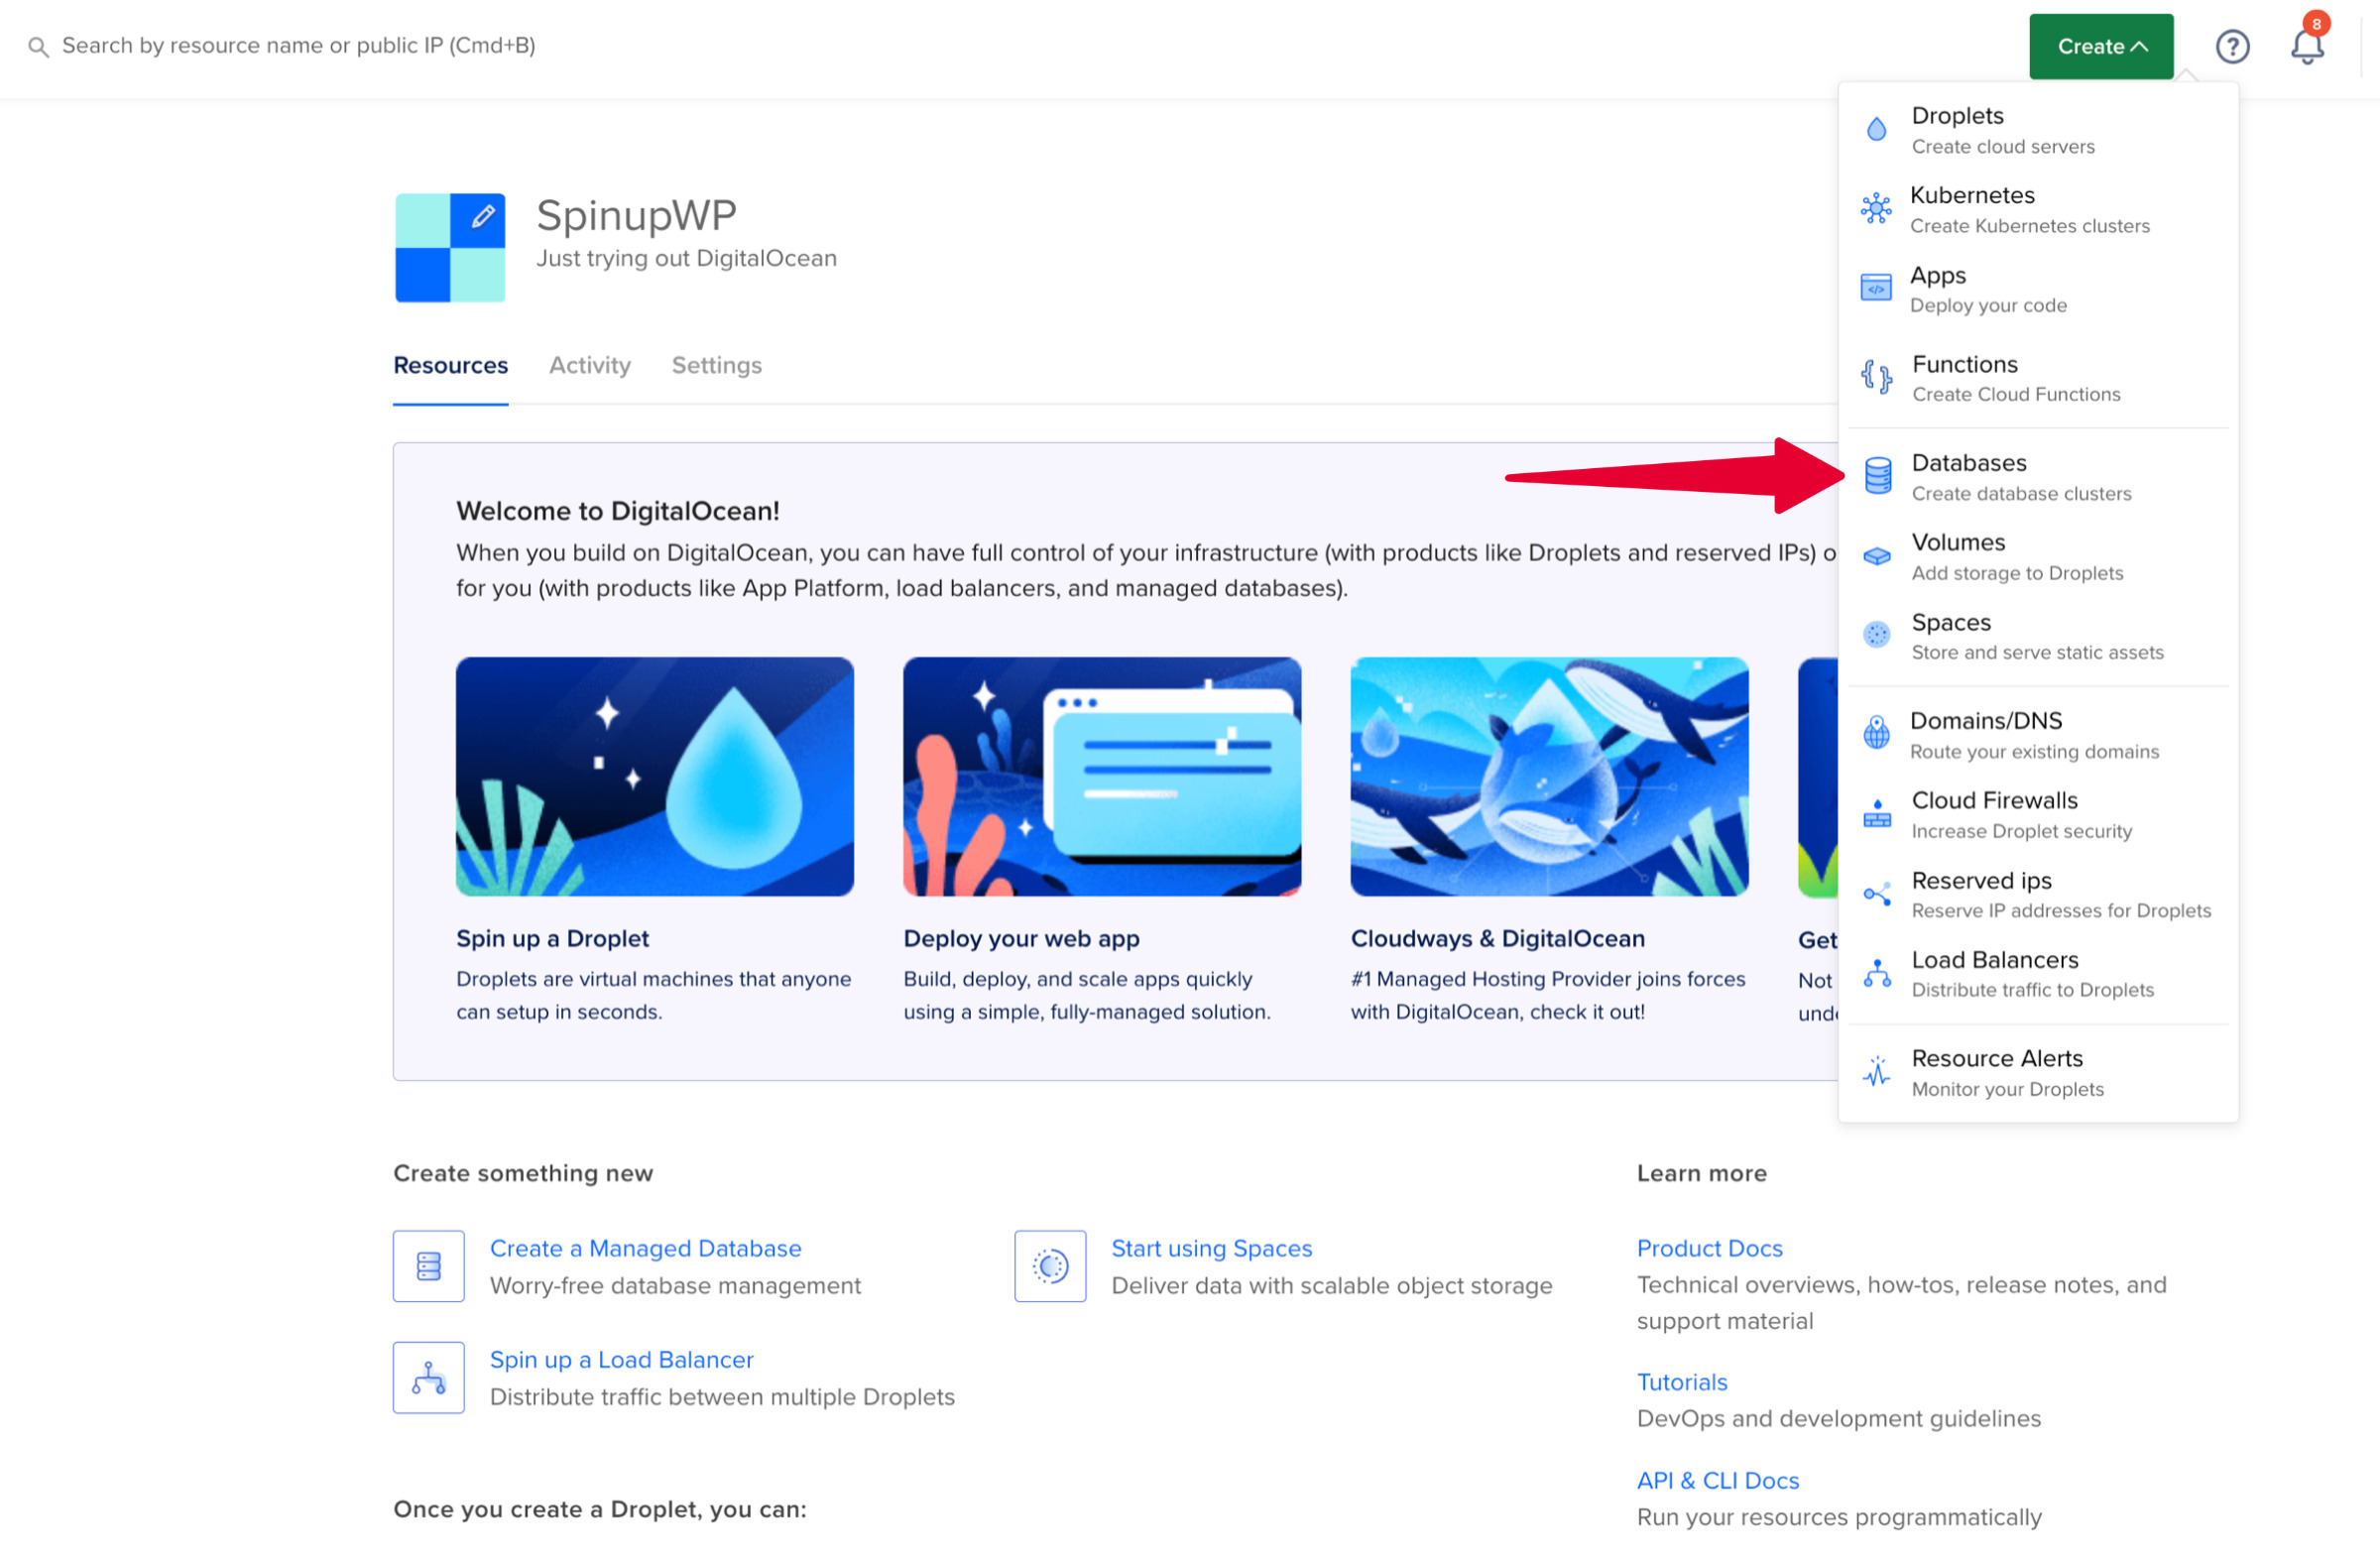
To create a new DigitalOcean database, log into your DigitalOcean account and click the Create button at the top of the DigitalOcean dashboard. Select Databases from the list of available products to create.
This will open the “Create database cluster” page. Your first step is to choose a datacenter region. Make sure to choose the same datacenter where your web server instance is located. This will ensure that latency between your web server and external database is kept to a minimum.
Choosing the same datacenter as your web server allows the use of a VPC Network automatically. All resources created in this datacenter will be members of the same VPC network, which means they can communicate securely over private IP addresses.
Next, is to choose a database engine. As WordPress only works with MySQL, select it from the available options.
Under “Choose a database configuration” you have three “Machine Types” to choose from. “General Purpose nodes” give you dedicated CPUs, so if you know that your database is going to require a lot of CPU, it might make sense to choose this option. Similarly, if your database takes a lot of disk space, “Storage-Optimized nodes” may interest you. “Basic nodes” will work just fine in the majority of situations.
Once you choose the machine type, you’ll need to select a “Node Plan” based on your CPU, memory, and disk space requirements. You can easily upgrade later without downtime, but you cannot easily downgrade.
“Standby Nodes” are essentially read-to-go backup servers that can keep your database operational should your main database server go down for some reason. It’s not something we have used ourselves and feel as though it is a bit overkill for most applications.
Your last step is to give your database a unique name. We typically use the domain name of the server for our server names, but you can use whatever you like. If you have more than one project set up in your DigitalOcean account, you can also select the project the database should belong to. A default database (defaultdb) and admin user (doadmin) will automatically be created.
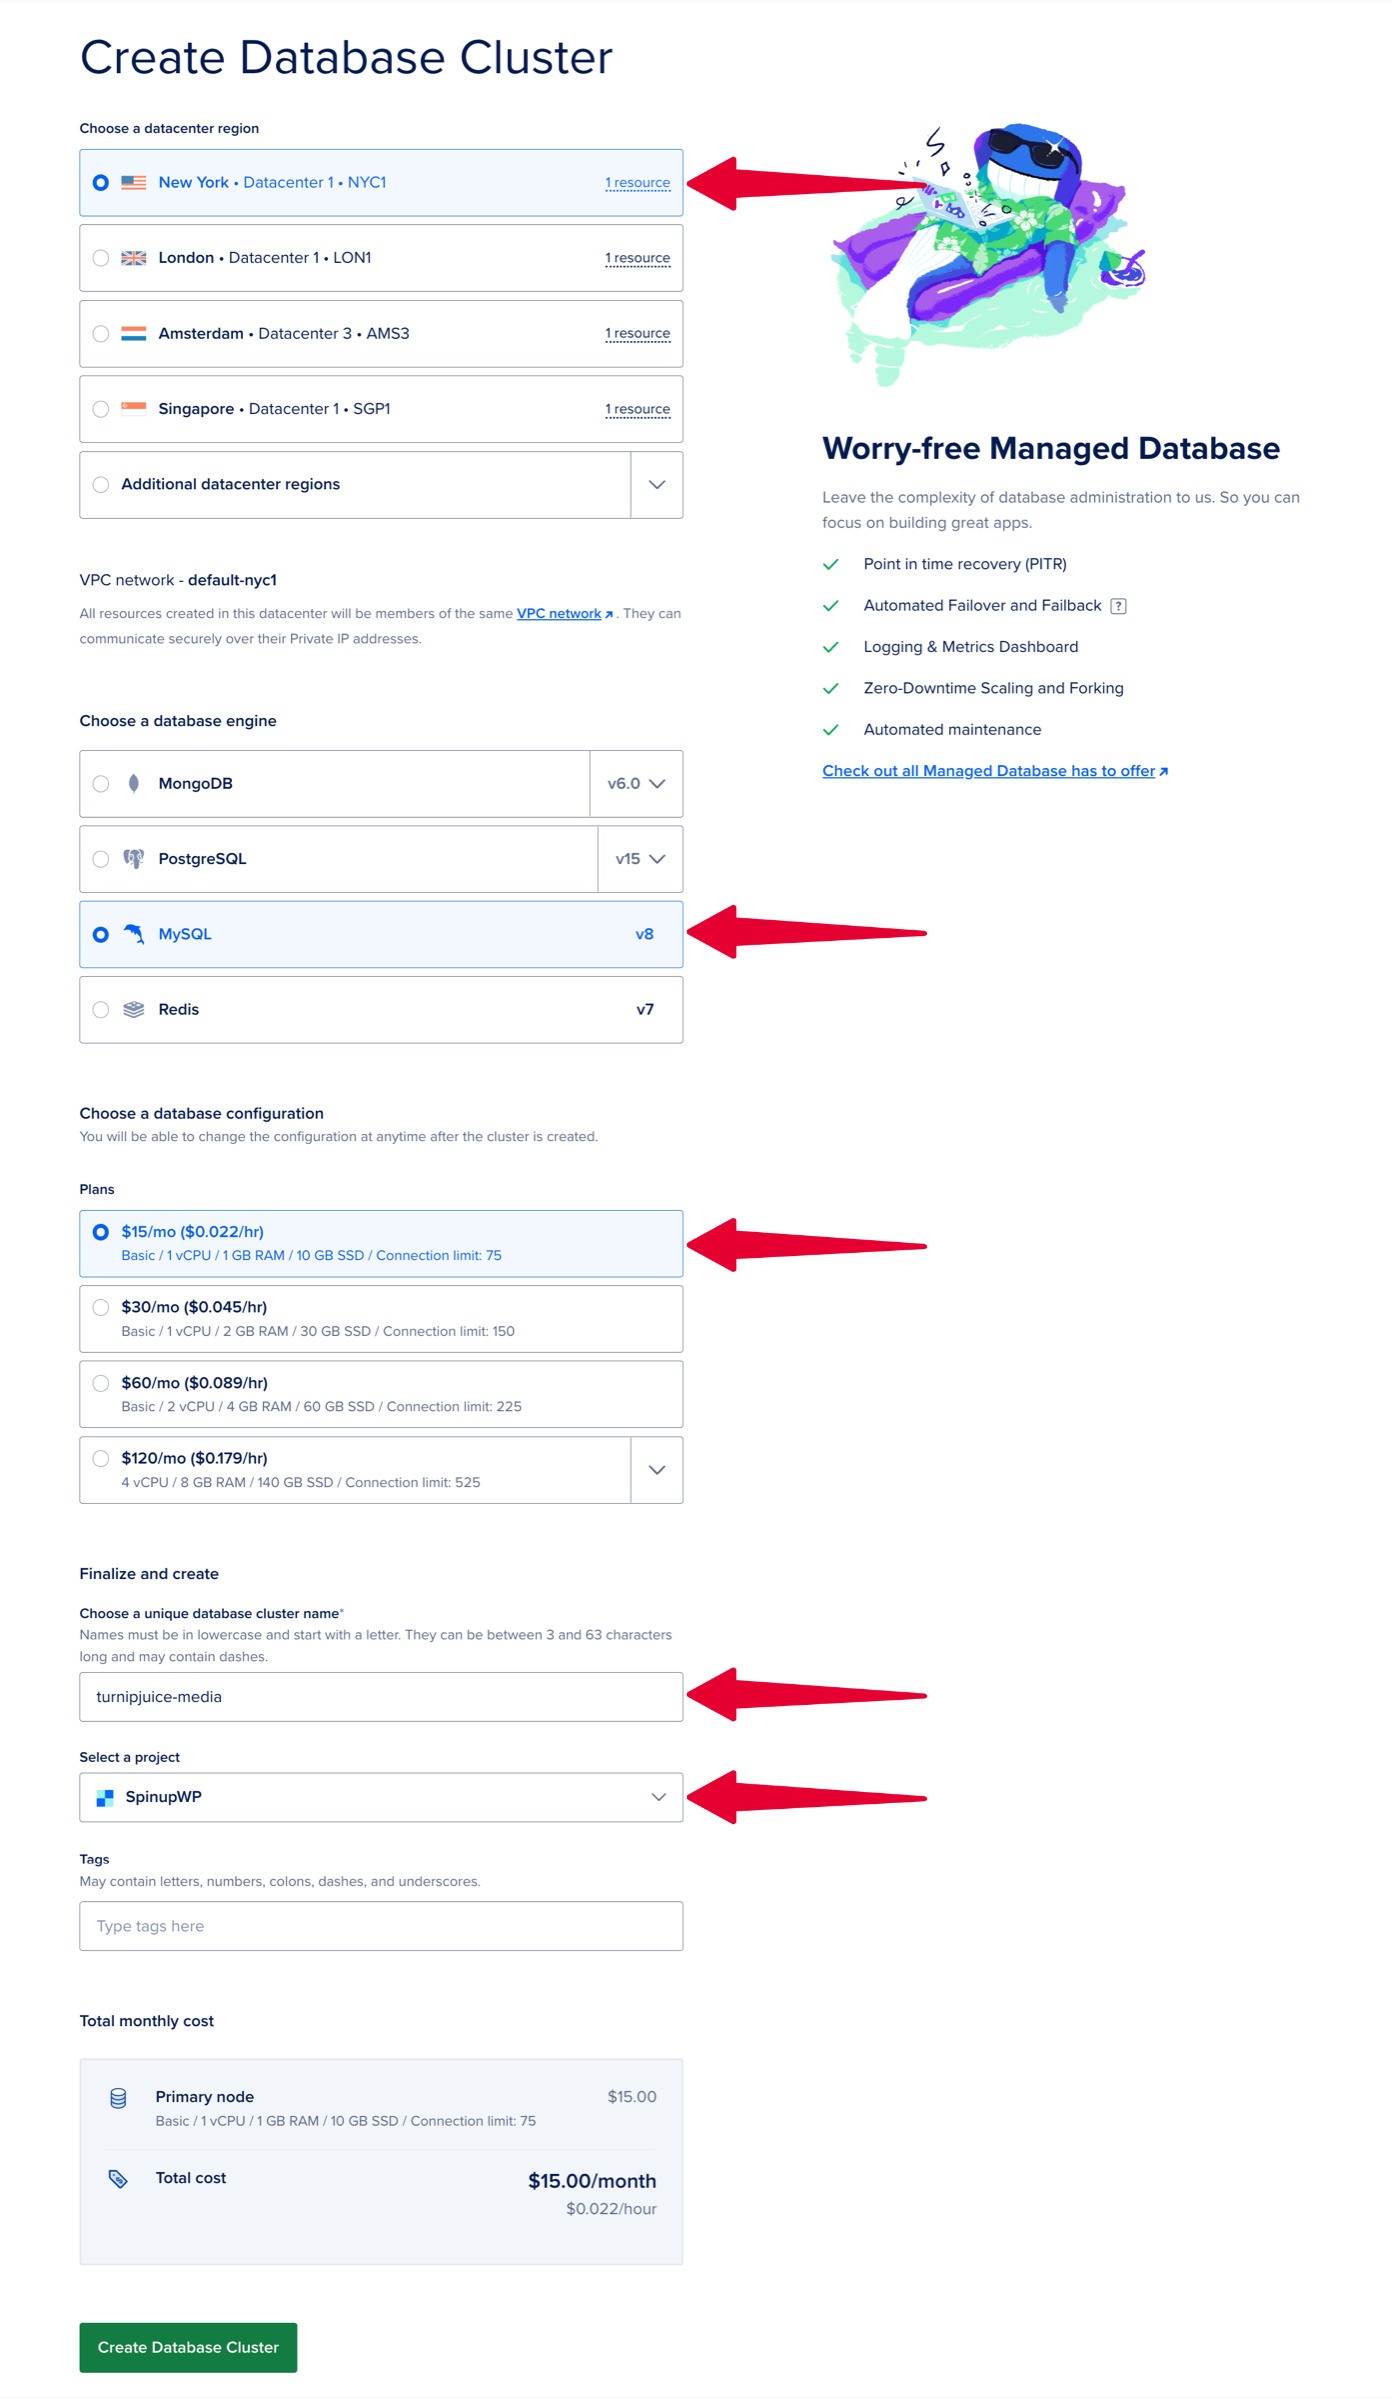
Once you are ready, click Create Database Cluster. It takes a few minutes for the database to be set up. While the database is being created, you can set up a secure connection to it.
Only Allow Connections From Your DigitalOcean Instance
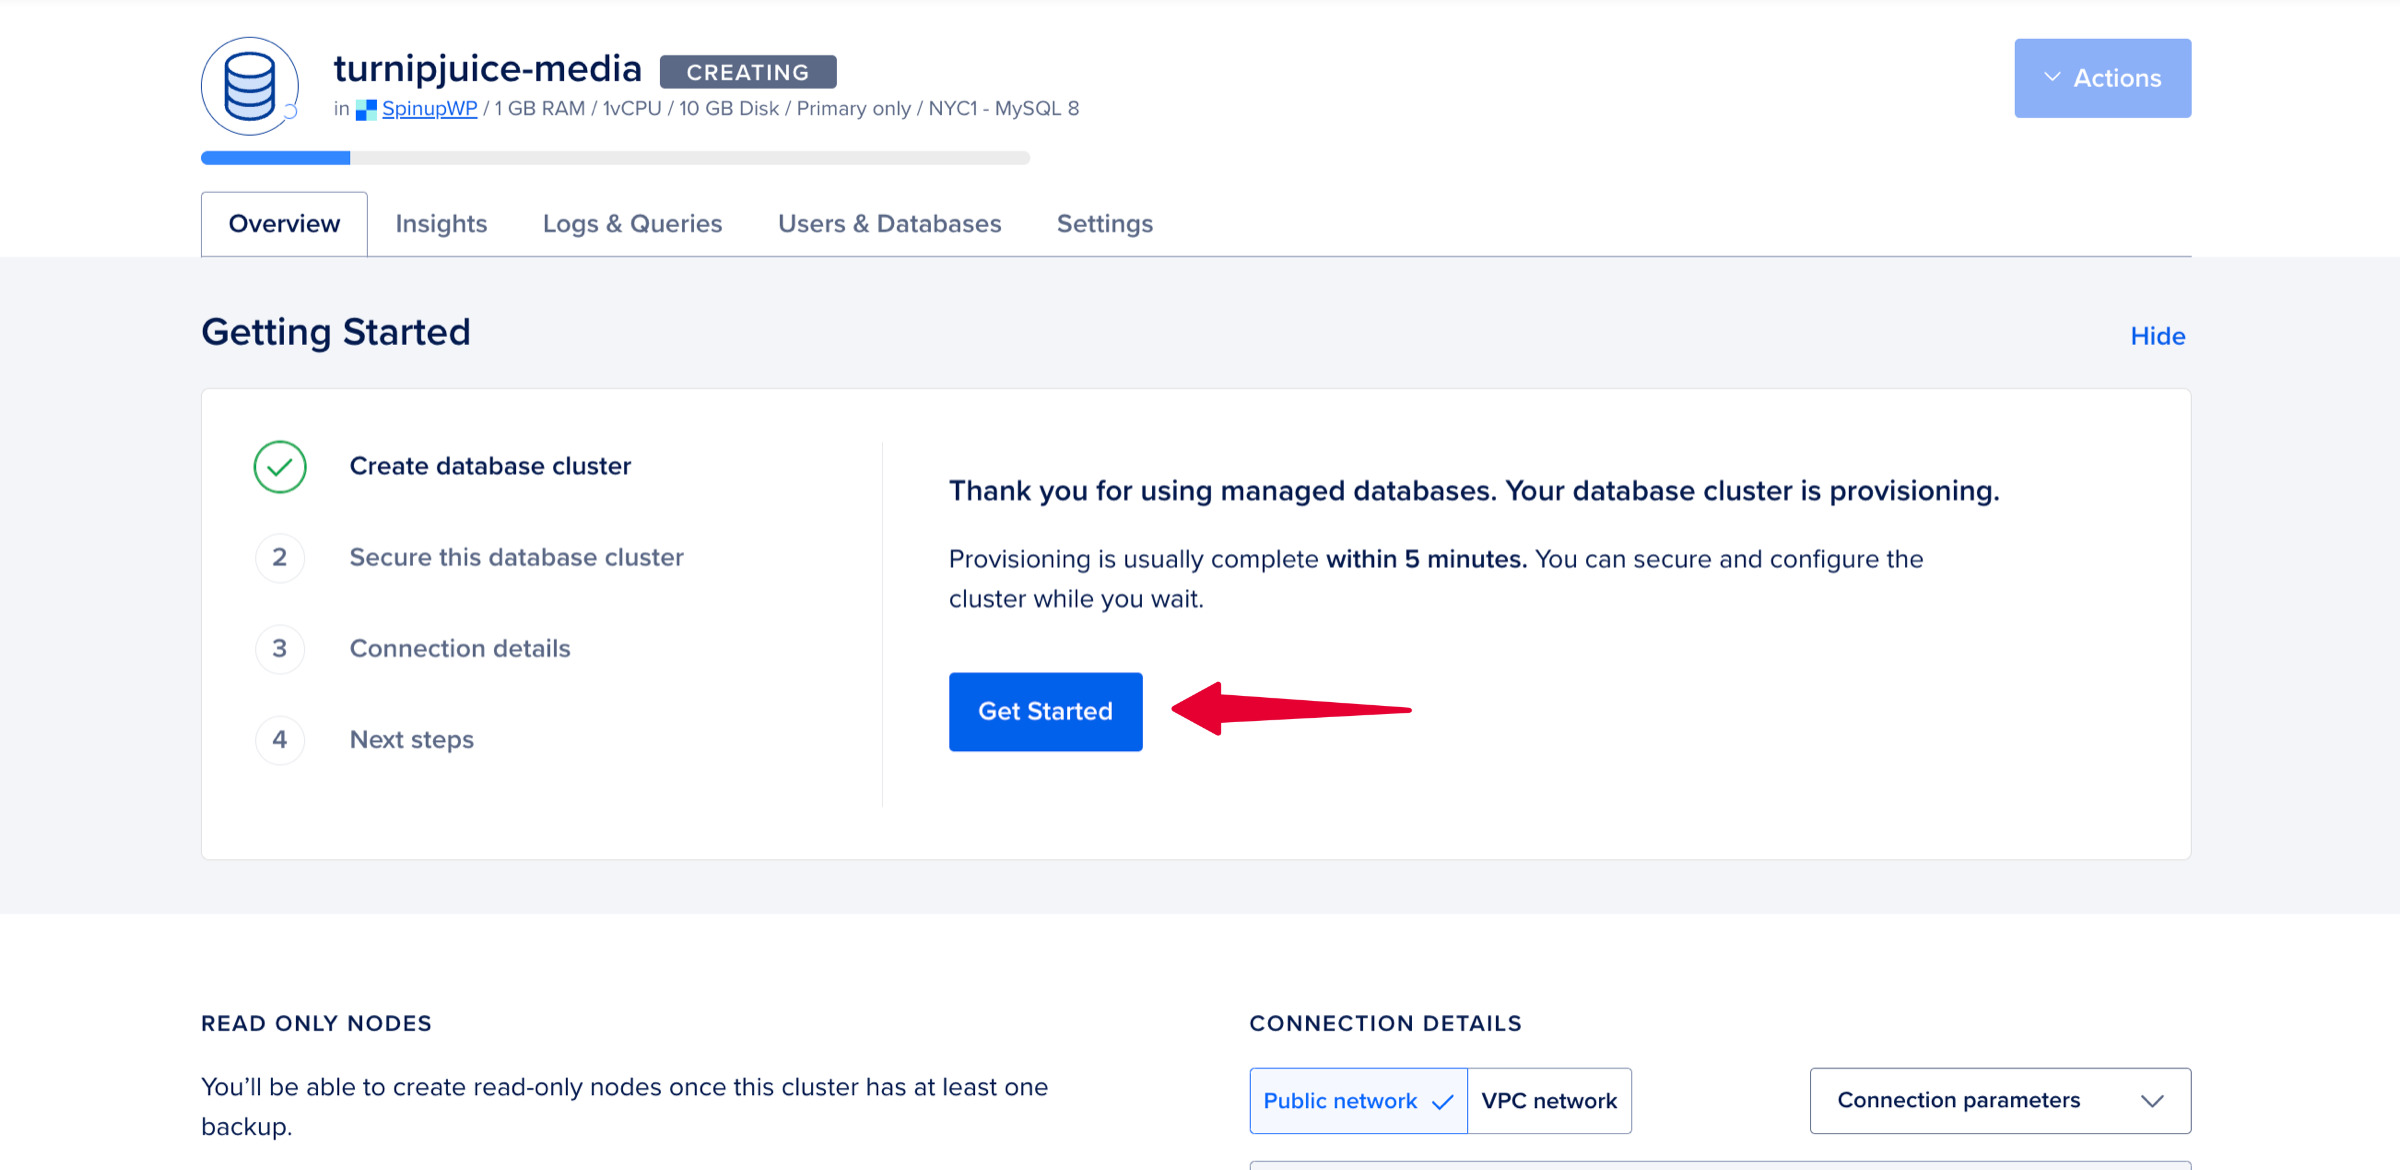
If this is the first time you are adding a database to the default VPC network, you’ll be presented with the “Getting Started” wizard. Click on the Get Started button.
In order to secure your database, you need to add at least one trusted source. This will allow connections only from your trusted source(s) and restrict all other incoming connections. You can search from the list of available servers in the Add trusted sources list to add the web server(s) that should be able to connect to this database. Try to limit this only to the specific web servers that need access to the database. You can always add more trusted sources at a later stage. Once you have added at least one trusted source, click Allow these inbound sources only.
If you’ll be spinning up a server from within SpinupWP, you can go ahead and skip this step for now. You can come back and add your server as a trusted source after it has been created.
The wizard will present you with the details to connect to the database. The default connection details will be that of the public network.
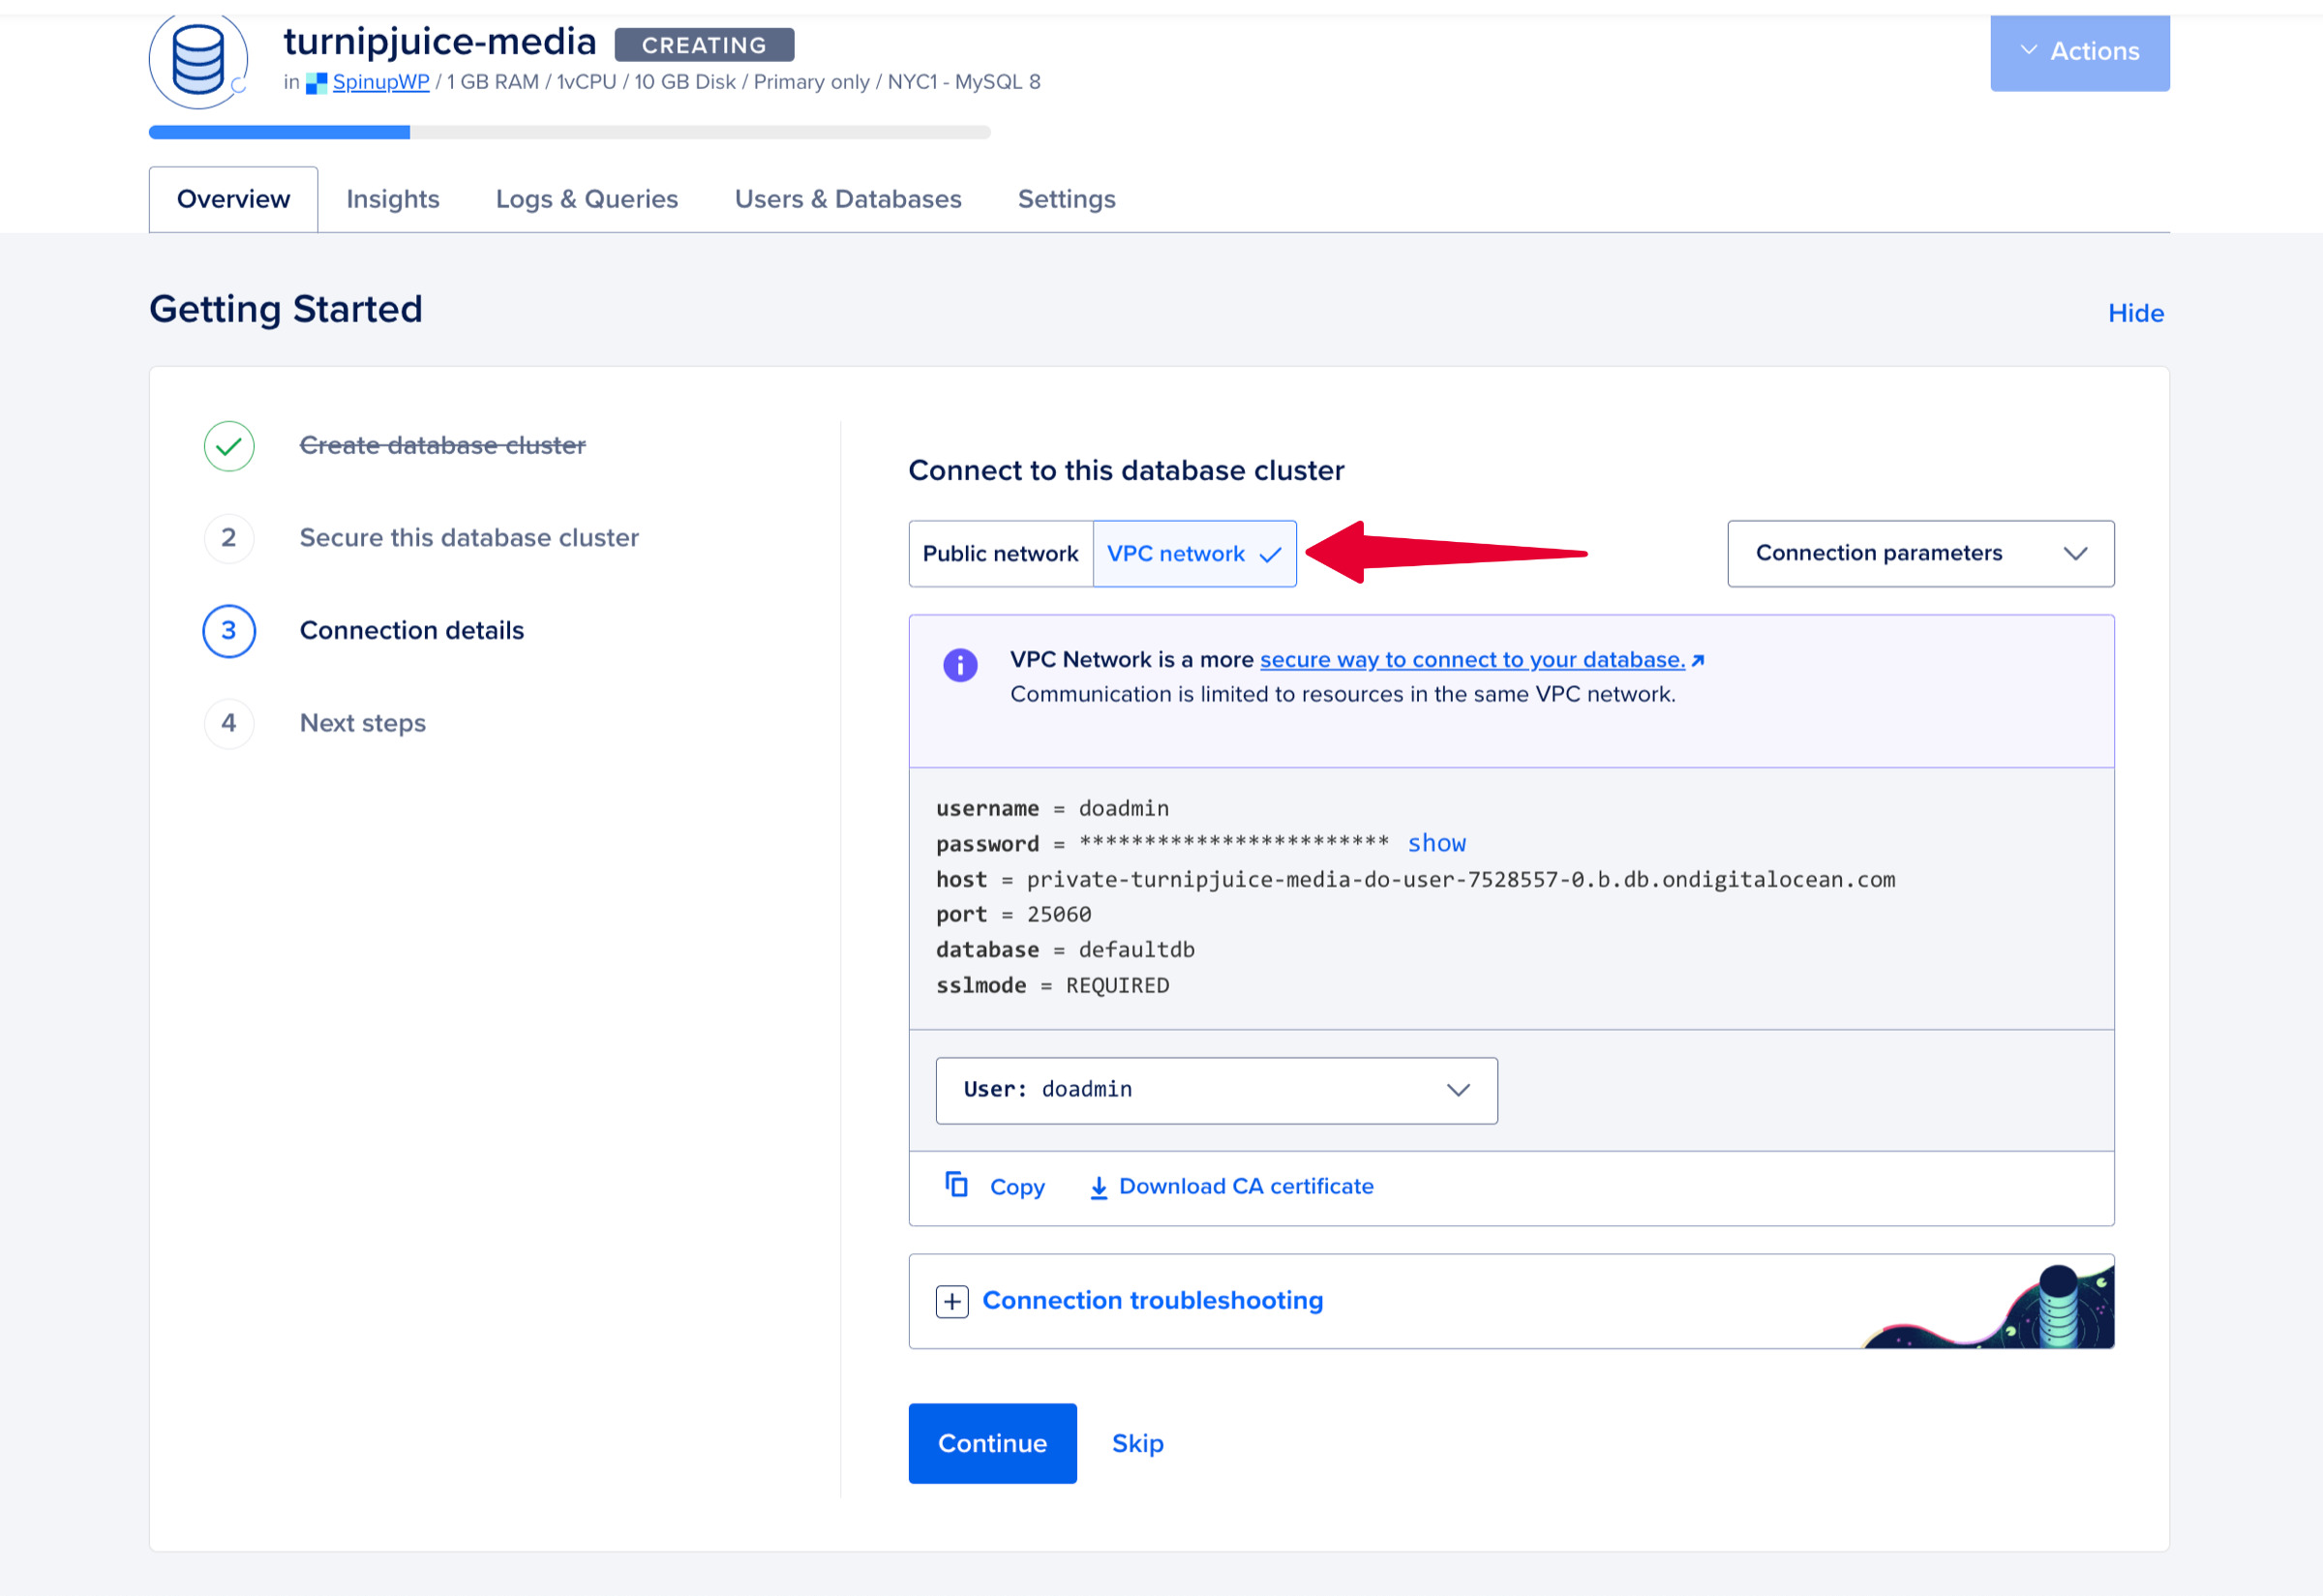
Click on the VPC network tab to view the connection details in the VPC network. Using these details means that if your database credentials are ever leaked, no one can connect to the database unless they also have access to your web server. These are the connection details you should use to add this database server as an external database in SpinupWP.
Take note of the username, password (you’ll need to click show to get this), host, and port. These are all the bits of info you’ll need when adding this database server as an external database in SpinupWP. Click Continue to move to the next step. The final step of the wizard presents you with the next possible steps, such as importing your data, configuring automatic updates, and database backup settings. The defaults will suffice for now. Click Great, I’m done to complete the wizard.
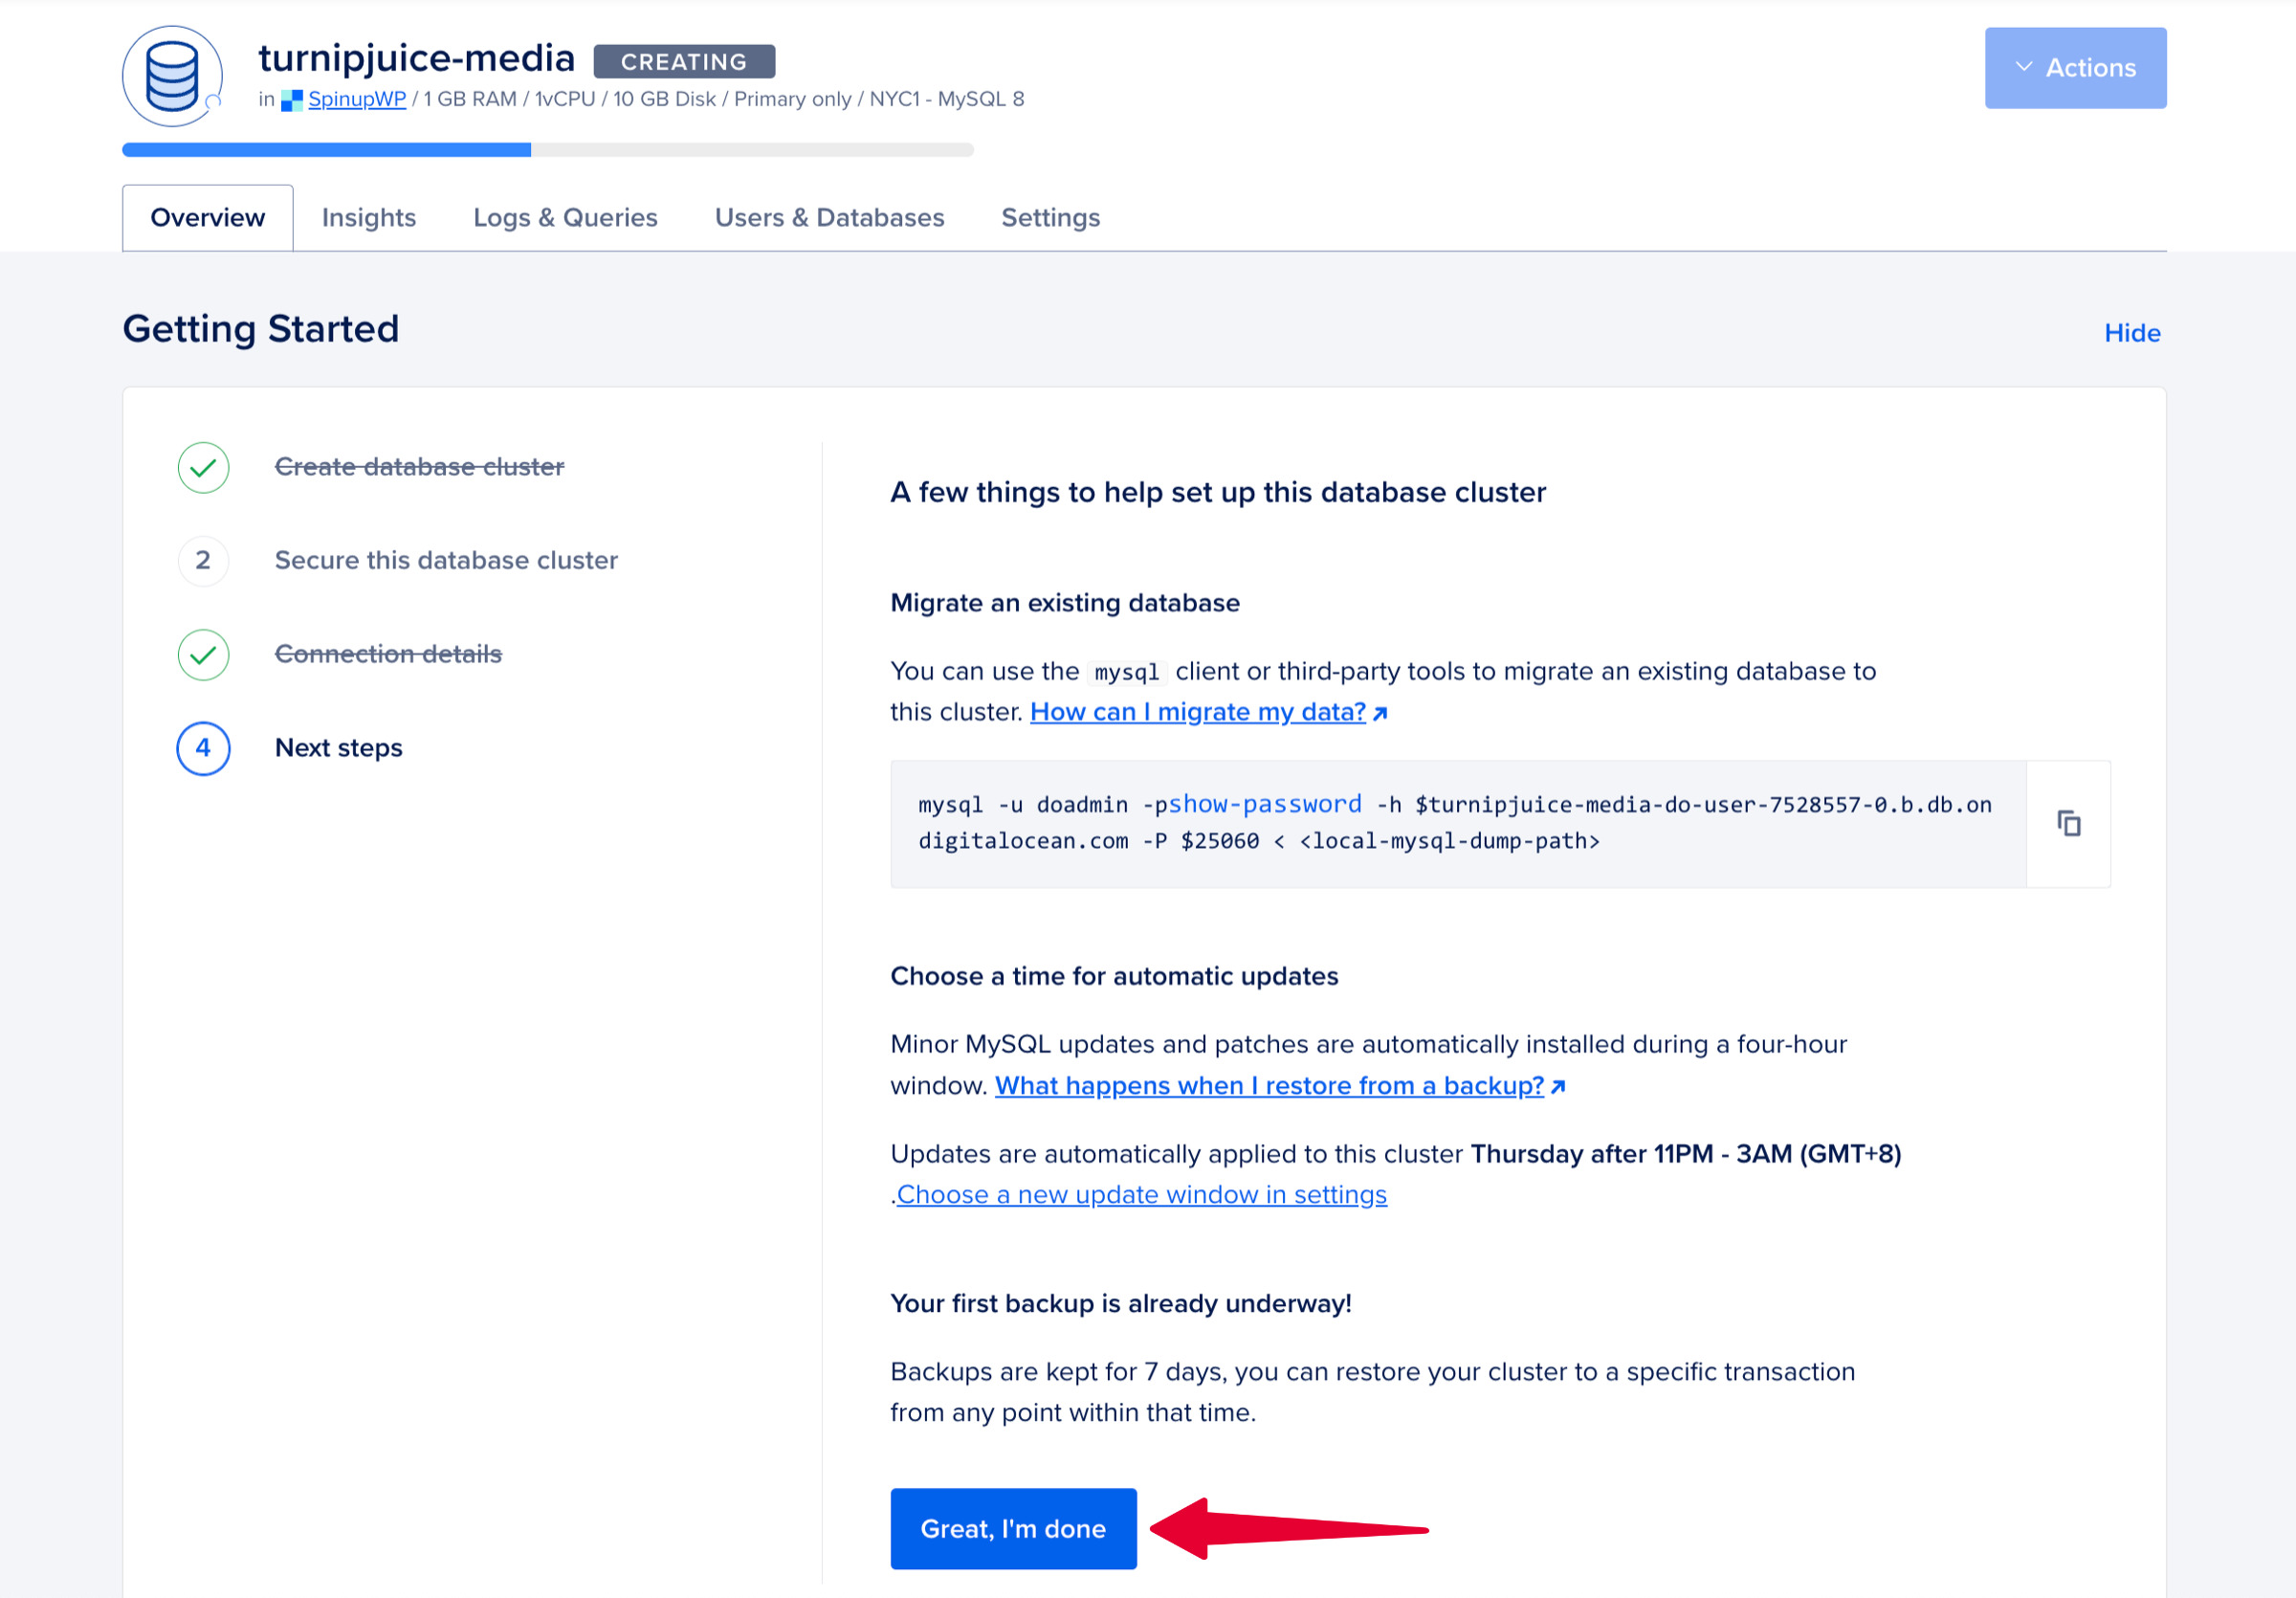
You’ll be presented with the database cluster overview. The database server might still be in the process of being created, which you can see by the blue progress bar, and the “CREATING” status next to the database server name.
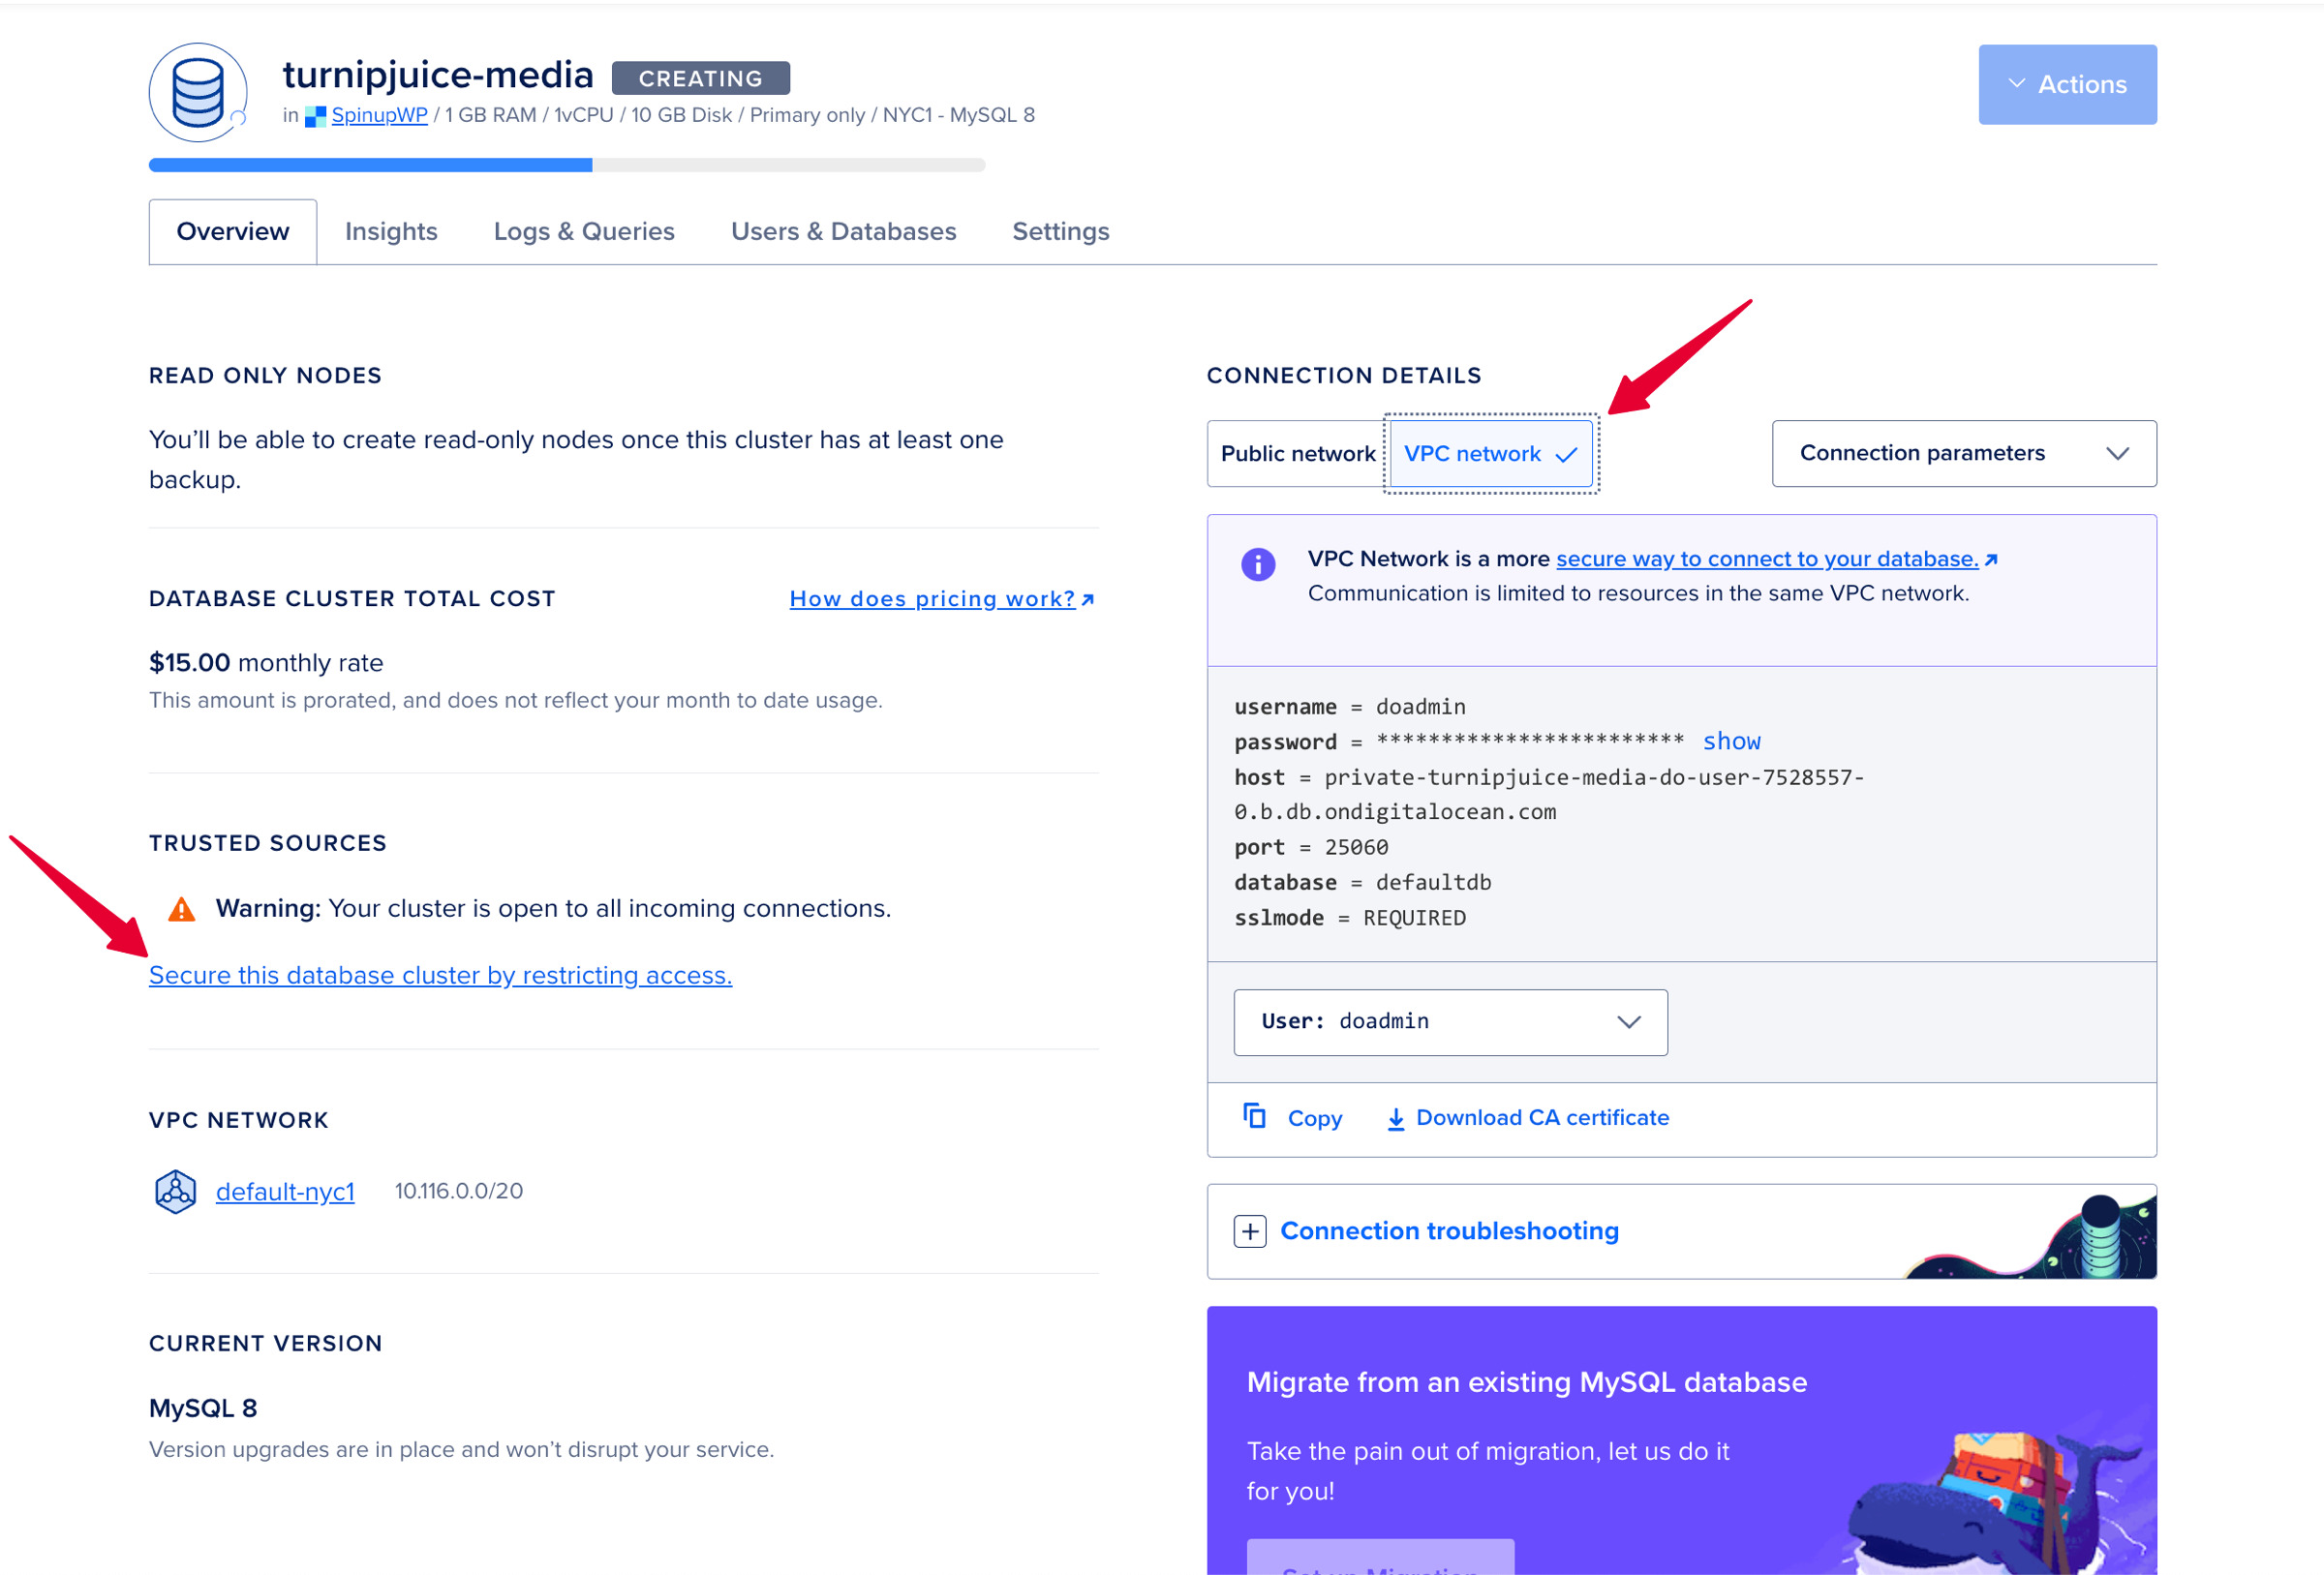
Once the database server creation has completed, you can use the username, password, host, and port to add the database server as an external database to SpinupWP. Remember, be sure to use the “VPC network” connection parameters and not the “Public network” connection parameters.