Create a Custom SpinupWP Dashboard in Under 30 minutes Using Laravel and Inertia
If you’re an agency or a freelance web designer using SpinupWP to manage your servers, chances are you’ll need to give clients access to manage their own websites. In this tutorial, we’ll show you how you can build a custom SpinupWP dashboard using the SpinupWP SDK, the popular PHP framework Laravel, and Inertia.js.
SpinupWP provides a powerful API you can use to perform actions like listing your servers and sites, creating new sites, or even restarting some server services. If you’re using PHP as your backend language, you can use the official SpinupWP Software Development Kit (SDK) to make things easier.
- The SpinupWP SDK
- Inertia.js
- Laravel Jetstream
- Assembling the Tools
- List and Manage Servers From Your Dashboard
- Create a New Site From Your Dashboard
- Next Steps
The SpinupWP SDK
The SpinupWP SDK is a PHP library that allows you to perform actions on servers and sites managed by SpinupWP from your own custom application, without calling the API directly. We made the SDK open source and it’s available on GitHub.
We recommend using the official SpinupWP SDK if you decide on PHP as the backend technology for your custom dashboard. This will take care of things like generating an HTTP request class to call the API, attaching the authorization token on every request, and parsing the responses. The SpinupWP SDK is also object oriented, so it will play very well if you’re already using a modern PHP framework such as Laravel.
Another advantage is that if there’s a major change in our API, SpinupWP will ensure that the SDK is updated to reflect these changes. Just updating the SDK should be sufficient to get your app working again. No need to refactor your app.
You’ll need an API token from your SpinupWP account to use the SpinupWP SDK or even if you want to call the API directly. This token has access to all the servers and sites in the account to which it belongs, so you should be careful who you give it to.
Now that we have an idea of how the SpinupWP SDK works, let’s take a look at the other tools we’ll use for our custom dashboard.
Inertia.js
Inertia.js is a frontend JavaScript library that allows you to build single-page apps (SPAs) without building an API. You write your web app as if it were a server-rendered app with full page loads. Forget about client-side routing, tokens, and API calls. You just need controllers and views. Your “views” in this case are actually client-side components. A full HTML page is returned when your app first loads. However, all subsequent page visits are done via AJAX and return JSON.
Inertia converts your initial server-rendered HTML page into an SPA by passing a page object into a client-side app. This page object includes the necessary information required to render the page component (props, URL, etc.). On subsequent page visits, requests are sent via AJAX. The response returns the same page object data, but in JSON format. The server-side stuff is handled by middleware that uses headers to detect if the request is an Inertia request and if it should serve HTML or JSON.
Laravel Jetstream
Laravel Jetstream is an application starter kit that integrates Inertia, Tailwind CSS as the CSS library, and Laravel Sanctum for API authentication. Jetstream is an official Laravel package, which means it’s maintained by the same developers who maintain Laravel.
Laravel Jetstream is a good starting point for your application, as it comes with a lot of functionality out of the box, such as login, registration, email verification, 2FA, session management, API tokens, and even an optional team management feature. With these features, along with the power of Inertia.js and the reusability of Tailwind CSS, you can create SPAs in record time. You can focus on your application logic and forget about everything else.
Now, let’s cover the tools we’ll need to build out our own custom SpinupWP dashboard!
Assembling the Tools
Installing Laravel requires you to have Composer installed and configured. You should also make sure to place Composer’s system-wide vendor bin directory in your system’s $PATH variable. This will make it possible to use the laravel executable later, once it’s installed. The location of this directory is dependent on your operating system:
- macOS:
$HOME/.composer/vendor/bin - Windows:
%USERPROFILE%\AppData\Roaming\Composer\vendor\bin - Linux:
$HOME/.config/composer/vendor/binor$HOME/.composer/vendor/bin,
Also, you should have a new database ready for the dashboard. You can use MariaDB or MySQL for this.
Installing Laravel
First, let’s create a Laravel project. There are different ways you can start a Laravel project. We prefer the Laravel installer method. Once it’s on your computer, creating a new project is very simple.
Use Composer to install the Laravel installer globally so you can run the laravel executable from any location:
composer global require laravel/installer
Once this is completed, create your new Laravel project:
laravel new custom-spinupwp-dashboard
This creates a new directory called custom-spinupwp-dashboard and installs the relevant dependencies. When it finishes, you can change into the directory and use the built-in development server to run the Laravel project for the first time.
cd custom-spinupwp-dashboard
php artisan serve
The artisan command powers the Artisan command line interface included with Laravel. We’ll be using this quite a bit.
This starts the Laravel development server, which you can visit in your browser at http://localhost:8000.
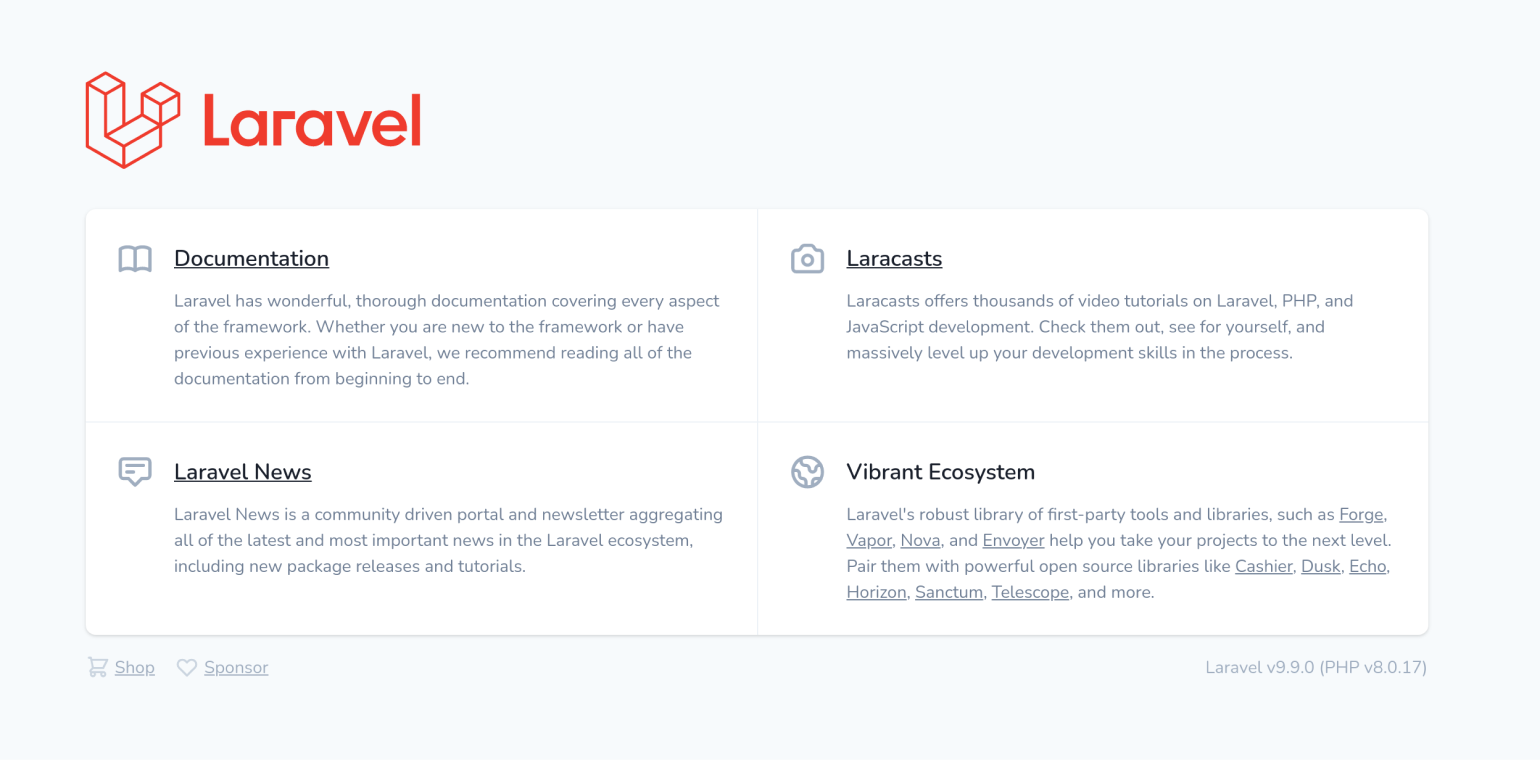
Because the development server runs from the terminal, it’s a good idea to open a new terminal window here to complete the rest of the setup. Either that, or just remember to run php artisan serve whenever you want to run the development server.
Before installing the next package, now would be a good time to set up some application config settings, which you can do by editing your .env file. This file stores all application specific settings, and is similar to the WordPress wp-config.php file. First, update your database credentials. In this example the database and user are both called spinupwp_dashboard:
DB_DATABASE=spinupwp_dashboard
DB_USERNAME=spinupwp_dashboard
DB_PASSWORD=XXXXXXXXXXXXXXX
Be sure to update the password with a password of your own. Next, make sure your app key has been generated by running the following from the terminal:
php artisan key:generate
This will update the APP_KEY value in your .env file.
Installing Laravel Jetstream
The next step is to install Laravel Jetstream, which will take care of a large portion of the custom dashboard and will include Tailwind CSS and Inertia. From here on, we’ll be working in the custom-spinupwp-dashboard directory.
composer require laravel/jetstream
You’ll have to install and configure Jetstream after installing the package. There are two stacks we can use with Laravel Jetstream. One is Livewire + Blade, which uses Laravel Blade to create reactive applications. The other is Inertia + Vue, which is the stack we want to use in this case.
php artisan jetstream:install inertia
The next steps are to finish installing the node dependencies, build the frontend, and run the Jetstream database migrations:
npm install
npm run dev
php artisan migrate
Installing the SpinupWP SDK
Installing the SpinupWP SDK via Composer is pretty straightforward:
composer require spinupwp/spinupwp-php-sdk
Once it’s installed, you’ll have to generate a SpinupWP API Token in your SpinupWP account. Just make sure you generate the token for the correct account (if you have multiple accounts) and give it Read & Write permissions.
Open the config/services.php file and append a new item in the array where the SpinupWP API token will be registered:
'spinupwp' => [
    'api_token' => env('SPINUPWP_API_TOKEN'),
]
Now you can paste your API token into your .env file. This way, you can use different API tokens in different environments, like local and production:
SPINUPWP_API_TOKEN=YOUR-API-TOKEN
Next, use Laravel’s dependency injection to use the SpinupWP SDK in the custom dashboard. This ensures you don’t have to worry about creating a wrapper class and generating new instances of it every time.
In app/Providers/AppServiceProvider.php, tell Laravel to register a singleton of the SpinupWp class. First, set up the AppServiceProvider to use the SpinupWp class:
use DeliciousBrains\SpinupWp\SpinupWp;
Next, update the register function to set up the singleton:
public function register()
{
    $this->app->singleton(SpinupWp::class, fn ($app) => new SpinupWp(config('services.spinupwp.api_token')));
}
As a final step, add your first user to your application. You can use Laravel Tinker to do this.
Switch back to your terminal and run the following command to enter the interactive Tinker terminal:
php artisan tinker
Once you’re inside the Tinker terminal, create the user using the User model:
\App\Models\User::create(['name' => 'Abraham Simpson','email' => 'abraham@hellfish.media','password' => \Hash::make('secret')]);
Note: the password we’re using for this user account is secret. You should see an output something like this:
daniel@ubuntu:~/custom-spinupwp-dashboard$ php artisan tinker
Psy Shell v0.11.2 (PHP 8.0.18 — cli) by Justin Hileman
>>> \App\Models\User::create(['name' => 'Abraham Simpson','email' => 'abraham@hellfish.media','password' => \Hash::make('secret')]);
=> App\Models\User {#3627
    name: "Abraham Simpson",
    email: "abraham@hellfish.media",
    #password: "$2y$10$qw1yoJTLjfdp6IrYfW97..6WBGgcN8FelTBYaX3VtLAFRct7NTLsq",
    updated_at: "2022-04-26 08:37:45",
    created_at: "2022-04-26 08:37:45",
    id: 1,
    +profile_photo_url: "https://ui-avatars.com/api/?name=A+S&color=7F9CF5&background=EBF4FF",
   }
Done! You have everything ready to start the custom SpinupWP dashboard. Now we can start adding functionality.
List and Manage Servers From Your Dashboard
As a first step, we’ll list your servers managed by SpinupWP. This will also act as your introduction to the three layers we’ll be working on:
- Routes
- Controllers
- Vue components
First, create your DashboardController, again using Laravel Tinker:
php artisan make:controller DashboardController
You’ll find the new controller at app/Http/Controllers. In the controller file, use the following code:
<?php

namespace App\Http\Controllers;

use Inertia\Inertia;
use Inertia\Response;
use DeliciousBrains\SpinupWp\SpinupWp;

class DashboardController extends Controller
{
    /**
    * Use Laravel dependency injection, so you can easily access to the singleton instance of SpinupWP;
    */
    protected SpinupWp $spinupwp;

    public function __construct(SpinupWp $spinupwp)
    {
        $this->spinupwp = $spinupwp;
    }

    /**
    *
    * @return Response
    */
    public function index(): Response
    {
            $servers = $this->spinupwp->servers->list()->toArray();
            return Inertia::render('Dashboard', [
                'servers' => $servers,
            ]);
    }
}
The index method retrieves our server list from SpinupWP. The method $this->spinupwp->servers->list() returns an instance of ResourceCollection which you can iterate. You need it to be an array to pass it to Vue, so you use the toArray() method. Finally, the last section of the code above renders our Inertia component/response and includes our data.
Now we’ll change our /dashboard route so it uses the controller instead of the default callback. Edit the routes/web.php file, and first allow the route to use the DashboardController.
use App\Http\Controllers\DashboardController;
Then, change this code:
Route::middleware(['auth:sanctum', 'verified'])->get('/dashboard', function () {
    return Inertia::render('Dashboard');
})->name('dashboard');
To this:
Route::middleware(['auth:sanctum'])->group(function () {
    Route::get('/dashboard', [DashboardController::class, 'index'])->name('dashboard');
});
Notice that we created a route group that adds the auth:sanctum middleware to the routes within it. So from now on, every other route we add will be added within this route group.
Now let’s modify the Vue component that will render our server list. Laravel Jetstream comes with some components and a layout out of the box. For the purposes of this article, we’ll use these for the UI.
Open resources/js/Pages/Dashboard.vue, and replace its content with the following code:
<template>
    <app-layout title="Dashboard">
        <template #header>
            <h2 class="font-semibold text-xl text-gray-800 leading-tight">
                Dashboard
            </h2>
        </template>

        <div class="py-12">
            <div class="max-w-7xl mx-auto sm:px-6 lg:px-8">
                <div
                    class="bg-white overflow-hidden shadow-xl sm:rounded-lg grid grid-cols-2 gap-4 p-10"
                >
                    <Item
                        :label="server.name"
                        href="#"
                        v-for="server in servers"
                        :key="server.id"
                    />
                </div>
            </div>
        </div>
    </app-layout>
</template>

<script>
import { defineComponent } from "vue";
import AppLayout from "@/Layouts/AppLayout.vue";
import Item from "@/Jetstream/Item.vue";

export default defineComponent({
    props: ["servers", "events"],

    components: {
        AppLayout,
        Item,
    },
});
</script>
To make this process easier, create an additional component called Item.vue which you will reuse. You can see this in use in the Dashboard.vue file.
Create a new resources/js/Jetstream/Item.vue file and paste in this code:
<template>
    <div
        class="flex flex-col pl-5 py-2 border border-gray-50 bg-white sm:rounded my-3"
    >
        <div
            class="font-bold text-sm md:text-lg lg:text-xl group-hover:underline flex flex-row items-center justify-between"
        >
            <span class="self-start">{{ label }}</span>
            <Link
                v-if="href"
                :href="href"
                class="text-sm font-medium text-indigo-900 self-end"
                >View</Link
            >
        </div>
        <slot></slot>
    </div>
</template>

<script>
import { defineComponent } from "vue";
import { Link } from "@inertiajs/inertia-vue3";

export default defineComponent({
    props: ["label", "href"],

    components: {
        Link,
    },
});
</script>
Next we’ll start Laravel Mix, which watches your Vue files for any changes and rebuilds them to be rendered in the browser.
npm run watch
It’s time to see the new dashboard in action! If you don’t have the development server running, in a new terminal window, serve the application:
php artisan serve
Next, visit http://localhost:8000 and use the credentials of the user we created with Tinker:
- email: abraham@hellfish.media
- password: secret
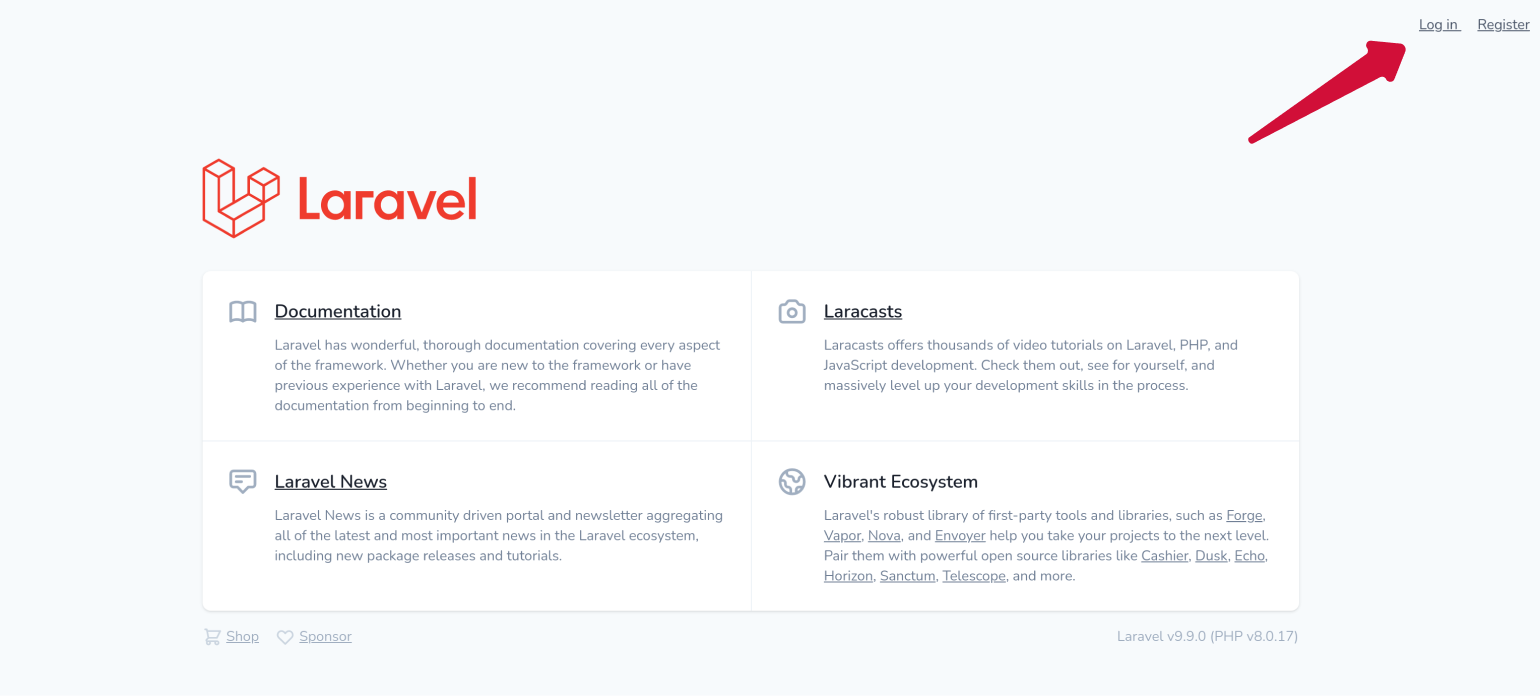
After logging in, we’ll see our dashboard with our servers listed!

Now let’s create our server view. First, create the new ServersController:
php artisan make:controller ServersController
In this controller, set up the SpinupWP dependency injection as before and create the show method:
<?php
namespace App\Http\Controllers;

use Inertia\Inertia;
use Inertia\Response;
use DeliciousBrains\SpinupWp\SpinupWp;

class ServersController extends Controller
{
    protected SpinupWp $spinupwp;

    public function __construct(SpinupWp $spinupwp)
    {
        $this->spinupwp = $spinupwp;
    }

    public function show(int $server): Response
    {
        $server = $this->spinupwp->servers->get($server);
        $sites = $server->sites()->toArray();

        return Inertia::render('Servers/Show', [
            'server' => $server->toArray(),
            'sites' => $sites,
        ]);
    }
}
Finally, open routes/web.php, then set up the route file to use a new ServersController and add a new route:
use App\Http\Controllers\ServersController;
...
Route::get('servers/{server}', [ServersController::class, 'show'])->name('servers.show');
We’re retrieving the $server object which has all the information about the server. It also includes a method, sites(), which we use to retrieve all the sites in this server.
Next, we render our Inertia response and pass the data. Since $server is still an object, we need to cast it to an array:
To add our Vue page component, create a new file at resources/js/Pages/Servers/Show.vue and add this code:
<template>
    <app-layout :title="server.name">
        <div class="py-12">
            <div class="max-w-7xl mx-auto sm:px-6 lg:px-8">
                <div
                    class="bg-white overflow-hidden shadow-xl sm:rounded-lg grid grid-cols-2 gap-4 p-10"
                >
                    <p class="mb-2 font-bold">
                        IP Address:
                        <span class="font-thin">{{ server.ip_address }}</span>
                    </p>
                    <p class="mb-2 font-bold">
                        Ubuntu
                        <span class="font-thin">{{
                            server.ubuntu_version
                        }}</span>
                    </p>
                    <p class="mb-2 font-bold">
                        Database Server:
                        <span class="font-thin">{{
                            server.database.server
                        }}</span>
                    </p>
                </div>
                <div
                    class="bg-white overflow-hidden shadow-xl sm:rounded-lg grid mt-5 p-10"
                >
                    <div class="flex flex-row justify-between">
                        <h1 class="font-bold text-xl text-gray-900">Sites</h1>
                        <JetButton>Create new site</JetButton
                        >
                    </div>
                    <div class="grid-cols-2 gap-4" v-if="sites.length">
                        <Item
                            :label="site.domain"
                            href="#"
                            v-for="site in sites"
                            :key="site.id"
                        />
                    </div>
                    <h2 class="text-center font-semibold text-gray-800" v-else>
                        No sites found
                    </h2>
                </div>
            </div>
        </div>
    </app-layout>
</template>

<script>
import { defineComponent } from "vue";
import AppLayout from "@/Layouts/AppLayout.vue";
import Item from "@/Jetstream/Item.vue";
import JetButton from "@/Jetstream/Button.vue";

export default defineComponent({
    props: {
        server: {
            type: Object,
            required: true,
        },
        sites: {
            type: Array,
            required: true,
        },
    },
    components: {
        AppLayout,
        Item,
        JetButton,
    },
});
</script>
The last step is to edit the Dashboard.vue component and update each server Item to add the route to the “View” button:
<Item
    :label="server.name"
    :href="route('servers.show', server.id)"
    v-for="server in servers"
:key="server.id"
/>
Reload your dashboard and click on the View button on any server. You should see the page with your server information and all its sites.
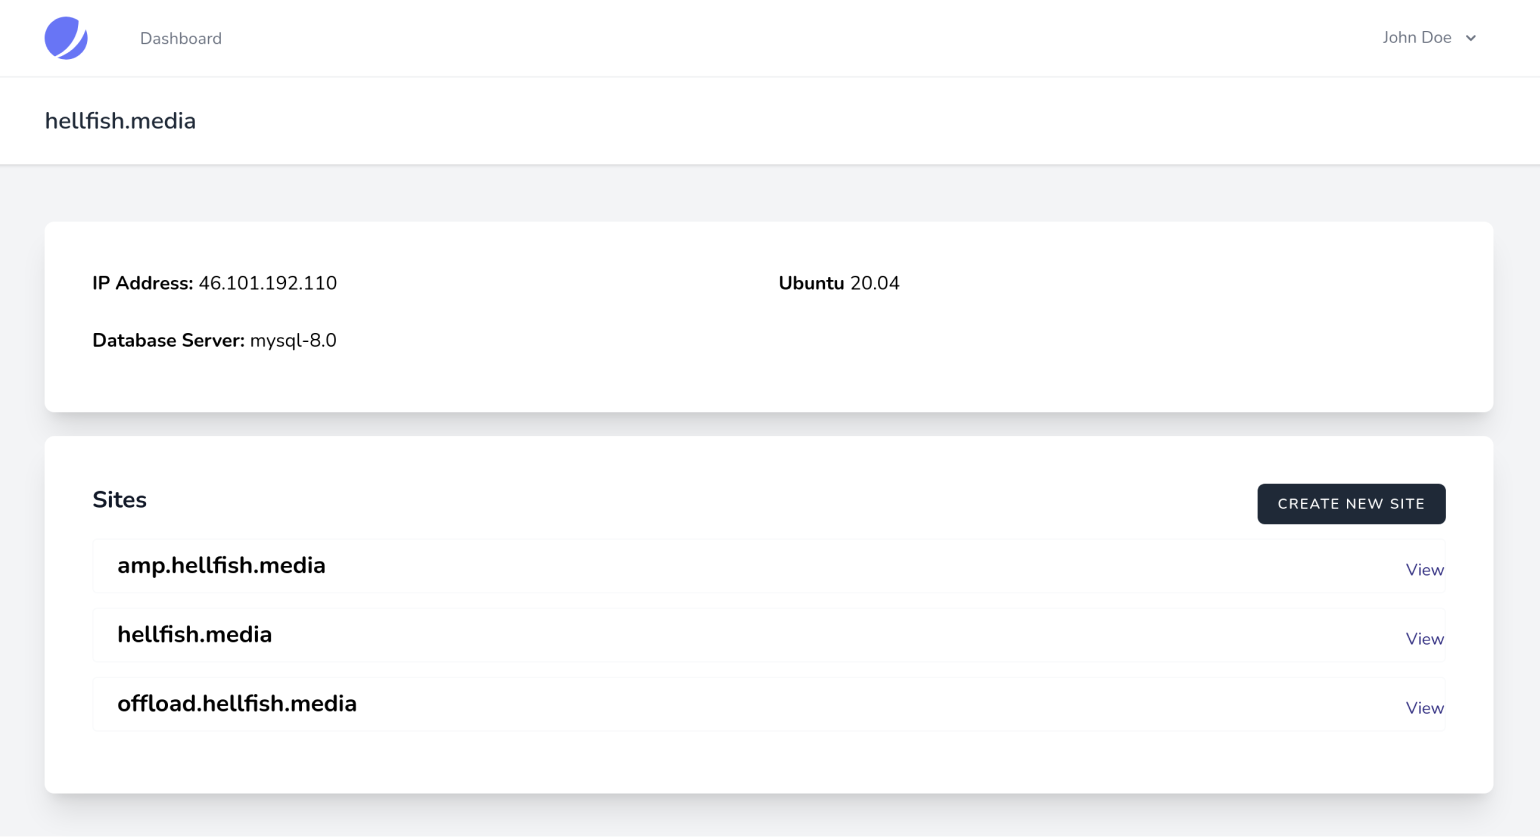
Now let’s add the site view. First, create the SitesController:
php artisan make:controller SitesController
Add the SitesController code with the SpinupWP dependency injection and the site-specific show() method:
<?php
namespace App\Http\Controllers;

use Inertia\Inertia;
use Inertia\Response;
use Illuminate\Http\Request;
use DeliciousBrains\SpinupWp\SpinupWp;

class SitesController extends Controller
{
    protected SpinupWp $spinupwp;

    public function __construct(SpinupWp $spinupwp)
    {
        $this->spinupwp = $spinupwp;
    }

    public function show(int $site): Response
    {
        $site = $this->spinupwp->sites->get($site);
        return Inertia::render('Sites/Show', [
            'site' => $site,
        ]);
    }
}
The last steps are to update routes/web.php to use the SitesController and add the new route.
use App\Http\Controllers\SitesController;
…
Route::get('sites/{site}', [SitesController::class, 'show'])->name('sites.show');
As you can see, the pattern is the same as the servers. The show method gets the requested site with $site = $this->spinupwp->sites->get($site); and passes it to the Inertia render method.
Finally, we create our Vue component at resources/js/Pages/Sites/Show.vue:
<template>
    <app-layout :title="site.domain">
        <template #header>
            <div class="flex flex-row justify-between items-center">
                <h2 class="font-semibold text-xl text-gray-800 leading-tight">
                    {{ site.domain }}
                </h2>
            </div>
        </template>

        <div class="py-12">
            <div class="max-w-7xl mx-auto sm:px-6 lg:px-8">
                <div
                    class="bg-white overflow-hidden shadow-xl sm:rounded-lg grid grid-cols-2 gap-4 p-10"
                >
                    <p class="mb-2 font-bold">
                        Primary domain:
                        <span class="font-thin">{{ site.domain }}</span>
                    </p>
                    <p class="mb-2 font-bold">
                        Additional domains:
                        <ul v-if="site.additional_domains.length">
                            <li class="font-thin" v-for="(additional_domain, i) in site.additional_domains" :key="i">
                                {{ additional_domain.domain }}
                            </li>
                        </ul>
                        <span class="font-thin" v-else>No additional domains</span>
                    </p>
                    <p class="mb-2 font-bold">
                        HTTPS:
                        <span class="font-thin">{{ site.https.enabled ? 'Enabled' : 'Disabled'}}</span>
                    </p>
                    <p class="mb-2 font-bold">
                        Page Cache:
                        <span class="font-thin">{{ site.page_cache.enabled ? 'Enabled' : 'Disabled'}}</span>
                    </p>
                </div>
            </div>
        </div>
    </app-layout>
</template>

<script>
import { defineComponent } from "vue";
import AppLayout from "@/Layouts/AppLayout.vue";
import Item from "@/Jetstream/Item.vue";

export default defineComponent({
    props: {
        site: {
            type: Object,
            required: true,
        },
    },
    components: {
        AppLayout,
        Item,
    },
});
</script>
Now update resources/js/Pages/Server/Show.vue to add the route to the View button on each Site item:
<item
:label="site.domain"
:href="route('sites.show', { site: site.id })"
v-for="site in sites"
:key="site.id"
/>
Reload your server view and click on any site’s View button:

This view is very simple, but it should give an idea of how to add more information about your sites.
Create a New Site From Your Dashboard
It’s time to create a new site. First, we’ll define our routes in routes/web.php. We need two: one to show the creation form and one to handle the POST request:
Route::get('servers/{server}/sites/create', [SitesController::class, 'create'])->name('sites.create');
Route::post('servers/{server}/sites/create', [SitesController::class, 'store'])->name('sites.store');
In SitesController.php, we define our two methods. The first one, create, will be used to render our Vue component:
use DeliciousBrains\SpinupWp\Exceptions\ValidationException;
public function create(int $server): Response
{
    return Inertia::render('Sites/Create', [
        'server' => $this->spinupwp->servers->get($server),
    ]);
}
The store method will handle the request in our dashboard and create our new site in SpinupWP.
public function store(Request $request, int $server): RedirectResponse
{
    $validated = $request->validate([
        'domain' => 'required',
        'site_user' => 'required',
        'title' => 'required',
        'admin_user' => 'required',
        'admin_email' => 'required',
       'admin_password' => 'required|min:8',
    ]);

    try {
        $this->spinupwp->sites->create($server, [
            'domain' => $validated['domain'],
            'site_user' => $validated['site_user'],
            'installation_method' => 'wp',
            'database' => [
                'name' => $validated['site_user'],
                'username' => $validated['site_user'],
            ],
            'wordpress' => [
                'title' => $validated['title'],
                'admin_user' => $validated['admin_user'],
                'admin_email' => $validated['admin_email'],
                'admin_password' => $validated['admin_password'],
            ],
        ]);
    } catch (ValidationException $e) {
        return redirect()->back()->withErrors($e->errors()['errors']);
    } catch (Exception $e) {
        return redirect()->back()->with([
            'flash.banner' => 'There was a problem while creating your site.',
            'flash.bannerStyle' => 'danger',
        ]);
    }

    return redirect()->route('servers.show', ['server' => $server])->with([
        'flash.banner' => 'Site is being created.',
        'flash.bannerStyle' => 'success',
    ]);
}
Let’s look at this code.
First, we validate the request, making sure all the required fields are there. If they’re not, the validator and the form component that you’ll create later will take care of handling the errors.
Then, we create the site using
$this->spinupwp->sites->create(),which receives two parameters: an integer which is the Server ID, and an array containing all the site data. This structure is the same as if you were to send the request to the SpinupWP API.The code is also catching some possible exceptions if things fail. The
ValidationExceptionwill be thrown in case SpinupWP returns a validation error. This is done so it can be handled and sent in a form that the Vue component can understand and process. It also catches any other exception with the generic classException.Finally, it redirects to the server view with the successful feedback.
All that’s left is to create the Vue component. Create a new file called resources/js/Pages/Sites/Create.vue and add the following code:
<template>
    <app-layout title="Create a site">
        <template #header>
            <div class="flex flex-row justify-between items-center">
                <h2 class="font-semibold text-xl text-gray-800 leading-tight">
                    Create a site
                </h2>
            </div>
        </template>

        <div class="py-12">
            <div class="max-w-7xl mx-auto sm:px-6 lg:px-8">
                <div
                    class="bg-white overflow-hidden shadow-xl sm:rounded-lg grid grid-cols-2 gap-4 p-10"
                >
                    <form @submit.prevent="create">
                        <div class="col-span-6 sm:col-span-4 my-3">
                            <JetLabel for="domain" value="Domain" />
                            <JetInput
                                id="domain"
                                type="text"
                                class="mt-1 block w-full"
                                v-model="form.domain"
                                autocomplete="domain"
                            />
                            <JetInputError
                                :message="form.errors.domain"
                                class="mt-2"
                            />
                        </div>
                        <div class="col-span-6 sm:col-span-4 my-3">
                            <JetLabel for="site_user" value="Site user" />
                            <JetInput
                                id="site_user"
                                type="text"
                                class="mt-1 block w-full"
                                v-model="form.site_user"
                                autocomplete="site_user"
                            />
                            <JetInputError
                                :message="form.errors.site_user"
                                class="mt-2"
                            />
                        </div>
                        <div class="col-span-6 sm:col-span-4 my-3">
                            <JetLabel for="title" value="Site Title" />
                            <JetInput
                                id="title"
                                type="text"
                                class="mt-1 block w-full"
                                v-model="form.title"
                                autocomplete="title"
                            />
                            <JetInputError
                                :message="form.errors.title"
                                class="mt-2"
                            />
                        </div>
                        <div class="col-span-6 sm:col-span-4 my-3">
                            <JetLabel
                                for="admin_user"
                                value="Wordpress Admin User"
                            />
                            <JetInput
                                id="admin_user"
                                type="text"
                                class="mt-1 block w-full"
                                v-model="form.admin_user"
                                autocomplete="admin_user"
                            />
                            <JetInputError
                                :message="form.errors.admin_user"
                                class="mt-2"
                            />
                        </div>
                        <div class="col-span-6 sm:col-span-4 my-3">
                            <JetLabel
                                for="admin_user"
                                value="Wordpress Admin Email"
                            />
                            <JetInput
                                id="admin_email"
                                type="text"
                                class="mt-1 block w-full"
                                v-model="form.admin_email"
                                autocomplete="admin_email"
                            />
                            <JetInputError
                                :message="form.errors.admin_email"
                                class="mt-2"
                            />
                        </div>
                        <div class="col-span-6 sm:col-span-4 my-3">
                            <JetLabel
                                for="admin_password"
                                value="Wordpress Admin Password"
                            /><
                            <JetInput
                                id="admin_password"
                                type="password"
                                class="mt-1 block w-full"
                                v-model="form.admin_password"
                                autocomplete="admin_password"
                            />
                            <JetInputError
                                :message="form.errors.admin_password"
                                class="mt-2"
                            />
                        </div>
                        <div
                            class="col-span-6 sm:col-span-4 mt-5 flex flex-row justify-between"
                        >
                            <JetSecondaryButton
                                @click="
                                    $inertia.visit(
                                        route('servers.show', {
                                            server: server.id,
                                        })
                                    )
                                "
                            >
                                Cancel
                            </JetSecondaryButton>
                            <JetButton @click="create">
                                Create site
                            </JetButton>
                        </div>
                    </form>
                </div>
            </div>
        </div>
    </app-layout>
</template>

<script>
import { defineComponent } from "vue";
import AppLayout from "@/Layouts/AppLayout.vue";
import JetCheckbox from "@/Jetstream/Checkbox.vue";
import JetLabel from "@/Jetstream/Label.vue";
import JetButton from "@/Jetstream/Button.vue";
import JetInput from "@/Jetstream/Input.vue";
import JetSecondaryButton from "@/Jetstream/SecondaryButton.vue";
import JetInputError from "@/Jetstream/InputError.vue";

export default defineComponent({
    props: {
        server: {
            type: Object,
            required: true,
        },
    },

    data() {
        return {
            form: this.$inertia.form({
                domain: "",
                site_user: "",
                title: "",
                admin_user: "",
                admin_email: "",
                admin_password: "",
            }),
        };
    },

    methods: {
        create() {
            this.form
                .transform((data) => ({
                    ...data,
                    server_id: this.server.id,
                }))
                .post(route("sites.create", { server: this.server.id }), {
                    success: () => {
                        this.$inertia.visit(
                            route("servers.show", {
                                server: this.server.id,
                            })
                        );
                    },
                });
        },
    },

    components: {
        AppLayout,
        JetCheckbox,
        JetLabel,
        JetButton,
        JetInput,
        JetInputError,
        JetSecondaryButton,
    },
});
</script>
The last step is to fix the Create new site button, so open resources/js/Pages/Server/Show.vue and change the button:
<JetButton @click="$inertia.visit(route('sites.create', { server: server.id }))">Create new site</JetButton>
Let’s test it!
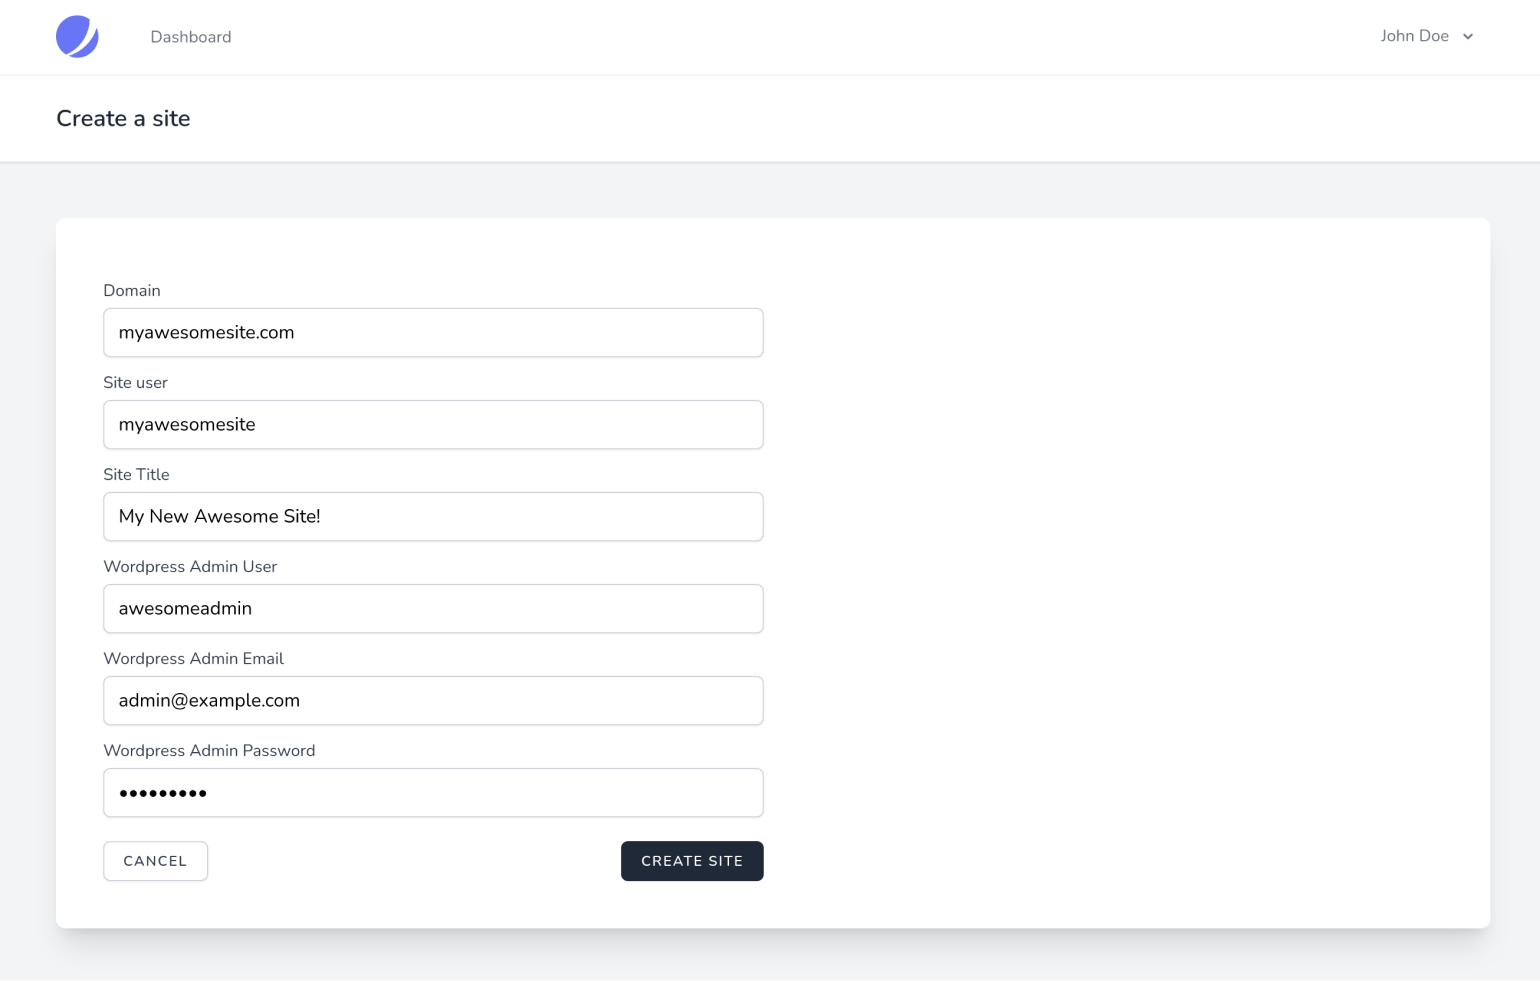
When we click on Create Site and check our SpinupWP account, we can see the new site being created:
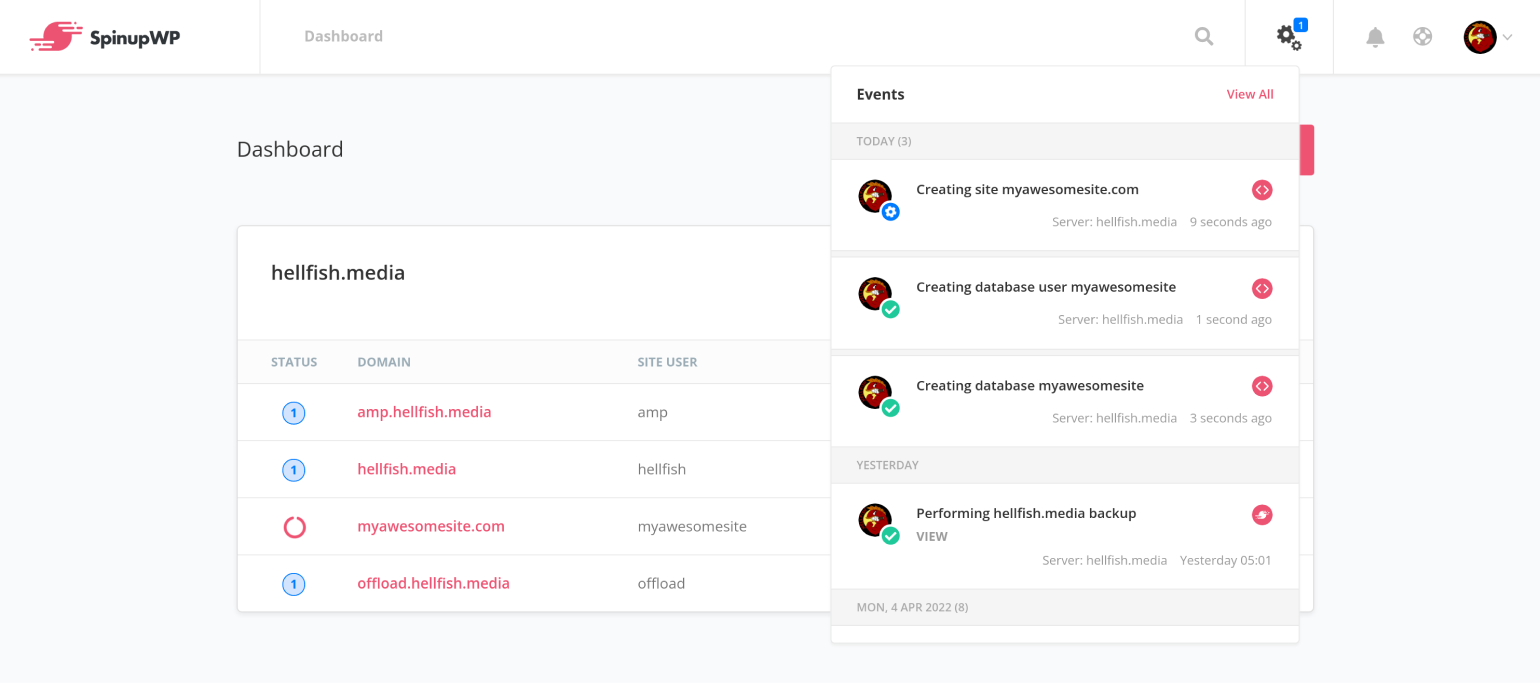
That’s it! Once the site is fully created, we can see our new site listed in our custom dashboard.
Next Steps
As you can see, using the SpinupWP SDK makes it really easy to perform actions on your servers managed by SpinupWP. We’ve only covered the most basic actions, but the SDK allows you to perform many others:
- Delete servers
- Reboot servers
- Restart server processes
- Delete sites
- Trigger git deployments
- Purge caches
- Correct file permissions
We’re continuously adding new methods to our SDK. In the future, you’ll be able to perform almost any action you would in the SpinupWP app.
Keep in mind that for the purpose of this tutorial, we created a whole new Laravel project and we used Laravel Jetstream so we wouldn’t worry about the UI, but you can include the SDK in any project you want. You can even use it in existing apps, as long as they’re written in PHP.