How to Install WordPress on AWS Lightsail
Looking to use Amazon Web Services (AWS) for hosting your next WordPress site but you’re not familiar with deploying AWS EC2 instances? We recommend that you use Amazon Lightsail. Amazon Lightsail extracts away a lot of the complexities around AWS and makes it simple to spin up virtual servers, while still using the same underlying AWS infrastructure.
Let’s go ahead and connect an AWS Lightsail instance to SpinupWP. Before you start this process, you will need to sign up for an AWS Management Console account if you don’t already have one.
Create An Instance
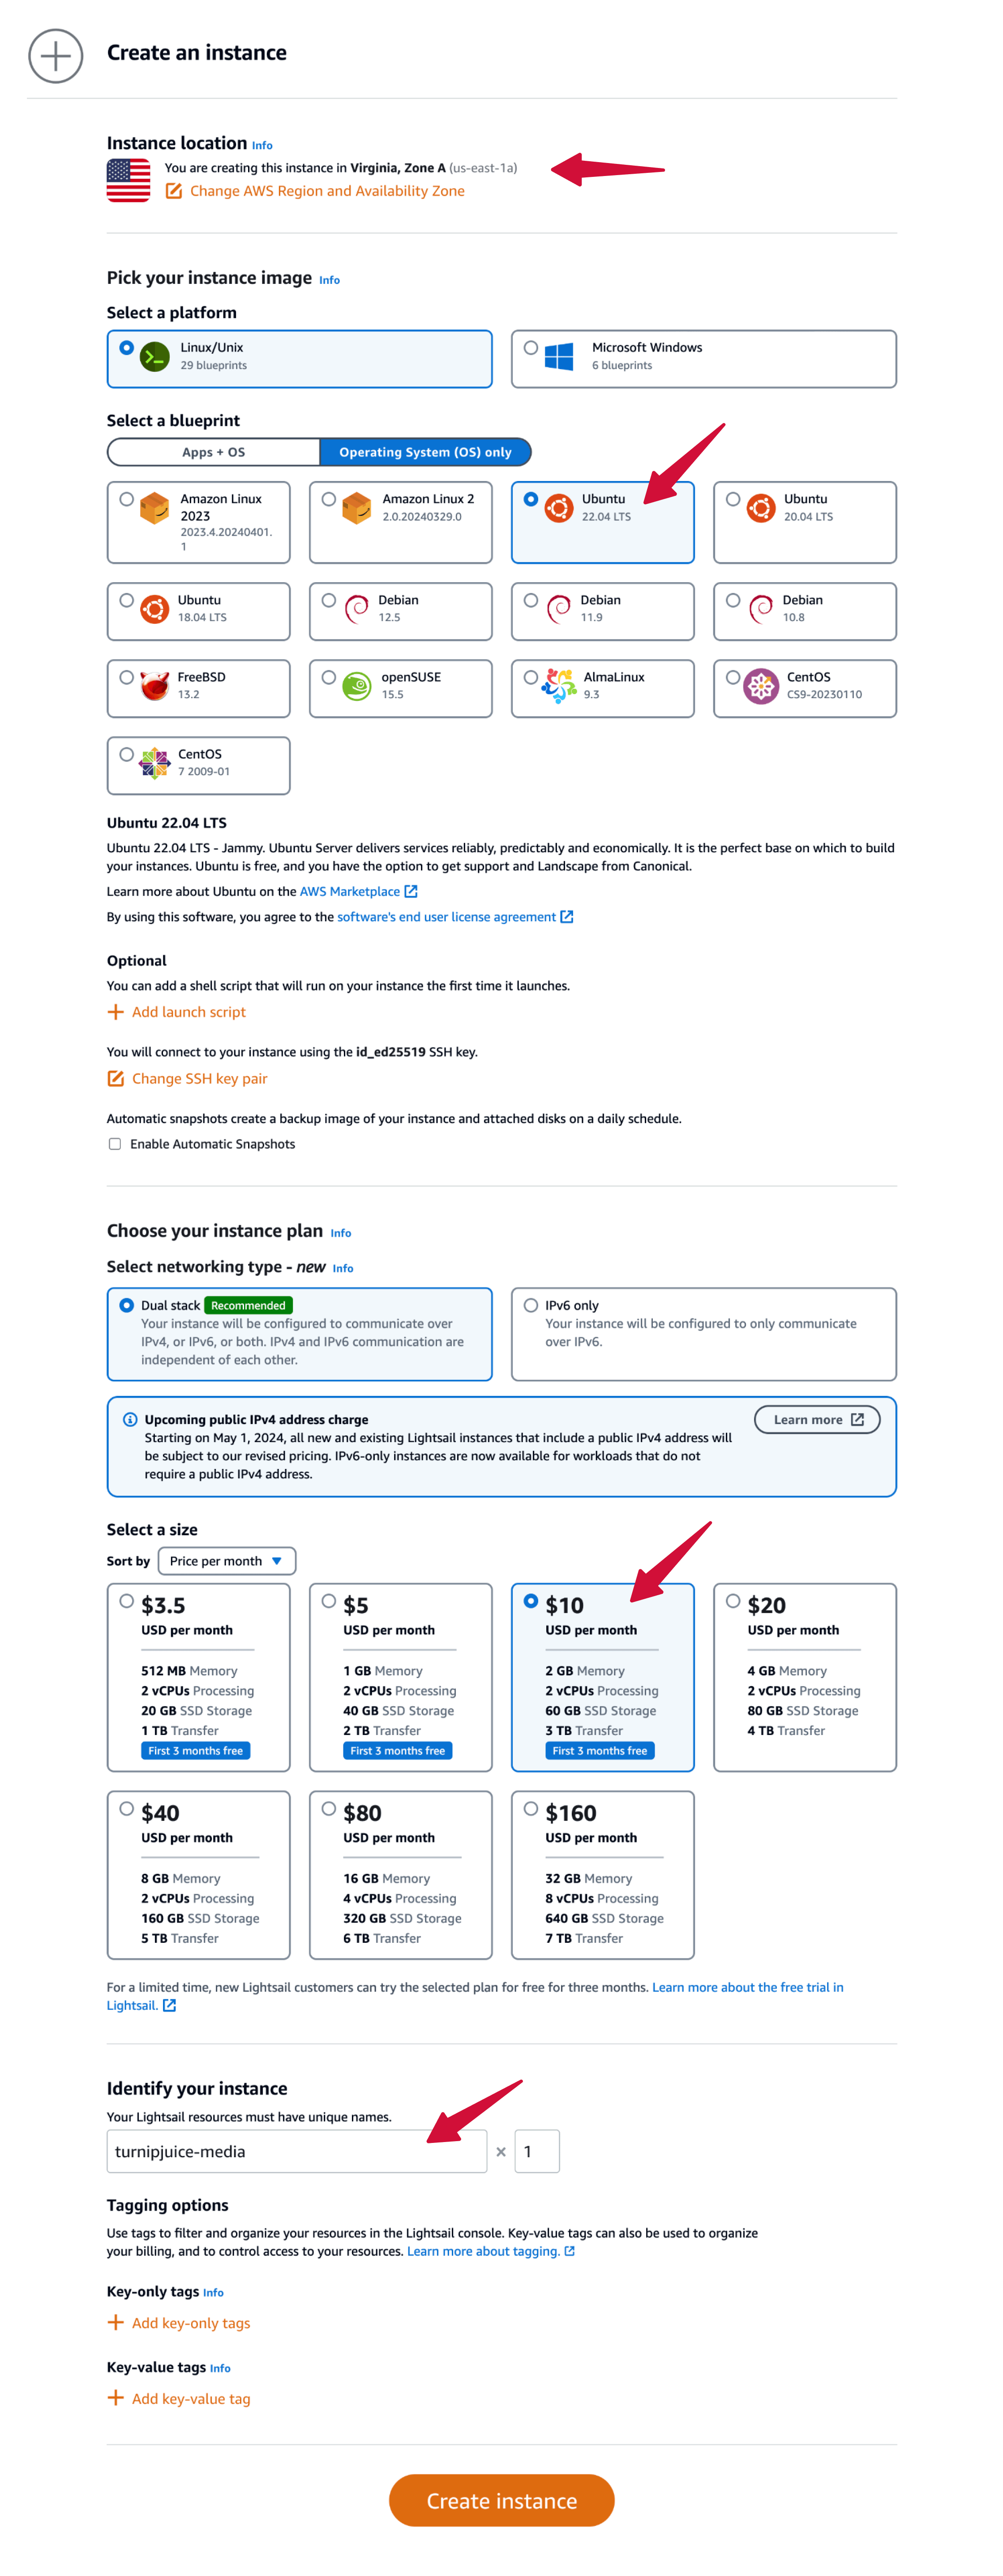
Once signed in to the AWS Management Console, navigate to Services > Lightsail, which will open Lightsail in a new window. Click Create instance. When adding a new instance via Amazon Lightsail:
- Select a location where the server will be hosted.
- Select Linux/Unix as the platform then choose the Ubuntu 22.04 LTS blueprint.
- Select an instance plan, which will determine how many sites you can host on the server and the amount of traffic it will be able to handle. Check out our Server Size doc if you need more help selecting an instance plan.
- Enter a unique name for the server.
All other options can be configured as required, or left as their default values.
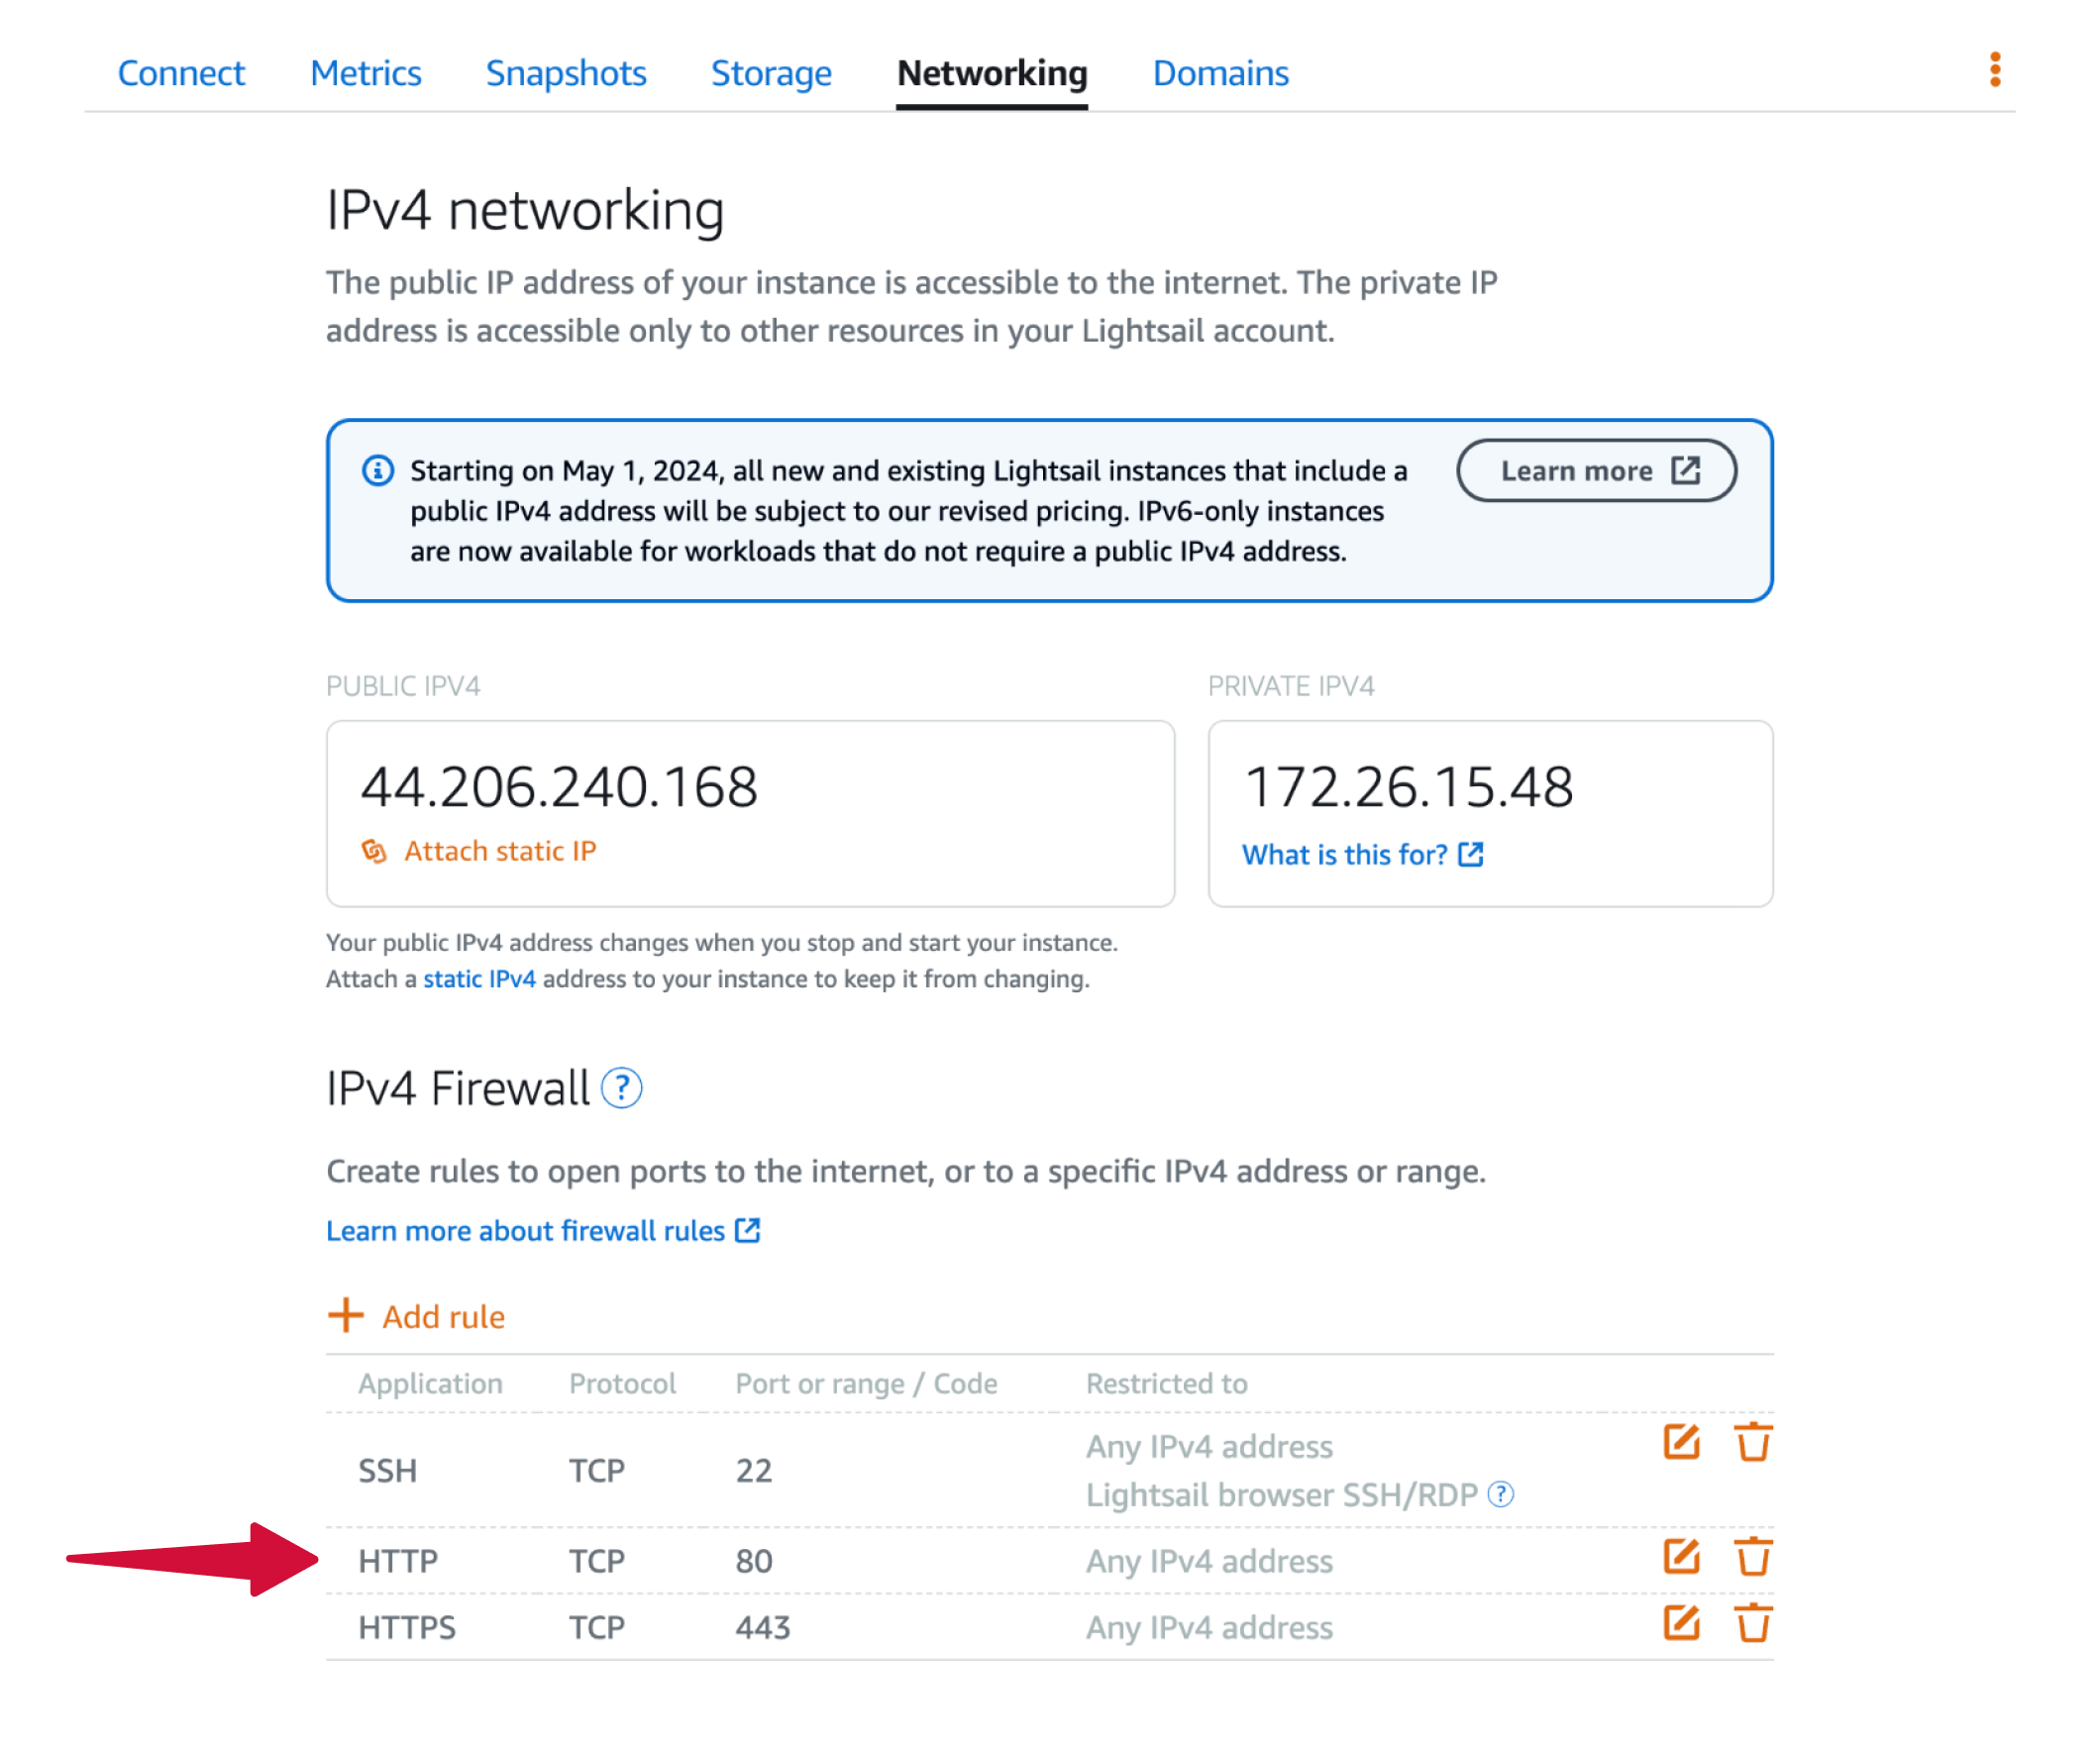
Once the server has been created, navigate to the Networking tab and add a new firewall rule for HTTPS.
Connect Your Instance To SpinupWP
Once you have a freshly created Lightsail instance, you are ready to provision the server via SpinupWP.
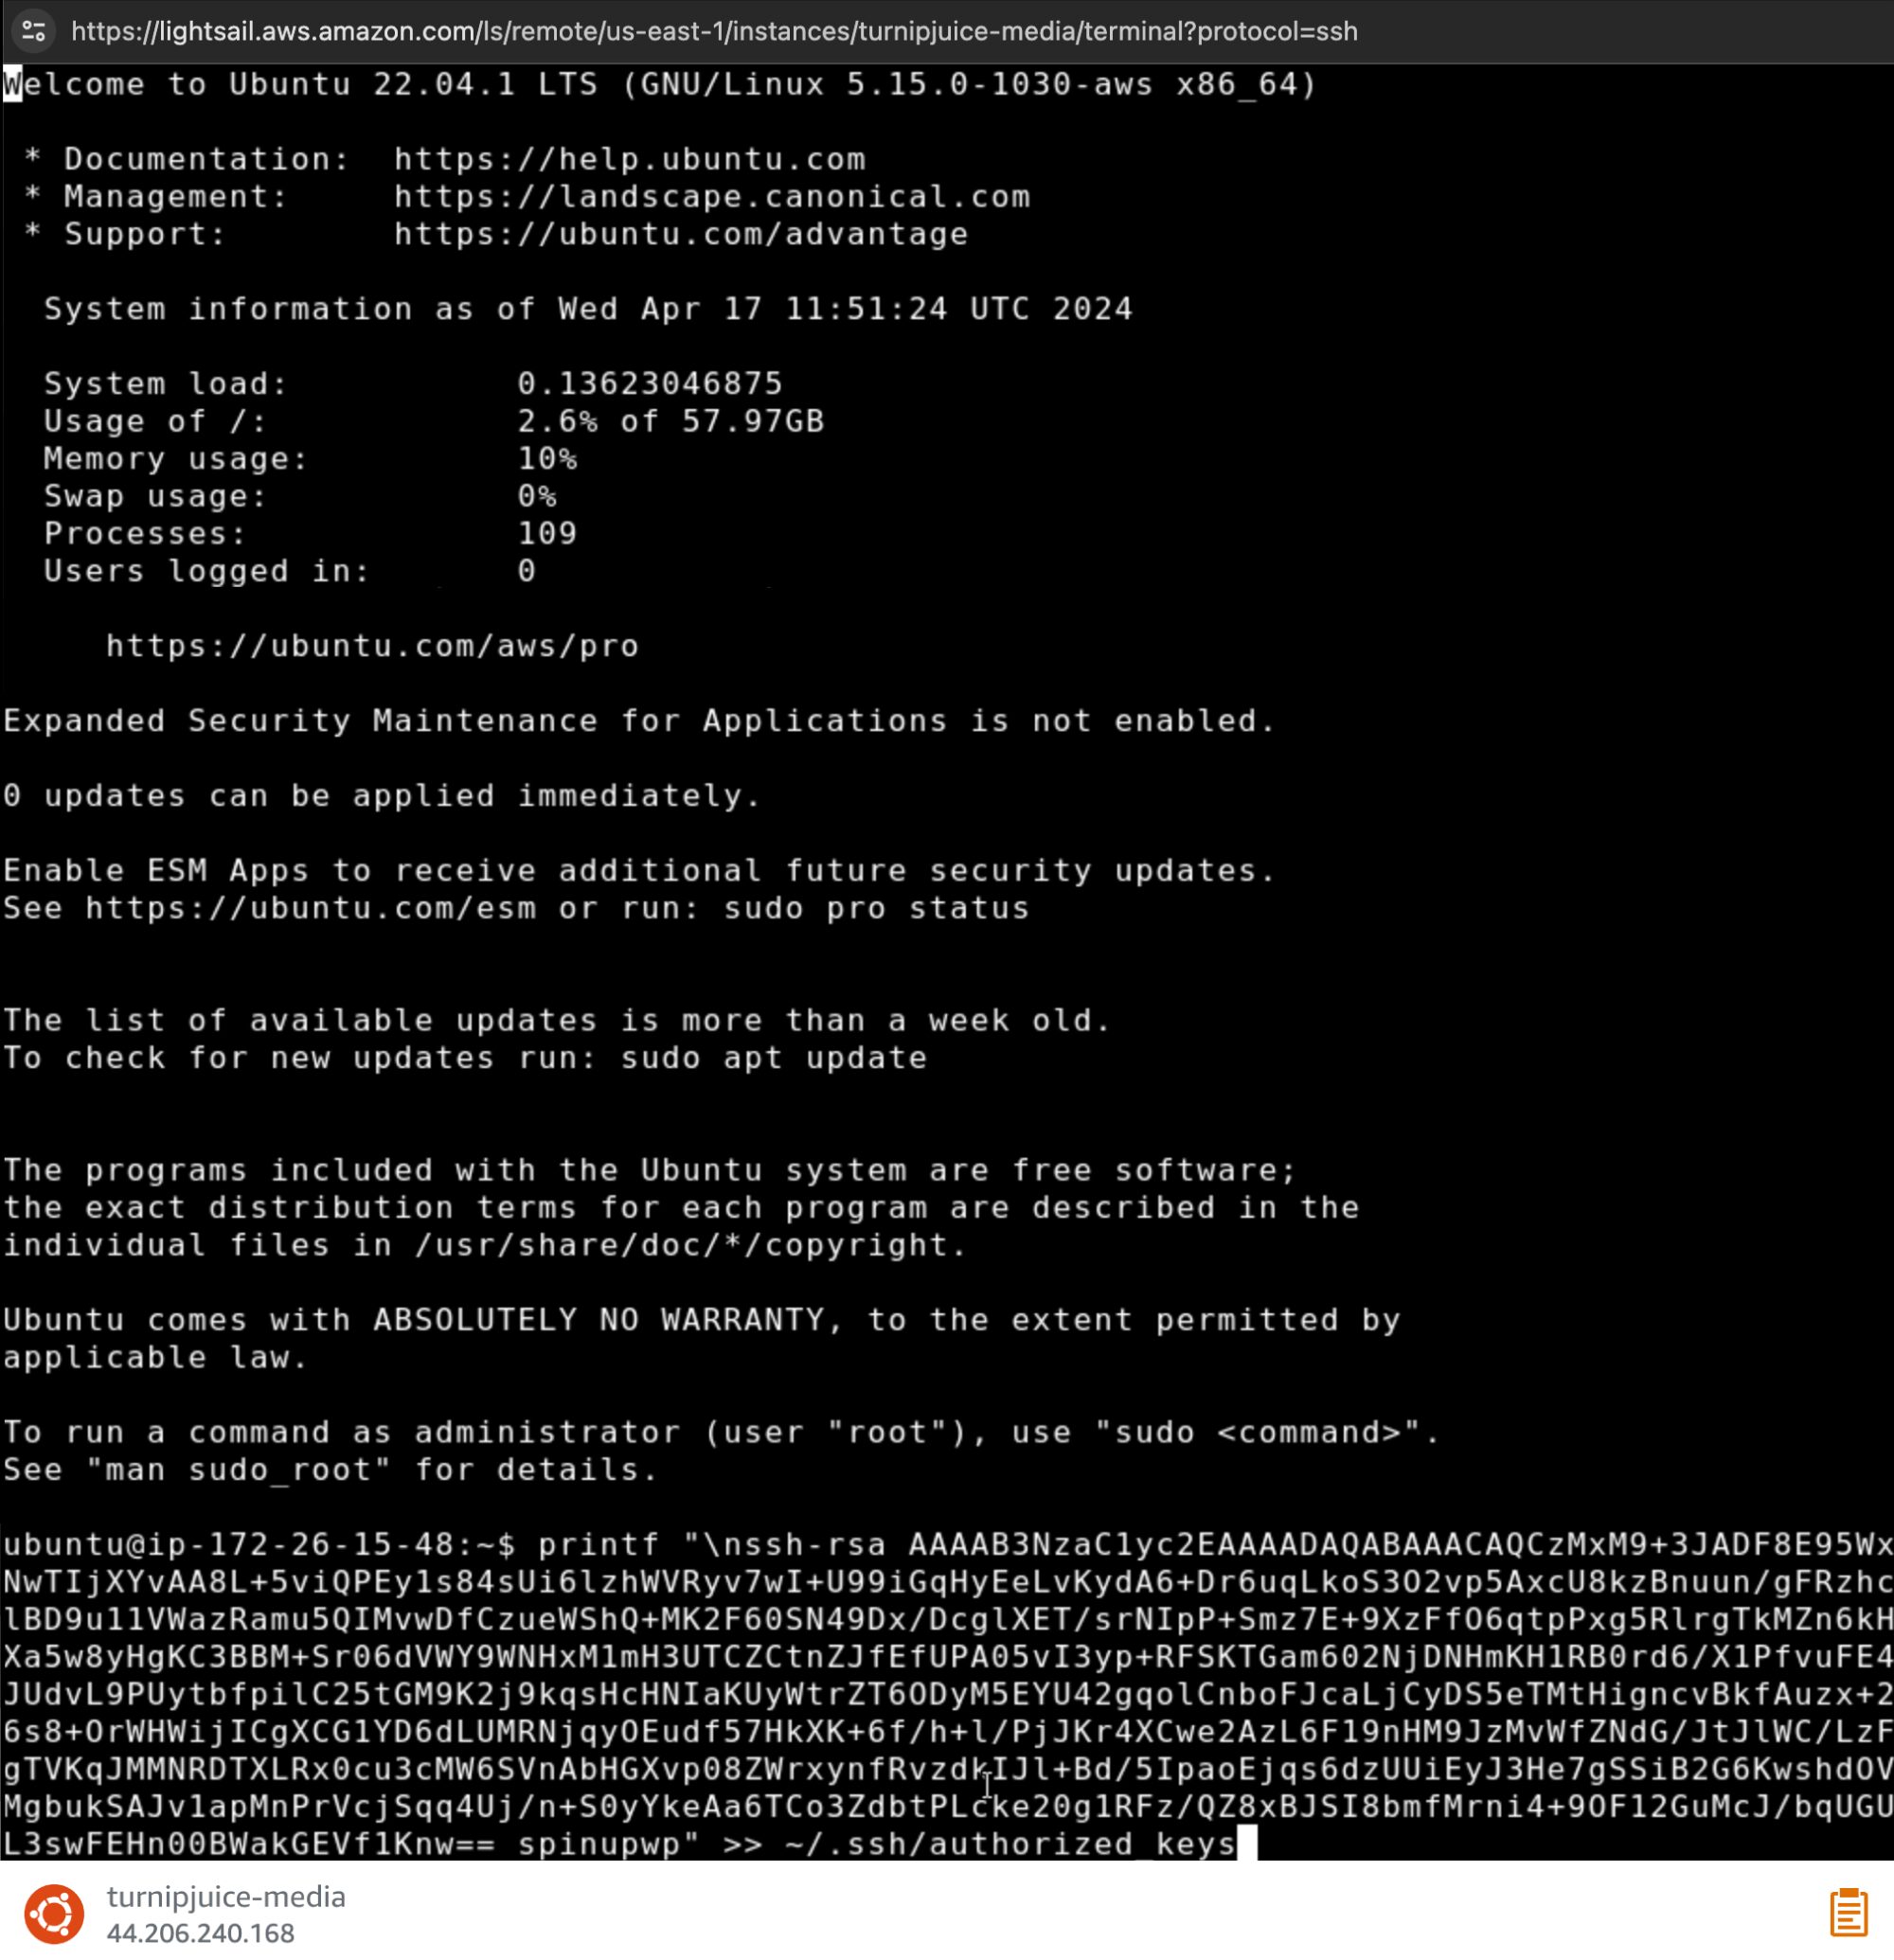
On AWS, navigate to the Connect tab for the instance and click Connect using SSH. This will open a terminal connection via your browser.
Head over to SpinupWP and click Spin Up a New Server followed by AWS. Enter the server’s public IP address, SSH username (usually ubuntu), and select Public Key authentication.
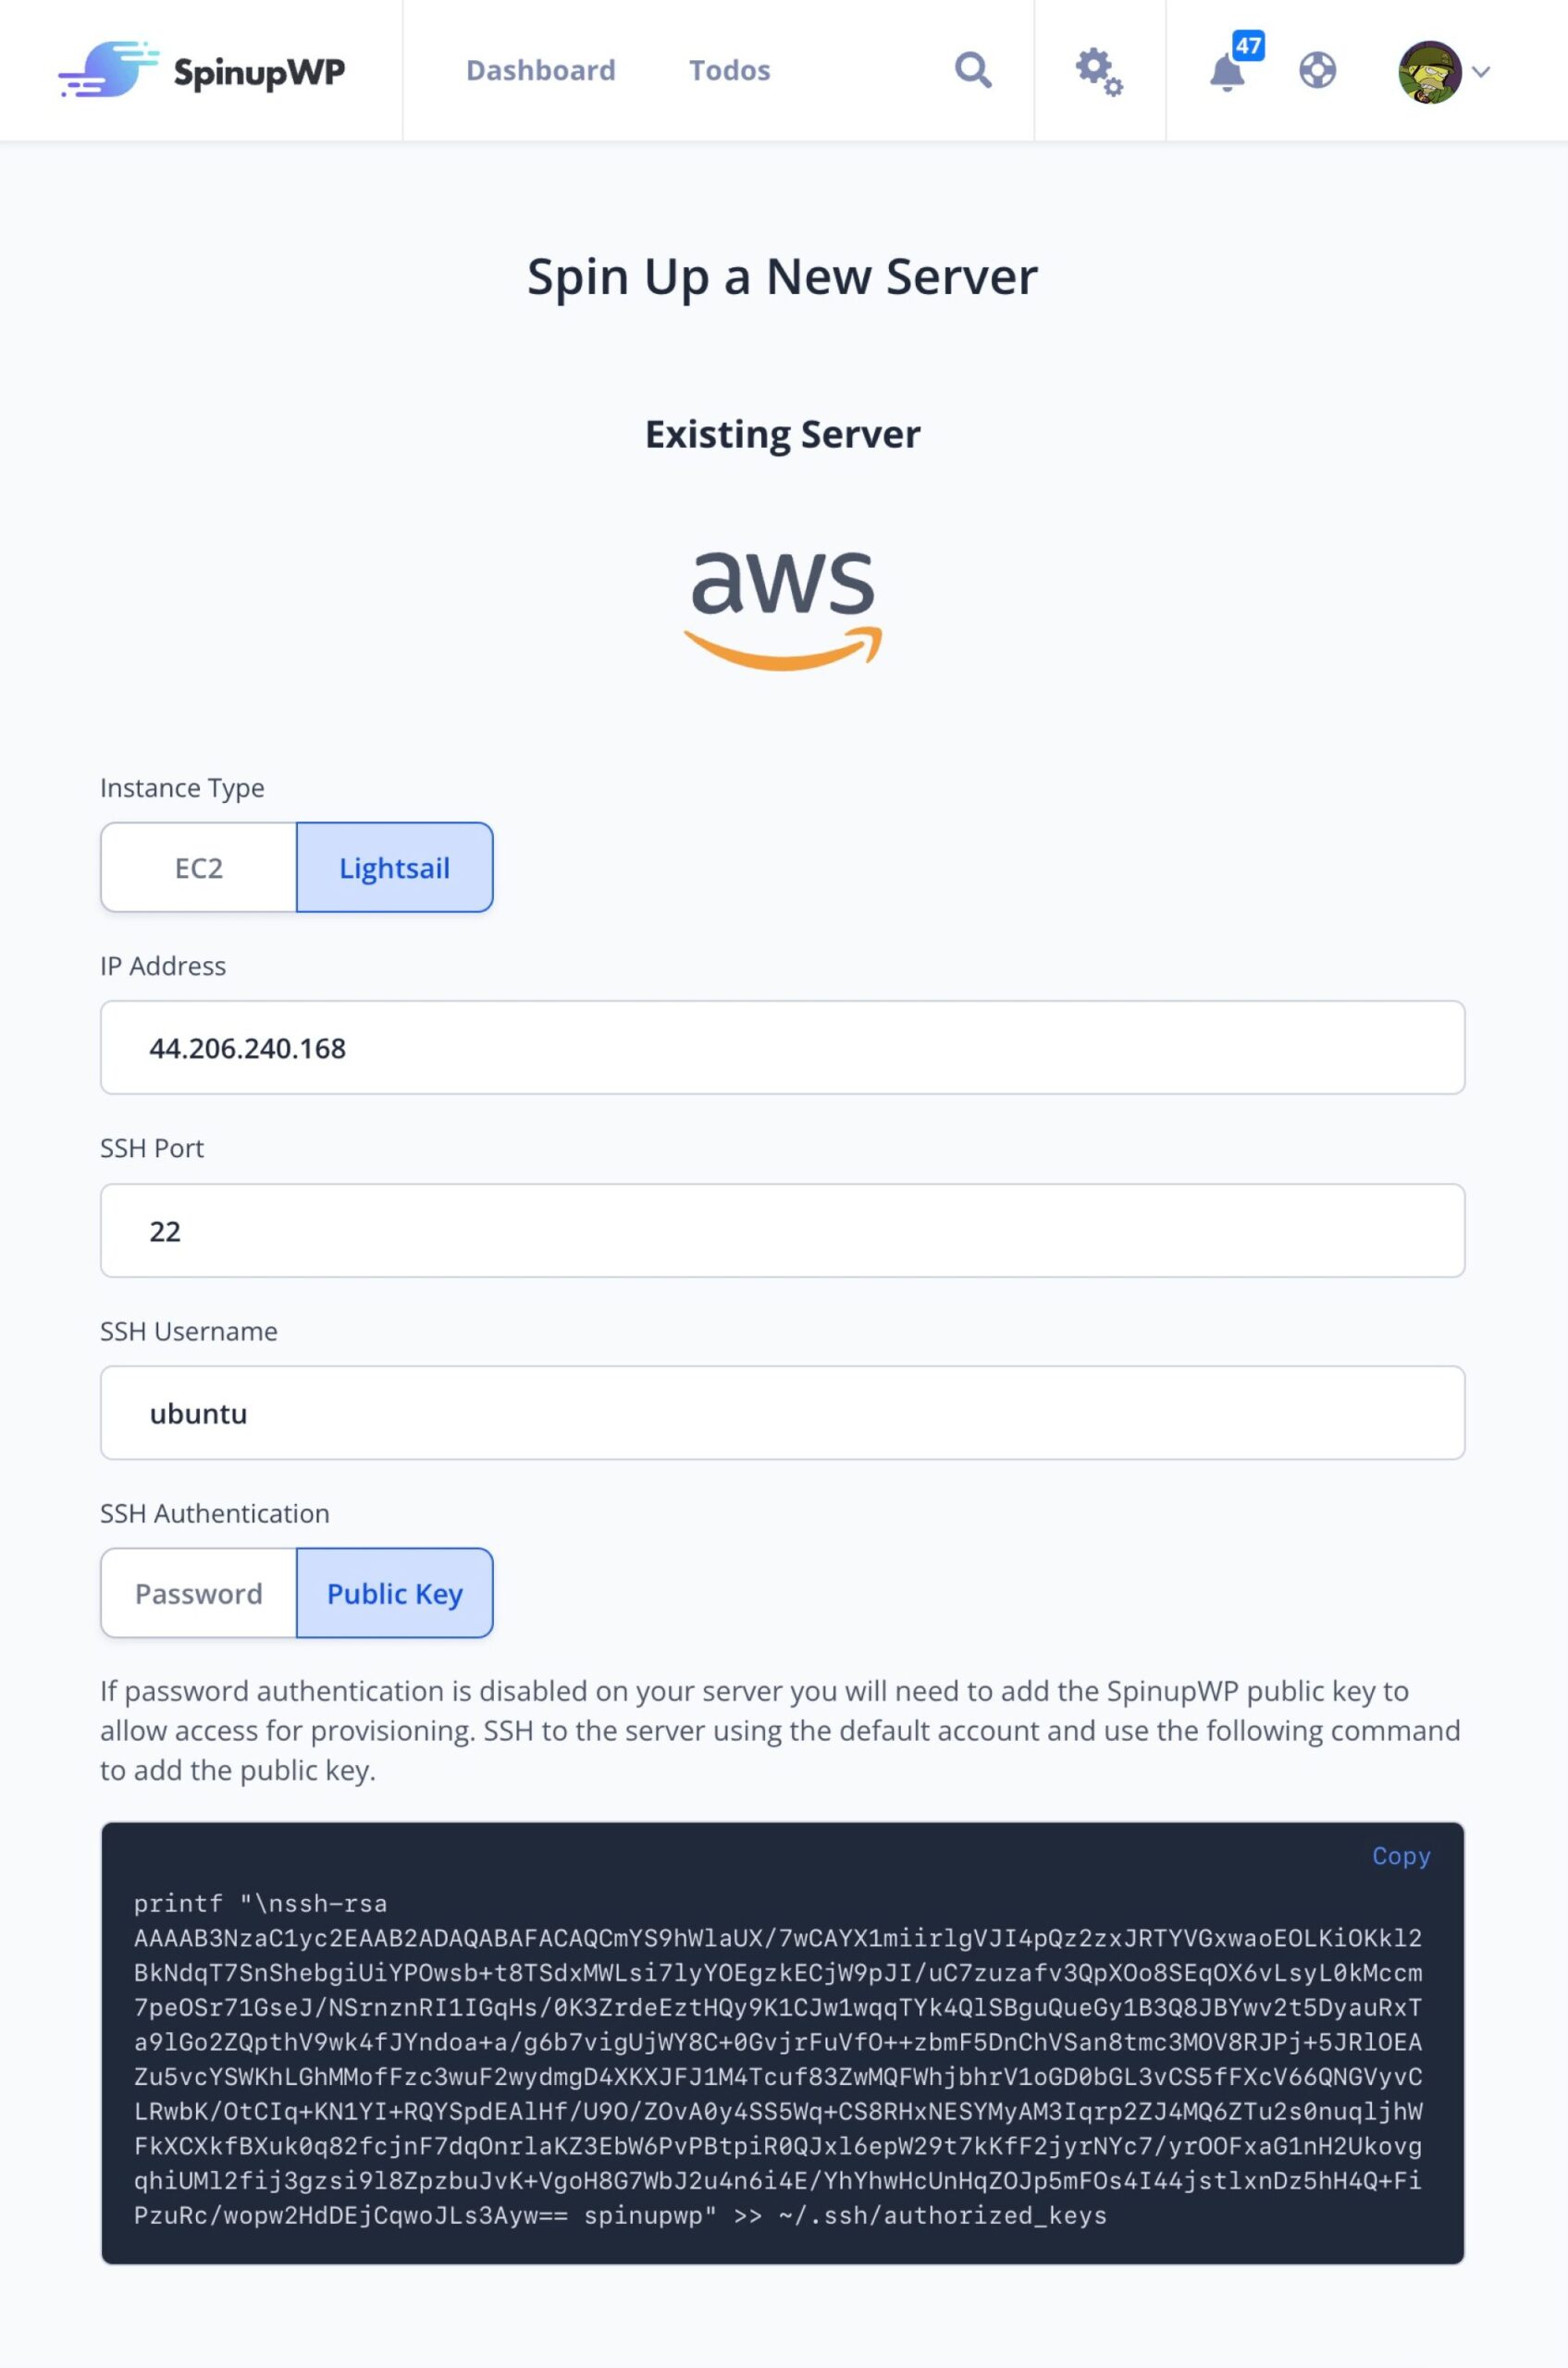
Copy the command provided by SpinupWP into the browser terminal connection.
Confirm the connection by clicking Next in SpinupWP. Enter the server’s hostname and select the desired database server. Click Provision Server to begin the provisioning process.
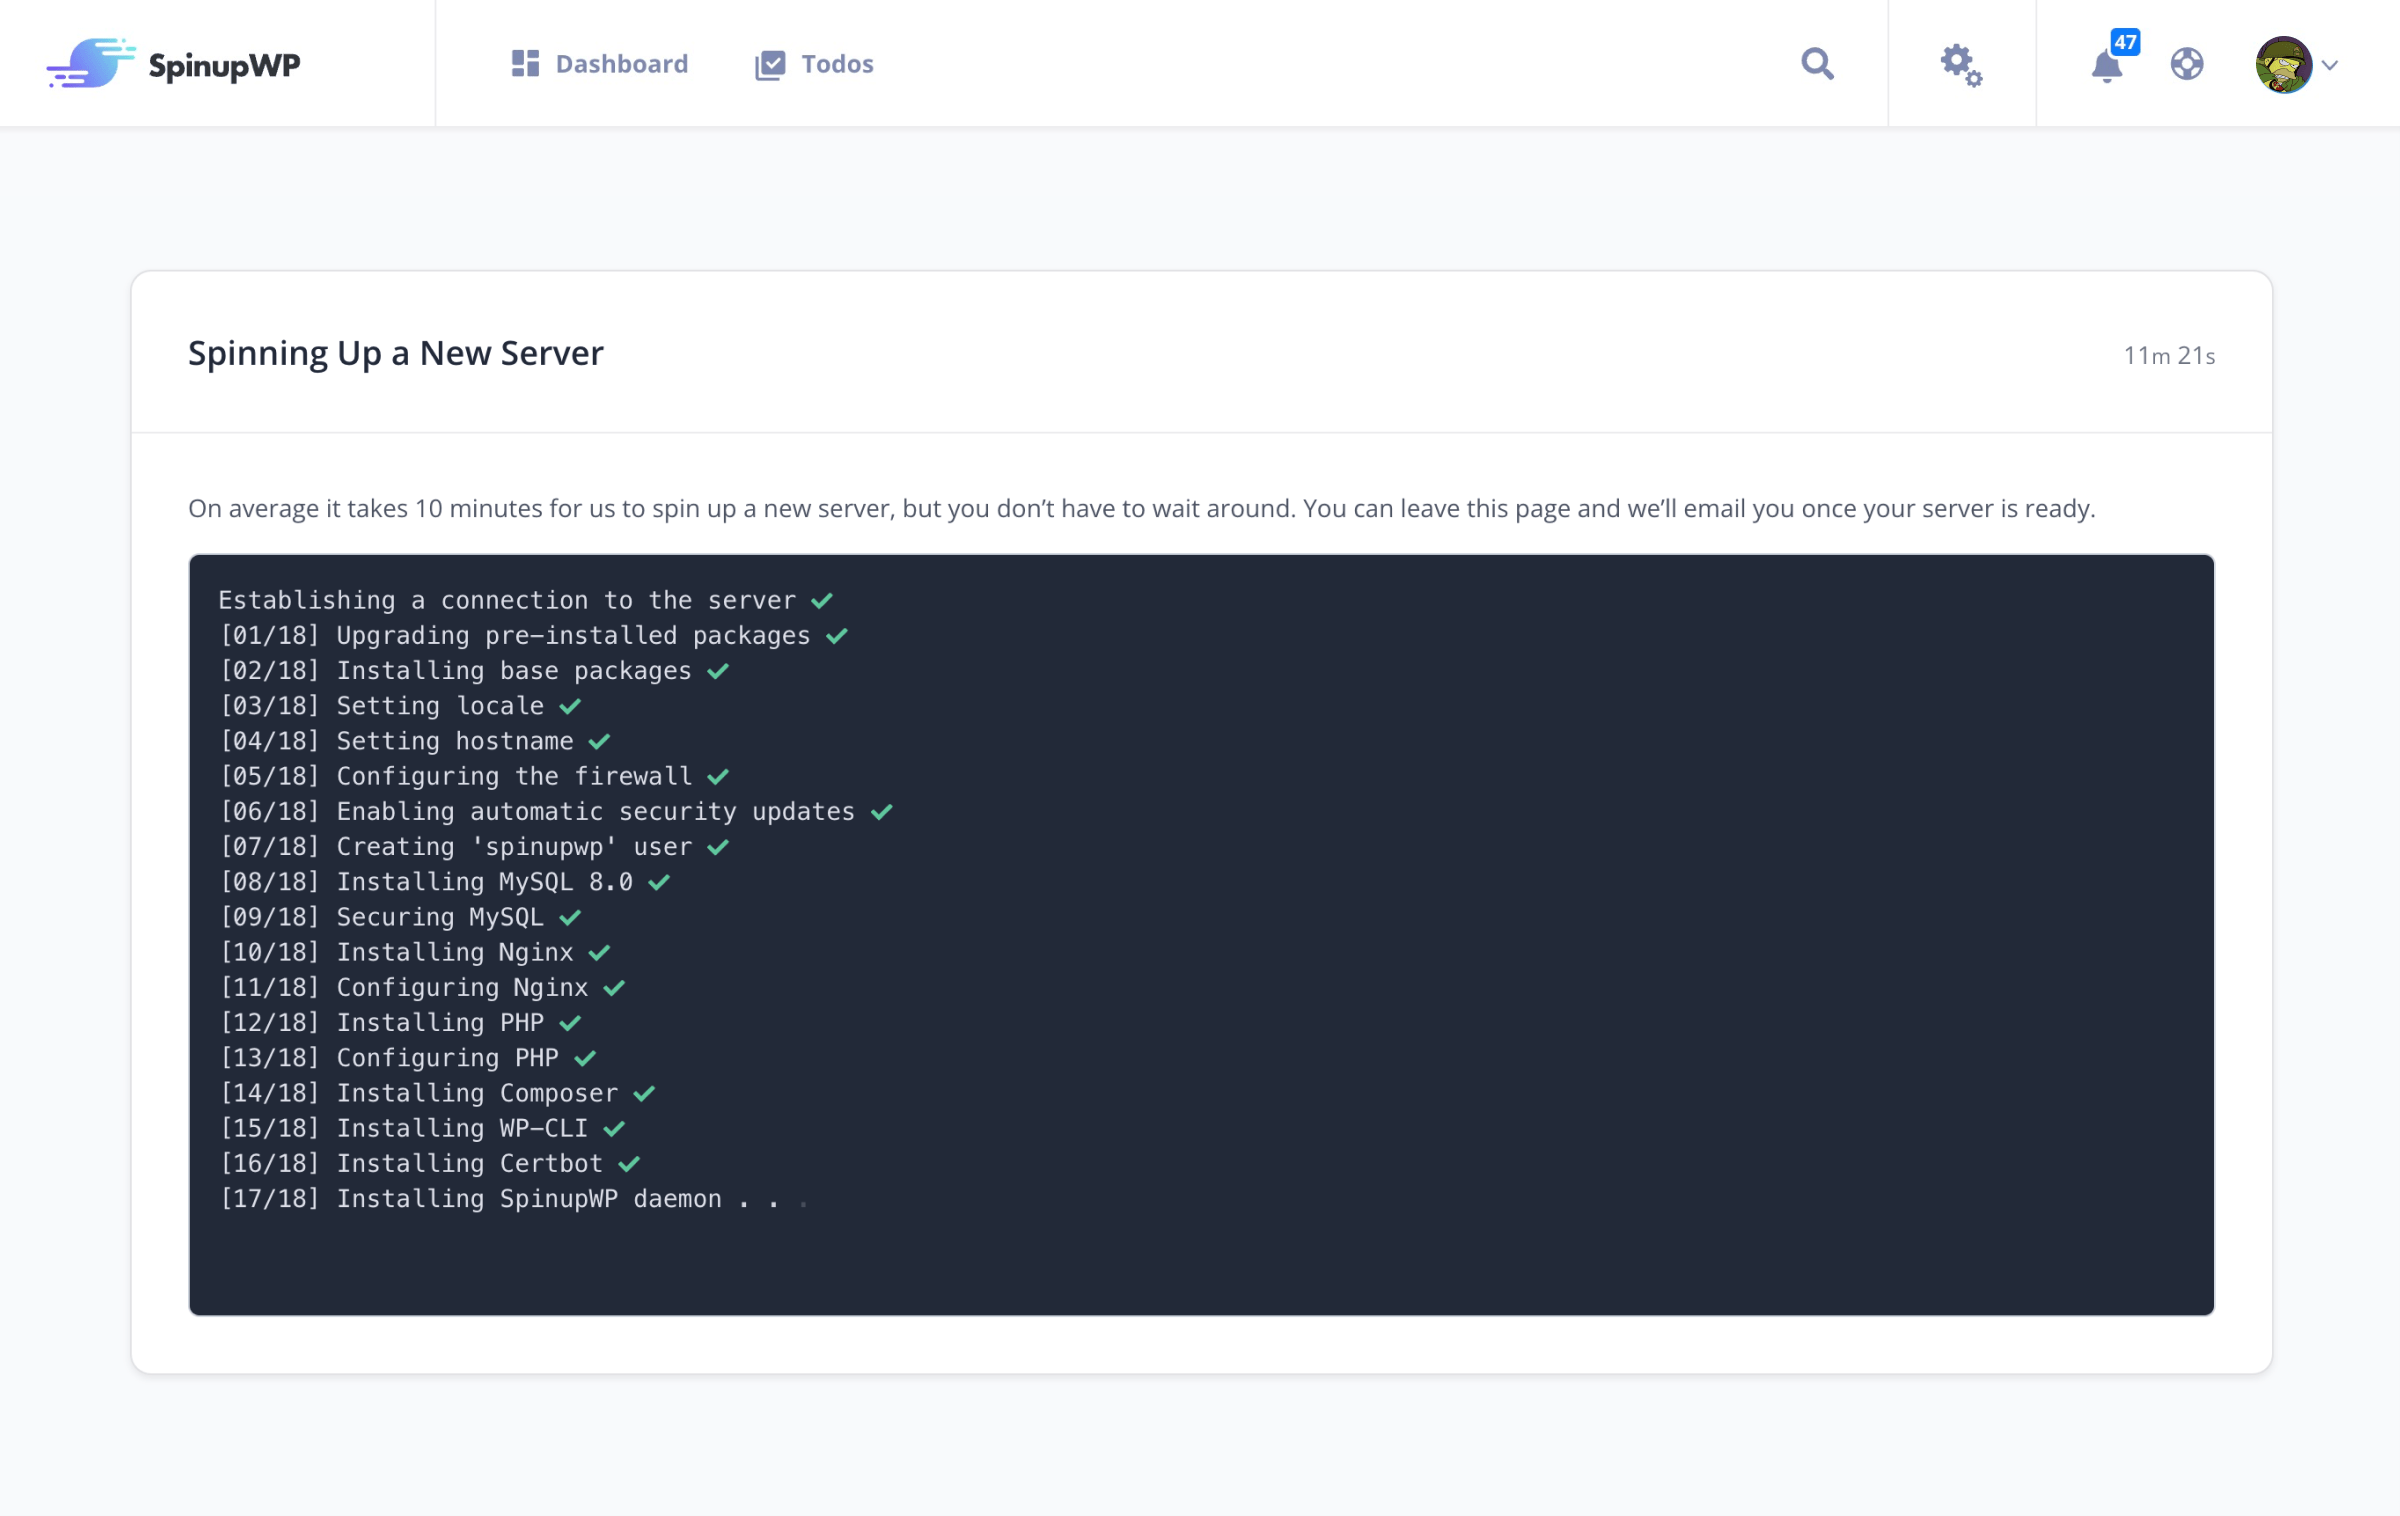
Once the server has finished provisioning you’re ready to start adding WordPress or other sites.
Next Steps
Once you’ve completed the SpinupWP provision process, you are ready to fine-tune settings and add a site. For more information on these steps, see our Getting Started doc.
What to expect after adding a site? You’ll have the option to configure your server and sites to your needs via the SpinupWP dashboard.
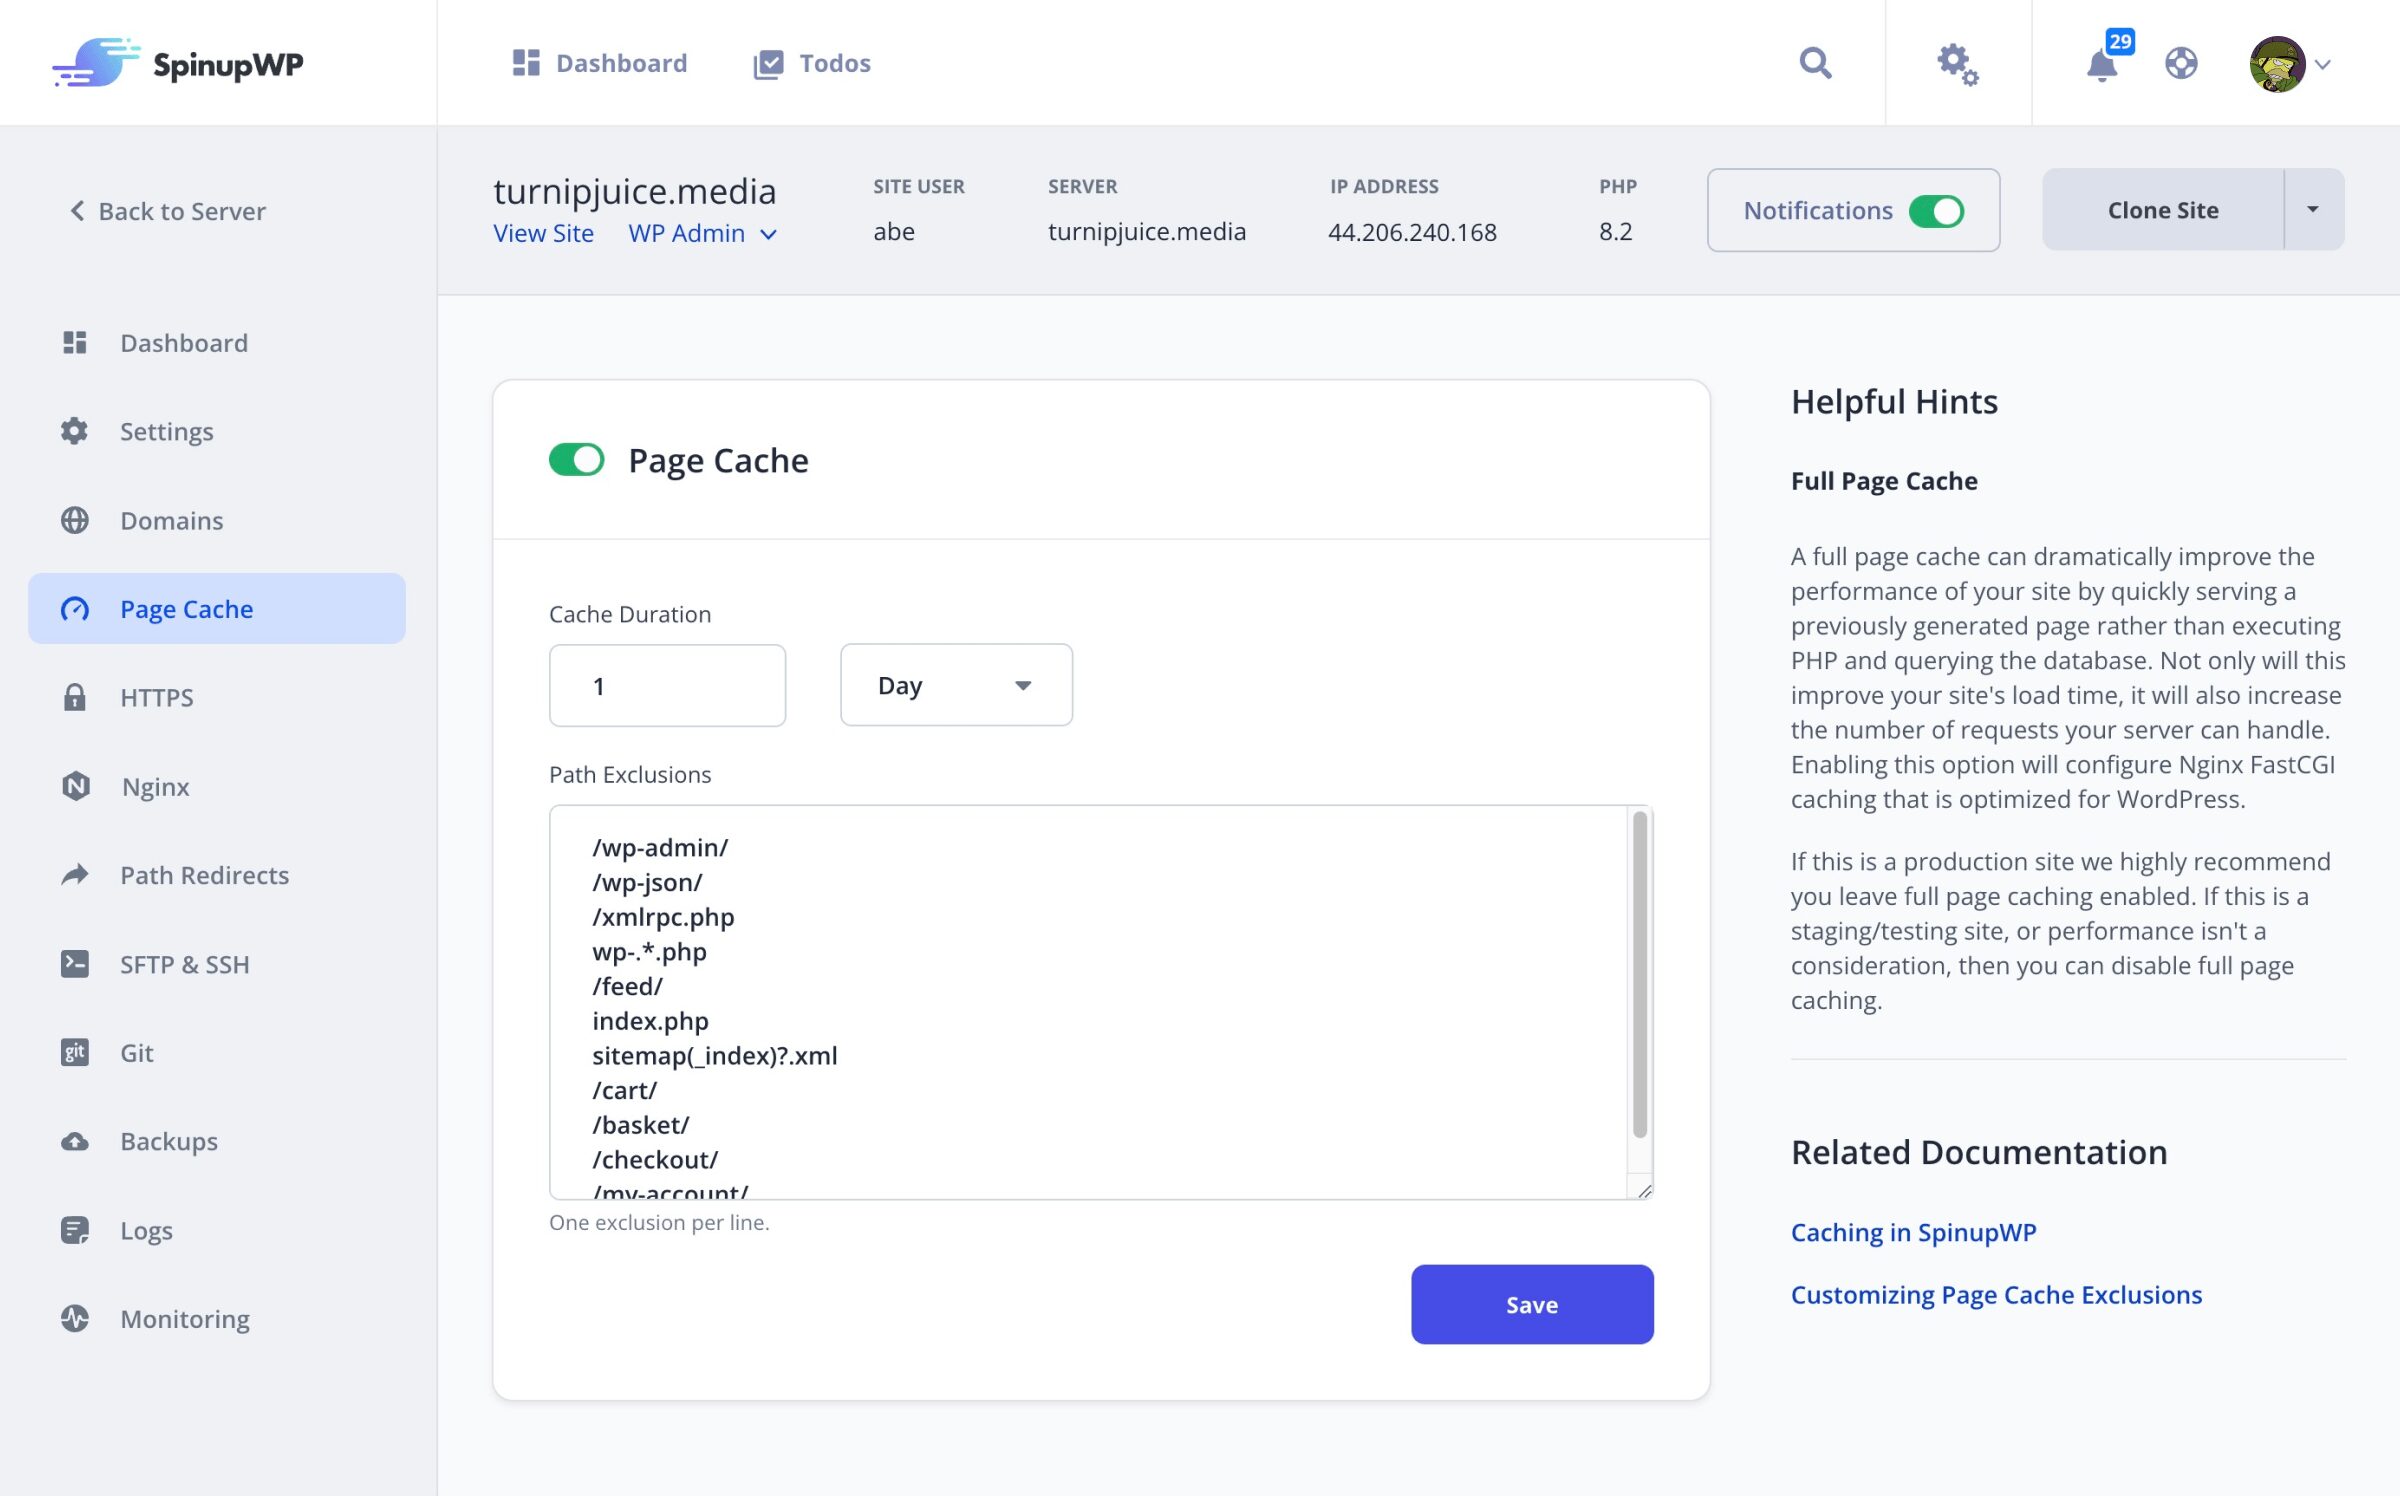
You’ll be able to quickly enable page caching. When enabled, SpinupWP configures full page caching, essentially turning your site into a static site and dramatically improving the load time of your site.
You can also toggle on an SSL certificate to enable HTTPS. This generates a free Let’s Encrypt certificate so you don’t have to manually manage this yourself. If you’d prefer to use a custom SSL certificate, you’ll have the opportunity to upload that instead.
If you’re looking to add rewrite rules or prevent PHP scripts from being executed in the uploads folder, the Nginx settings steps will cover that.
We’ll also cover enabling SFTP & SSH access to your site and setting up site backups.
SpinupWP can take care of automated daily site backups which include full backups of your site files (media, themes and plugins). You’ll have the option to backup to Amazon S3, DigitalOcean Spaces, Akamai/Linode, Google Cloud Storage, Wasabi or Backblaze B2.
Follow our Getting Started Guide for step by step instructions for all of the above mentioned features and more.