How to Install New Relic Monitoring on SpinupWP
New Relic is a powerful tool that provides comprehensive monitoring and performance analytics for your web applications. Integrating New Relic with your SpinupWP servers can help you gain valuable insights into your site’s performance, identify bottlenecks, and optimize for better user experiences.
This document will walk you through the installation steps and configuration of New Relic on your SpinupWP server, providing you with a tailored, step-by-step approach specifically designed for SpinupWP servers. Taking into consideration aspects such as hosting multiple sites across multiple versions of PHP, and supporting New Relic on future versions of PHP for your server.
Pre-Installation
Before we begin, if you haven’t done so already, you’ll need to create a New Relic account here. For the purposes of this documentation, we will be using New Relic’s free plan, however, feel free to adjust this as you see fit to better accommodate your needs.
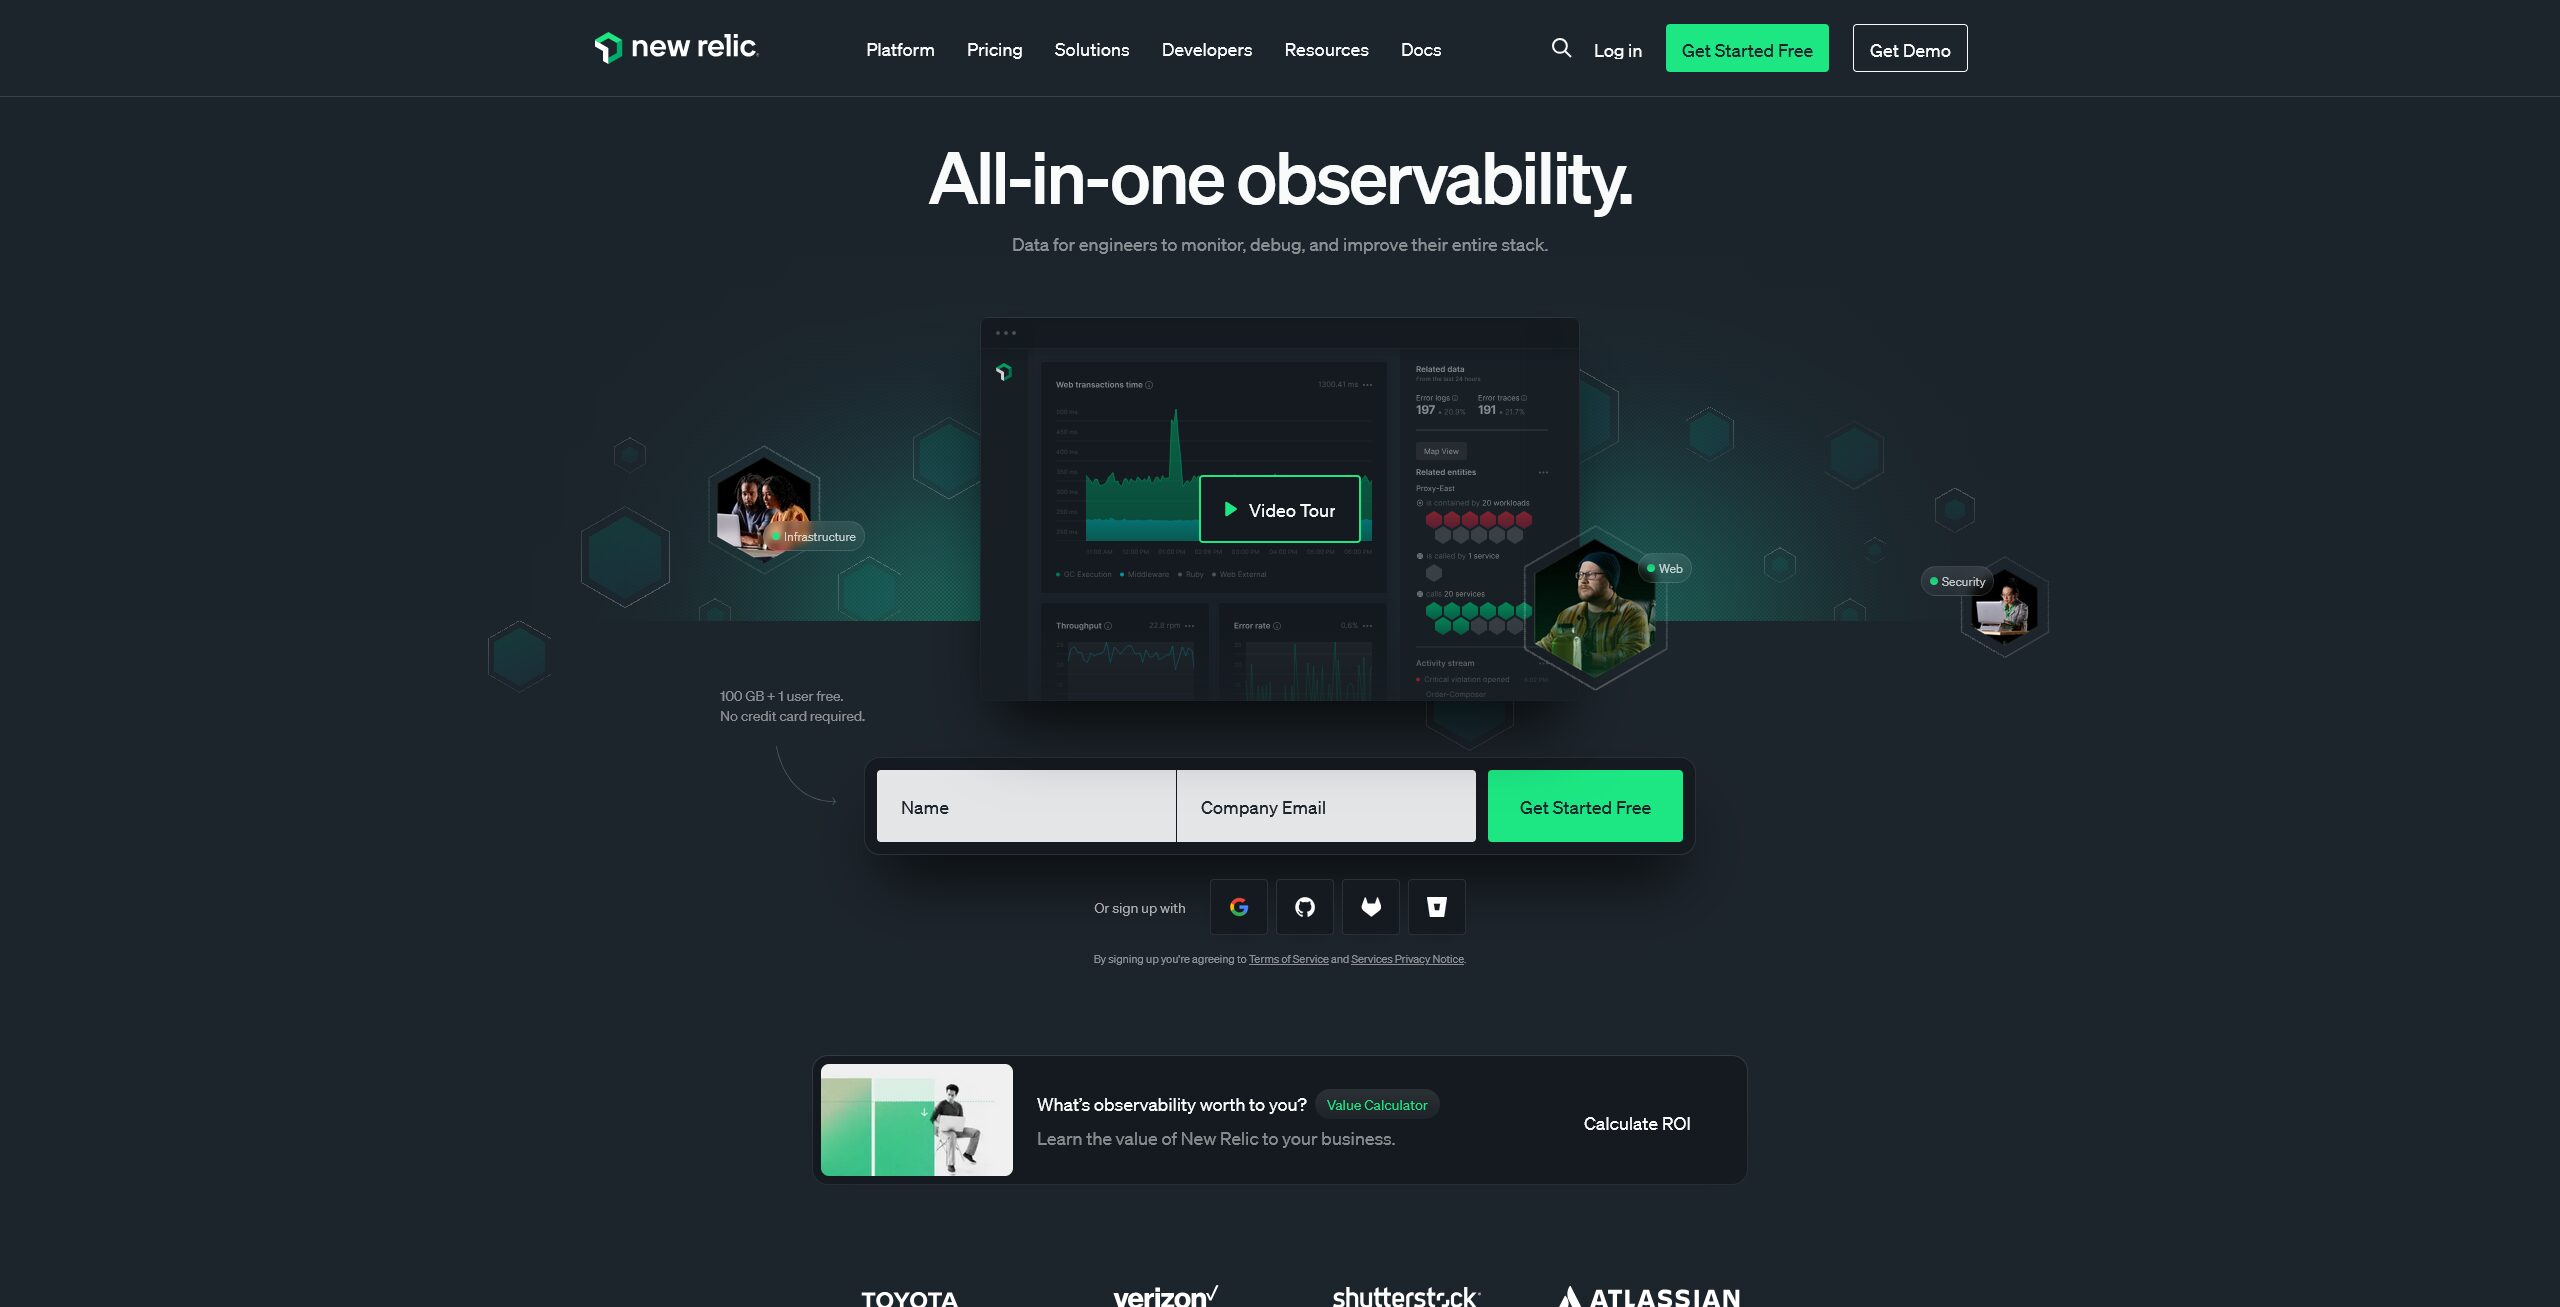
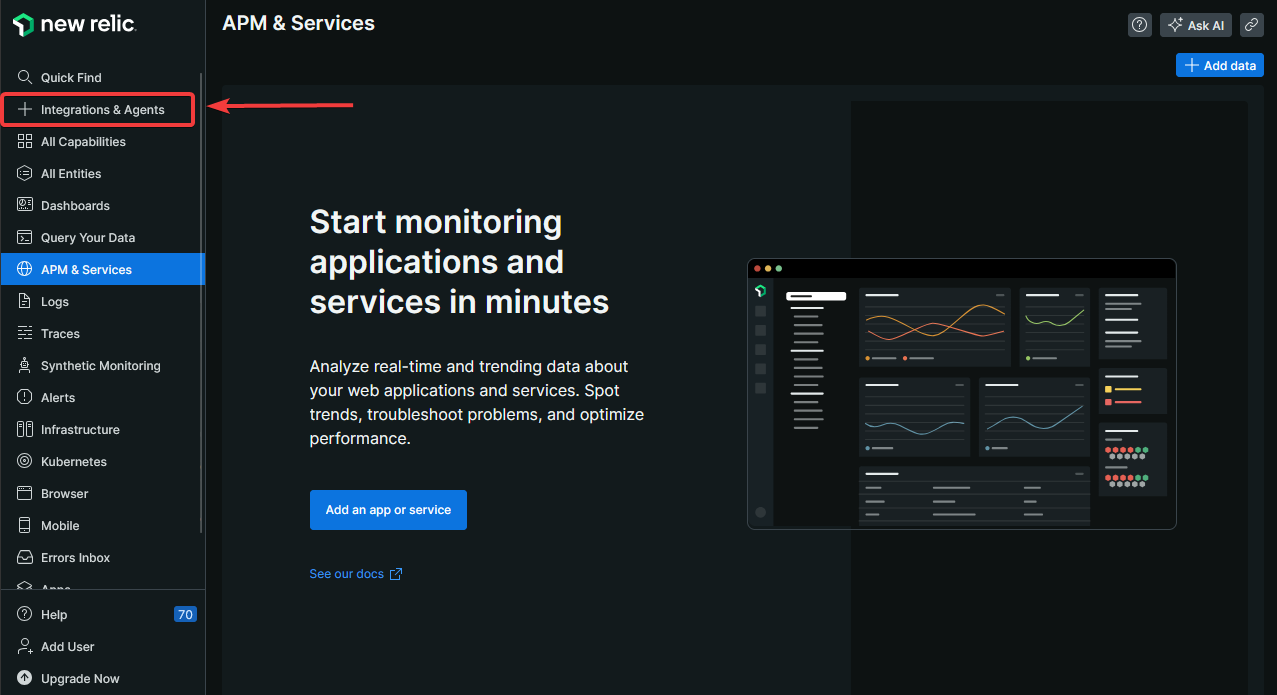
Let’s start by logging in to our New Relic dashboard and selecting the “+ Integrations & Agents” option on the main menu. Once you’ve opened it, look for the “Recommended” section and select the “Guided Install” option. This option will automatically install the PHP agent and all necessary modules for our host, based on our server’s installed packages.
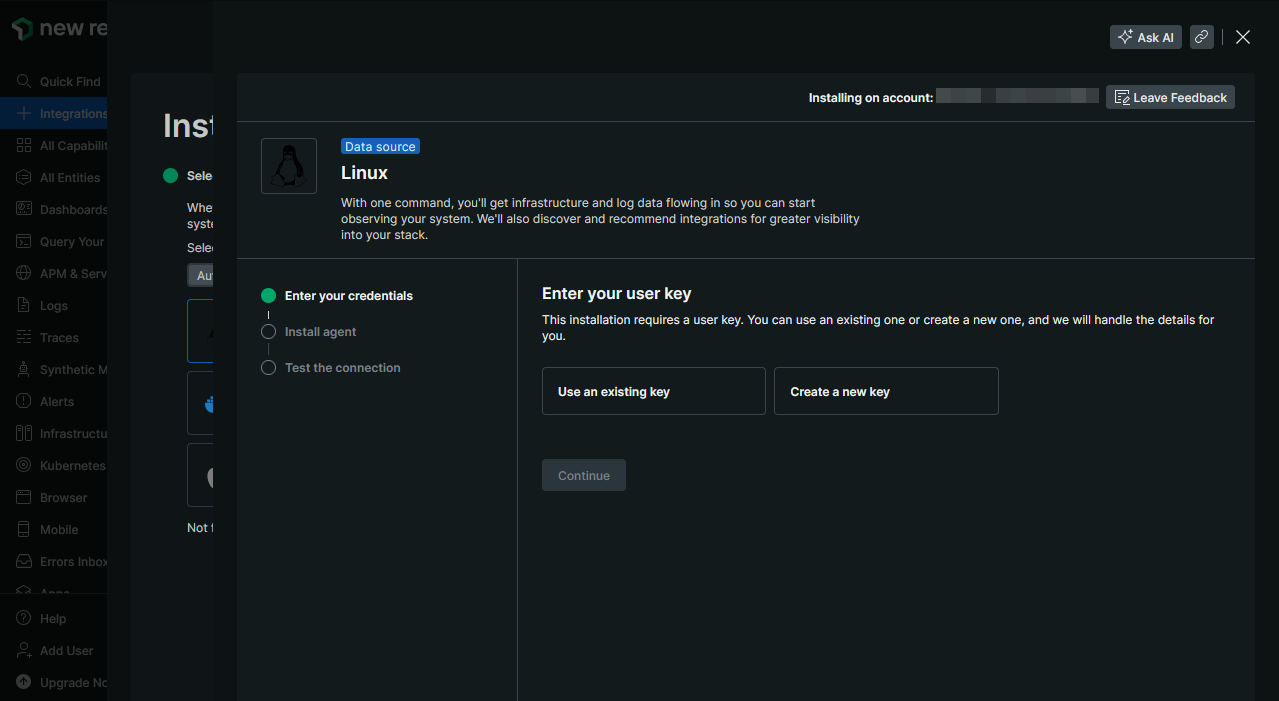
Once you’ve opened the “Guided Install” window, select the “Linux” option and create a new user key by selecting the “Create a new key” option during the “Enter your user key” step. If you already have an existing user key that you wish to use, then you may select the “Use an existing key” option instead. Once you’re done, click “Continue” to move on to the next step.
Installation
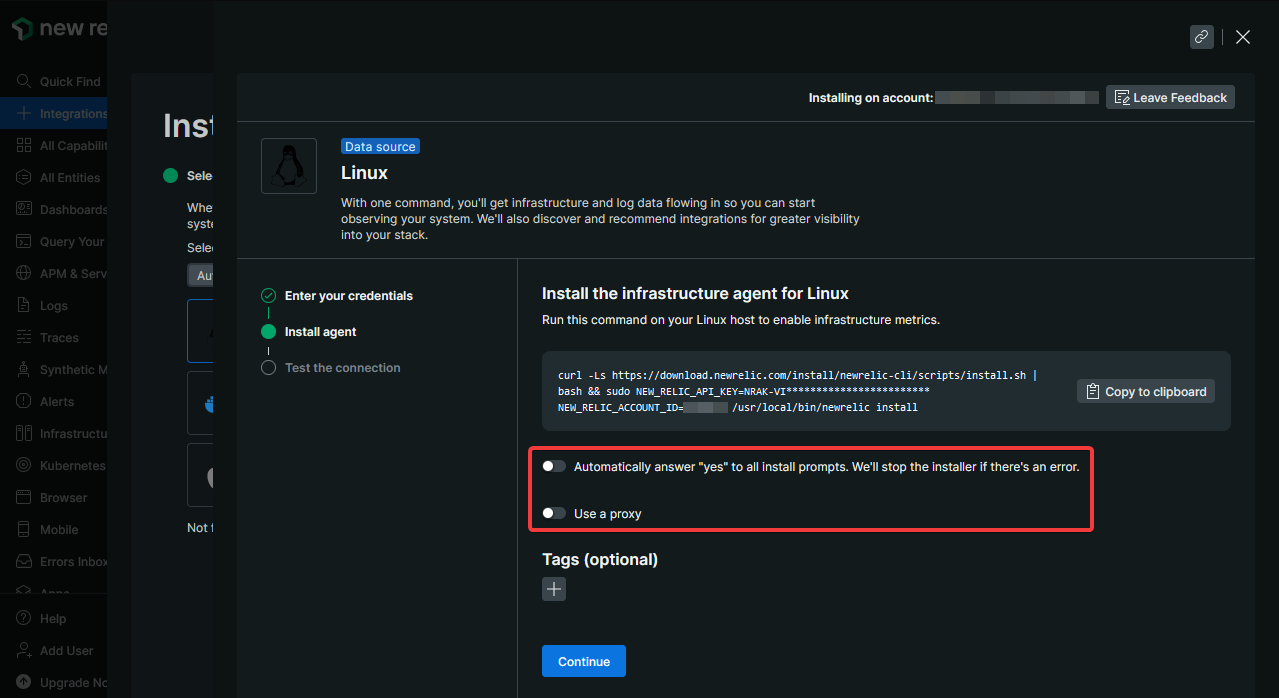
Before running the command provided on the “Install the infrastructure agent for Linux” step, ensure that you’re logged in to your server under a sudo user account, and that the options “Automatically answer “yes” to all install prompts. We’ll stop the installer if there’s an error.” and “Use a proxy” are both disabled, as we’ll need to answer some prompts with a “no”. Once you’re ready, run the command on your server.
The New Relic guided installation script will add all the necessary packages and repositories for you, while also detecting your server components and prompting you to install their respective monitoring modules. As shown below, we’ll go ahead and answer this prompt with a “Y”:
We've detected additional monitoring that can be configured by installing the following:
  Golden Signal Alerts
  MySQL Integration
  PHP Agent
  Redis Integration

? Continue installing?  (Y/n) Y
The Golden Signal Alerts module will set some basic alerts for your server under your New Relic account. Additionally, it will prompt you if you wish to receive email notifications when these alerts trigger, this is completely optional and not required to proceed.
==> Installing Golden Signal Alerts
Creating alert policy Golden Signals...
done
File deleted successfully
File '/tmp/condition.json' is created
Adding alert condition High CPU...
done
Adding alert condition High Application Error percentage...
done
Adding alert condition High Application Response Time...
done
Adding alert condition Low Application Throughput...
done
Would you like to be notified on your registered email address **REDACTED** when this alert triggers Y/N (default: N)? N
Once you’ve reached the “Installing PHP Agent” step, it will prompt you to name your PHP application. However, for the purposes of this documentation, we will use the name of our server as the name of our PHP application. In the event your server hosts multiple sites, you’ll probably want to use different names to identify each of them. Don’t worry, we will also go through the process of naming multiple sites later on in this documentation.
==> Installing PHP Agent
What is the name of your PHP application? (Double-quote (") is not a valid character in the name) turnipjuice.media
Next, we’ll go ahead and answer the following prompt with an “n”, since we’ll need to manually restart these services later:
Restart the PHP web service after PHP agent installation? Selecting 'y' will automatically restart php-fpm, nginx, or apache depending on the service that is detected. Selecting 'n' will require you to manually restart the process when prompted. (y/n)n
Finally, install the PHP Agent by answering the following prompt with a “Y”:
Do you want to install the PHP Agent Y/N (default: Y)? Y
During this step, open an additional SSH session to your server and run the following commands to restart the Nginx service alongside the multiple PHP-FPM services:
sudo service php8.1-fpm restart
sudo service php8.2-fpm restart
sudo service php8.3-fpm restart
sudo service nginx restart
Once you’re done restarting these services, proceed to answer the following prompt with a “Y”:
===> Restarting the services, as needed
This step causes the changes to newrelic.ini to be picked up.
Please restart php8.0-fpm as privileged user root for instrumentation to be enabled.
Press Y if you successfully restarted your web server.  Press N if you are unable to restart your web server at this time, and you wish to exit the installation. (default: Y)? Y
If everything went well, your New Relic installation summary should look like this:
 --------------------
  Installation Summary

  ✔  Golden Signal Alerts  (installed)
  ✔  Infrastructure Agent  (installed)
  ✔  Logs Integration  (installed)
  ✔  MySQL Integration  (installed)
  ✔  PHP Agent  (installed)
  ✔  Redis Integration  (installed)

  View your data at the link below:
  ⮕  https://onenr.io/**REDACTED**

  View your logs at the link below:
  ⮕  https://onenr.io/**REDACTED**

  --------------------
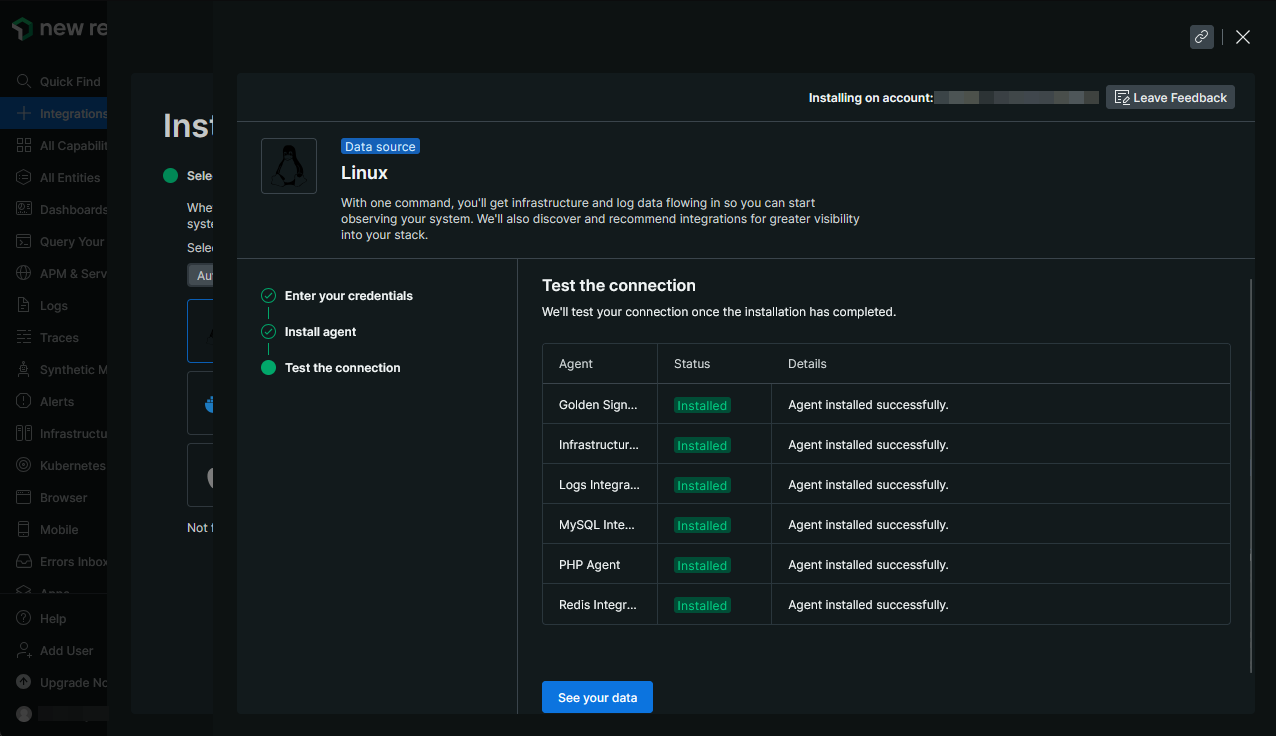
Finally, return to the New Relic installation tab on your browser and proceed to the “Test the connection” step, if everything went well, you should see something like this:
Post-Installation
In this section, we will go over some of the things you might want to do after installing New Relic’s monitoring on your server. In particular, assigning names for each of the sites hosted in your server to better help you identify them in your New Relic dashboard.
Naming Your Sites
By default, New Relic will use the application name provided during the installation step as the default name for all your sites. In this section, we will go over the naming process for each of your sites. For the purposes of this documentation, we will be using the following 3 websites as examples:
- turnipjuice.media (running on PHP 8.3)
- nr2.turnipjuice.media (running on PHP 8.2)
- nr1.turnipjuice.media (running on PHP 8.1)
Let’s proceed to remove the default application name assigned during the New Relic installation step. Let’s begin by making changes to the module running on PHP 8.3 by heading over to /etc/php/8.3/mods-available/ and editing the newrelic.ini file. Once inside, search for the line beginning with newrelic.appname and comment it by adding a ; to the beginning of the line as shown below:
;newrelic.appname = "turnipjuice.media"
While you’re still editing the newrelic.ini file, ensure that your New Relic license appears properly in the configuration file and it is not blank as shown below:
newrelic.license = ""
During the installation process, New Relic will select the most current version of PHP, in our case PHP 8.3, and write the information provided to its module there. While leaving the other versions of its modules, in our case PHP 8.2 and 8.1, with a blank license.
Once you’re done editing the file, save your changes and exit. Then, proceed to go over the same steps for the rest of the modules running on the other versions of PHP. Just remember to modify the directory to match the PHP version you want to edit next, i.e. /etc/php/{PHP_VERSION}/mods-available/.
Finally, let’s proceed with actually naming our sites. As an example, we’ll use turnipjuice.media, but the process is exactly the same for the rest of the sites. Since turnipjuice.media runs on PHP 8.3 we’ll head over to /etc/php/8.3/fpm/pool.d/ and add the following line to our site’s configuration file turnipjuice.media.conf:
php_admin_value[newrelic.appname] = "turnipjuice.media"
You may add that line, just before the last line with the include as shown below:
php_admin_value[error_log] = /sites/turnipjuice.media/logs/debug.log
php_admin_value[newrelic.appname] = "turnipjuice.media"

include=/sites/turnipjuice.media/.spinupwp-pool.conf
Once you’re done editing the file, save your changes and exit. As always, it’s a good idea to test our changes before applying them, to do so, run the following command:
sudo php-fpm{YOUR_PHP_VERSION} -t
If your test passes, then proceed to apply your changes by restarting the PHP-FPM service with the following command:
sudo service php{YOUR_PHP_VERSION}-fpm restart
Once you’re done, feed your site(s) some traffic and the APM(s) should appear shortly in your New Relic account with your assigned application name(s).
Frequently Asked Questions
1. Why am I getting “PHP Warning: Module “newrelic” is already loaded in Unknown on line 0″ when running “sudo php{YOUR_PHP_VERSION} -m” to check my modules?
During the installation phase, New Relic will select the most current version of PHP and install its module on both the cli and fpm directories of said version. Because of this, PHP will take it as the New Relic module being loaded twice, once from the cli directory and again from the fpm directory, which will result in the aforementioned warning.
To fix this warning, all you need to do is delete the newrelic.ini file from your cli directory modules, which you can find in /etc/php/{YOUR_PHP_VERSION}/cli/conf.d/, and run the following command:
sudo rm /etc/php/{YOUR_PHP_VERSION}/cli/conf.d/newrelic.ini
Once the file has been deleted, running sudo php{YOUR_PHP_VERSION} -m should no longer present the warning.
2. New Relic is already installed on my server. How can I add a site running on a new version of PHP?
If you’re deploying a site on a version of PHP that was not previously installed on your server and would like to add New Relic monitoring to it, then you’ll need to manually install the New Relic PHP agent for that particular version of PHP.
Fortunately, since New Relic was already installed on your server, you can use their included utility to install the New Relic agent for the new version of PHP. To do so, you’ll need to run the following command:
sudo newrelic-install
Then select option 1 as shown below:
New Relic PHP Agent Installation (interactive mode)
===================================================

Please select from one of the following options:

1)  Install New Relic Agent and Daemon
2)  Uninstall New Relic Agent and Daemon

0)  Exit

Enter choice (1-2, 0 to exit): 1
Once the installation has concluded, you may head over to the Post-Installation section of this documentation for next steps and additional details.
3. How can I uninstall New Relic completely from my server?
If you wish to uninstall New Relic completely, the first thing you’ll need to do is stop the newrelic-daemon and newrelic-infra services by running the following commands:
sudo systemctl stop newrelic-daemon.service
sudo systemctl stop newrelic-infra stop.service
Next, we’ll use the newrelic-install utility to start the PHP agent uninstallation process by running the following command:
sudo newrelic-install purge
sudo newrelic-install purge will remove ALL the configuration files and links created during the installation process.
Then, proceed to list all the installed New Relic packages by running the following command:
sudo apt list --installed | grep newrelic
Next, proceed to remove all the New Relic packages based on the obtained list by using the sudo apt remove command as shown below:
sudo apt remove newrelic-daemon newrelic-infra newrelic-php5-common newrelic-php5
Finally, check the /etc/php/{PHP_VERSION}/mods-available/ directory for any remnants of the PHP agent and delete them. Once you’re done, proceed to restart PHP-FPM and Nginx by running the following commands:
sudo service php{YOUR_PHP_VERSION}-fpm restart
sudo service nginx restart