Restoring Site Backups
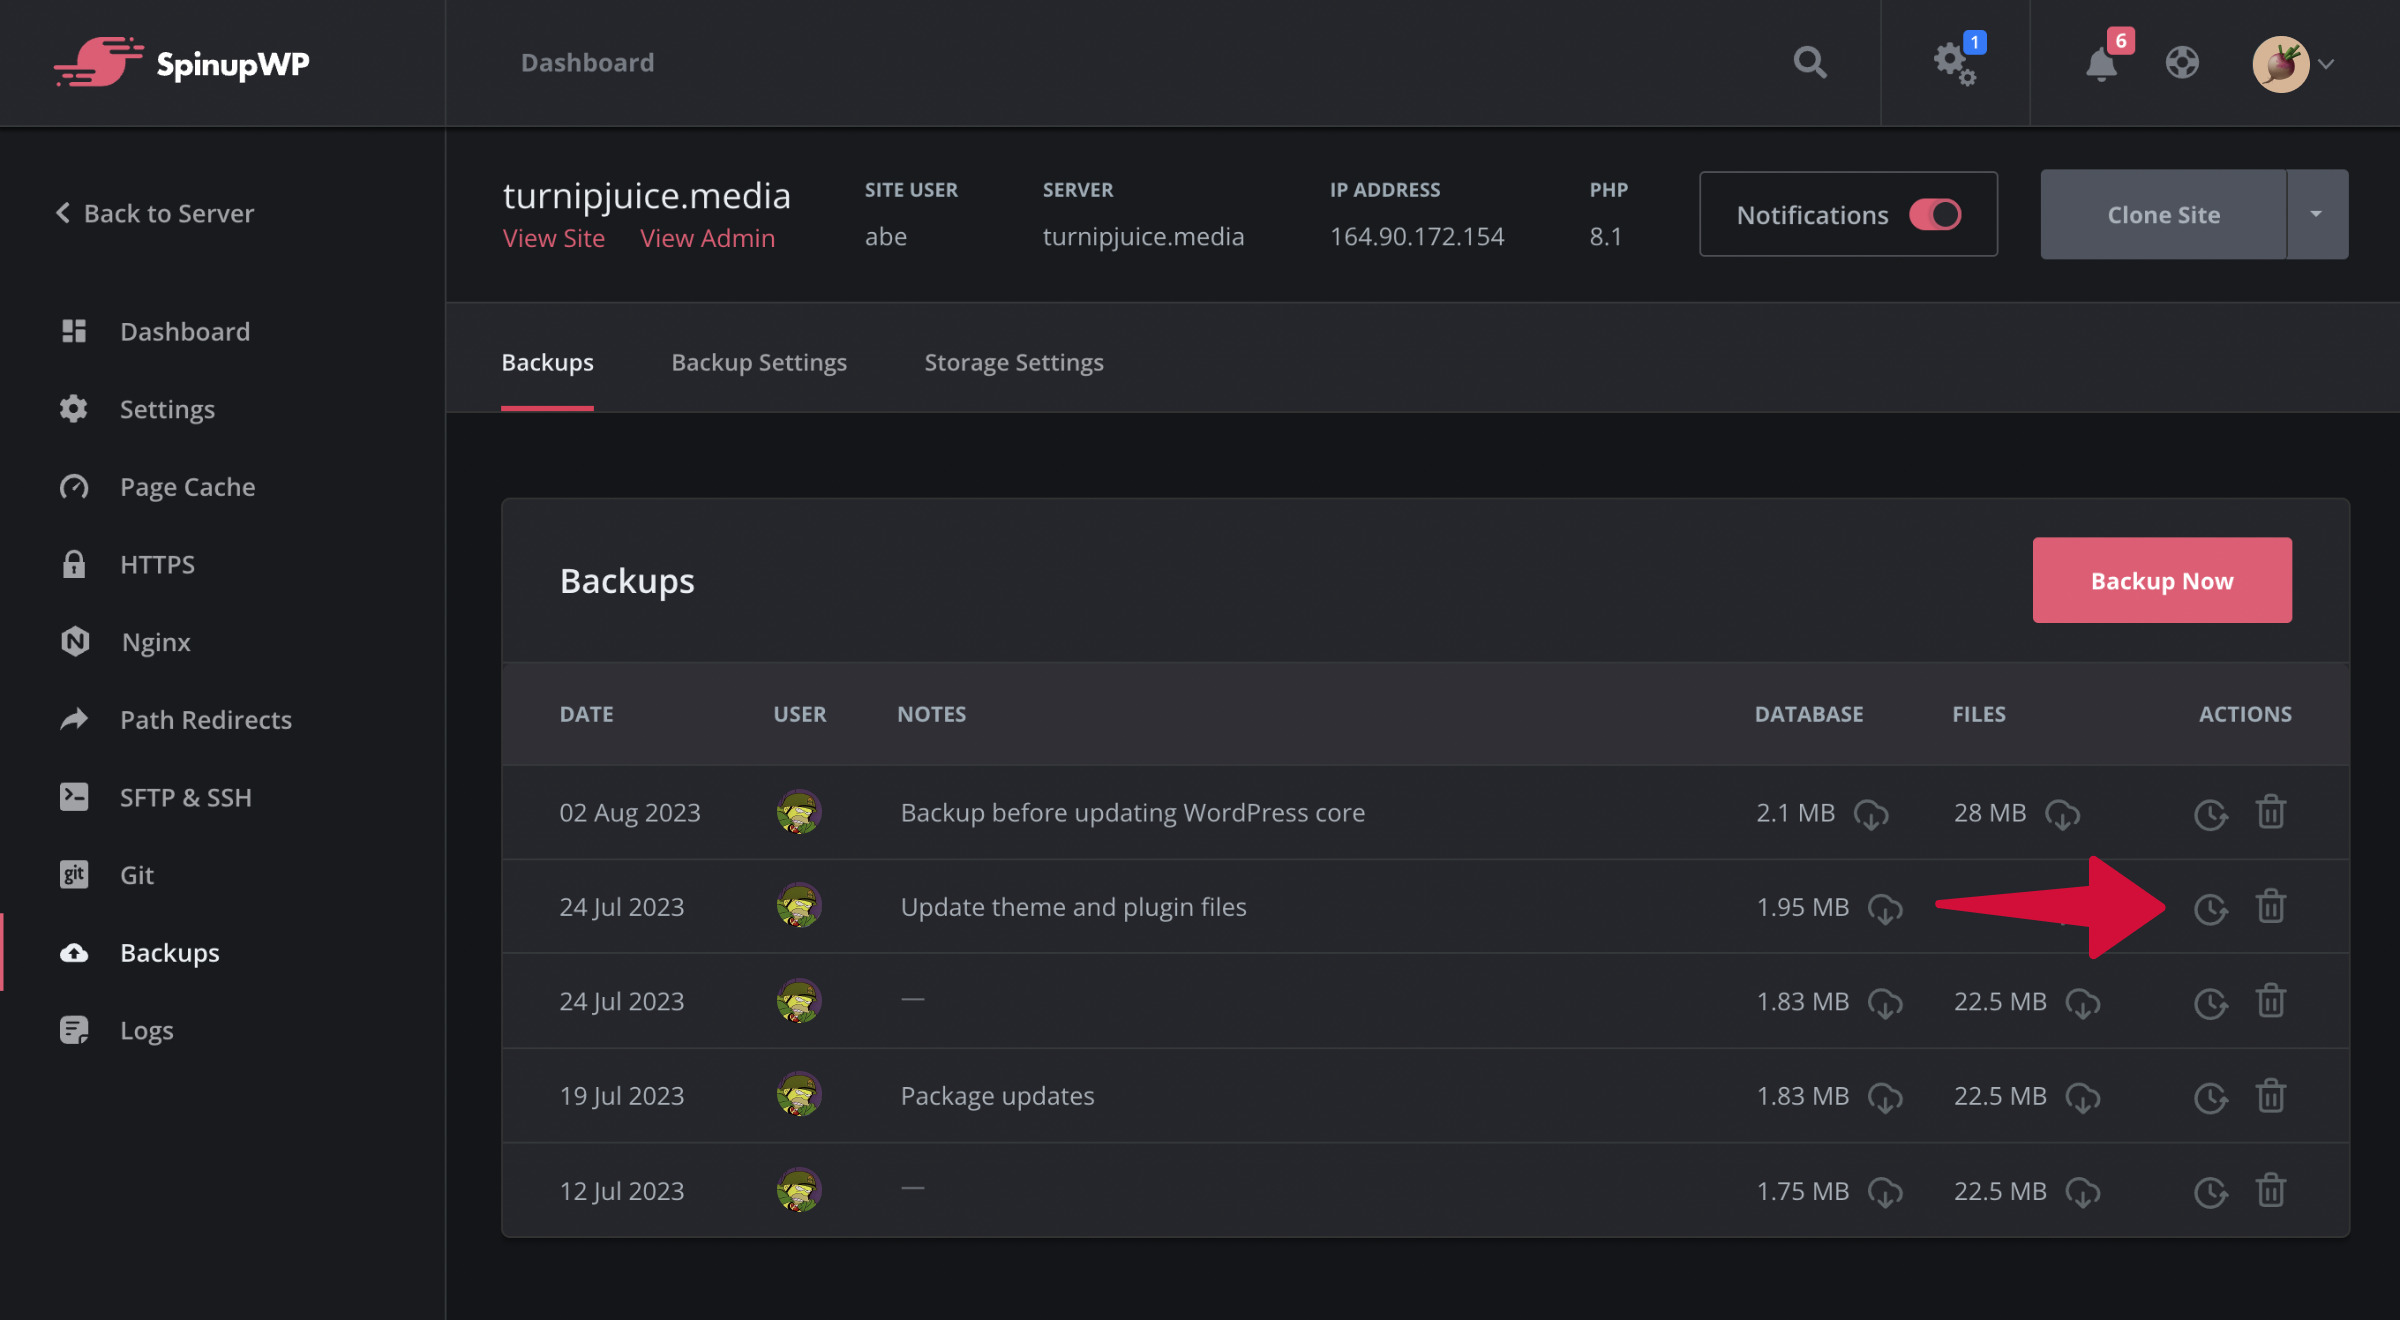
To restore a site from a site backup in SpinupWP simply click the “Restore” action in the list of backups.

You will be prompted to confirm that you want to restore the site from a backup as restoring a site is a destructive action (all existing files and data will be deleted). For this reason, you will also be asked if you want SpinupWP to create a new backup before restoring. We recommend leaving this option enabled.
After the restore has completed we recommend you test your site thoroughly to make sure it’s working correctly. SpinupWP will automatically purge the page cache and object cache for you after a site has been restored.
Manually Restoring a Backup
There may be times when you need to manually restore a backup. To do so, follow the steps below. SSH to your server as the site user for the site you’re restoring and create a temporary directory on your server to store the backup files.
mkdir ~/restore
Now let’s backup the existing site files manually so that it includes any files that are excluded from SpinupWP backups just in case we make a mistake below.
tar -czf ~/site-backup.tar.gz ~/files
You may want to check the available disk space on your server and if you’re low, you should download this backup file to your local computer and delete it from the server. From your local computer terminal you can download the file with a command like this:
scp {site_user}@{domain}:~/site-backup.tar.gz ~/Downloads
Now visit your site dashboard in SpinupWP and download the files and/or database backups from your backup storage provider to your local computer.
Next, copy the backup files from your local computer to your server using SFTP or scp:
scp 2020-03-12-10-07-33-files.tar.gz {site_user}@{domain}:~/restore
scp 2020-03-12-10-07-33-database.sql.gz {site_user}@{domain}:~/restore
Restoring Site Files
Back on your server, extract the files backup on your server:
cd ~/restore
tar -xf 2020-03-12-10-07-33-files.tar.gz
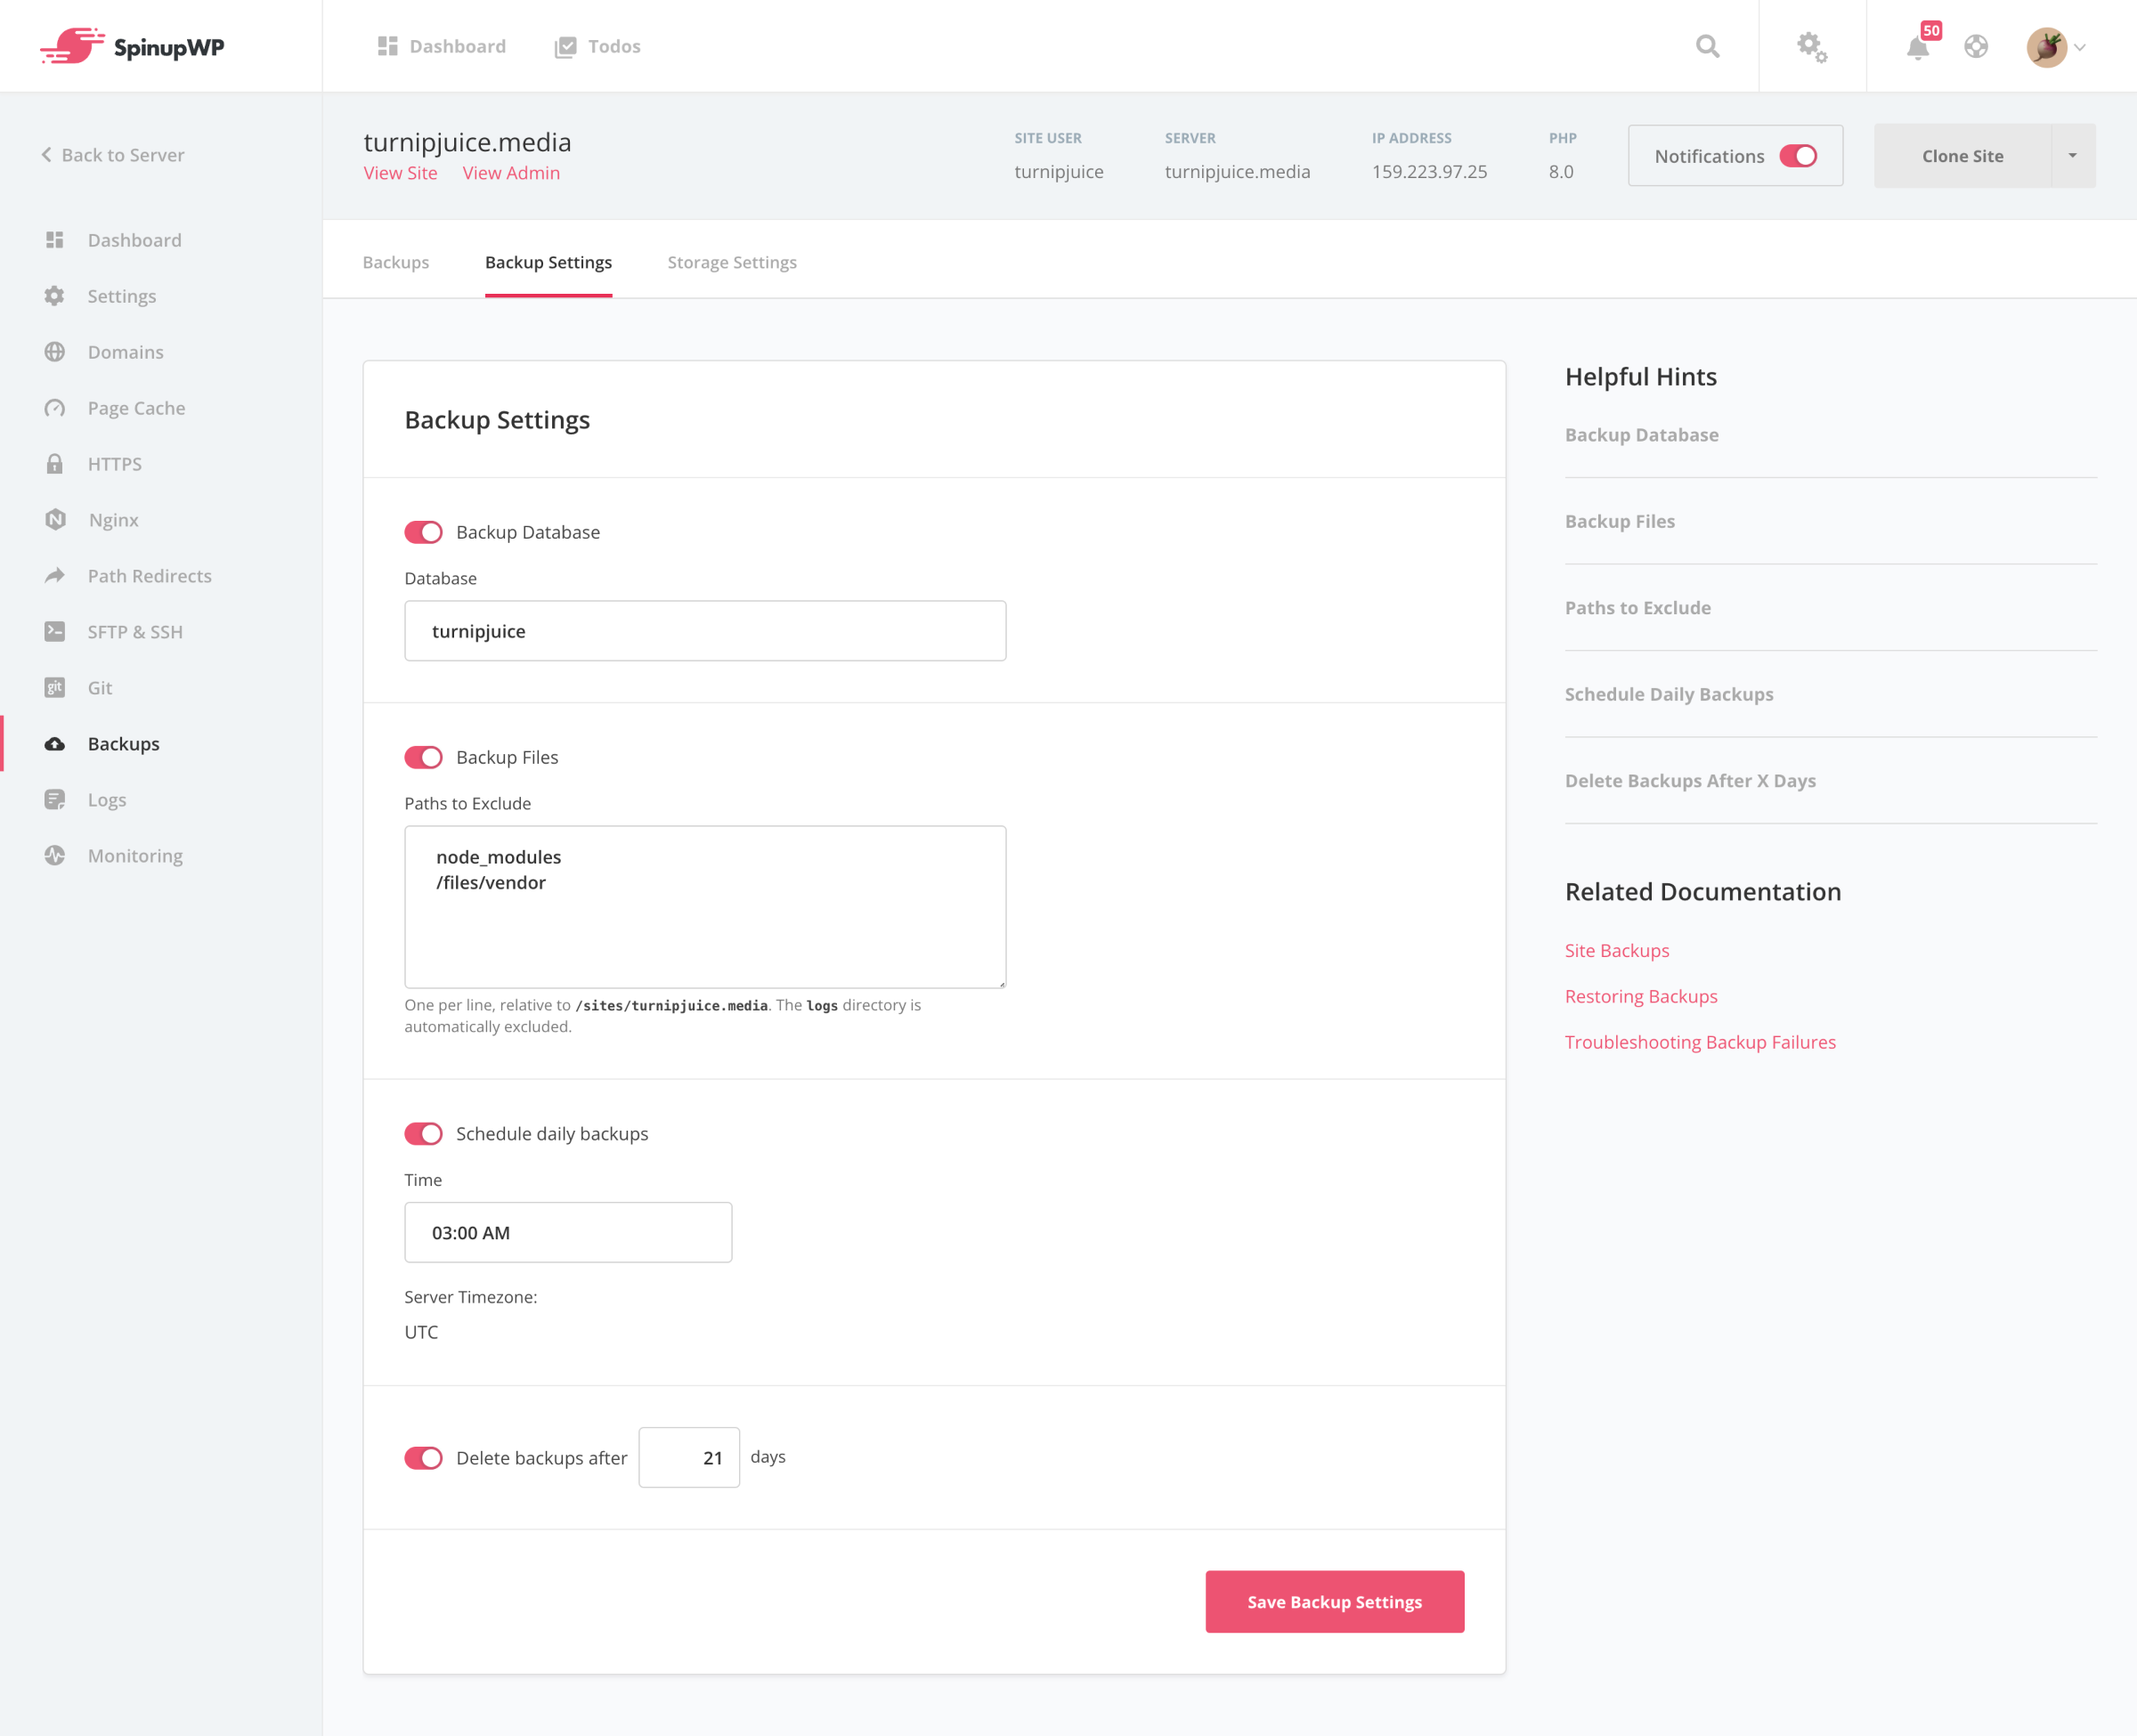
Now check if you excluded site files from your backup. In SpinupWP, go to your site dashboard, then Backups > Backup Settings:

In the Paths to Exclude box, check for any files or paths that would exclude files from your /sites/{domain}/files folder. You may want to review the doc that explains how excluding files from backups works. If you find files that have been excluded from your backup, move them to the same relative path in ~/restore.
For example, let’s say you excluded MVI_17324.mov because it’s a very large file. You locate the file in /sites/turnipjuice.media/files/wp-content/uploads/2019/08/22/. And so you move the file with the following command:
mv /sites/turnipjuice.media/files/wp-content/uploads/2019/08/22/MVI_17324.mov ~/restore/turnipjuice.media/files/wp-content/uploads/2019/08/22/
Once you’re sure you’ve moved all the excluded files over, you can delete the site files:
rm -rf /sites/{domain}/files
Then restore the site files and any other files included in your backup:
mv ~/restore/{domain}/files/ /sites/{domain}
Restoring the Database
To restore the database, first connect to your database as the root user. We’ll use the command line here as an example:
mysql -u root -p
Next, drop and recreate the database:
DROP DATABASE {database};
CREATE DATABASE {database};
Finally, exit the MySQL prompt and then restore the database:
gunzip < ~/restore/2020-03-12-10-07-33-database.sql.gz | mysql -u root -p {database}
Make sure and clean up your server by deleting the backup files after the restore is complete:
rm -rf ~/restore
We also recommend clearing the page cache and object cache after restoring a site:
wp spinupwp cache purge-site
wp cache flush