Amazon S3 Storage Provider
This guide aims to help you set up Amazon S3 for storing site backups.
Start by signing in to the AWS Management Console.
Create Bucket
Navigate to S3 and click Create bucket.

Enter a unique bucket name. A good naming scheme is “domain-name-backups,” for example, “hellfish-media-backups”.
The region should be geographically close to your server location. This will improve the time it takes to copy backup files from your server to Amazon S3.
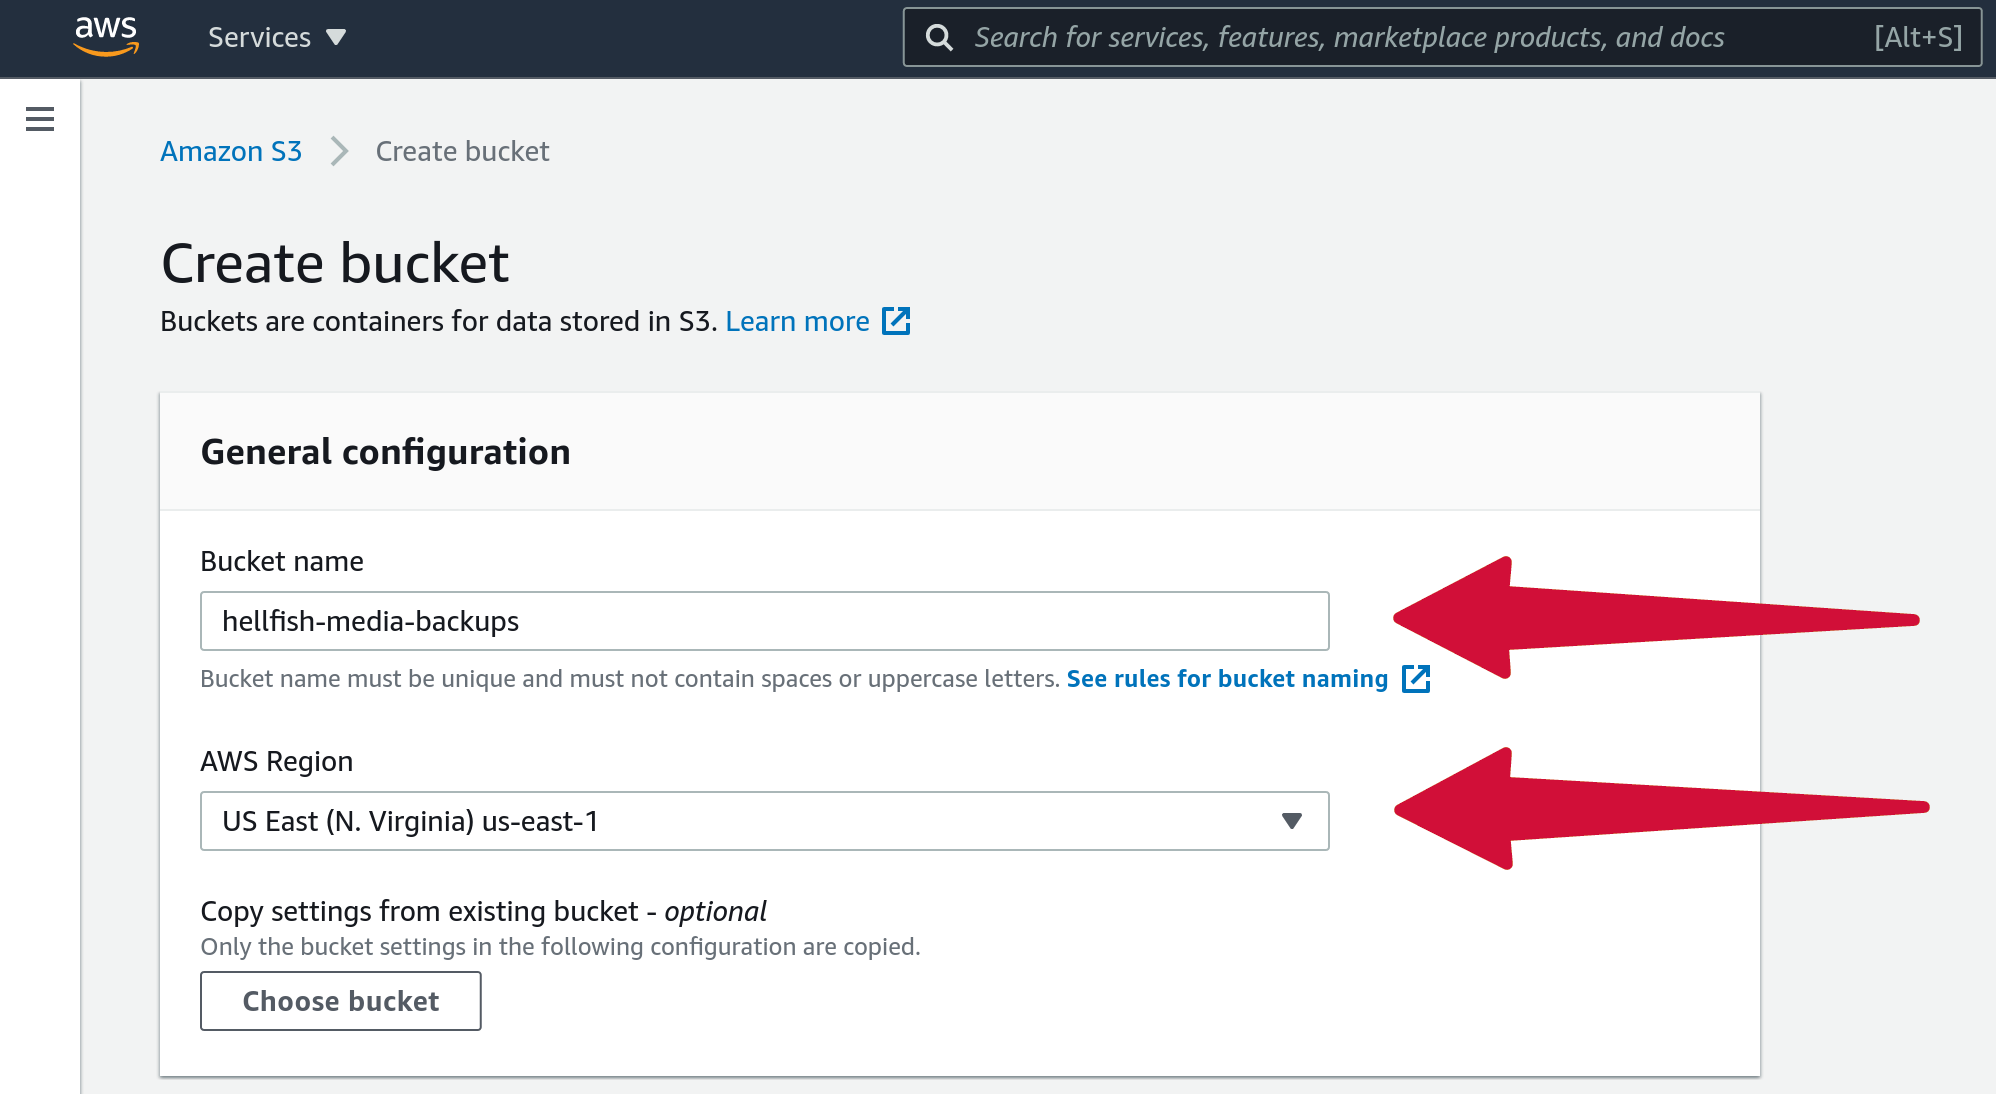
All other options can be left as the default values. Scroll down and click Create bucket.
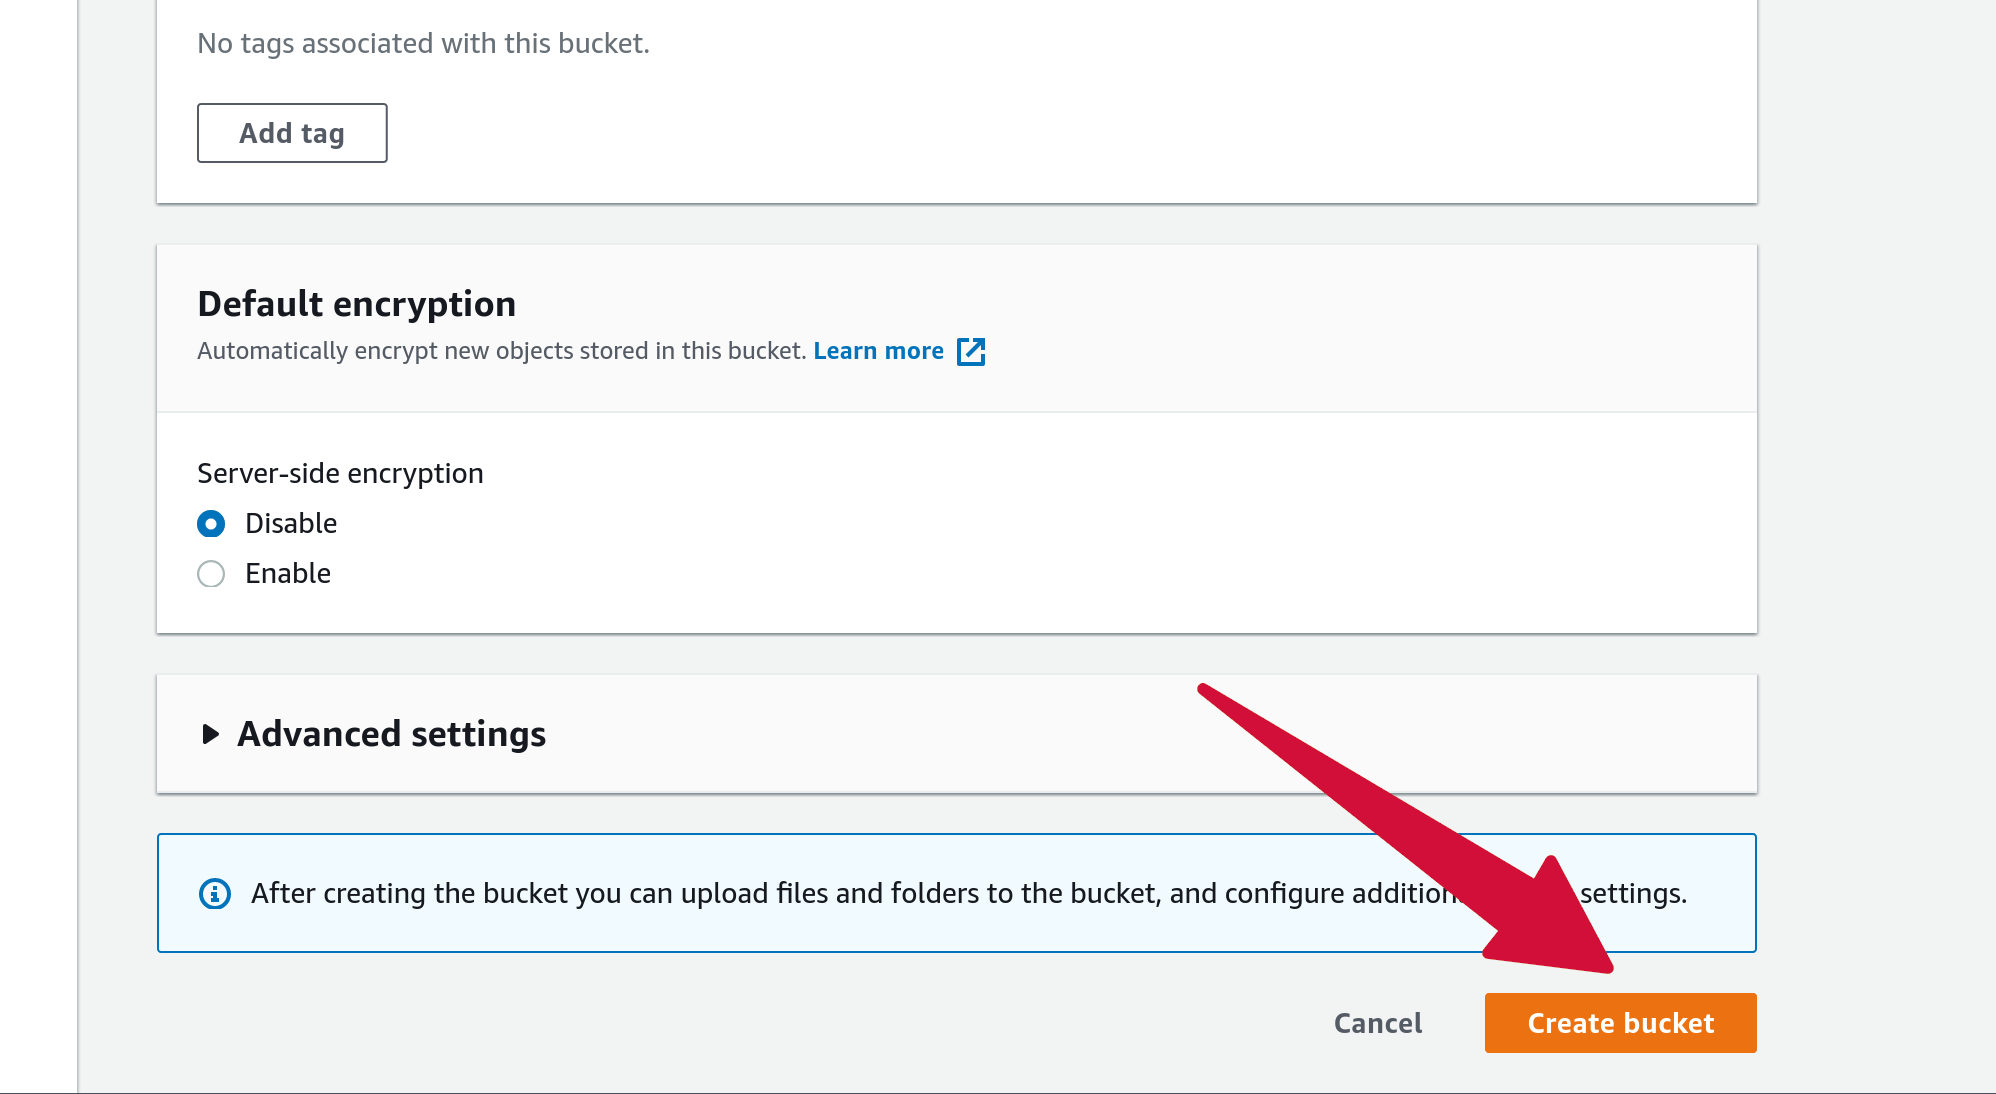
Once the bucket is created, you’ll see it listed with the rest of your buckets. You can also filter buckets by name, if you ever need to find it quickly.

Create IAM User
For SpinupWP to authenticate with Amazon S3, you must create an IAM user. Head over to IAM and click Add user.
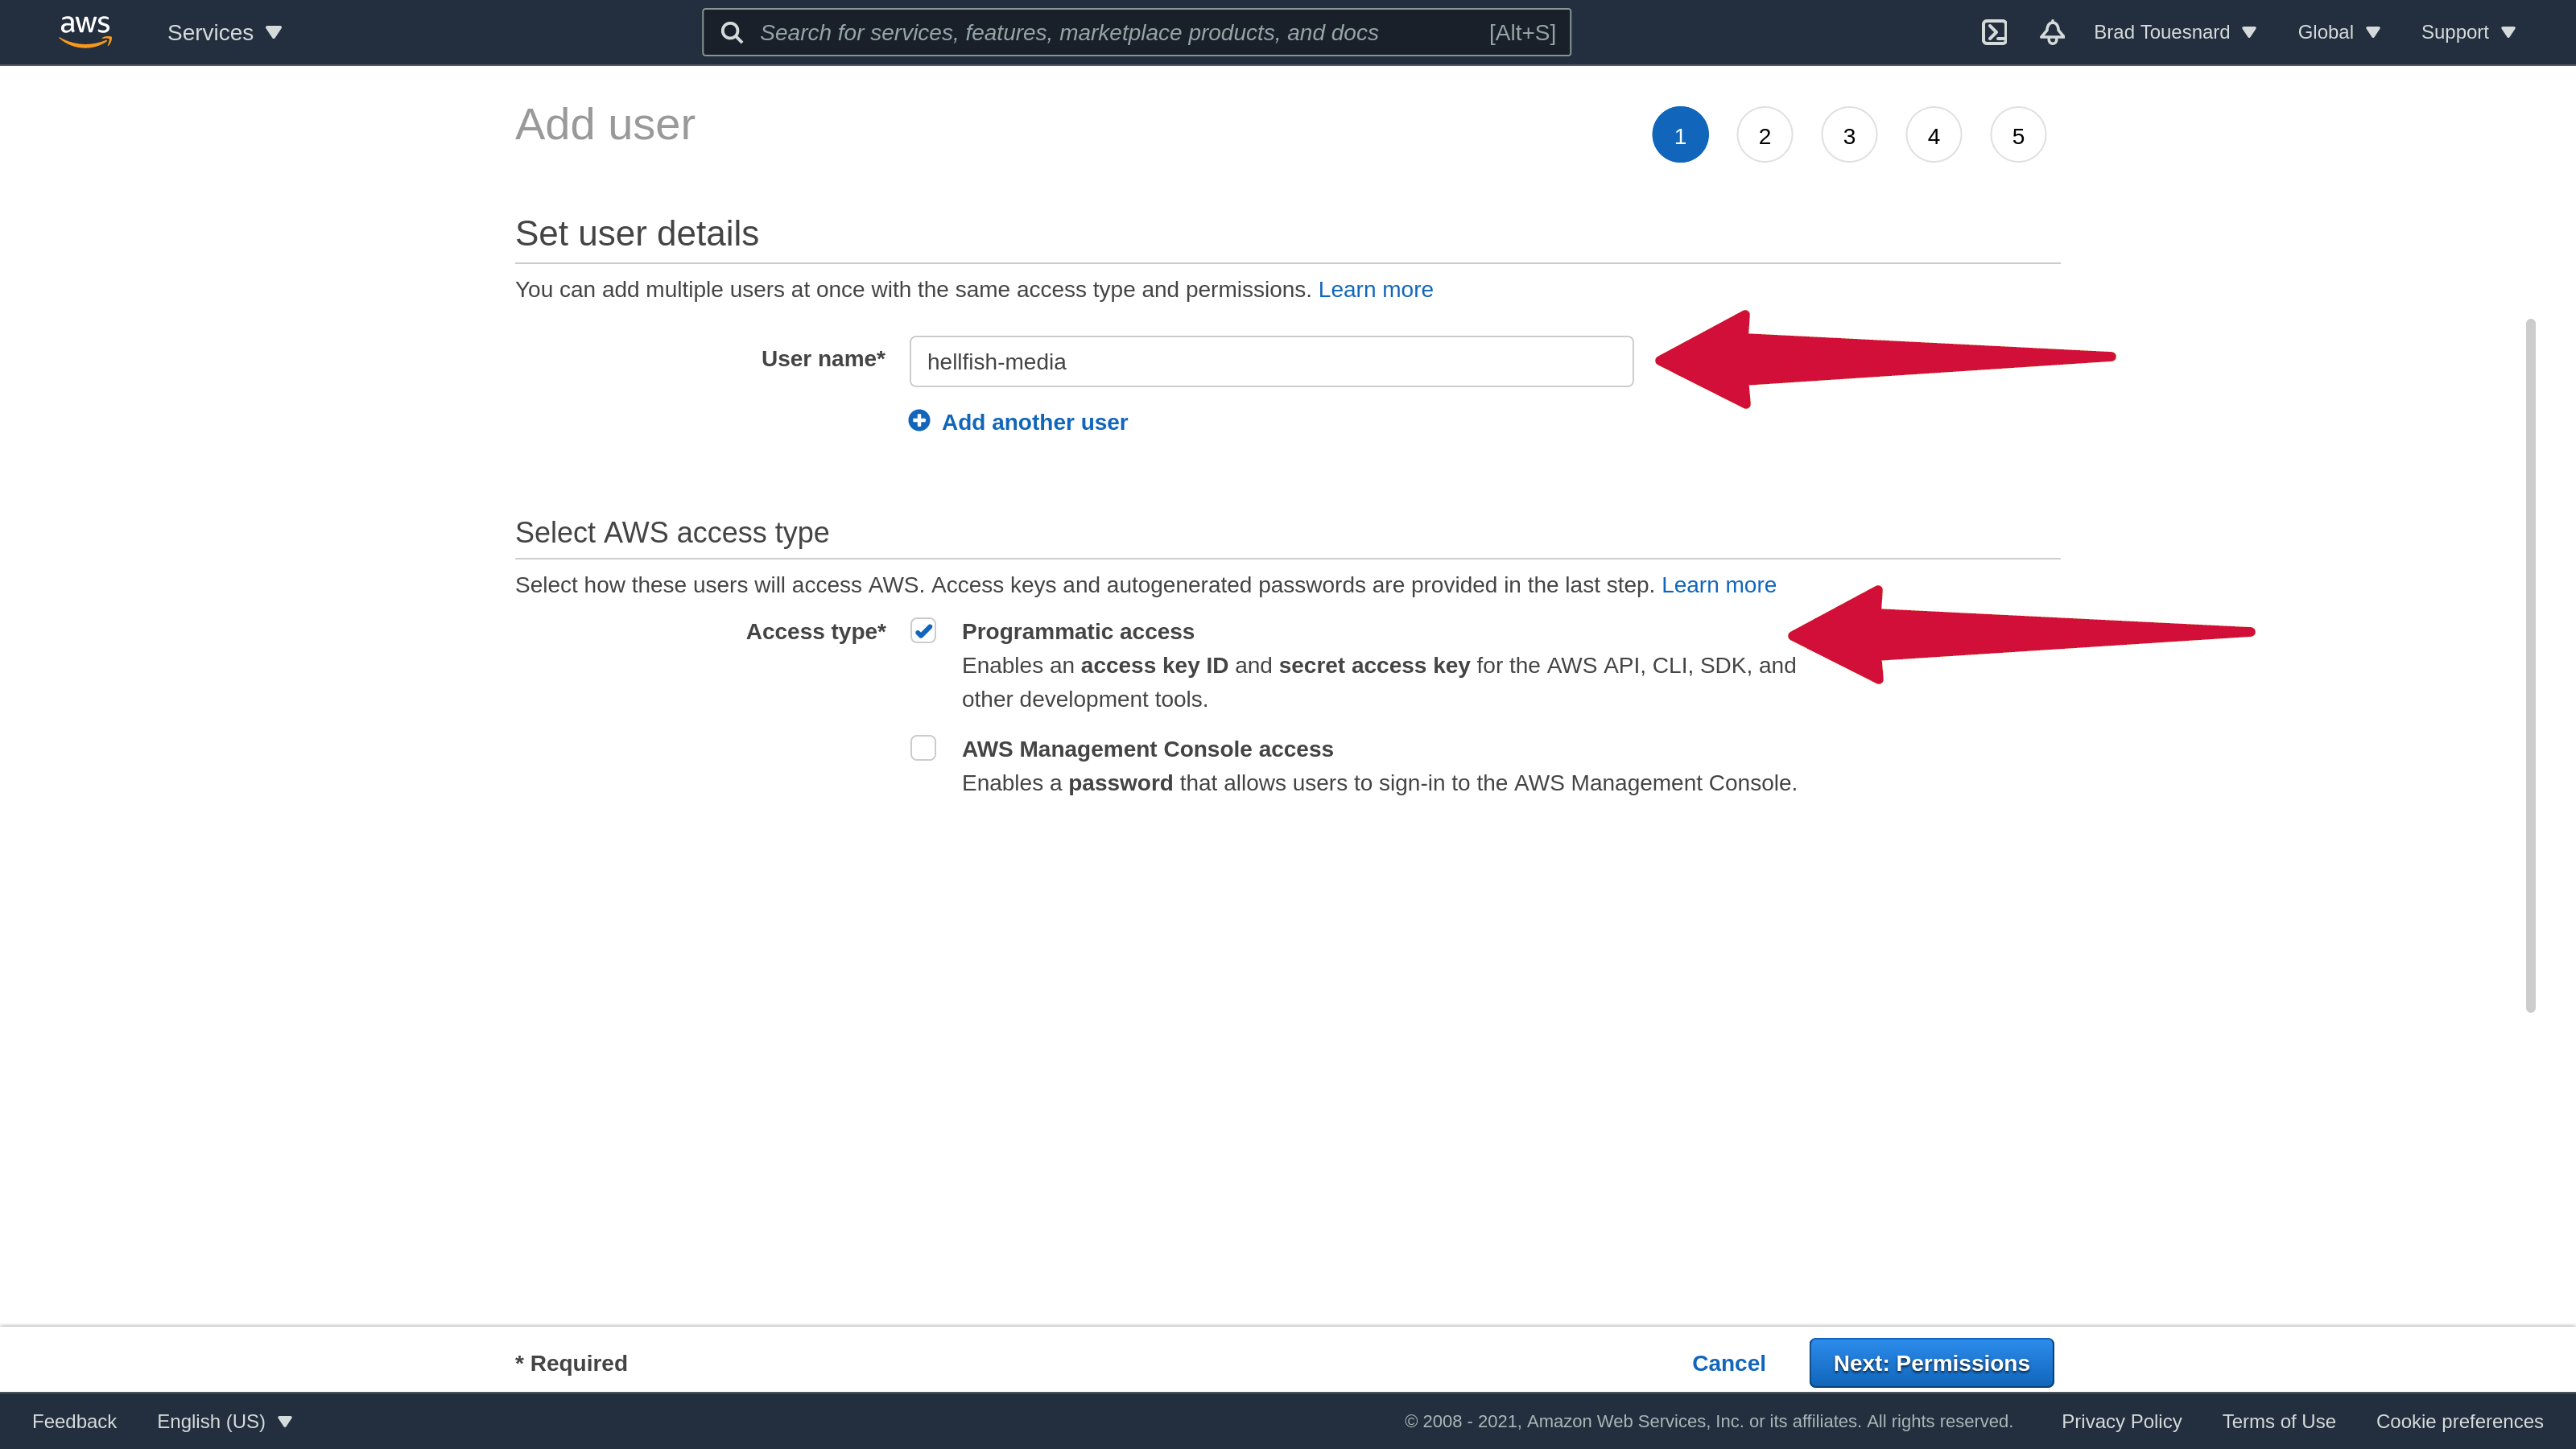
Enter a name for the user in the User name field.
Under Access type select the checkbox for Programmatic access, then click Next: Permissions.
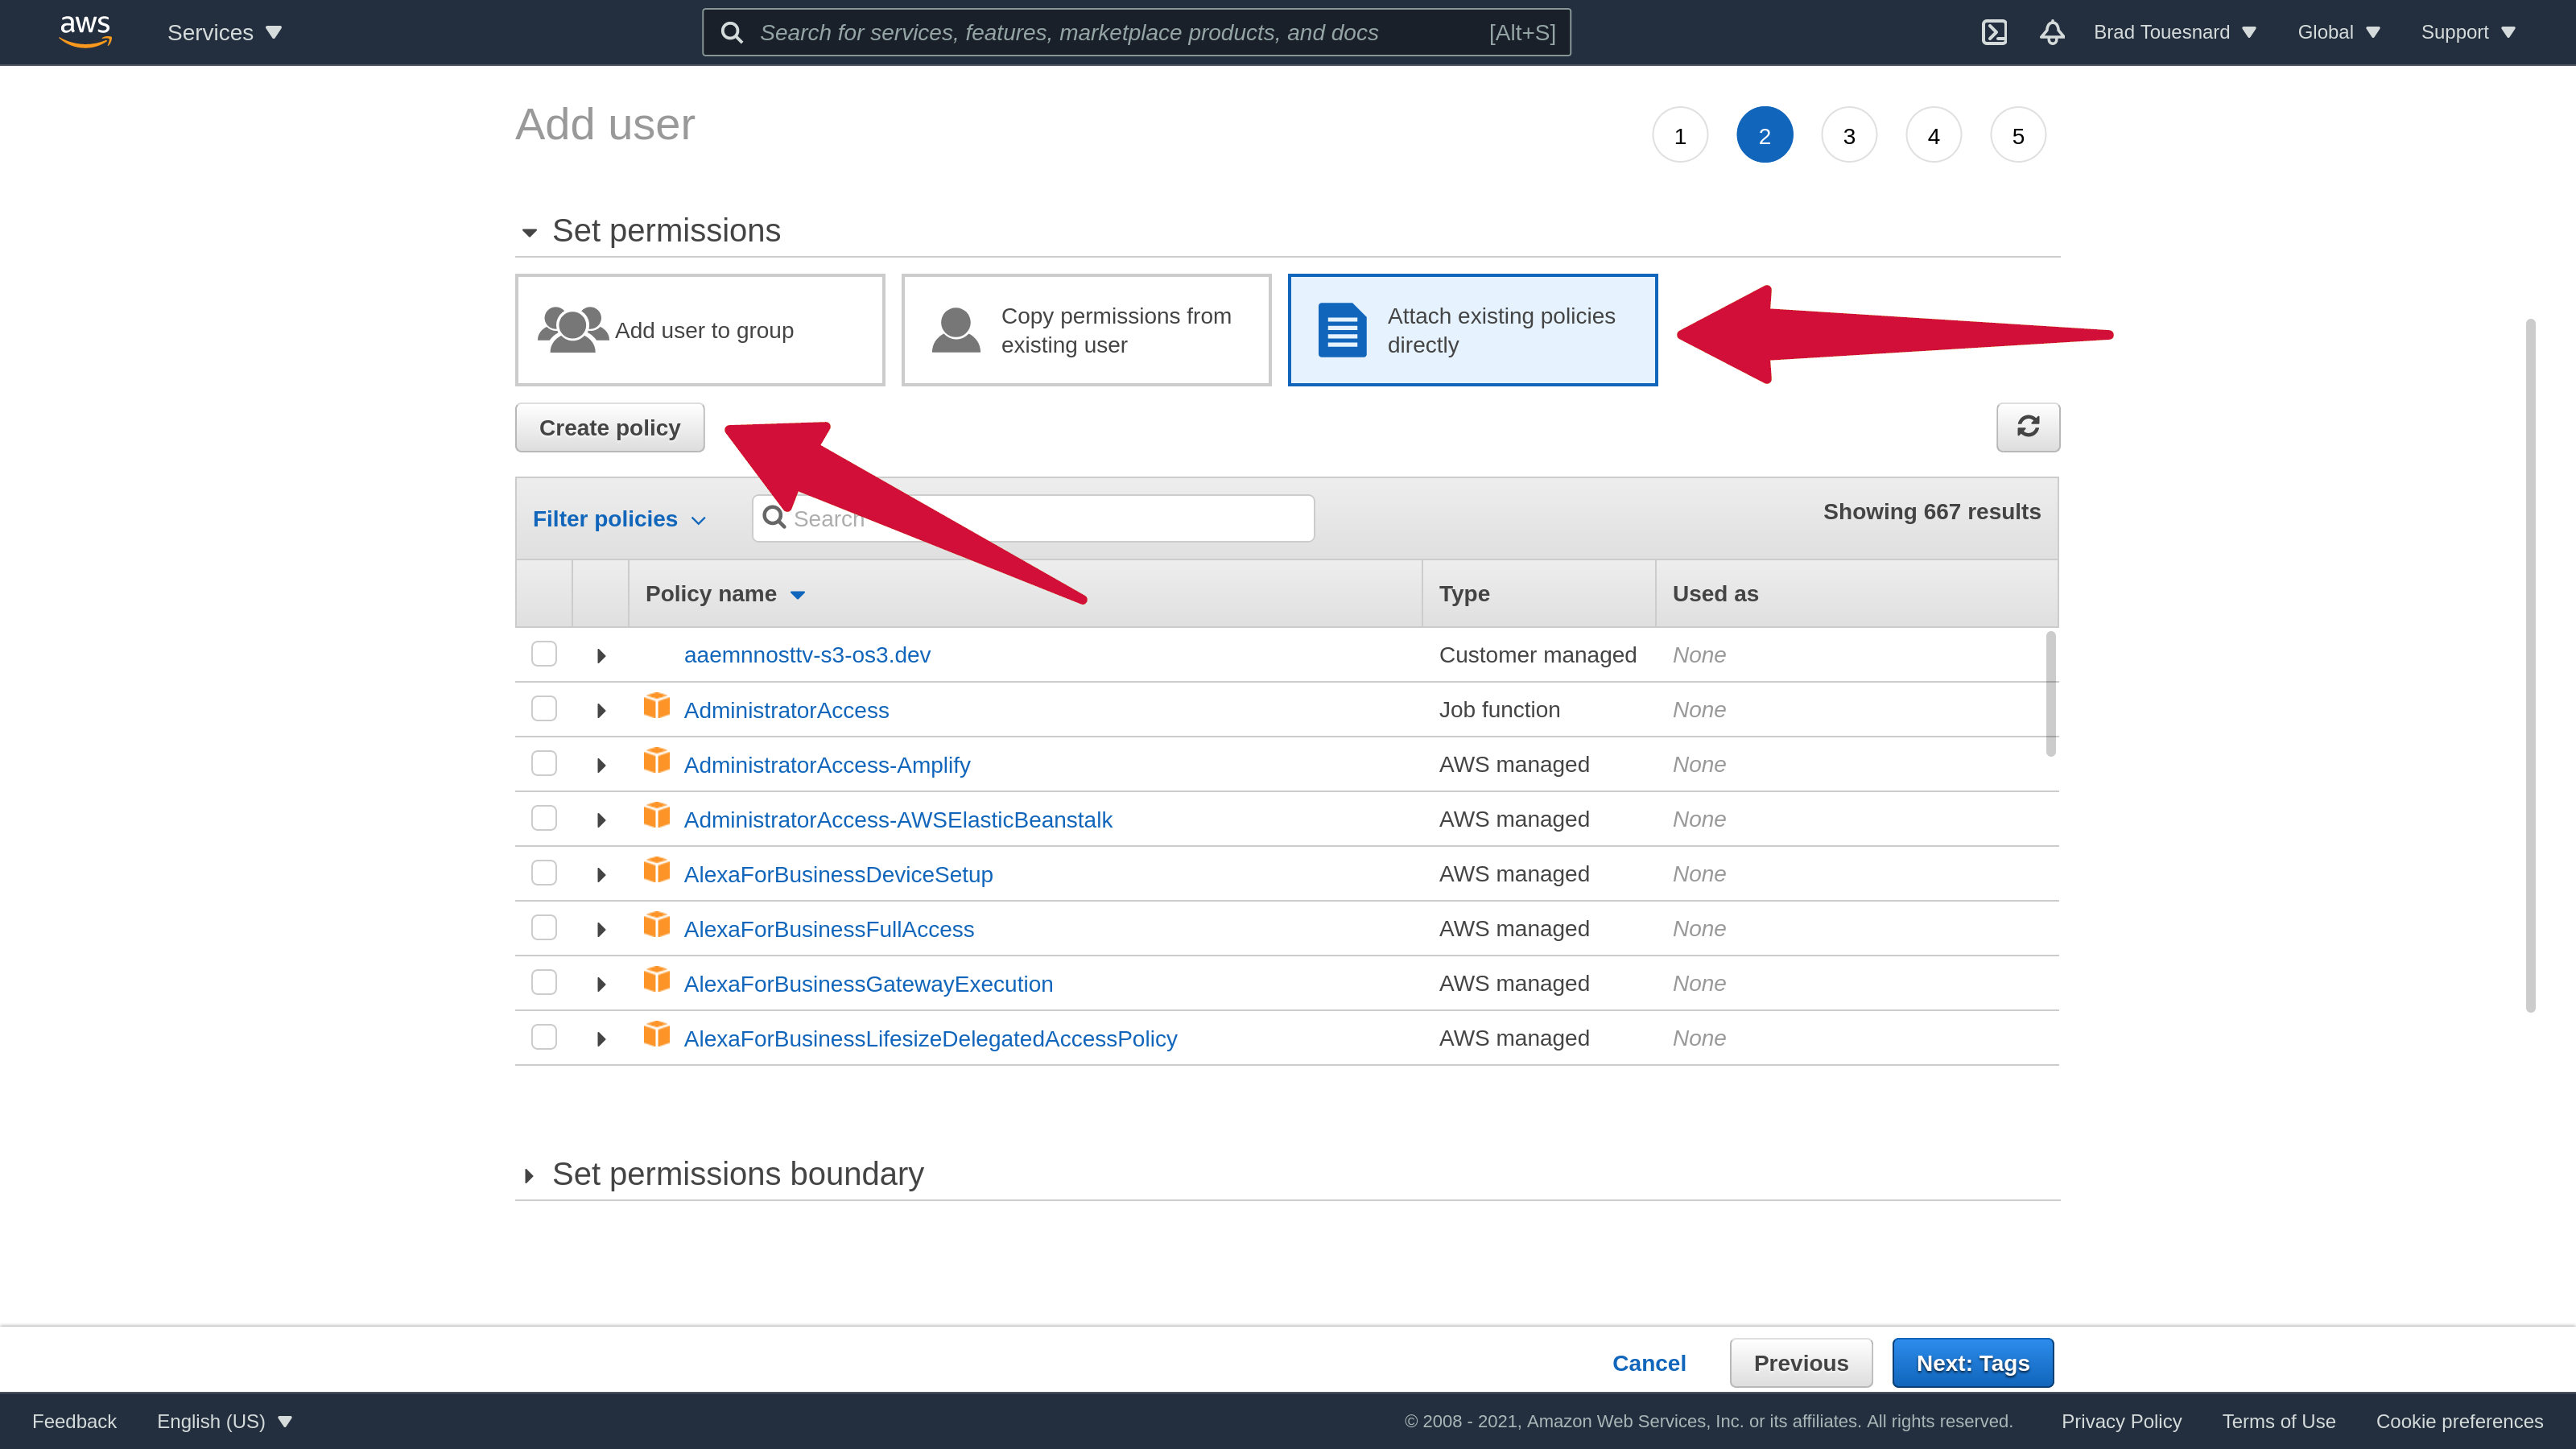
To ensure that we give the IAM user an extremely secure set of S3 permissions, we need to create a custom access policy. Click the Attach existing policies directly button, and then click the Create policy button.
This will open a new “Create policy” window. Click on the JSON tab to open the policy JSON editor.
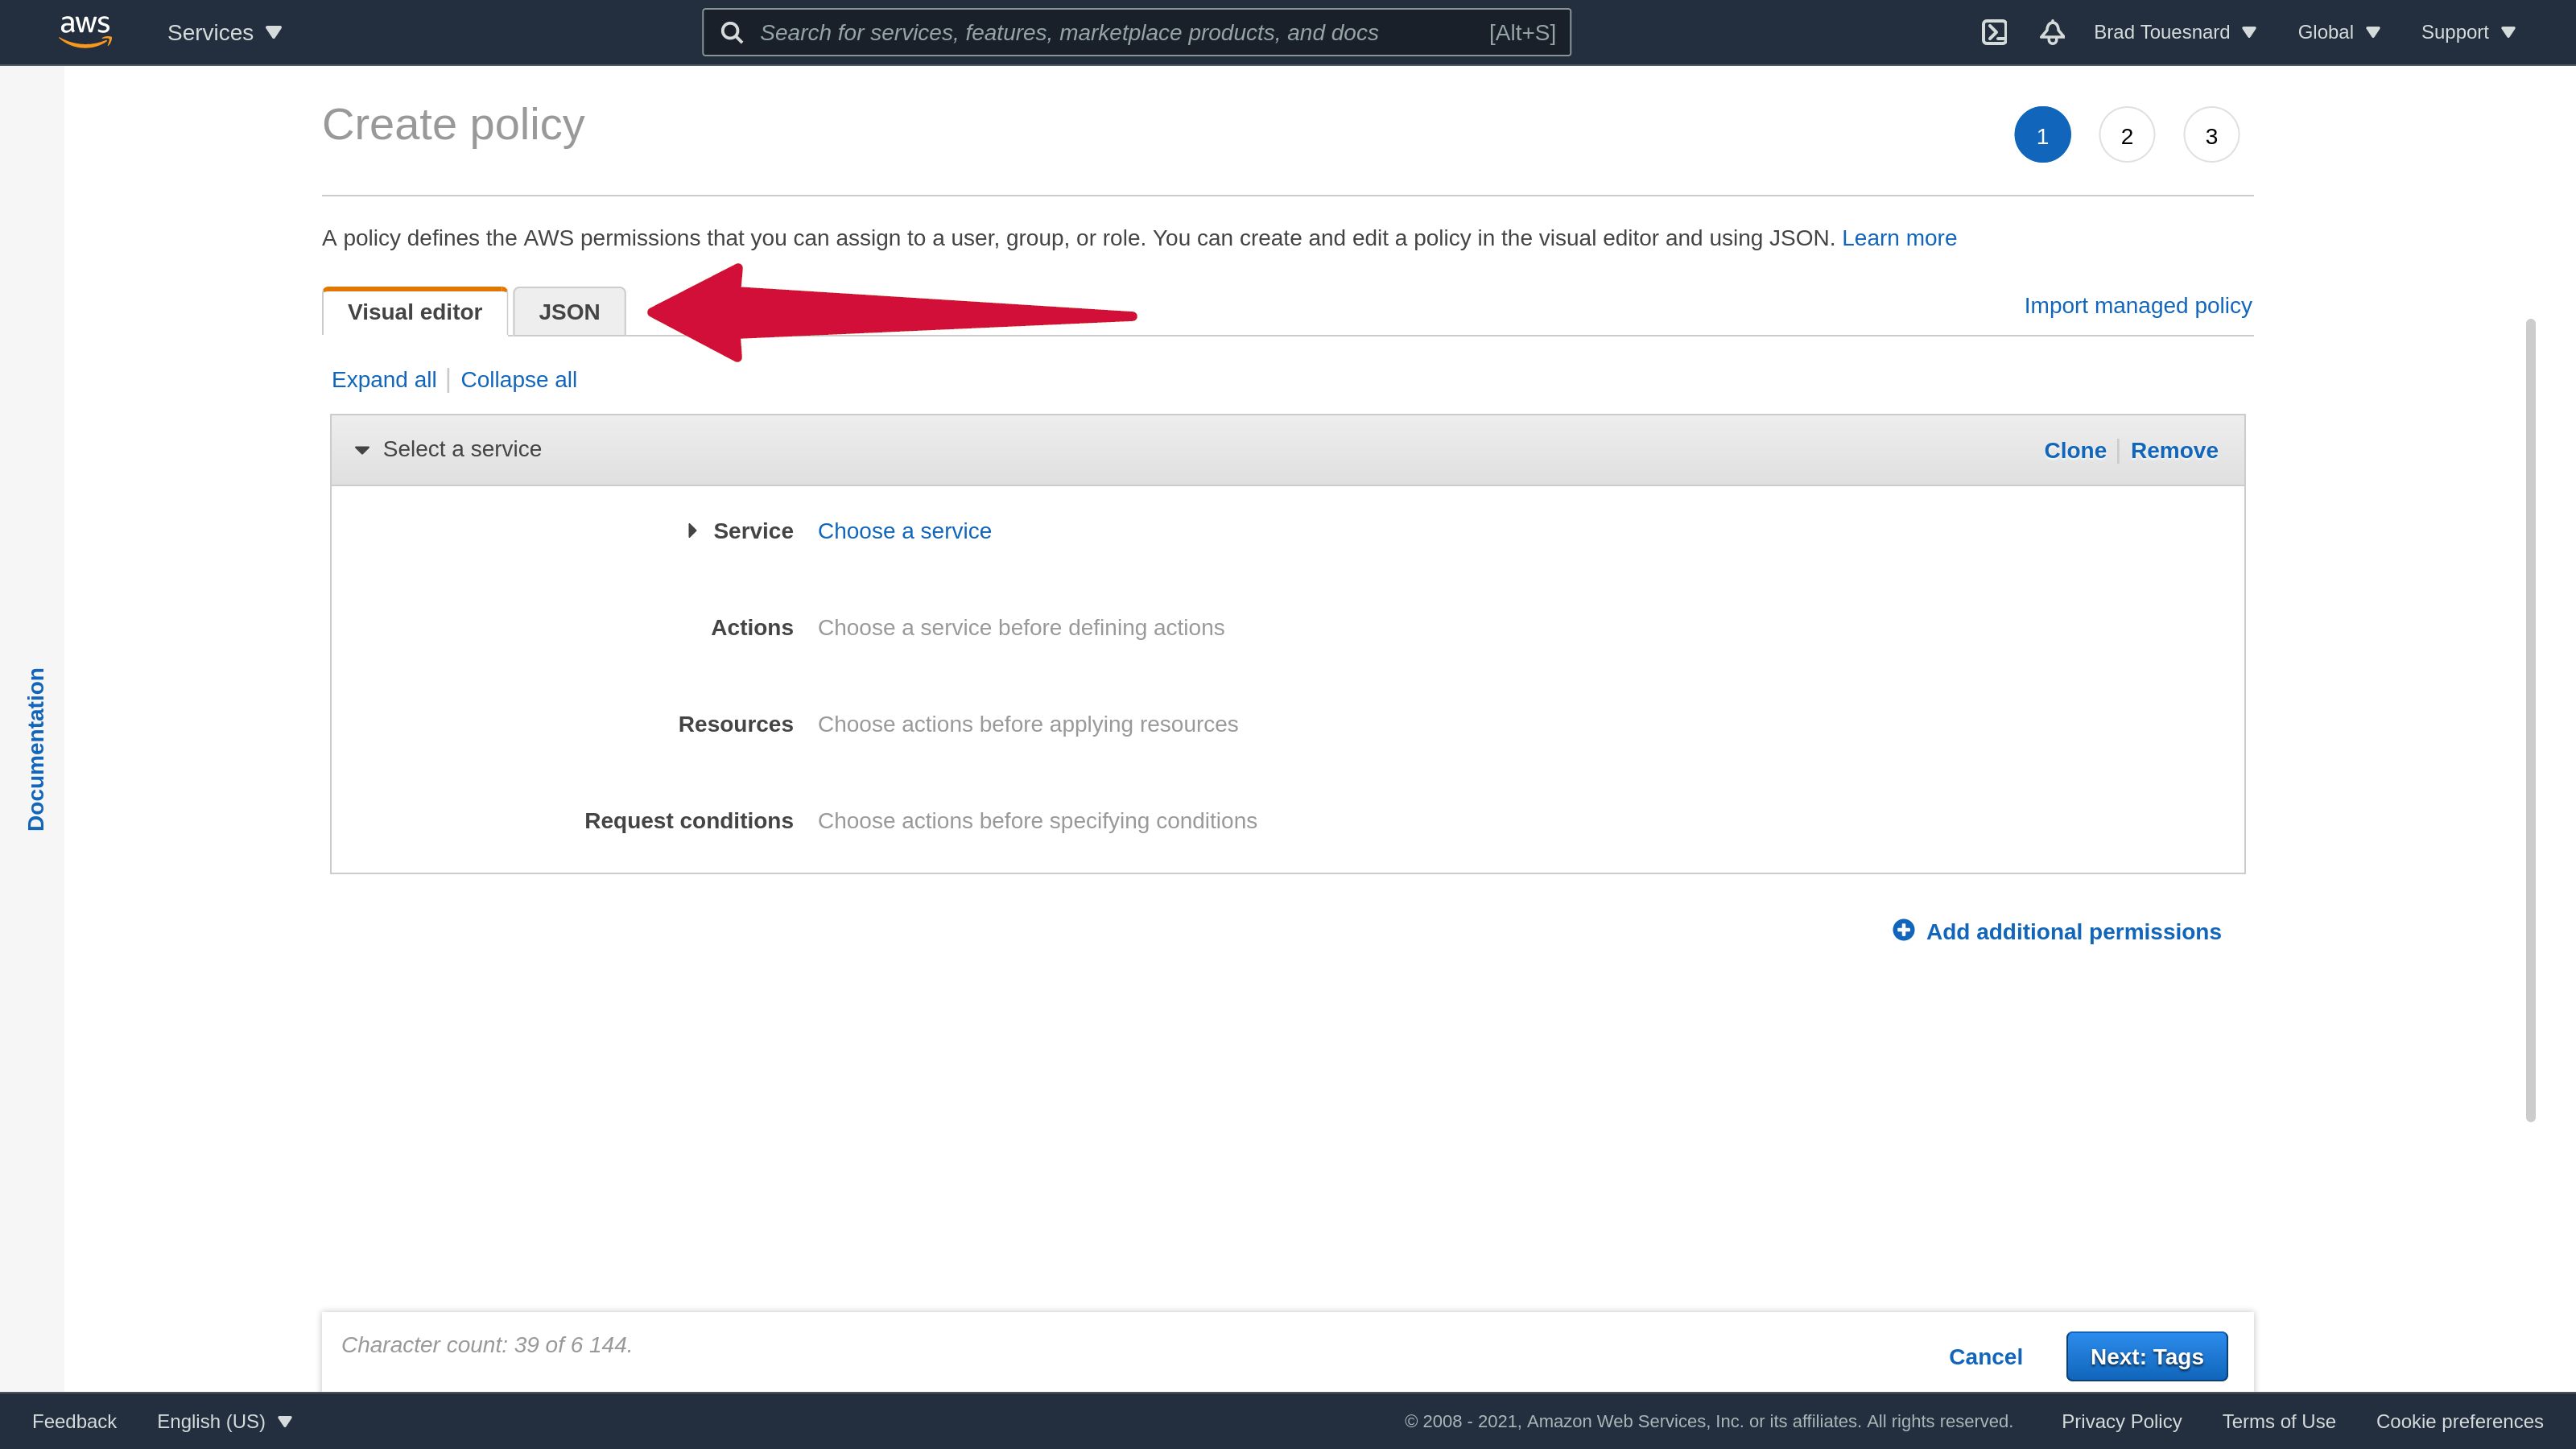
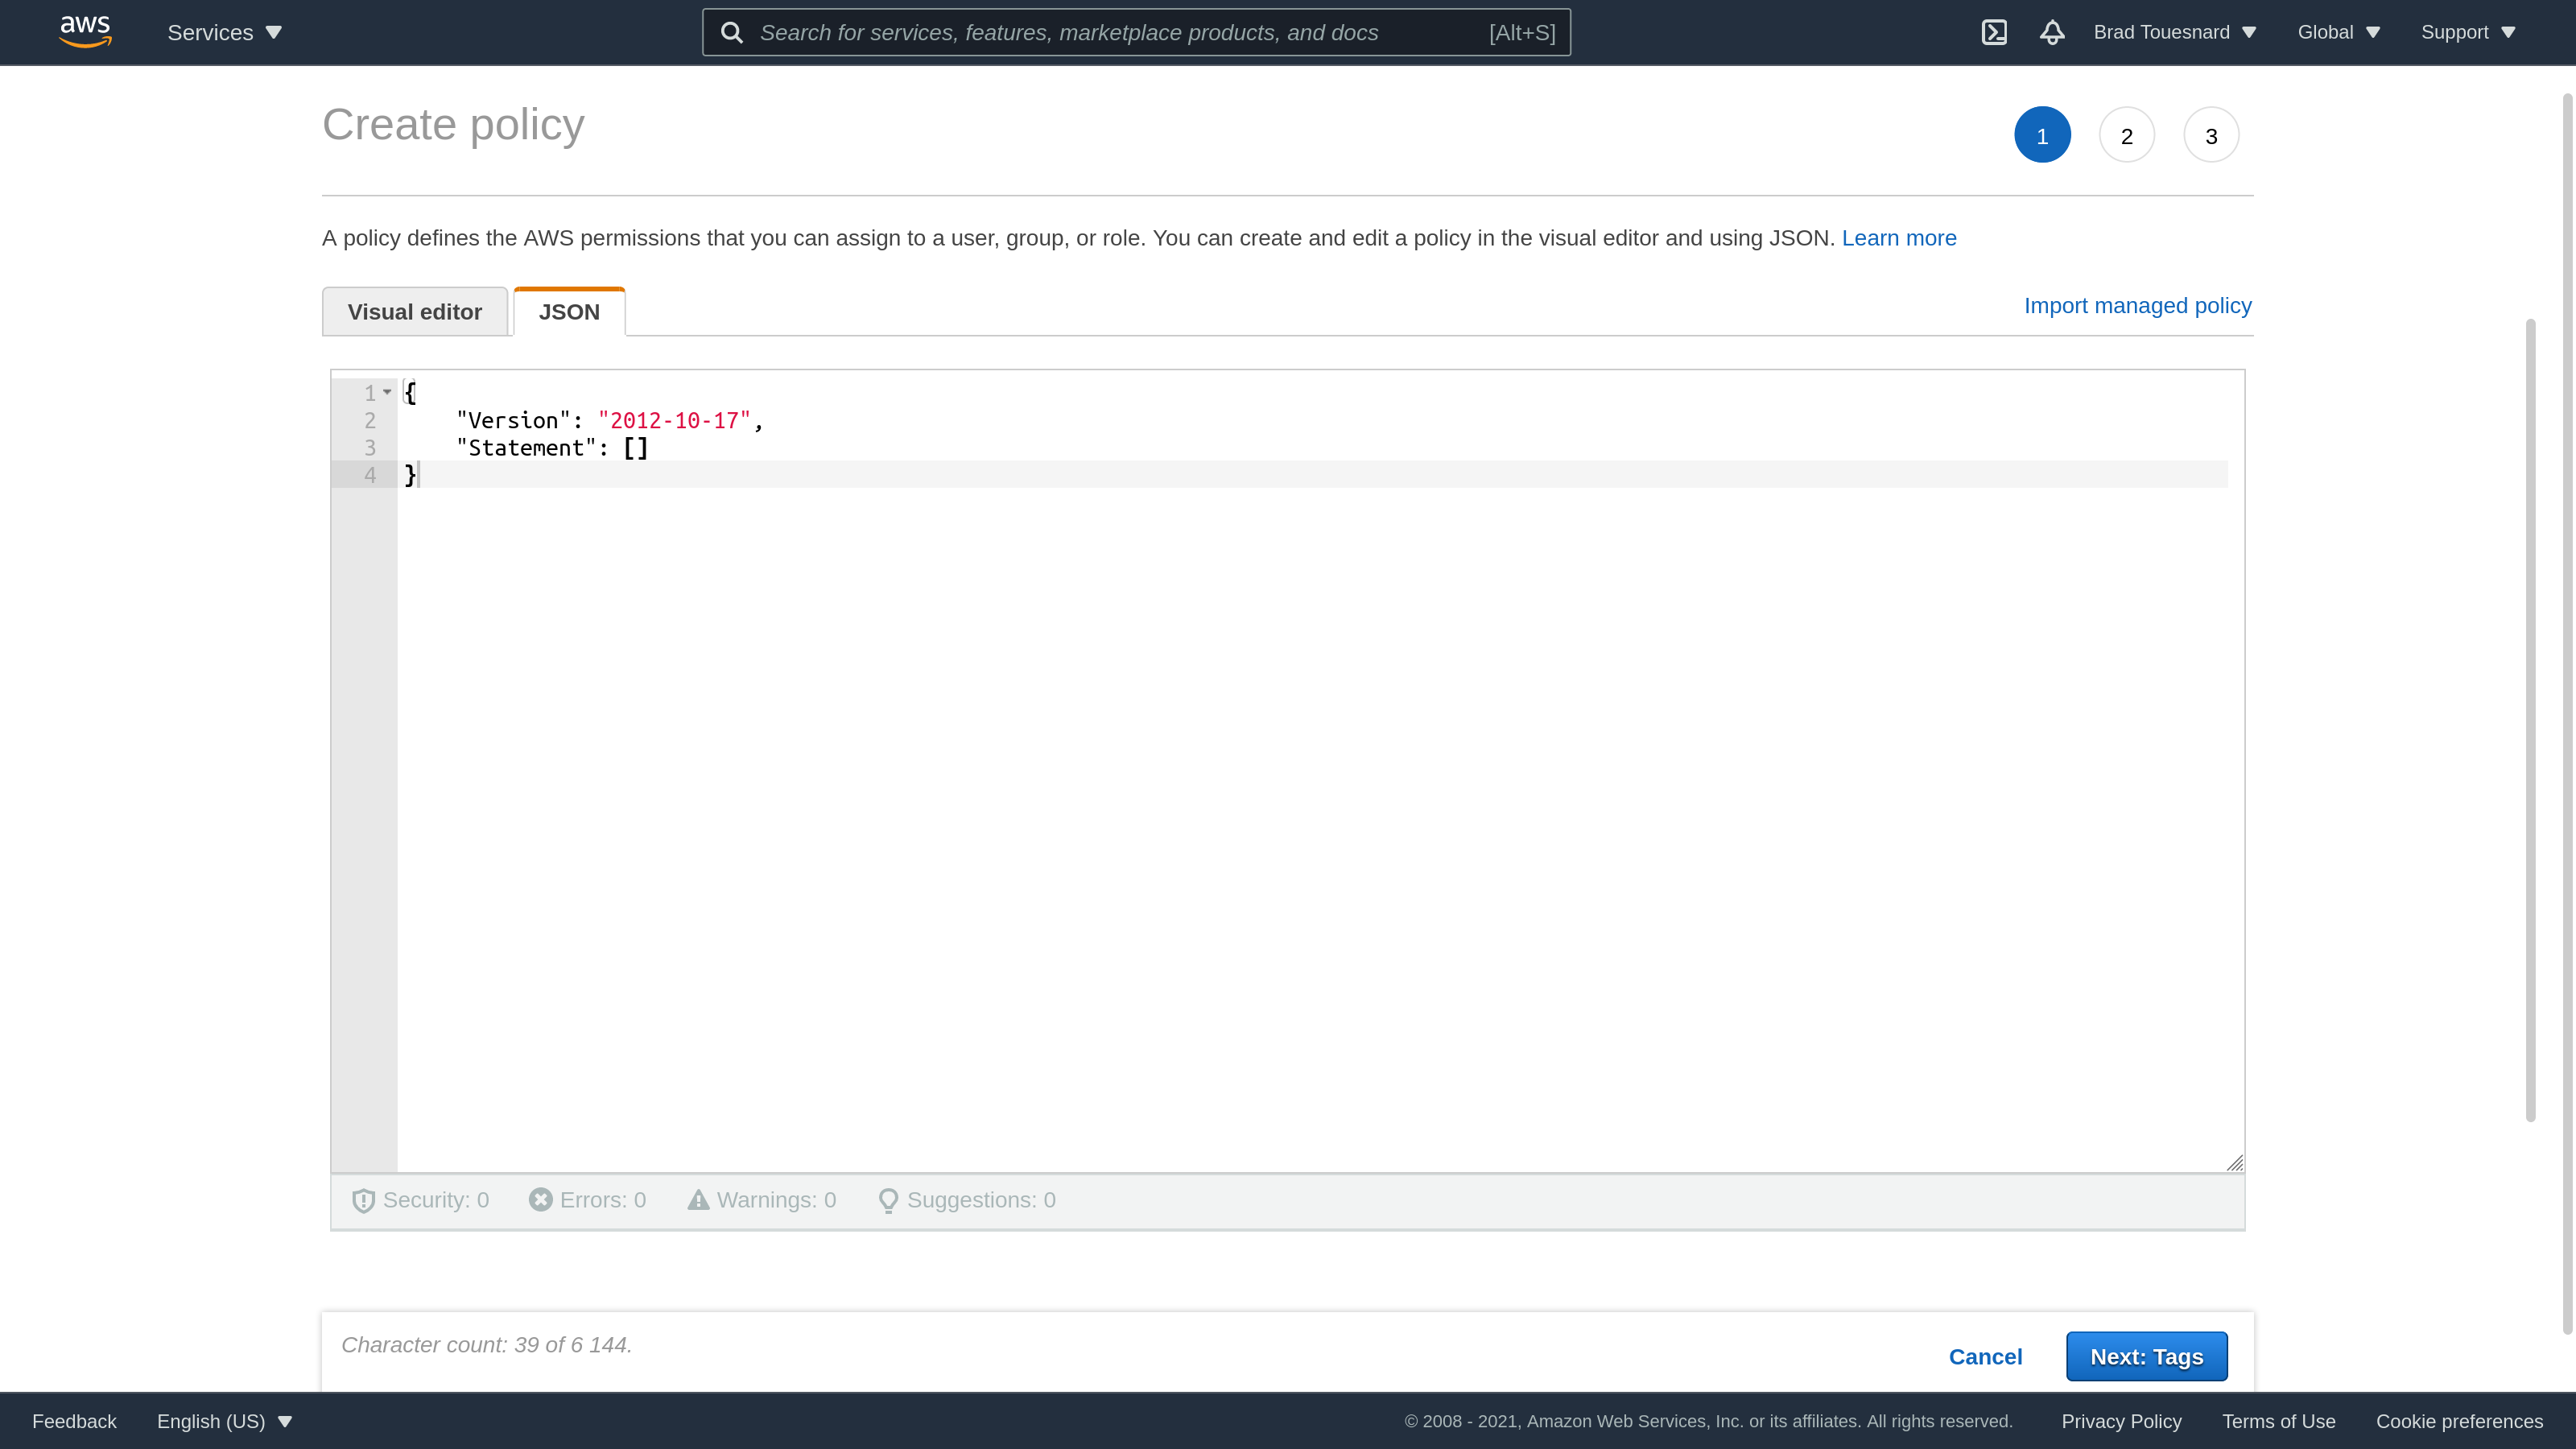
Delete what’s there, and paste the following JSON notation:
{
  "Version": "2012-10-17",
  "Statement": [
    {
      "Action": [
        "s3:GetObject*",
        "s3:GetBucket*",
        "s3:List*",
        "s3:DeleteObject*",
        "s3:PutObject",
        "s3:Abort*"
      ],
      "Resource": "*",
      "Effect": "Allow"
    }
  ]
}
If your JSON is correct, you will see no errors reported in the status bar at the bottom of the screen, and you can click Next: Tags.
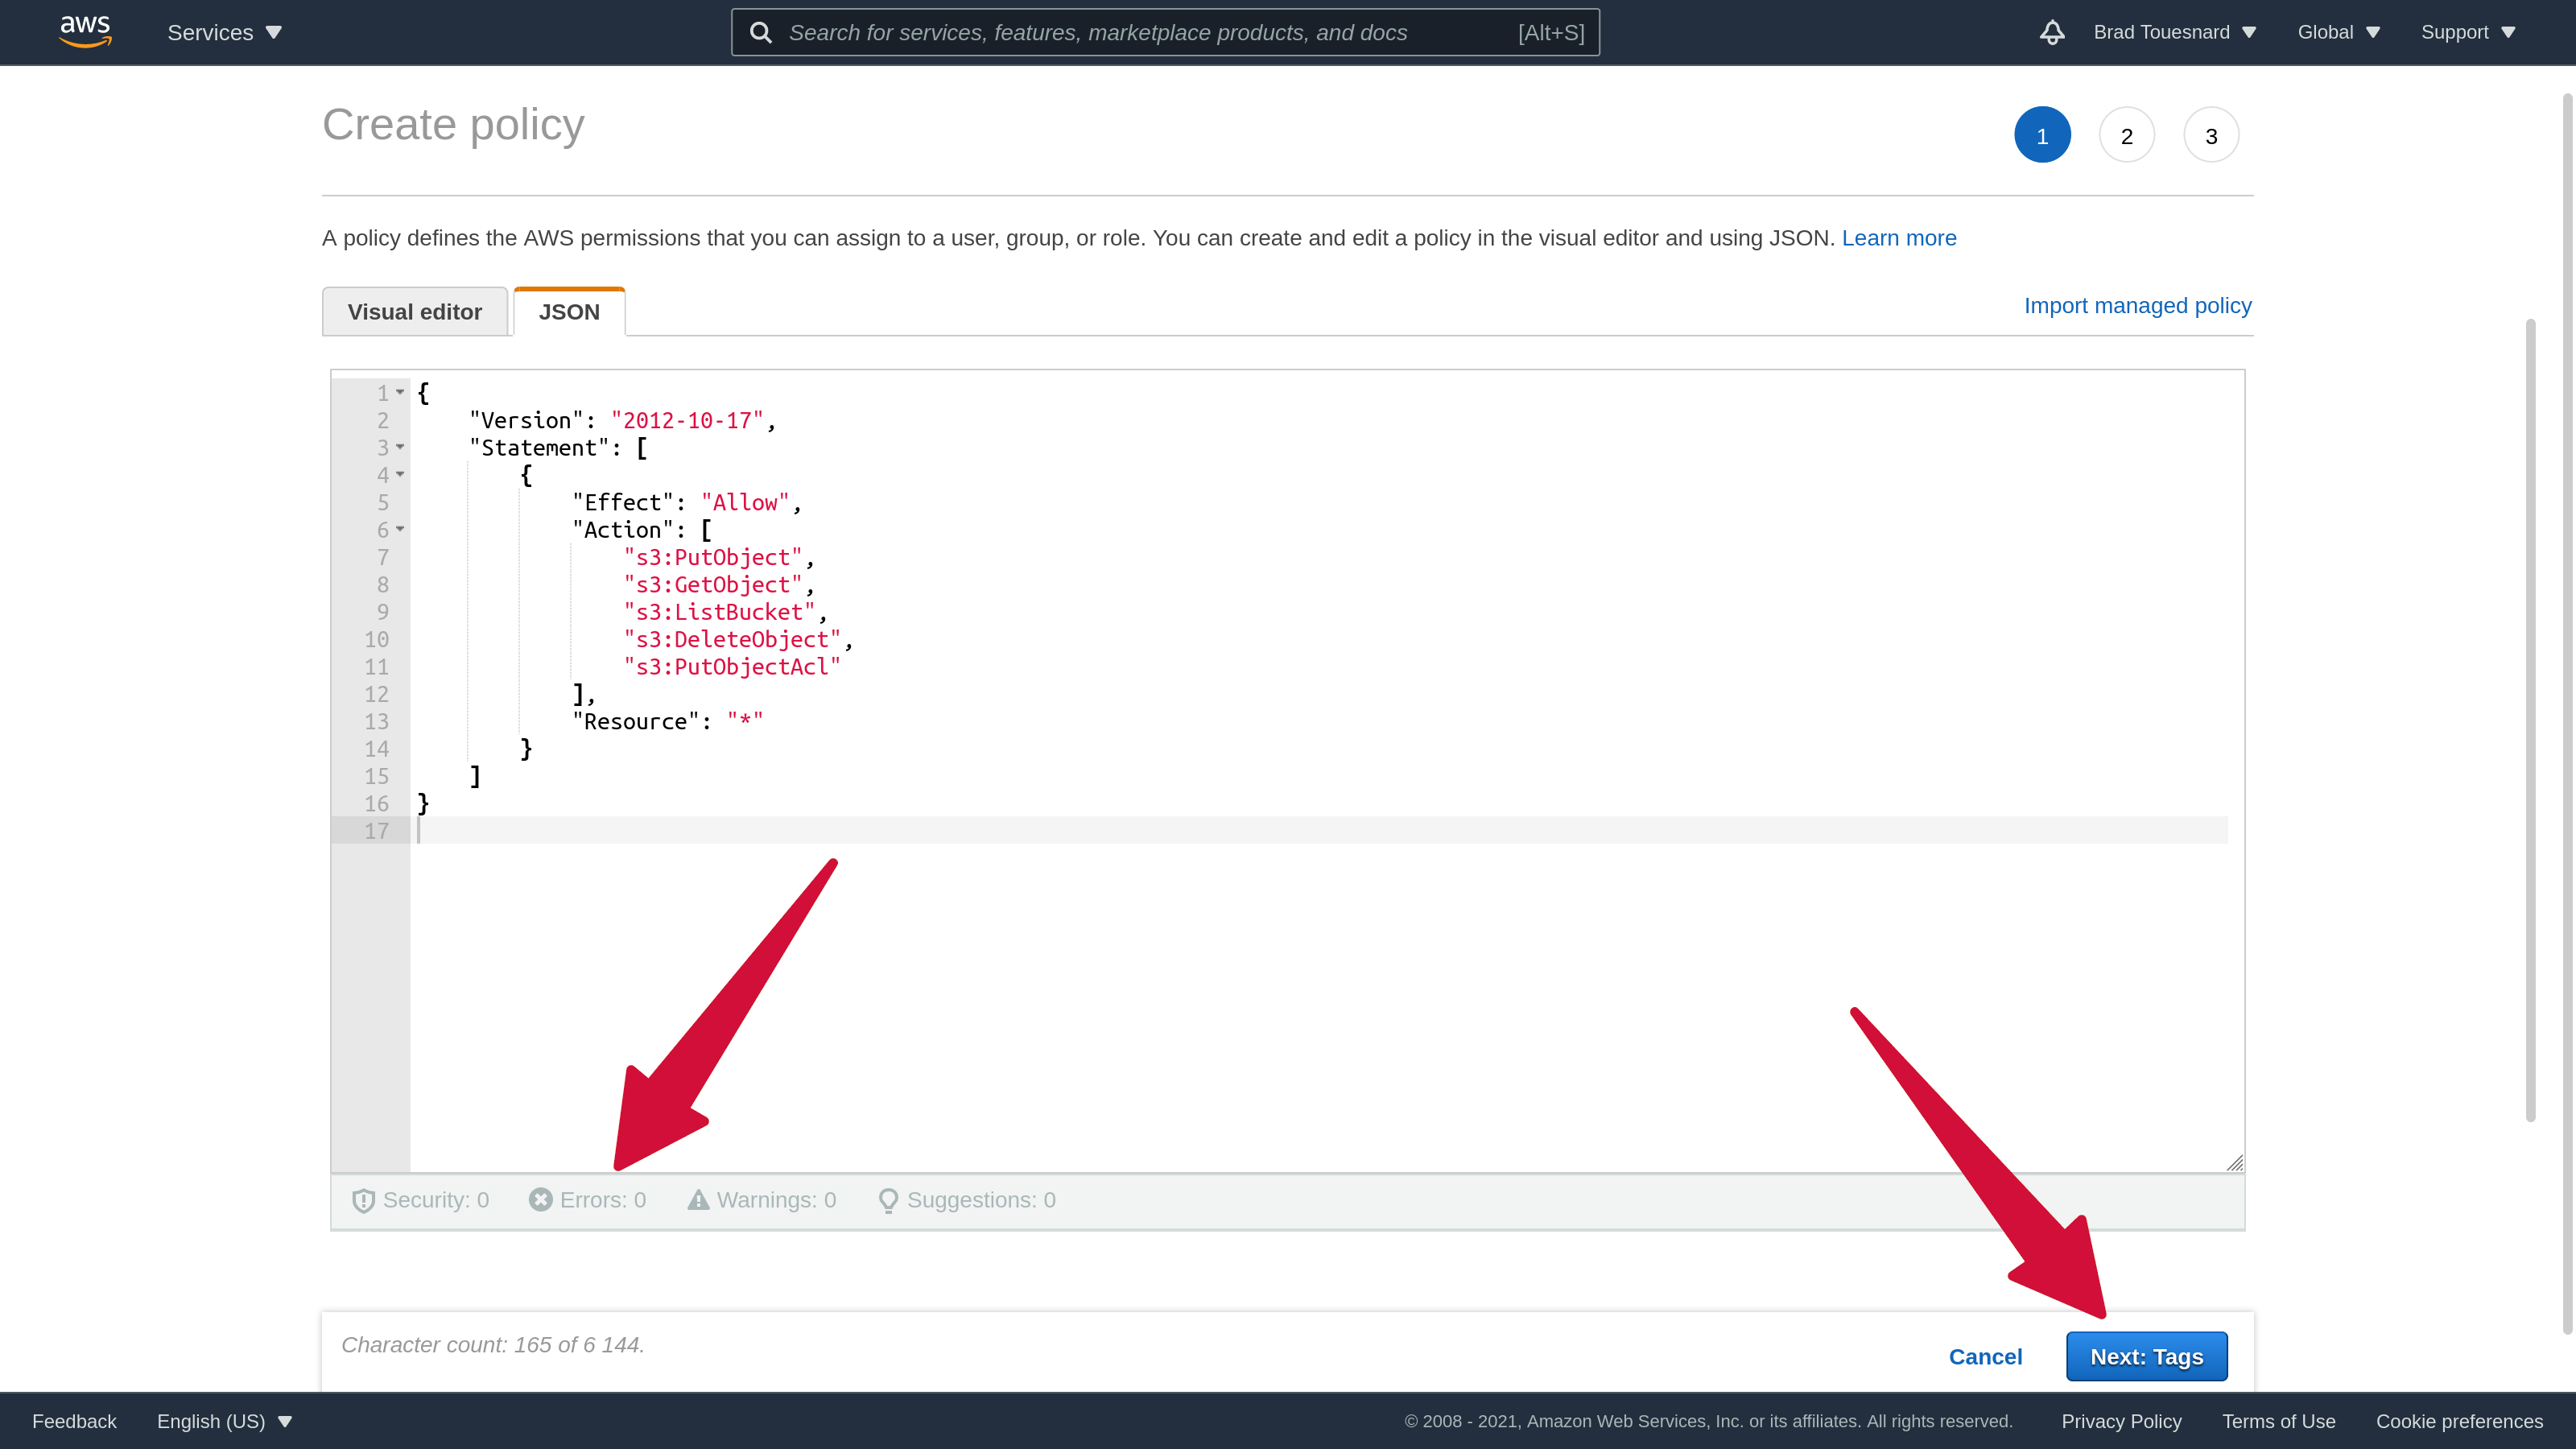
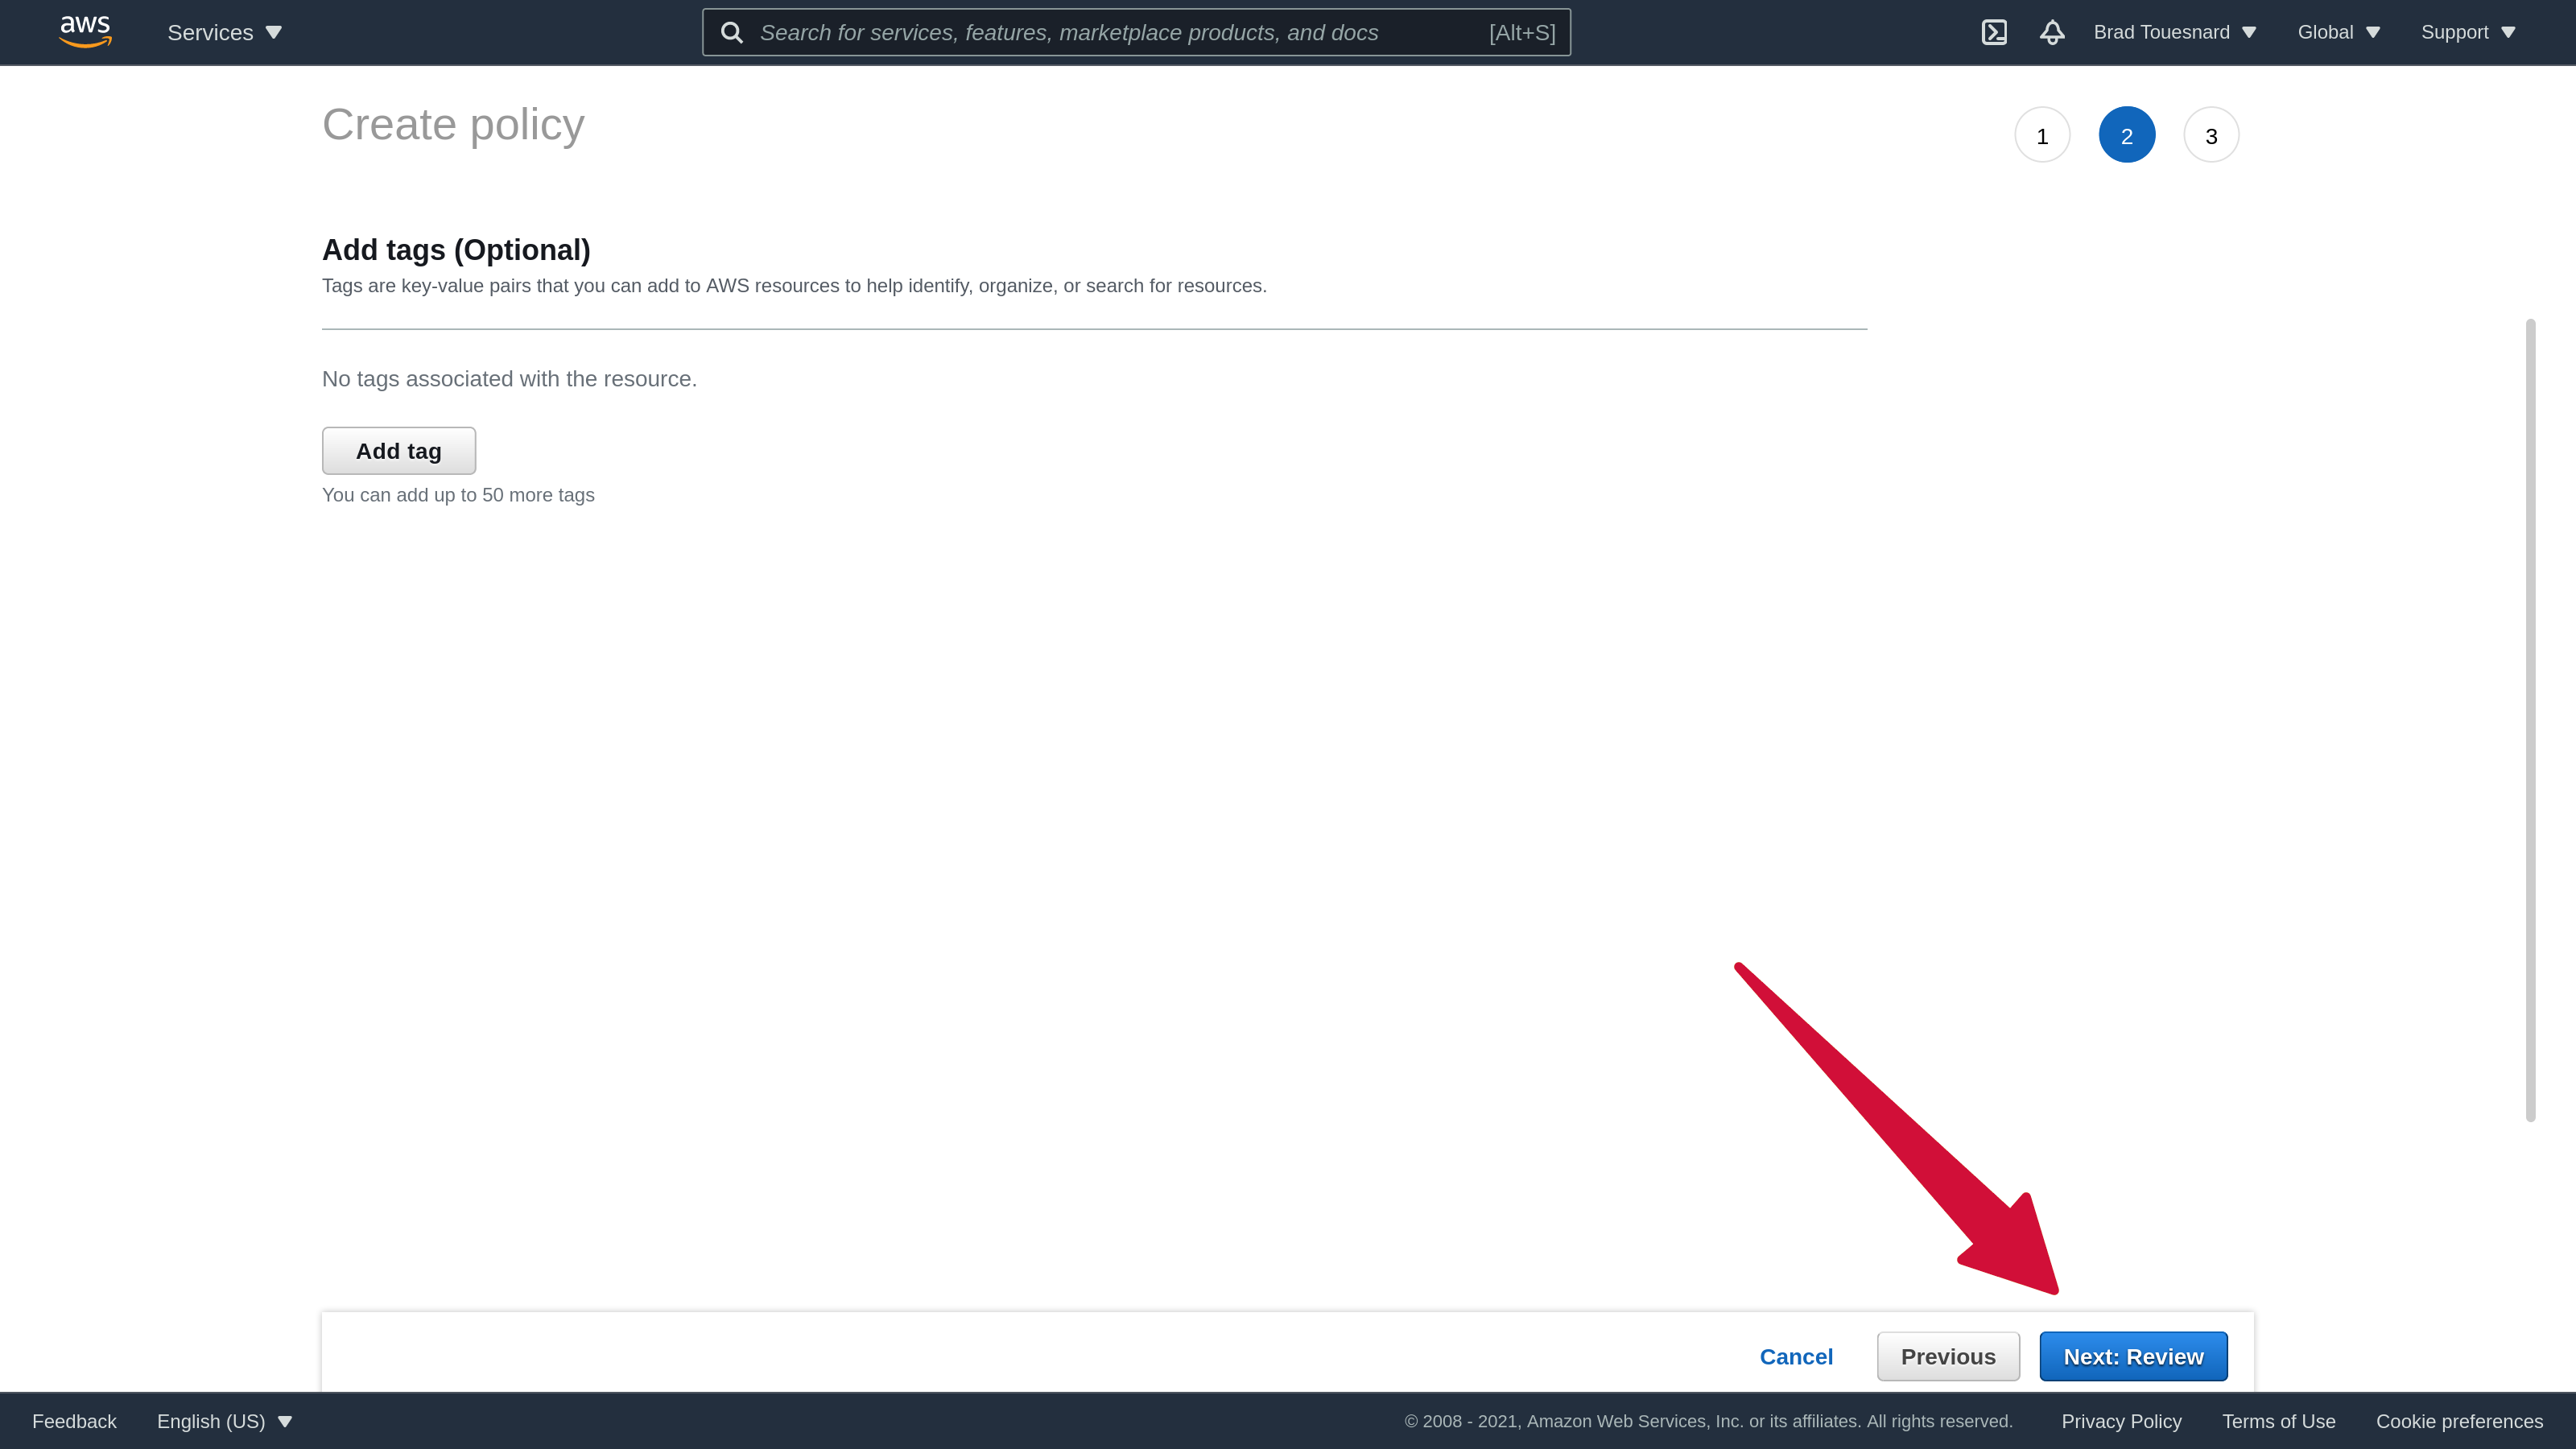
Adding tags is optional, so you can click Next: Review to finalize your policy.
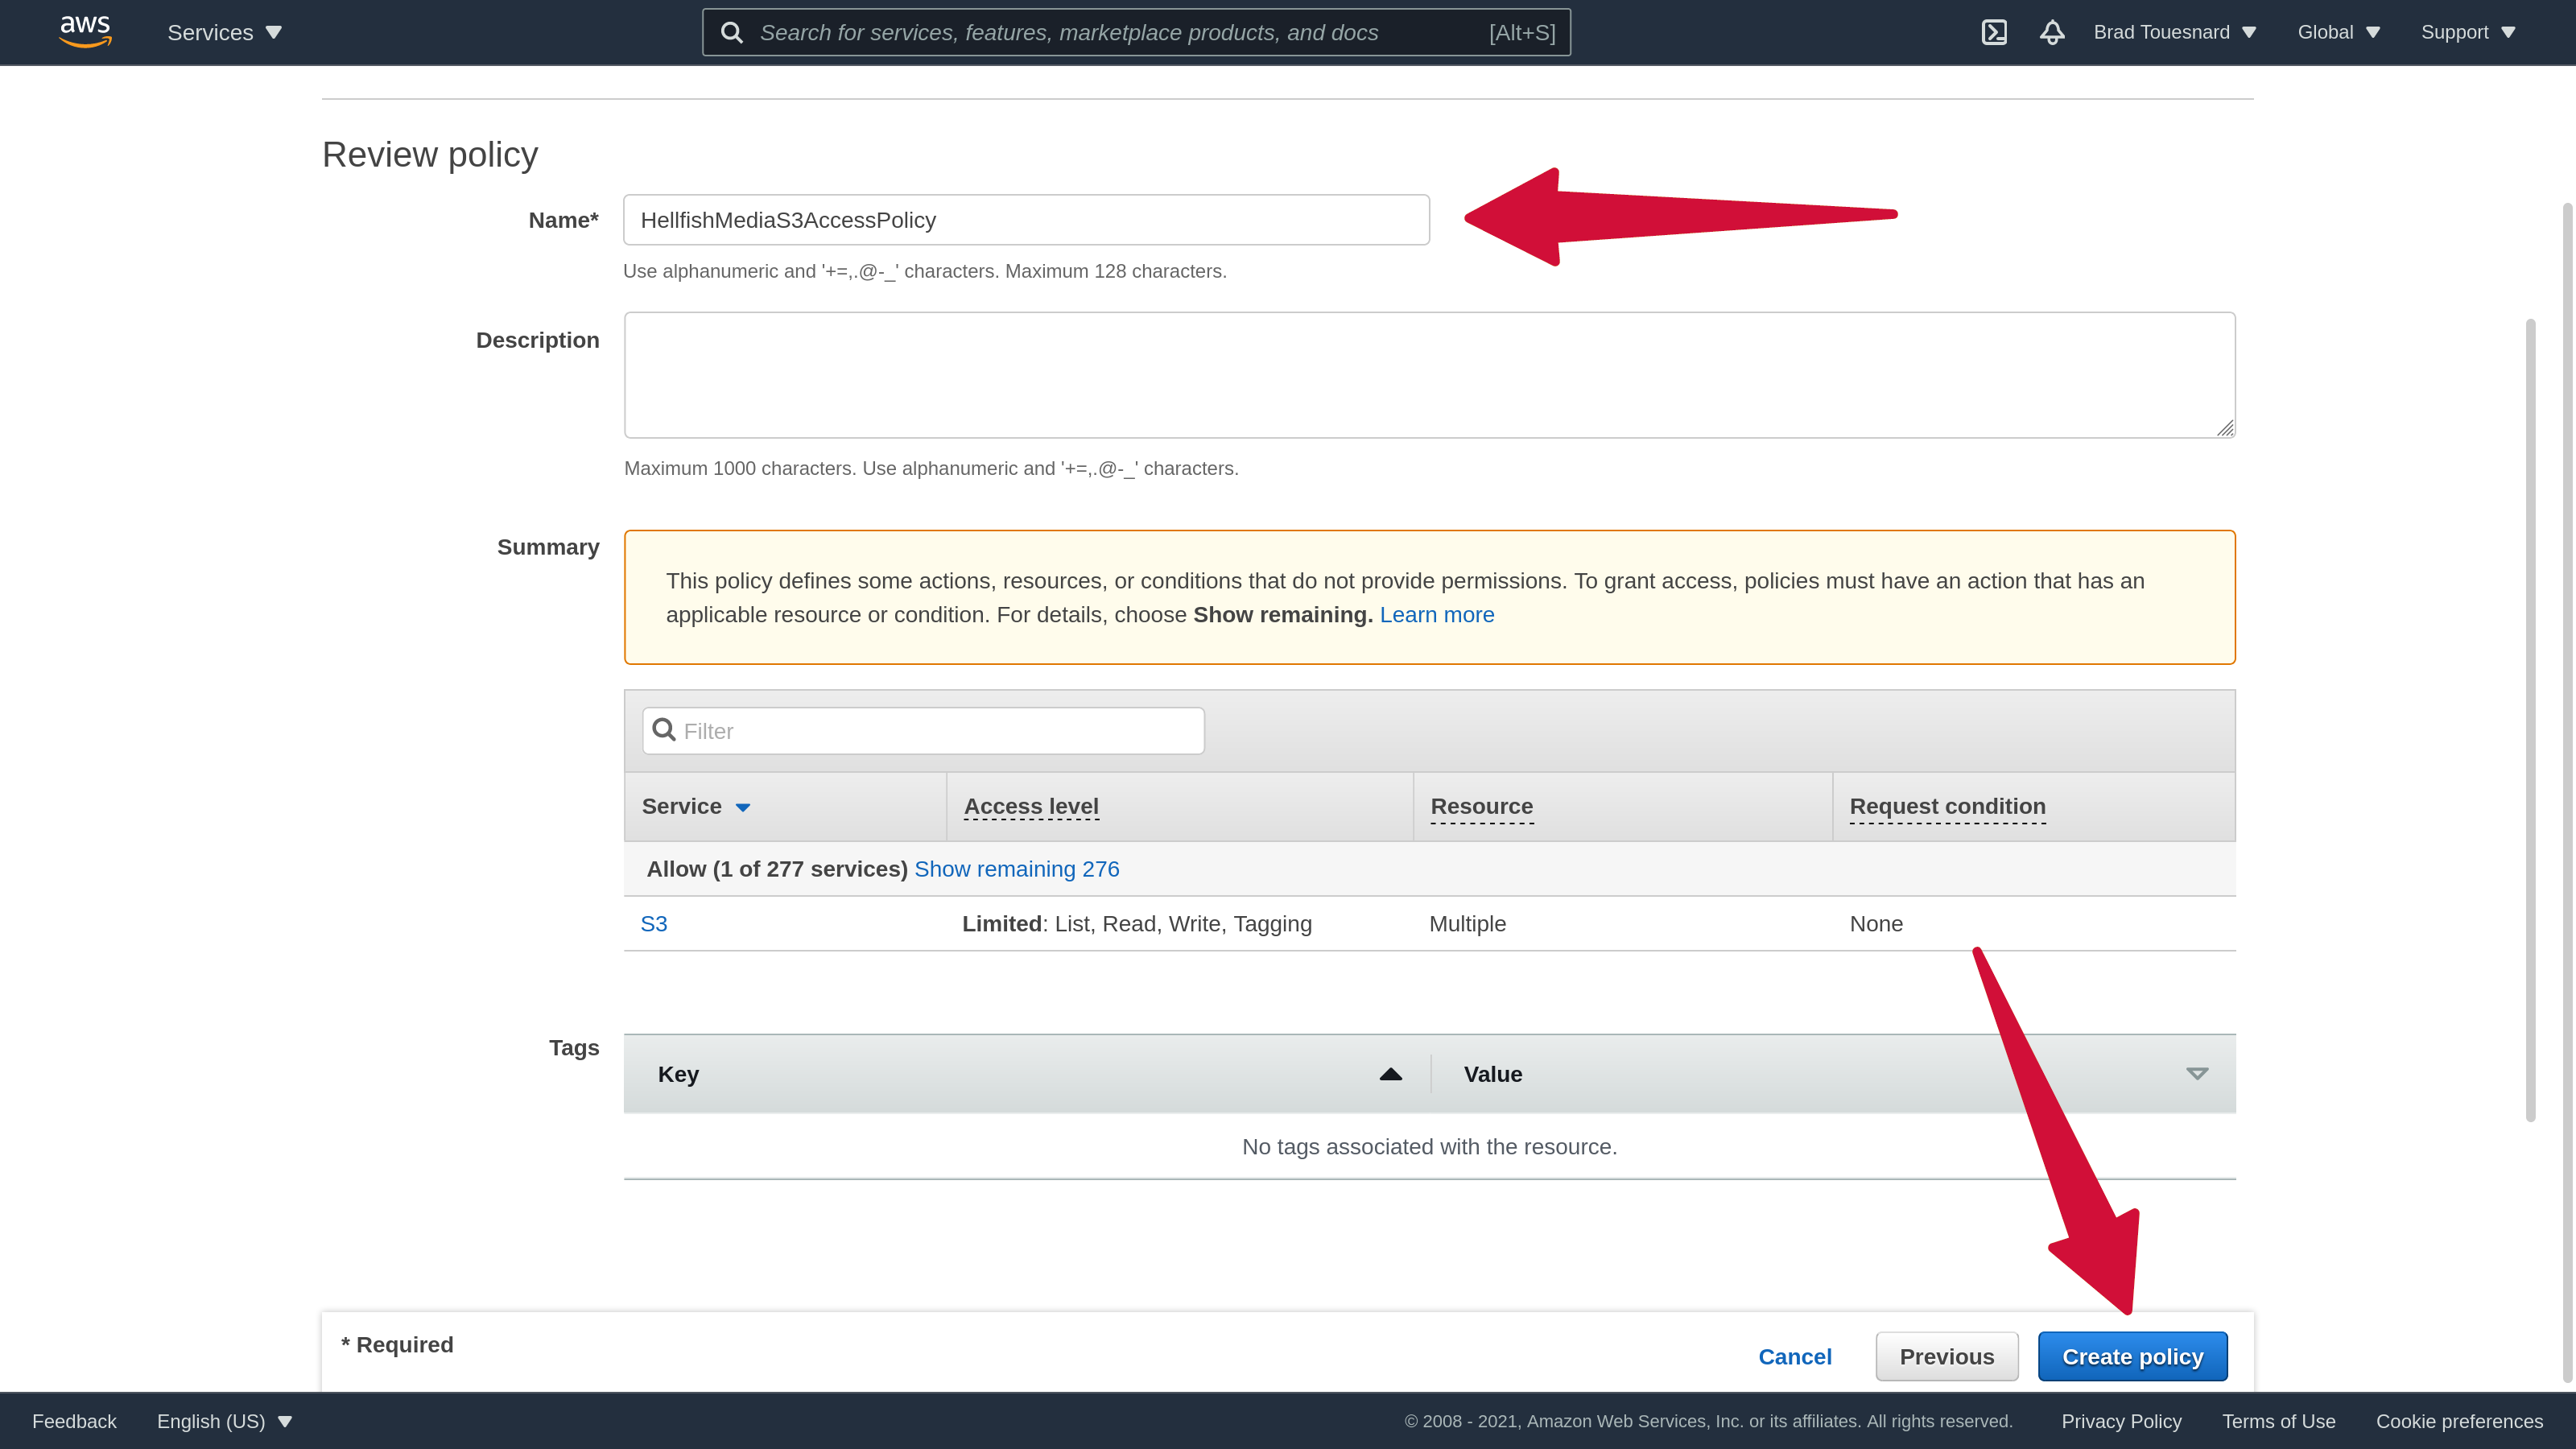
On the “Review policy” page, give your policy a name you will remember, ideally related to the user you’re creating the policy for. This makes it easier to attach to the user later. You can leave everything else as is and click Create policy.
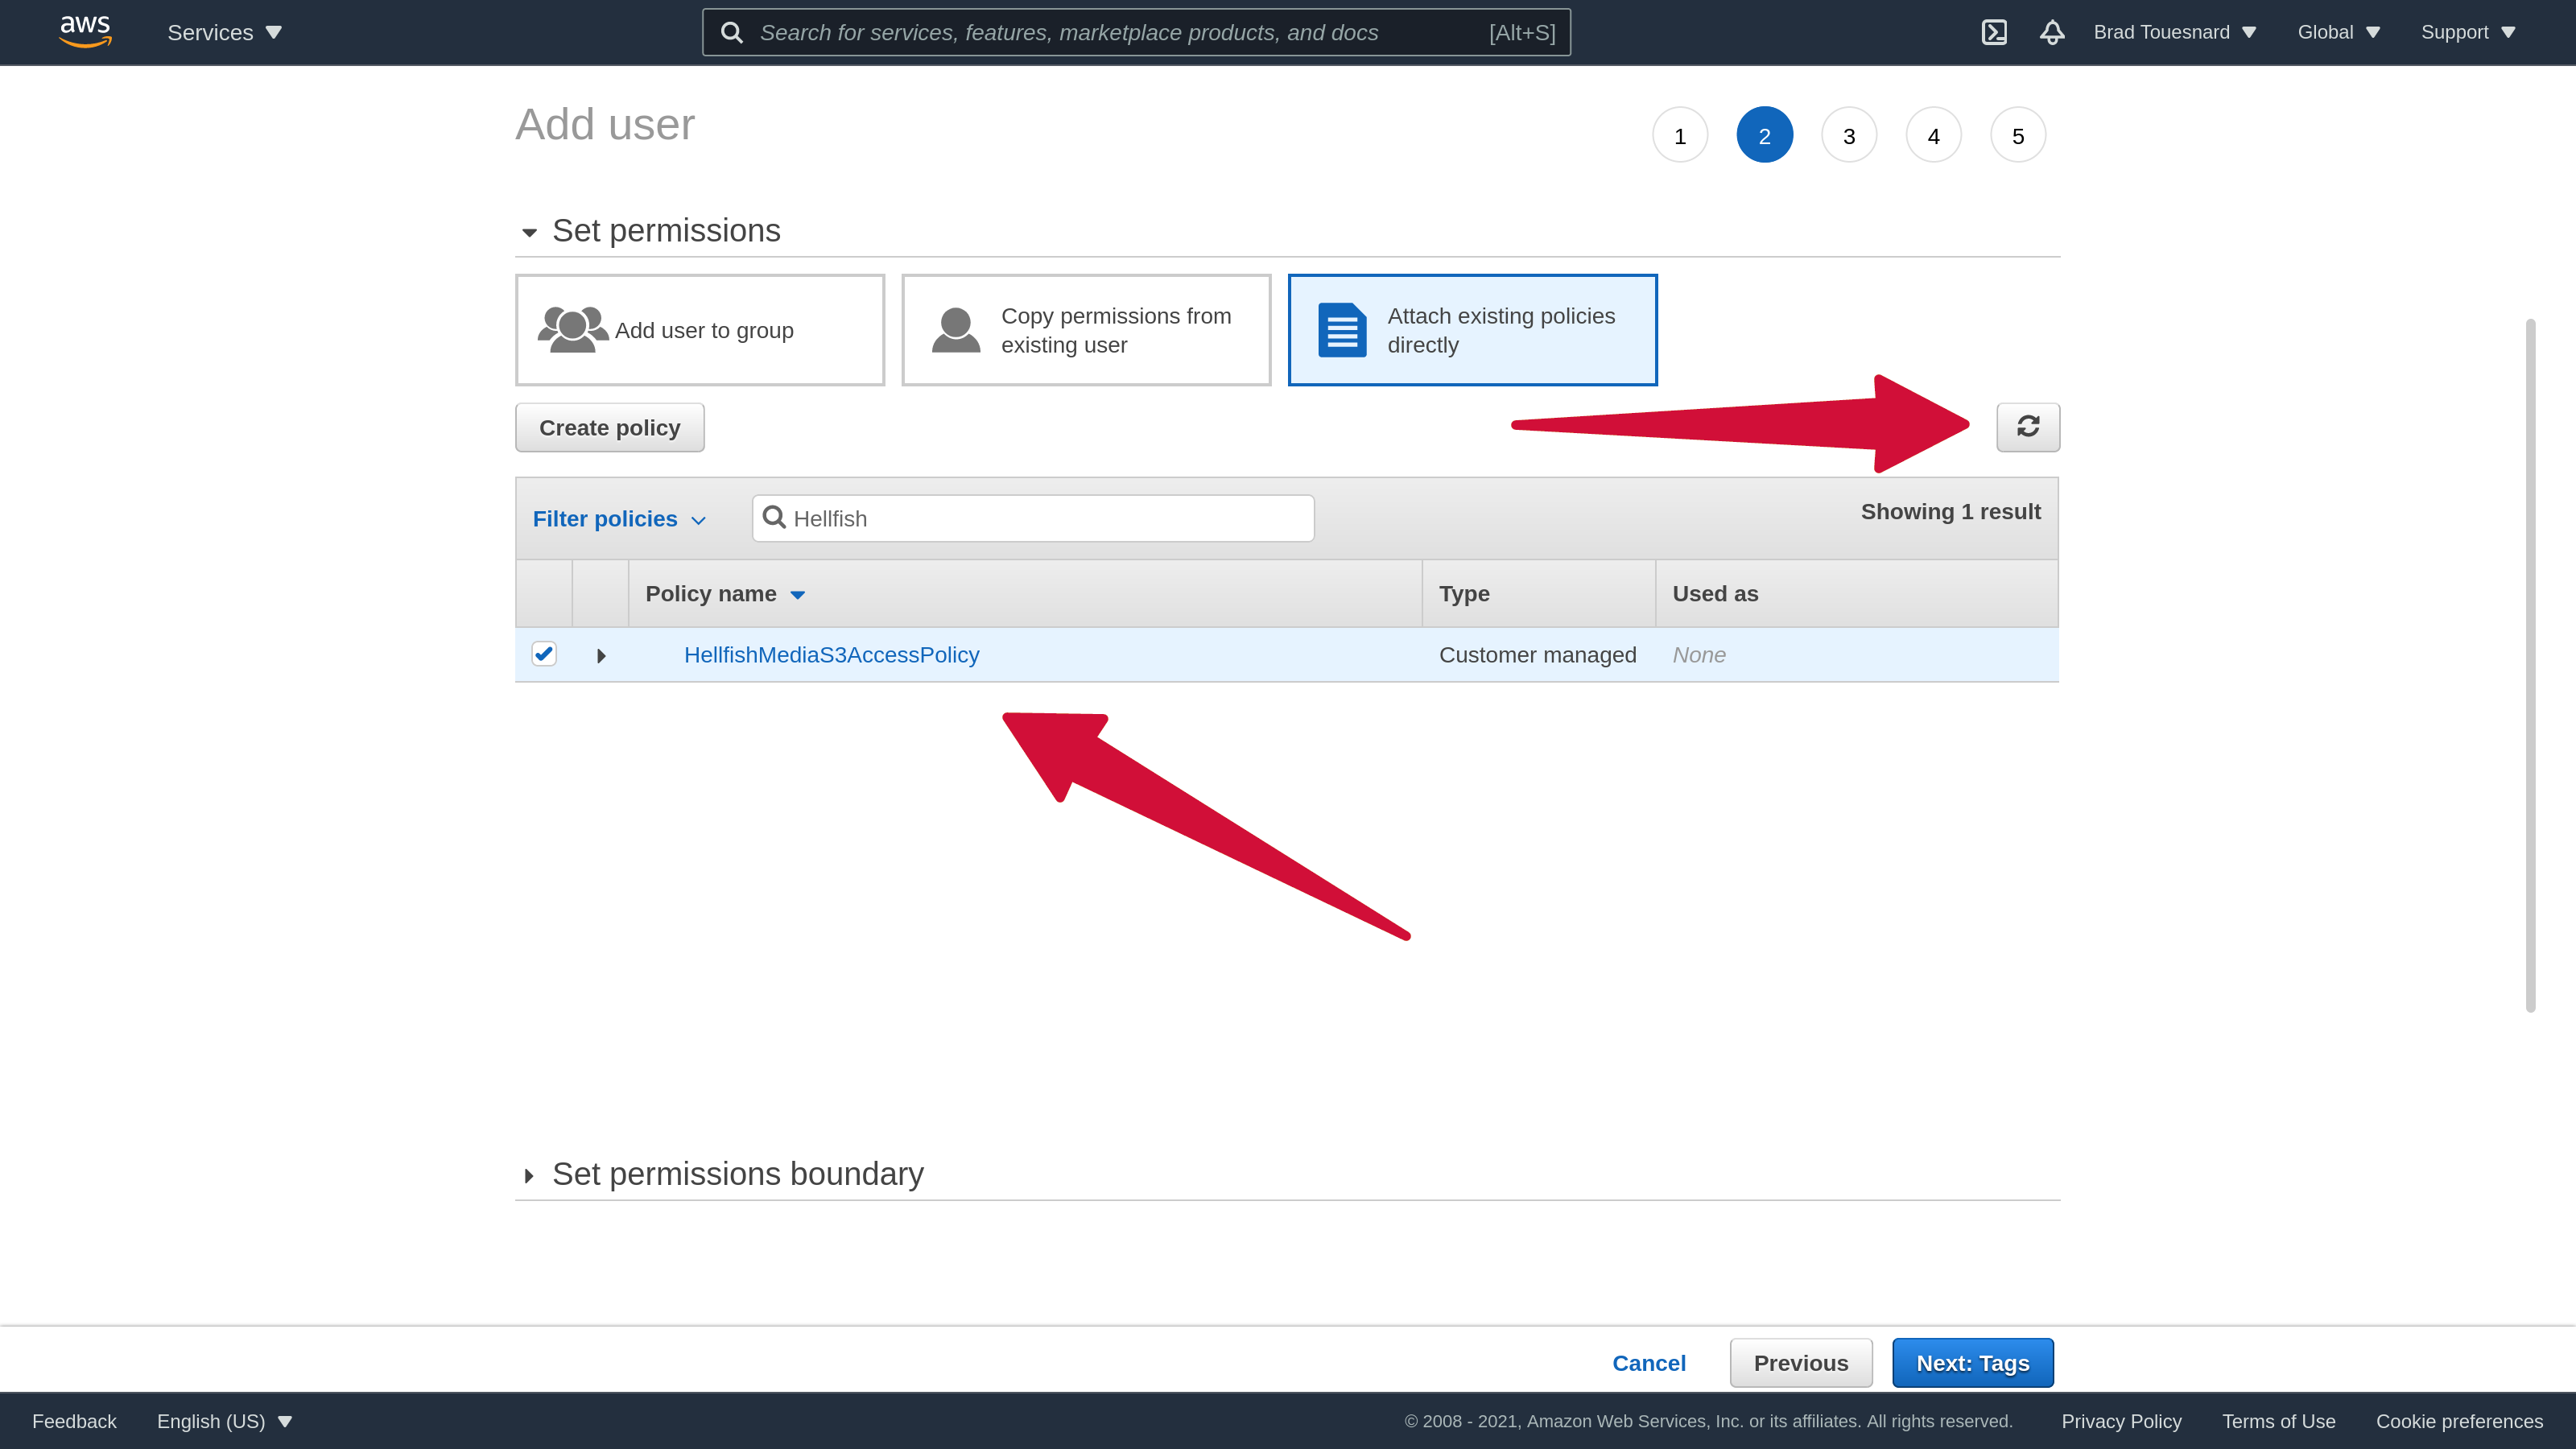
Once you’ve created the policy, go back to your “Add user” window, and click the Refresh icon, to refresh the list of policies. Your newly created policy should appear on that list, which you can filter by searching for the policy name. Tick the checkbox next to the policy name to attach it to the user. Then click Next: Tags.
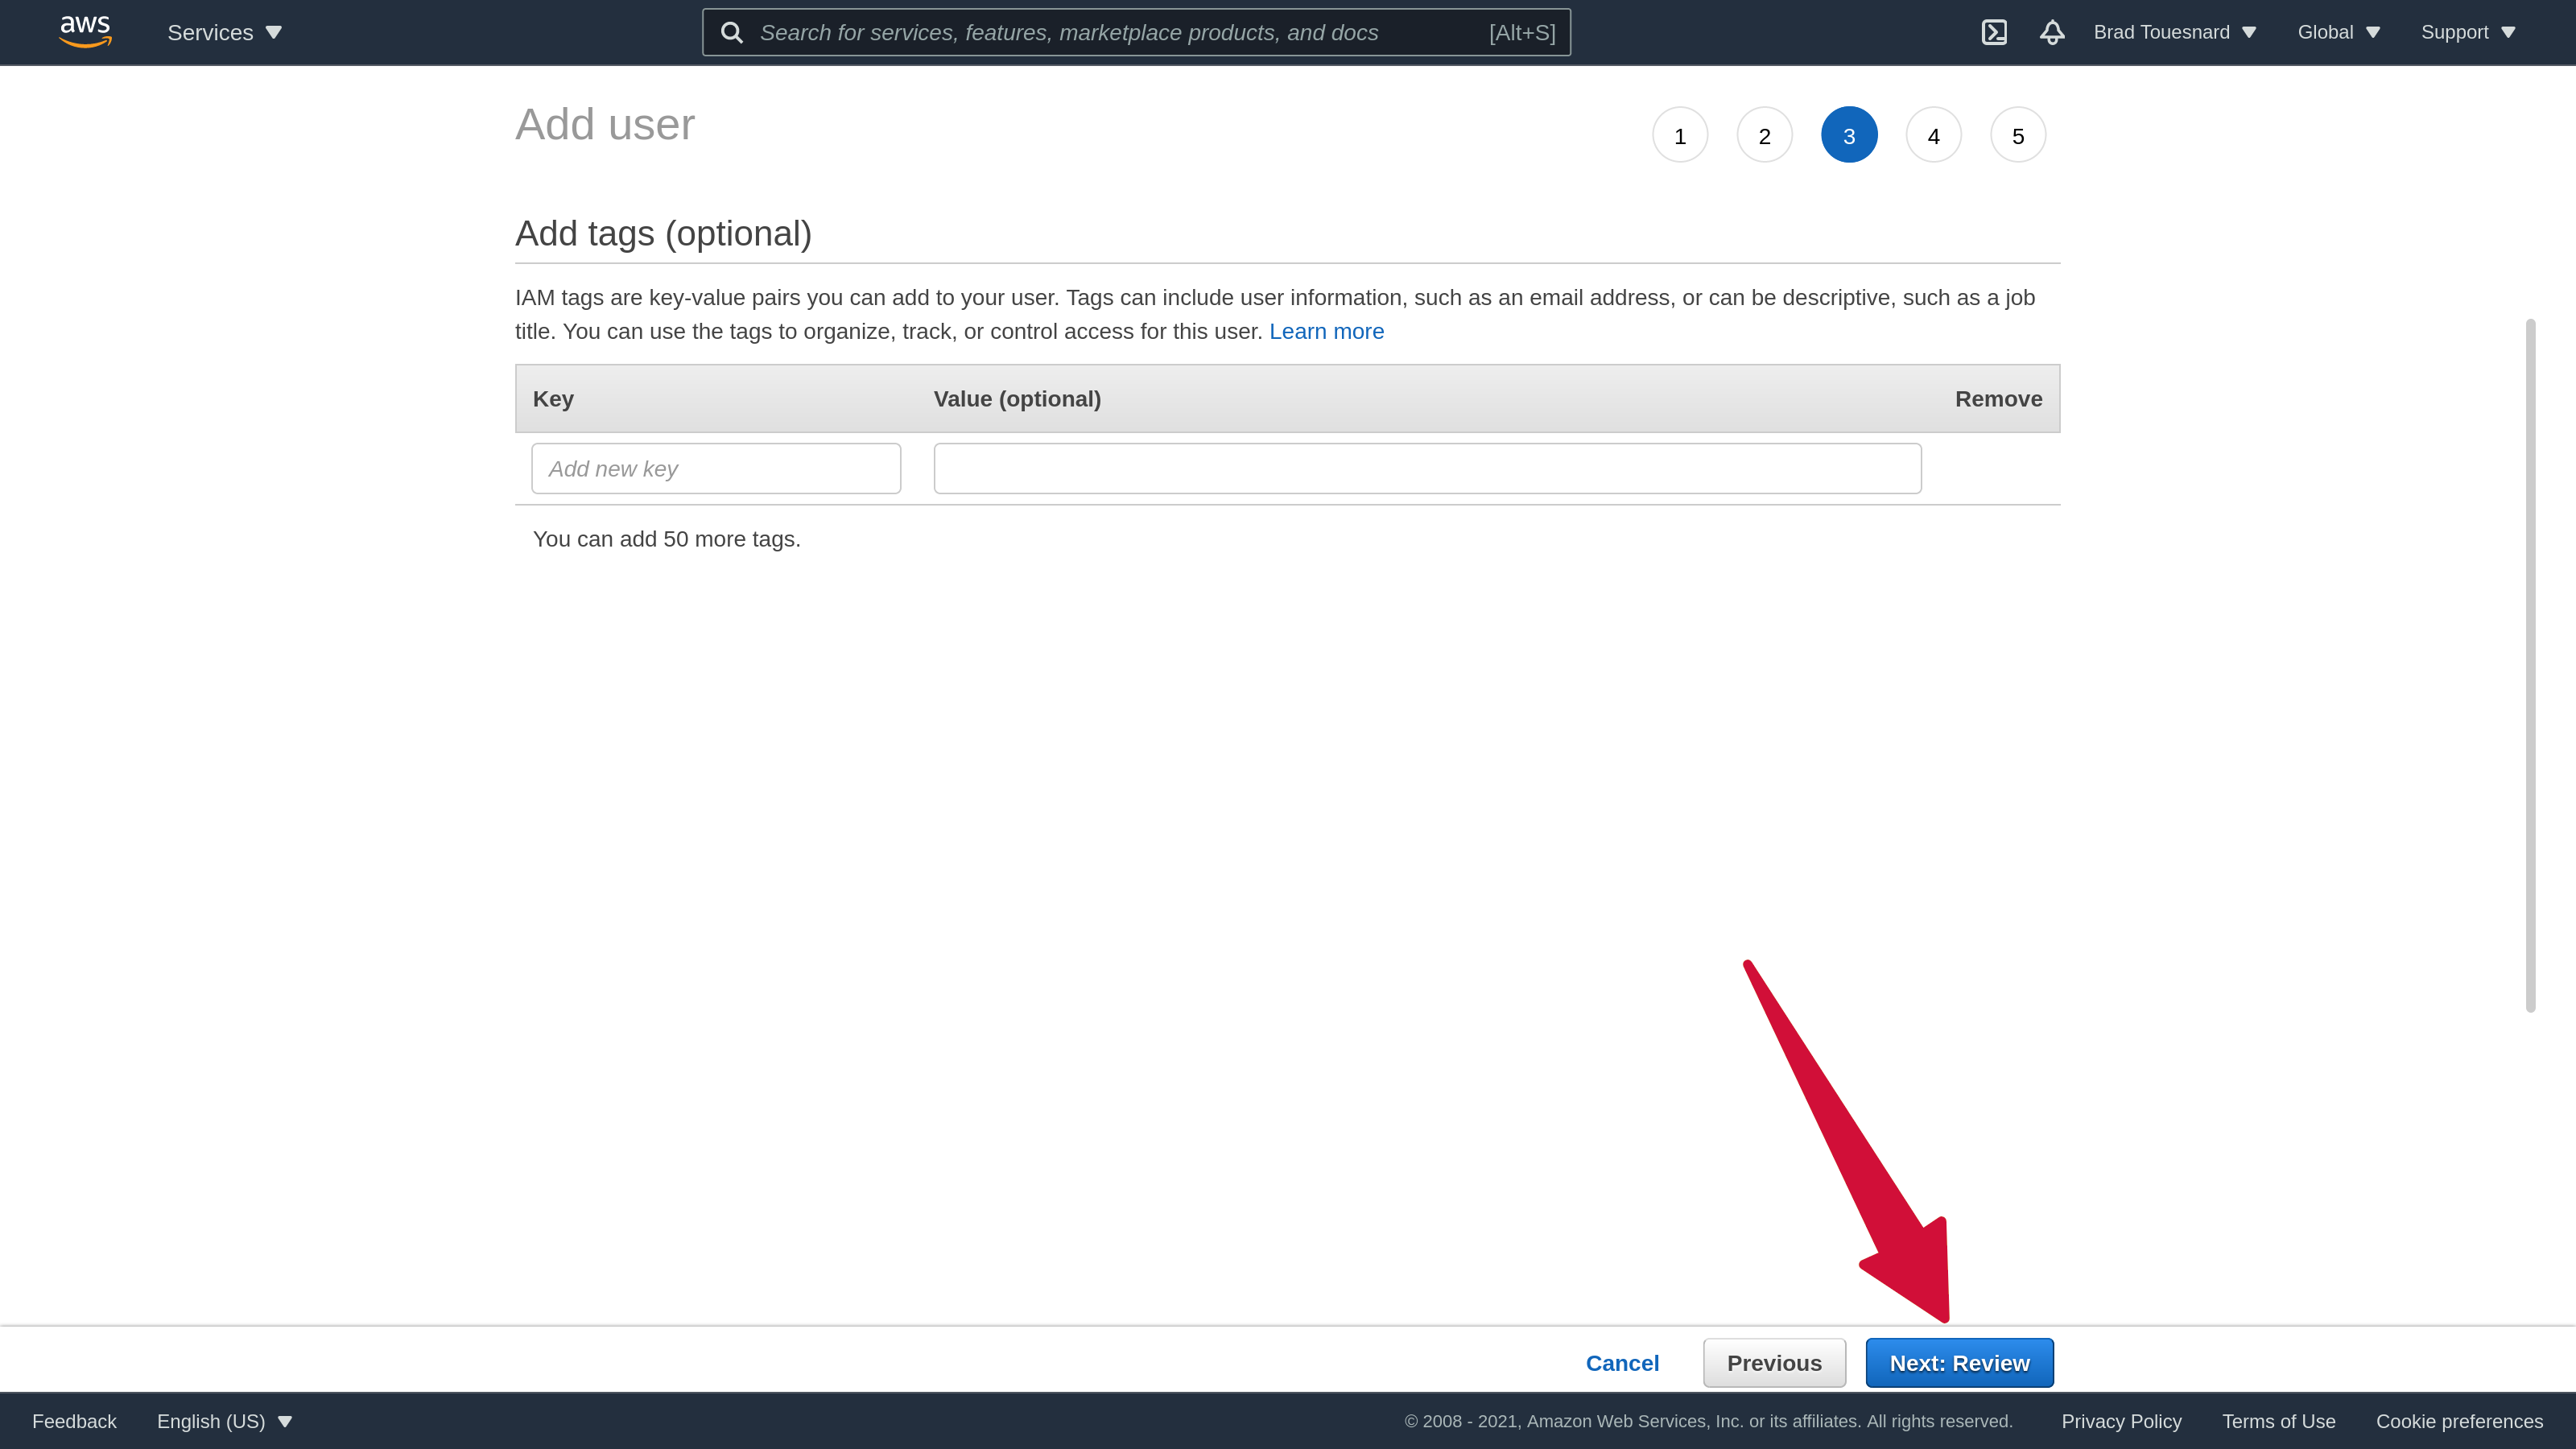
Optionally add any tags to help identify this user, then click Next: Review.
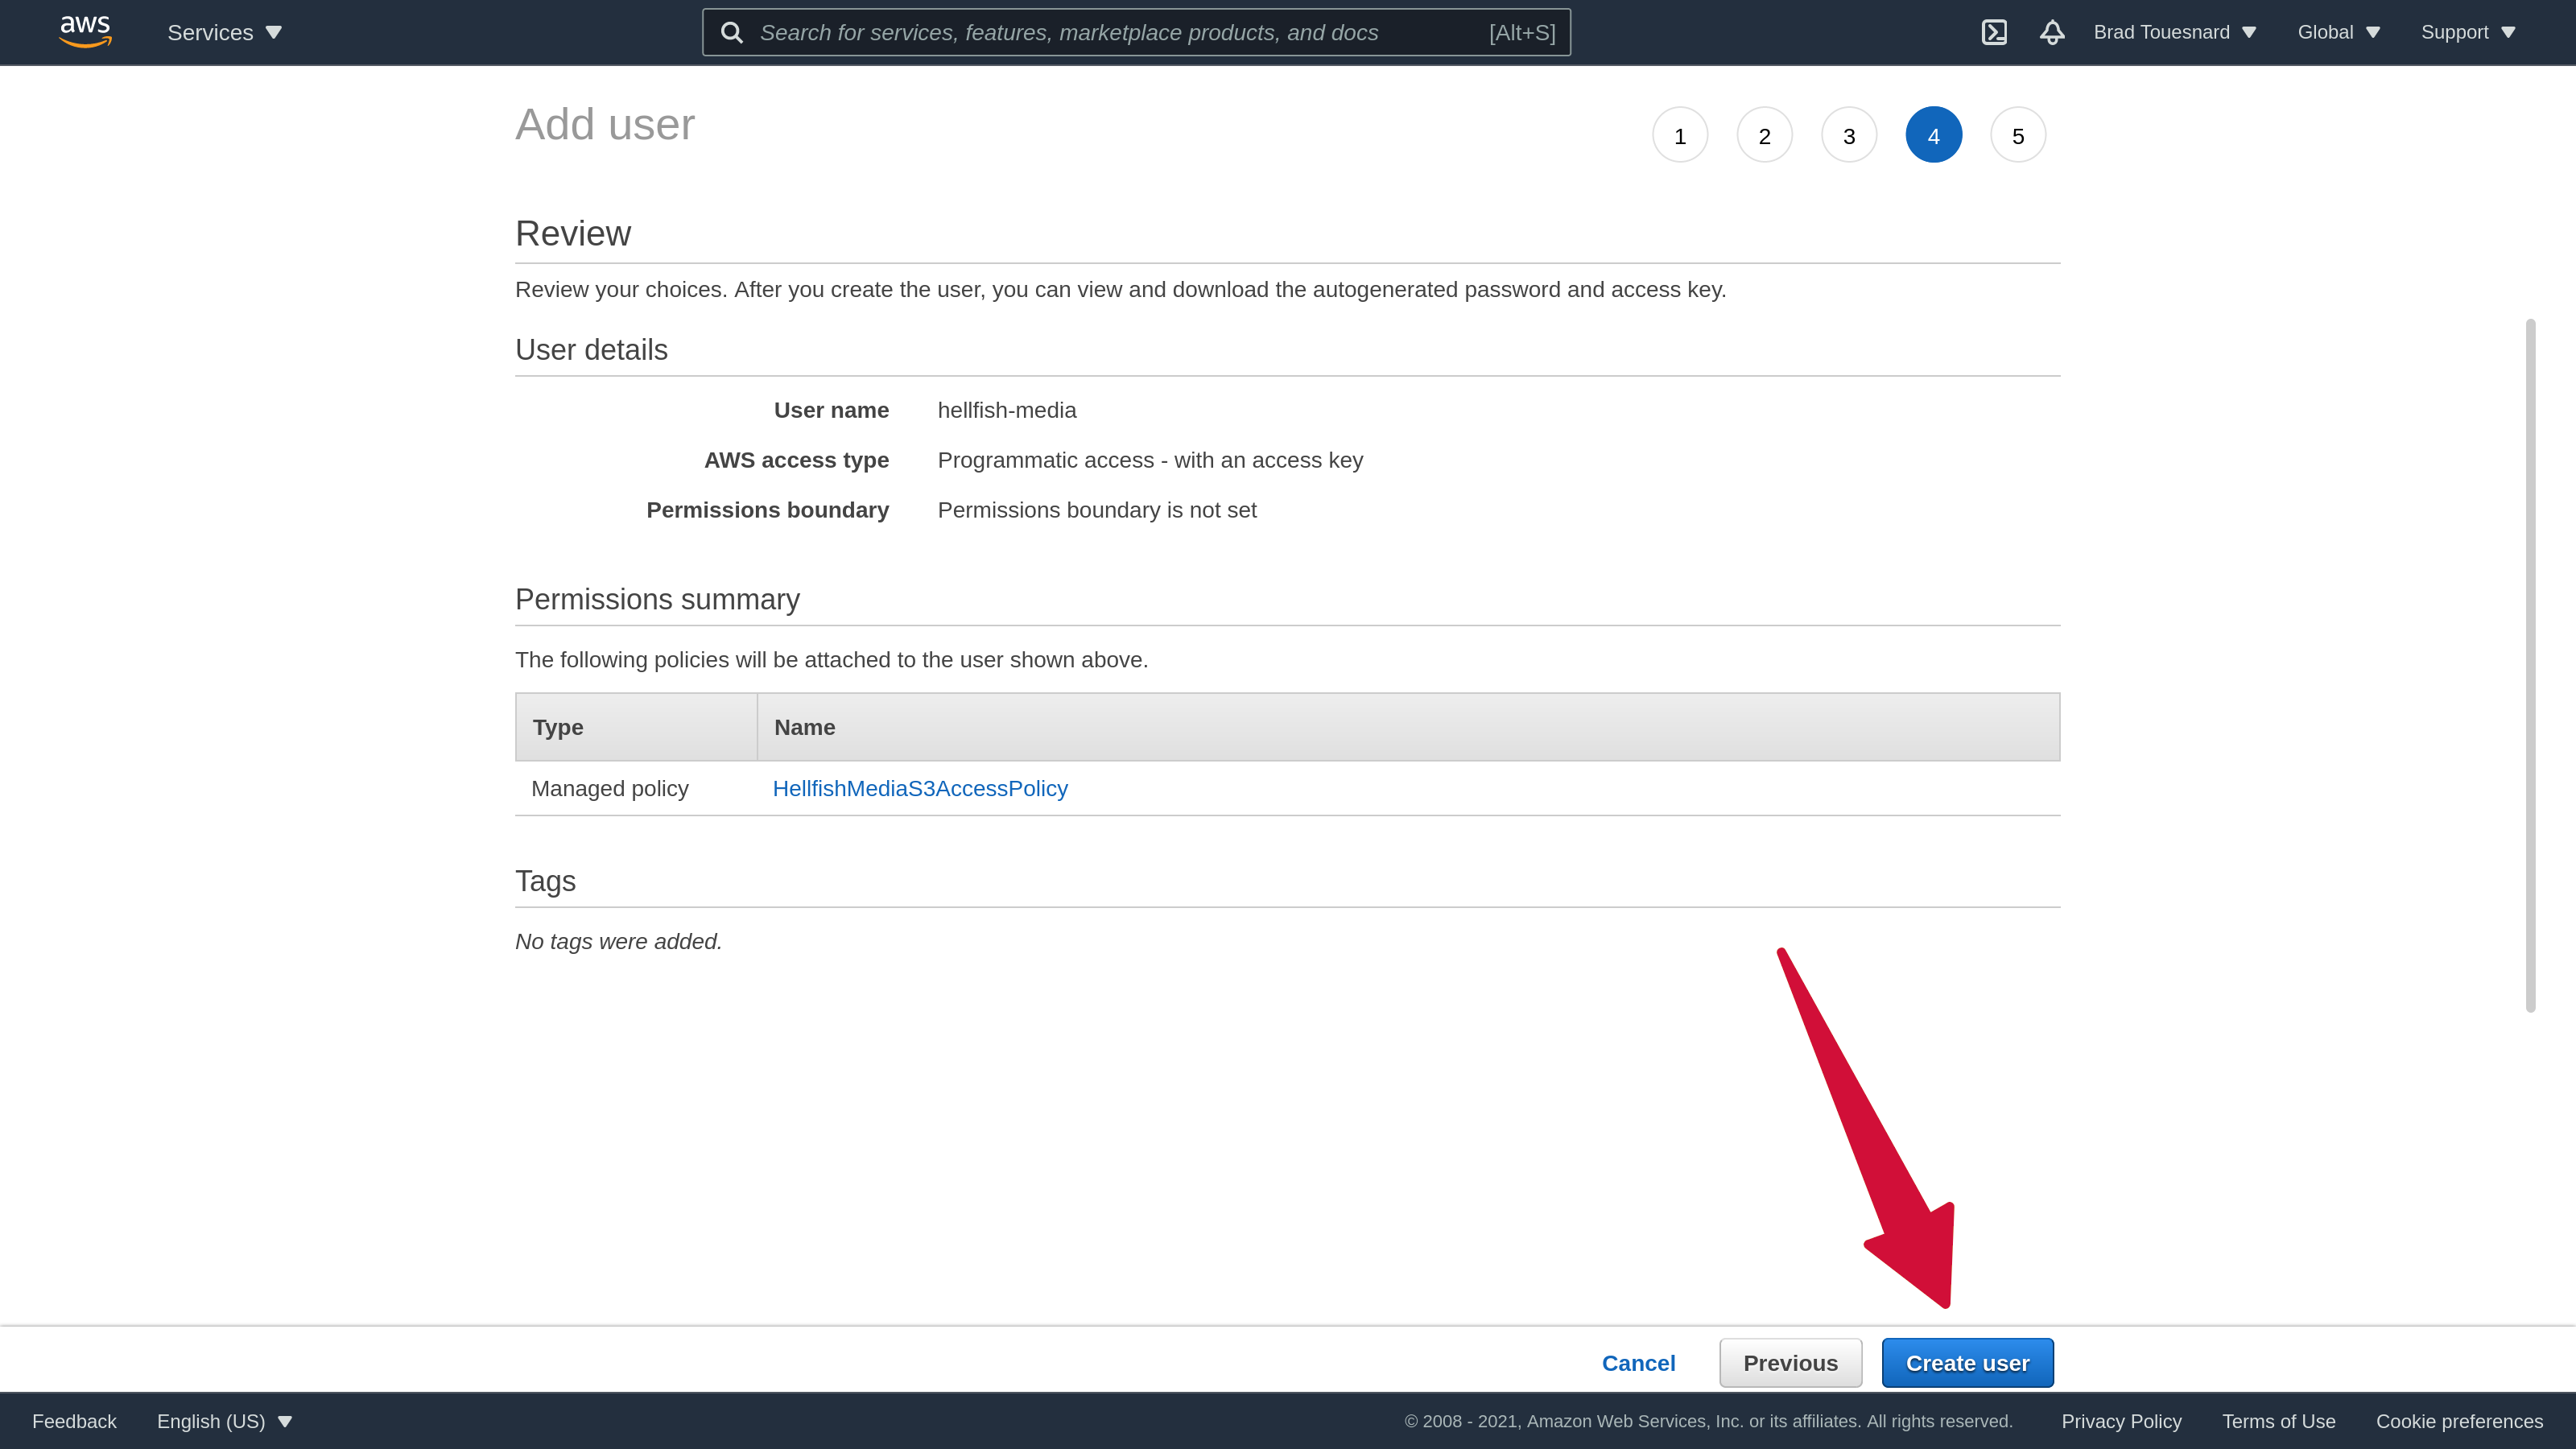
Confirm that the details are correct and click Create user.
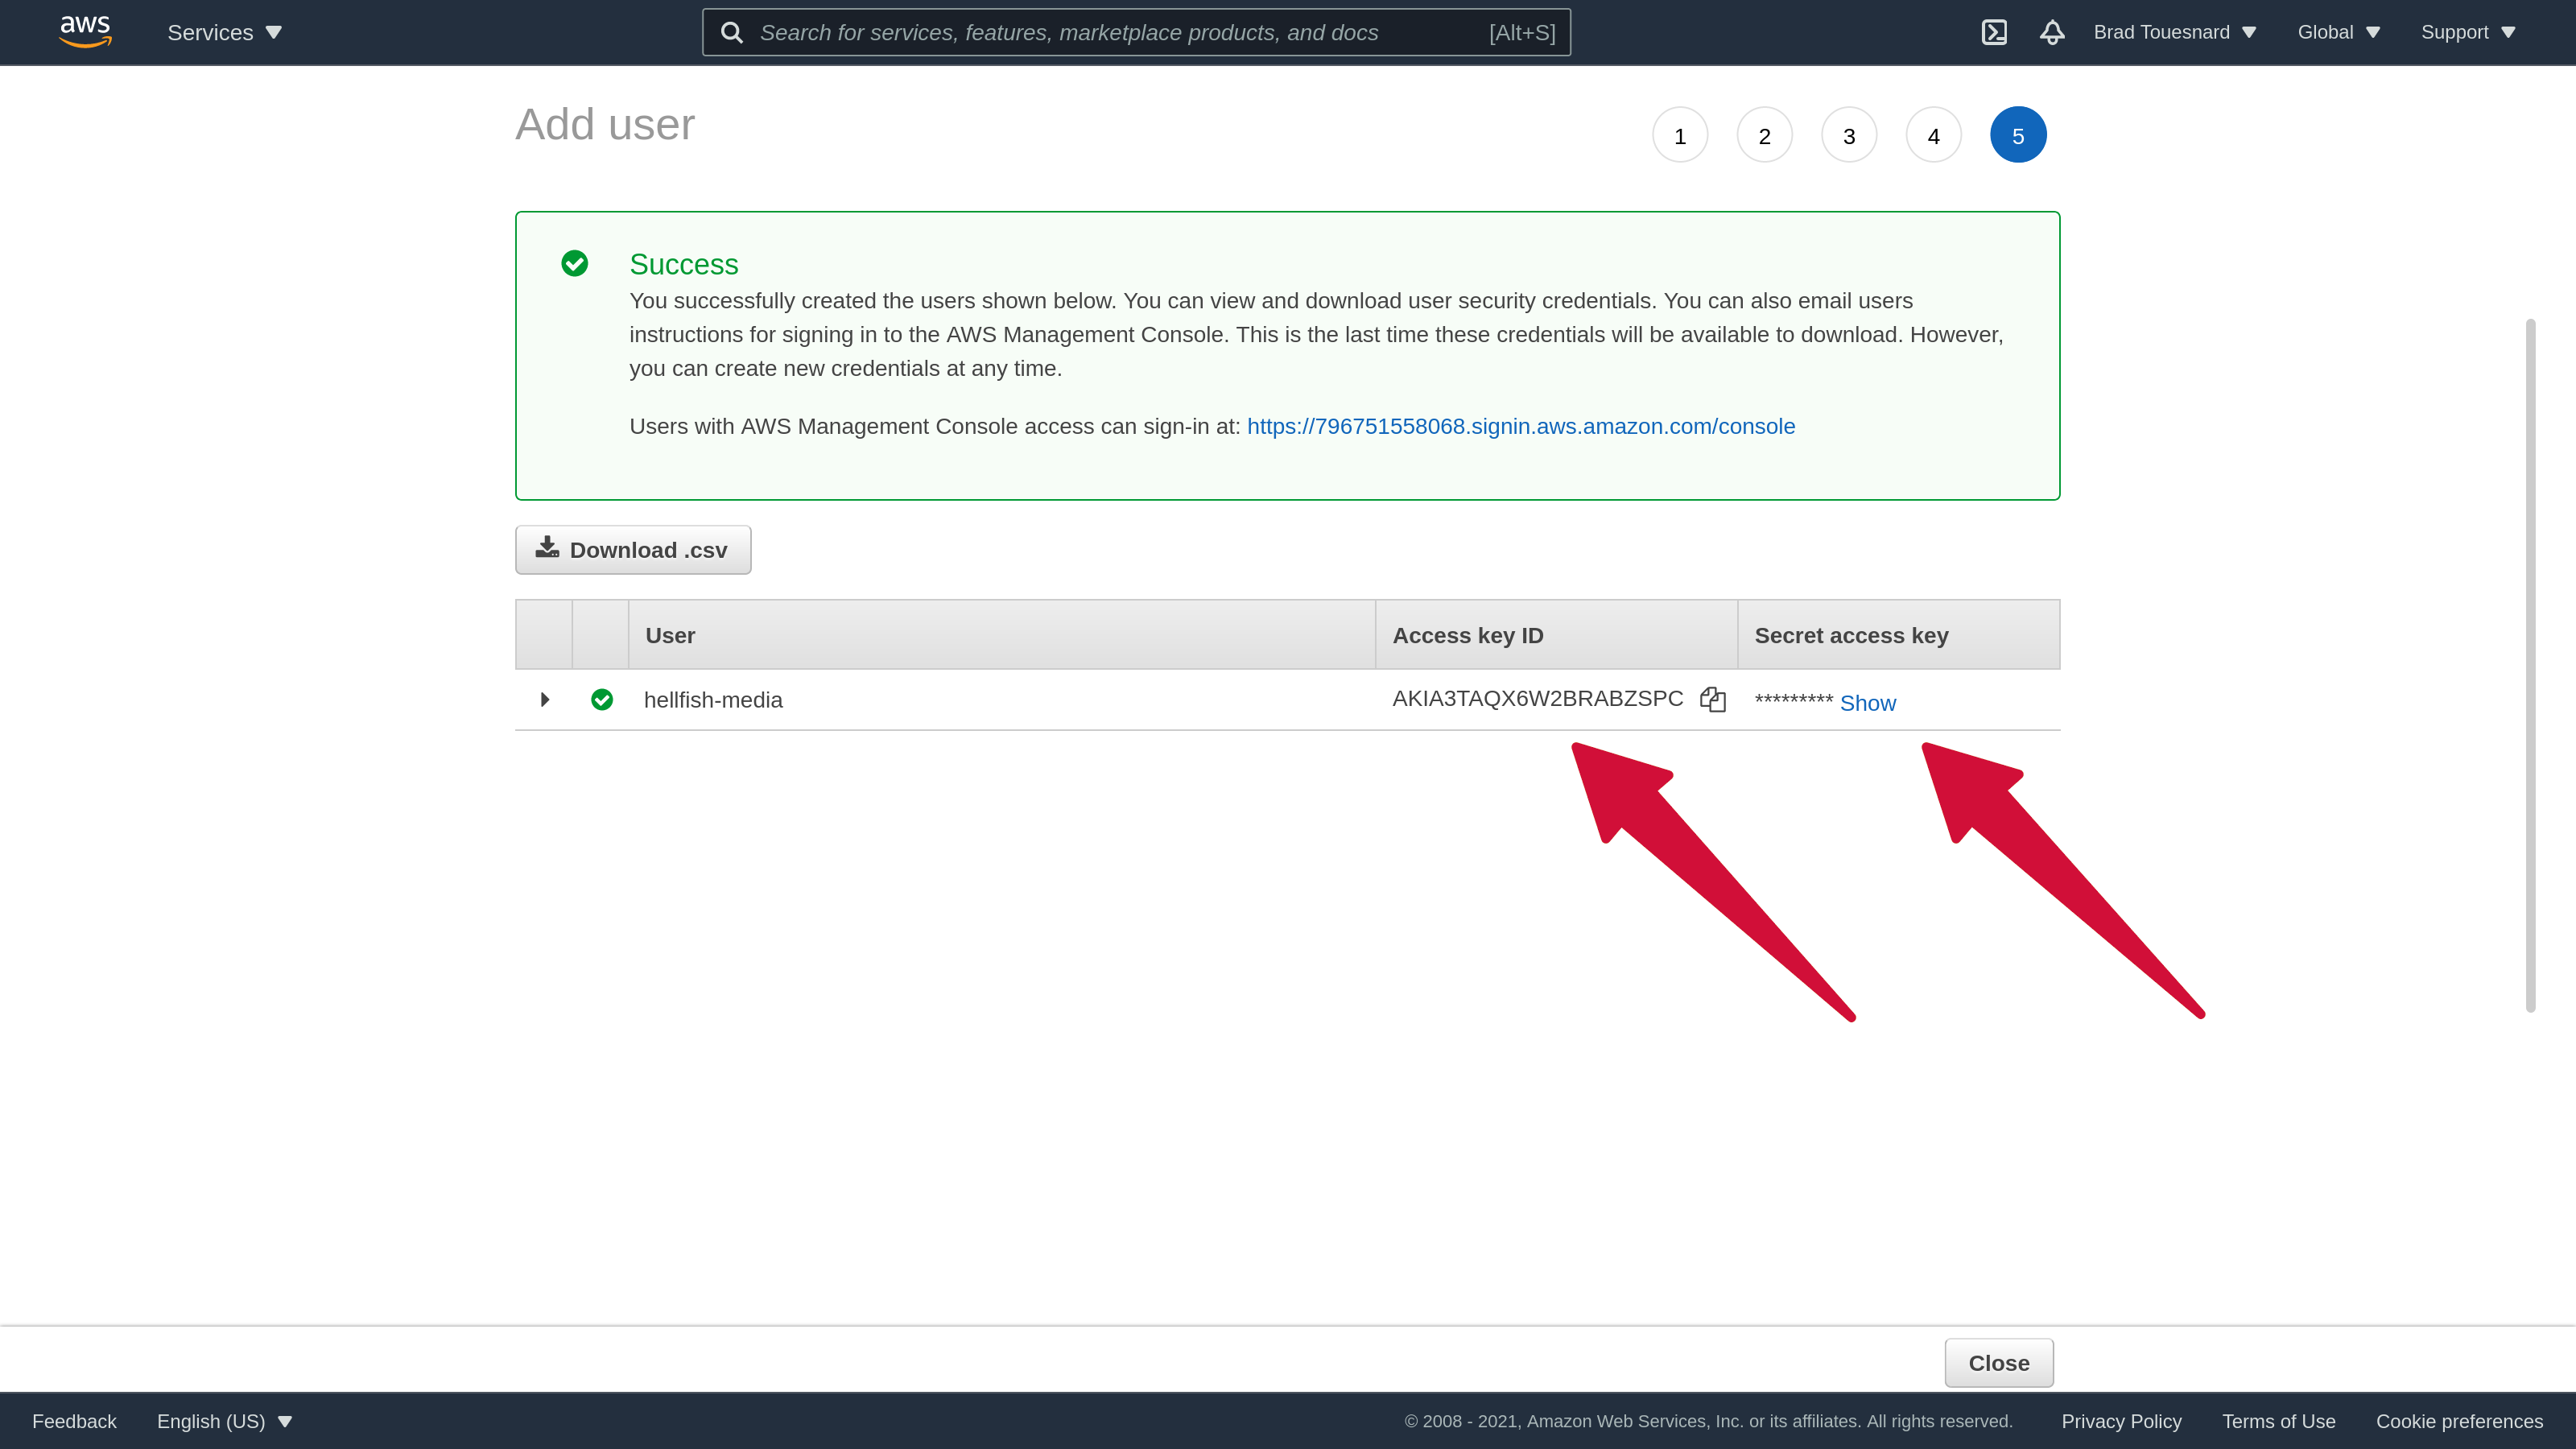
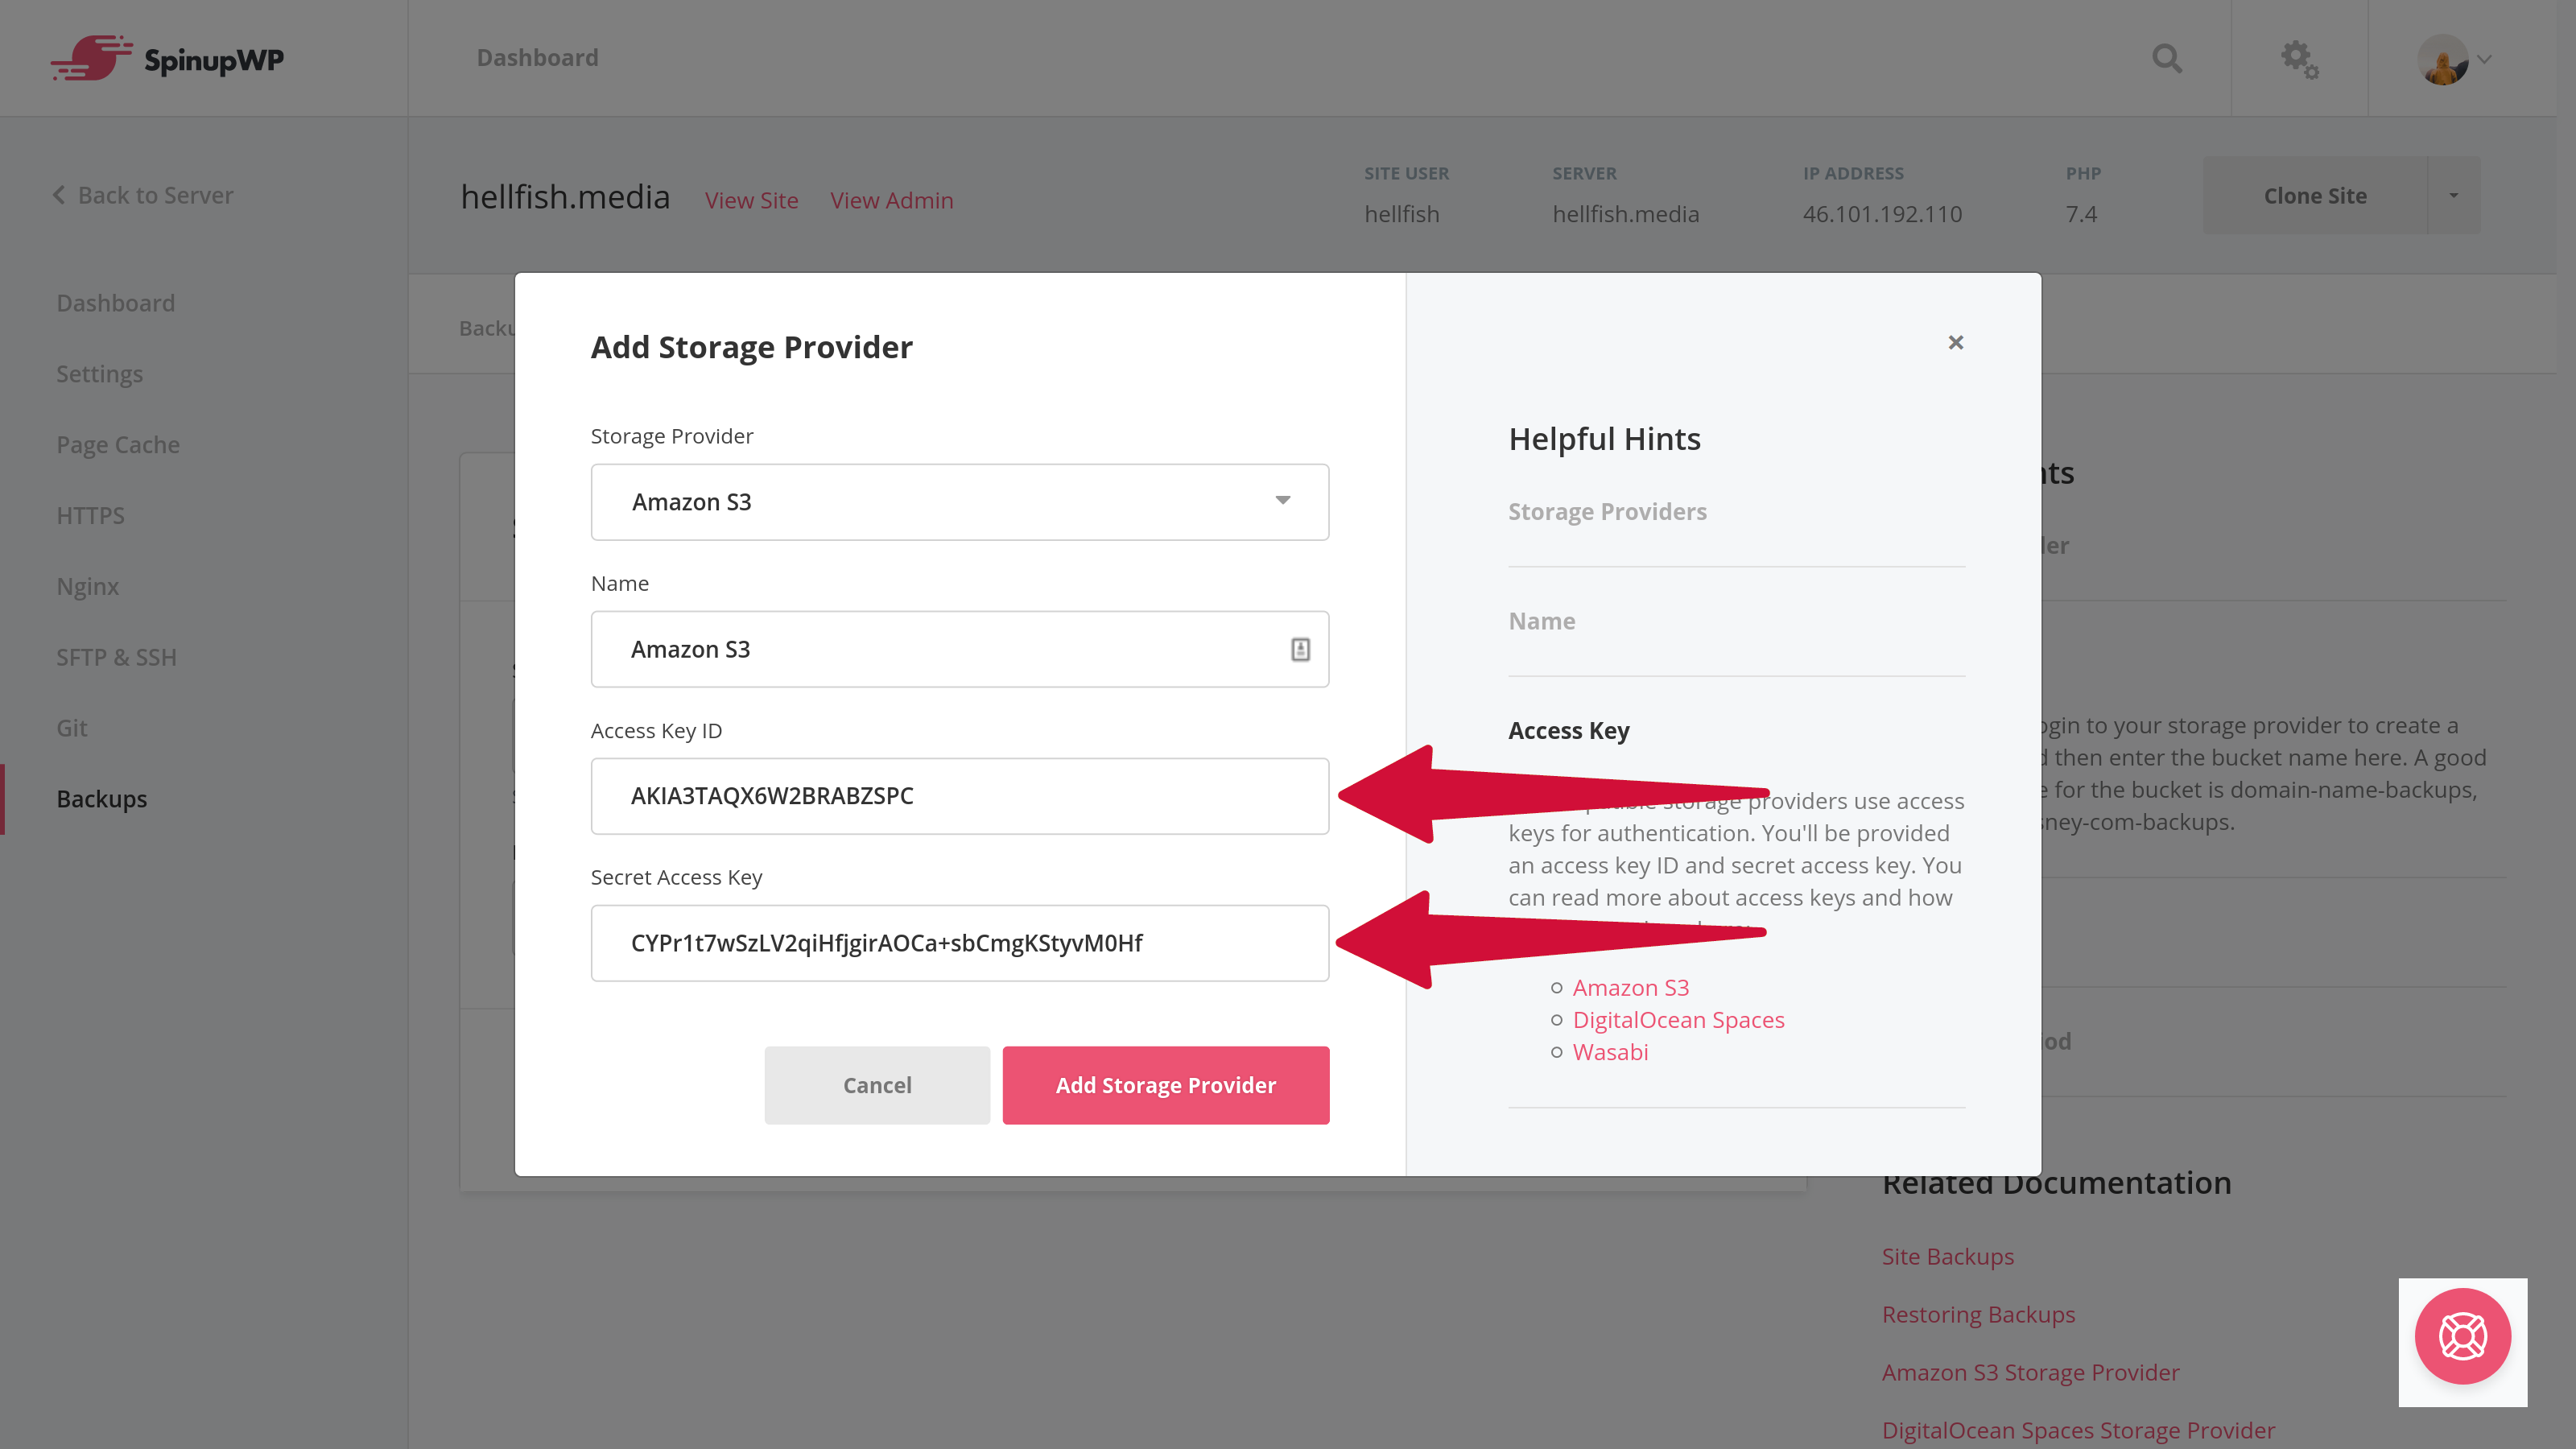
You will be presented with your IAM credentials. Copy the Access key ID and Secret access key. These should be added to SpinupWP when asked for the Access Key ID and Secret Access Key.
These keys can then be added to SpinupWP when asked for the Access Key ID and Secret Access Key.
Restricting an IAM User to a Specific Bucket
You can also limit the IAM user to only have access to certain buckets by explicitly allowing specific bucket resource names (or ARN) in the access policy settings. This is useful if you manage multiple buckets and you want to keep them secured separately from others. The downside to this is that you have to create multiple IAM users, but if one IAM user’s access credentials are leaked somehow, you only have to worry about the contents of one bucket.
When creating a bucket, you can copy the bucket’s ARN from the list of available buckets by selecting the bucket from the list and clicking on the Copy ARN button.

Then, when creating a new policy or editing an existing policy, you can update the policy JSON to include the resource names in the “Resource” node.
{
    "Version": "2012-10-17",
    "Statement": [
        {
            "Effect": "Allow",
            "Action": [
                "s3:PutObject",
                "s3:GetObject",
                "s3:ListBucket",
                "s3:DeleteObject",
                "s3:PutObjectAcl"
            ],
            "Resource": [
                "arn:aws:s3:::hellfish-media-backups",
                "arn:aws:s3:::hellfish-media-backups/*"
            ]
        }
    ]
}
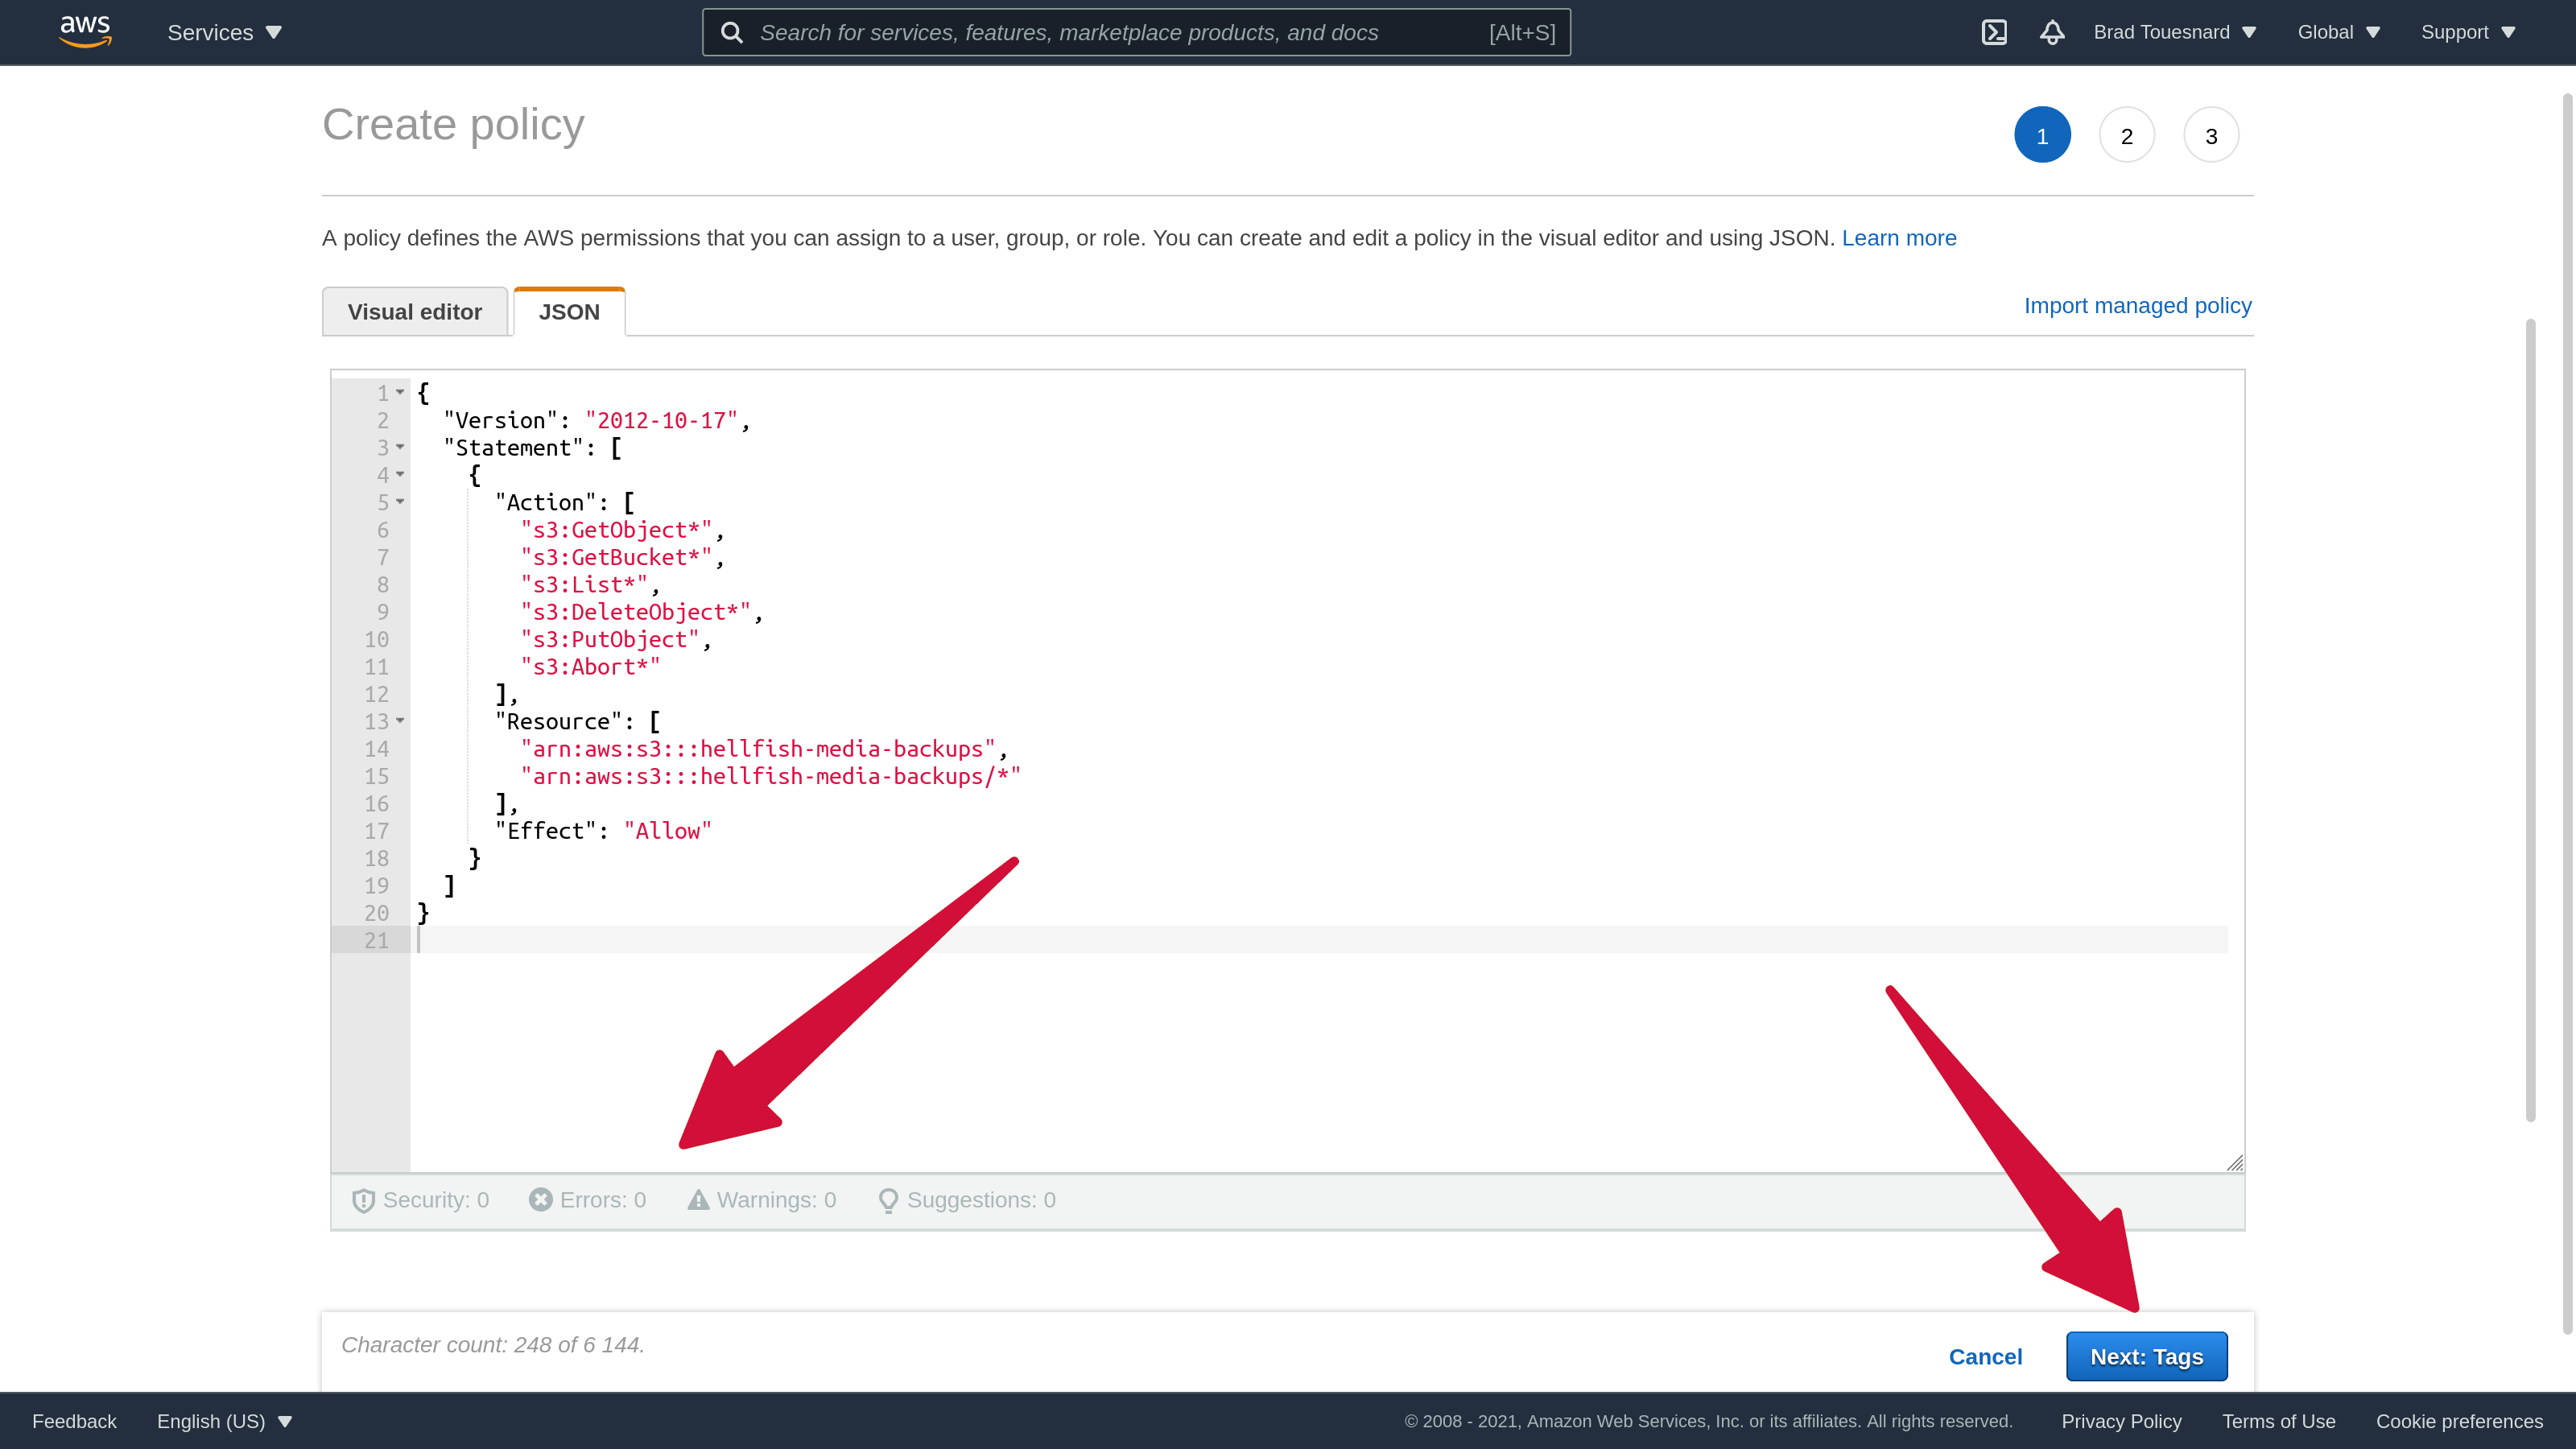
When the policy is attached to a specific user, that user will only have access to the bucket(s) specified.
S3 Storage Classes
Amazon S3 offers many different storage classes, each designed for different purposes and access patterns. Each class also has different costs for storage and data retrieval, and some classes have a minimum storage duration. You can see a full overview of the available S3 storage classes here.
You can now select your preferred storage class for site backups using Amazon S3. Under the Storage Settings on the site Backups screen, you can see the Storage Class dropdown for the available options.
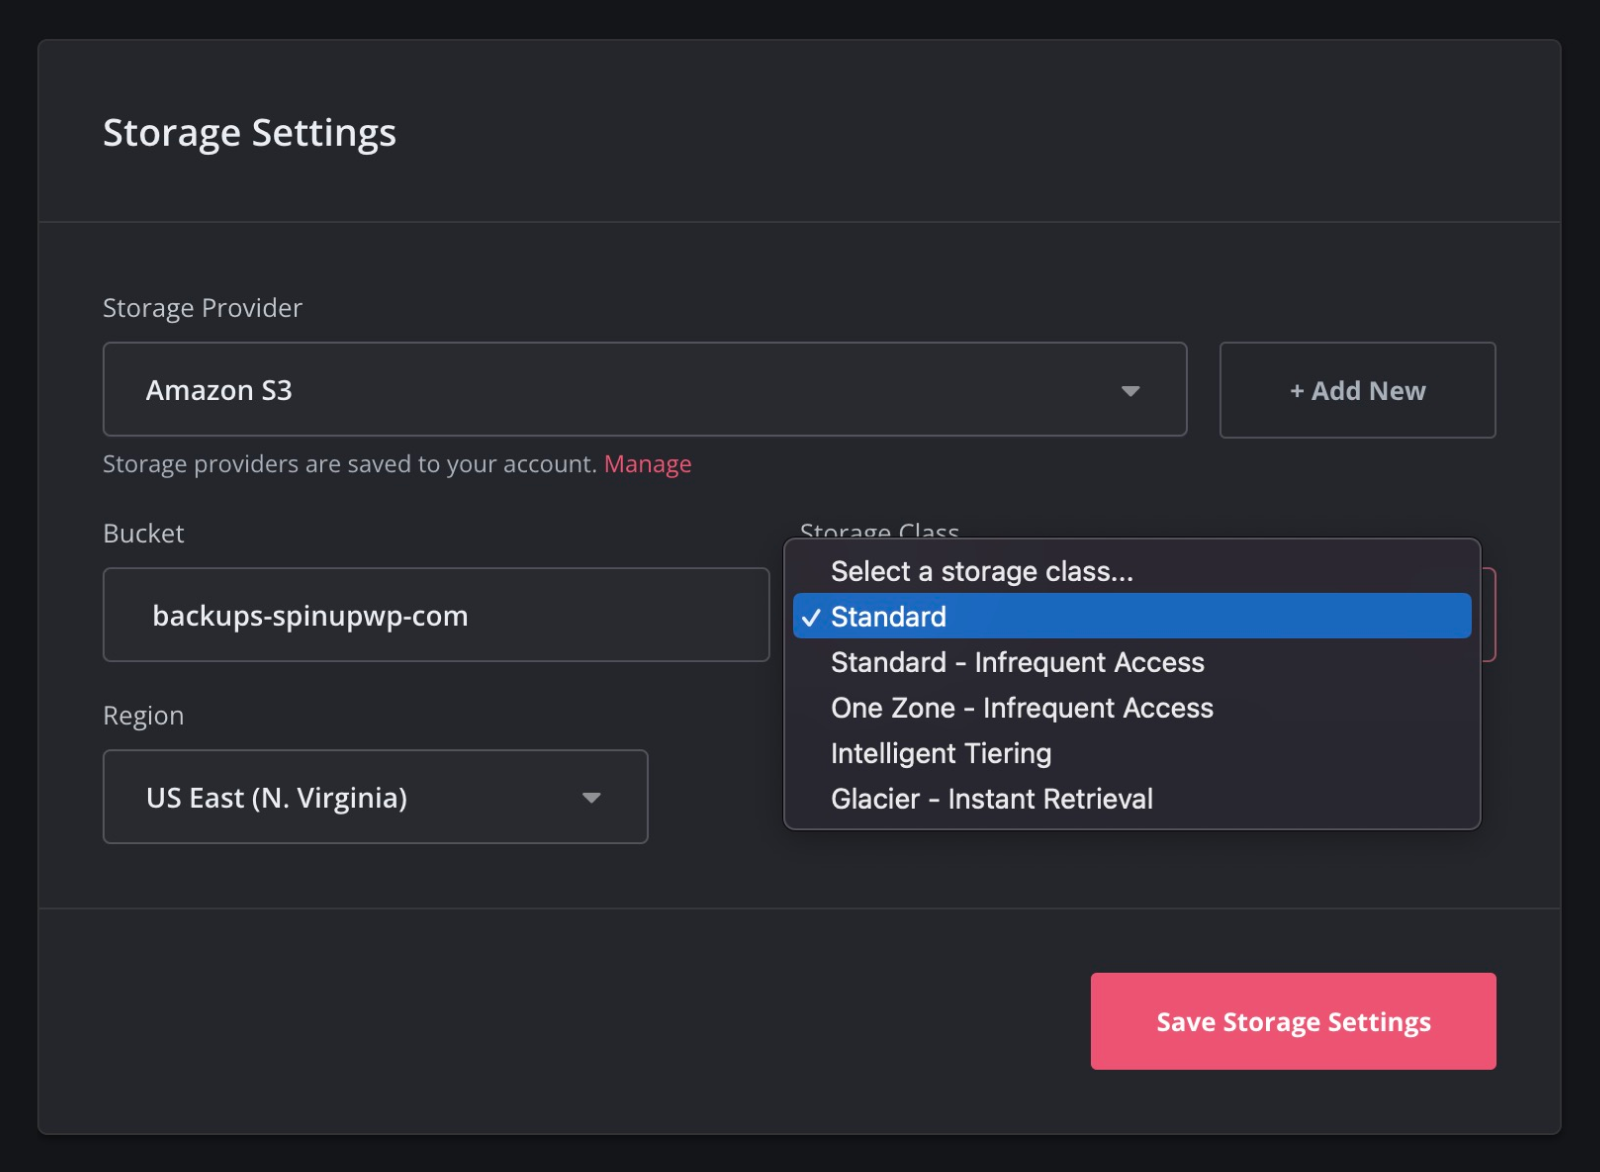
Amazon S3 also offers a feature called Lifecycle Rules, which allow you to automate actions on your bucket. You can configure Lifecycle Rules on your bucket to automatically transition your backups to a different class after a certain number of days.
Because the minimum storage duration can offset the storage cost savings on some of the classes, we recommend using the S3 Standard class if your backup retention period is less than 30 days, the S3 Standard – Infrequent Access class if it is between 30 and 90 days, and the S3 Glacier Instant Retrieval class if it is more than 90 days. Although, if you are regularly accessing backups as part of your workflow, you may want to stick to the S3 Standard class because of the higher data retrieval costs on the other classes.
The S3 Glacier Flexible Retrieval and S3 Glacier Deep Archive classes are not offered as an option in SpinupWP because the delayed retrieval times are not compatible with the restore process in SpinupWP. However, you can still use Lifecycle Rules to transition your backups to these classes for longer term storage.