Wasabi Storage Provider
This guide aims to help you set up Wasabi for storing site backups.
Start by signing in to Wasabi. Once logged in, it will take you to your list of buckets.
Create Bucket
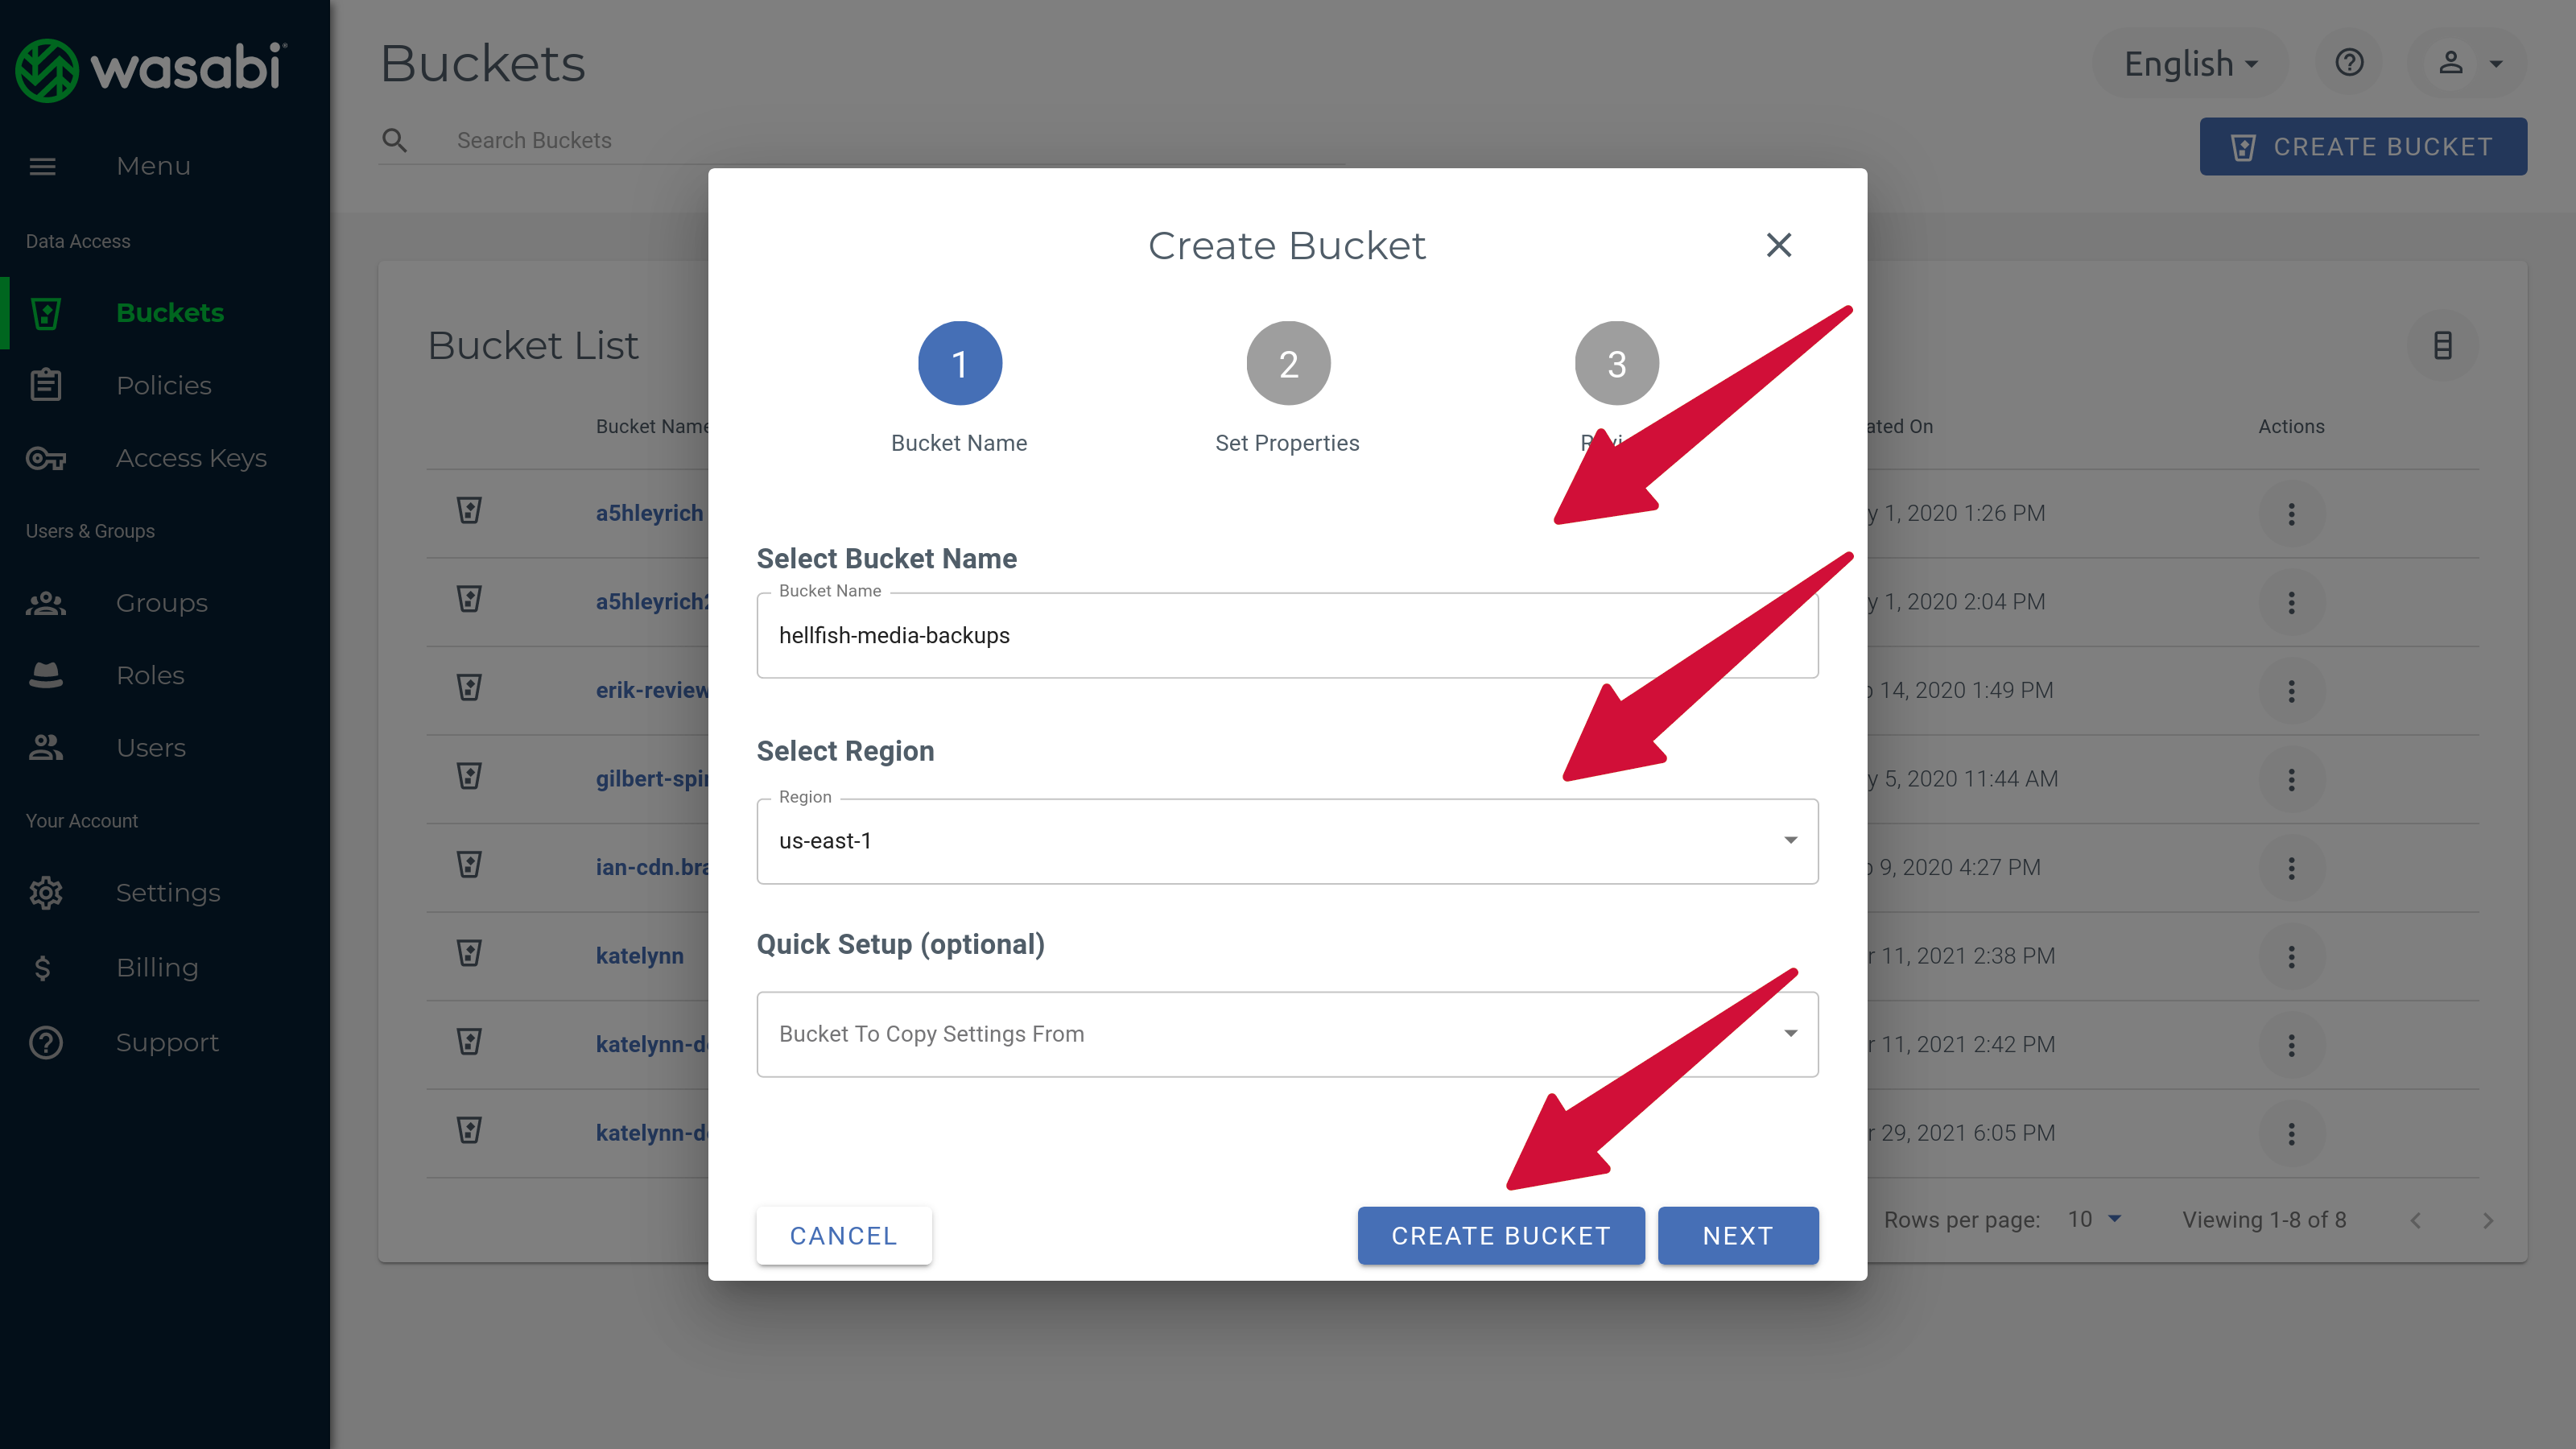
Click Create Bucket.
Give the bucket a unique bucket name. A good naming scheme is “domain-name-backups”, for example, “hellfish-media-backups”.
Select a region that’s geographically close to your server location. This will improve the time it takes to copy backup files from your server to Wasabi.
All other options can be left as the default values, and click Create Bucket to create it.
Create Policy
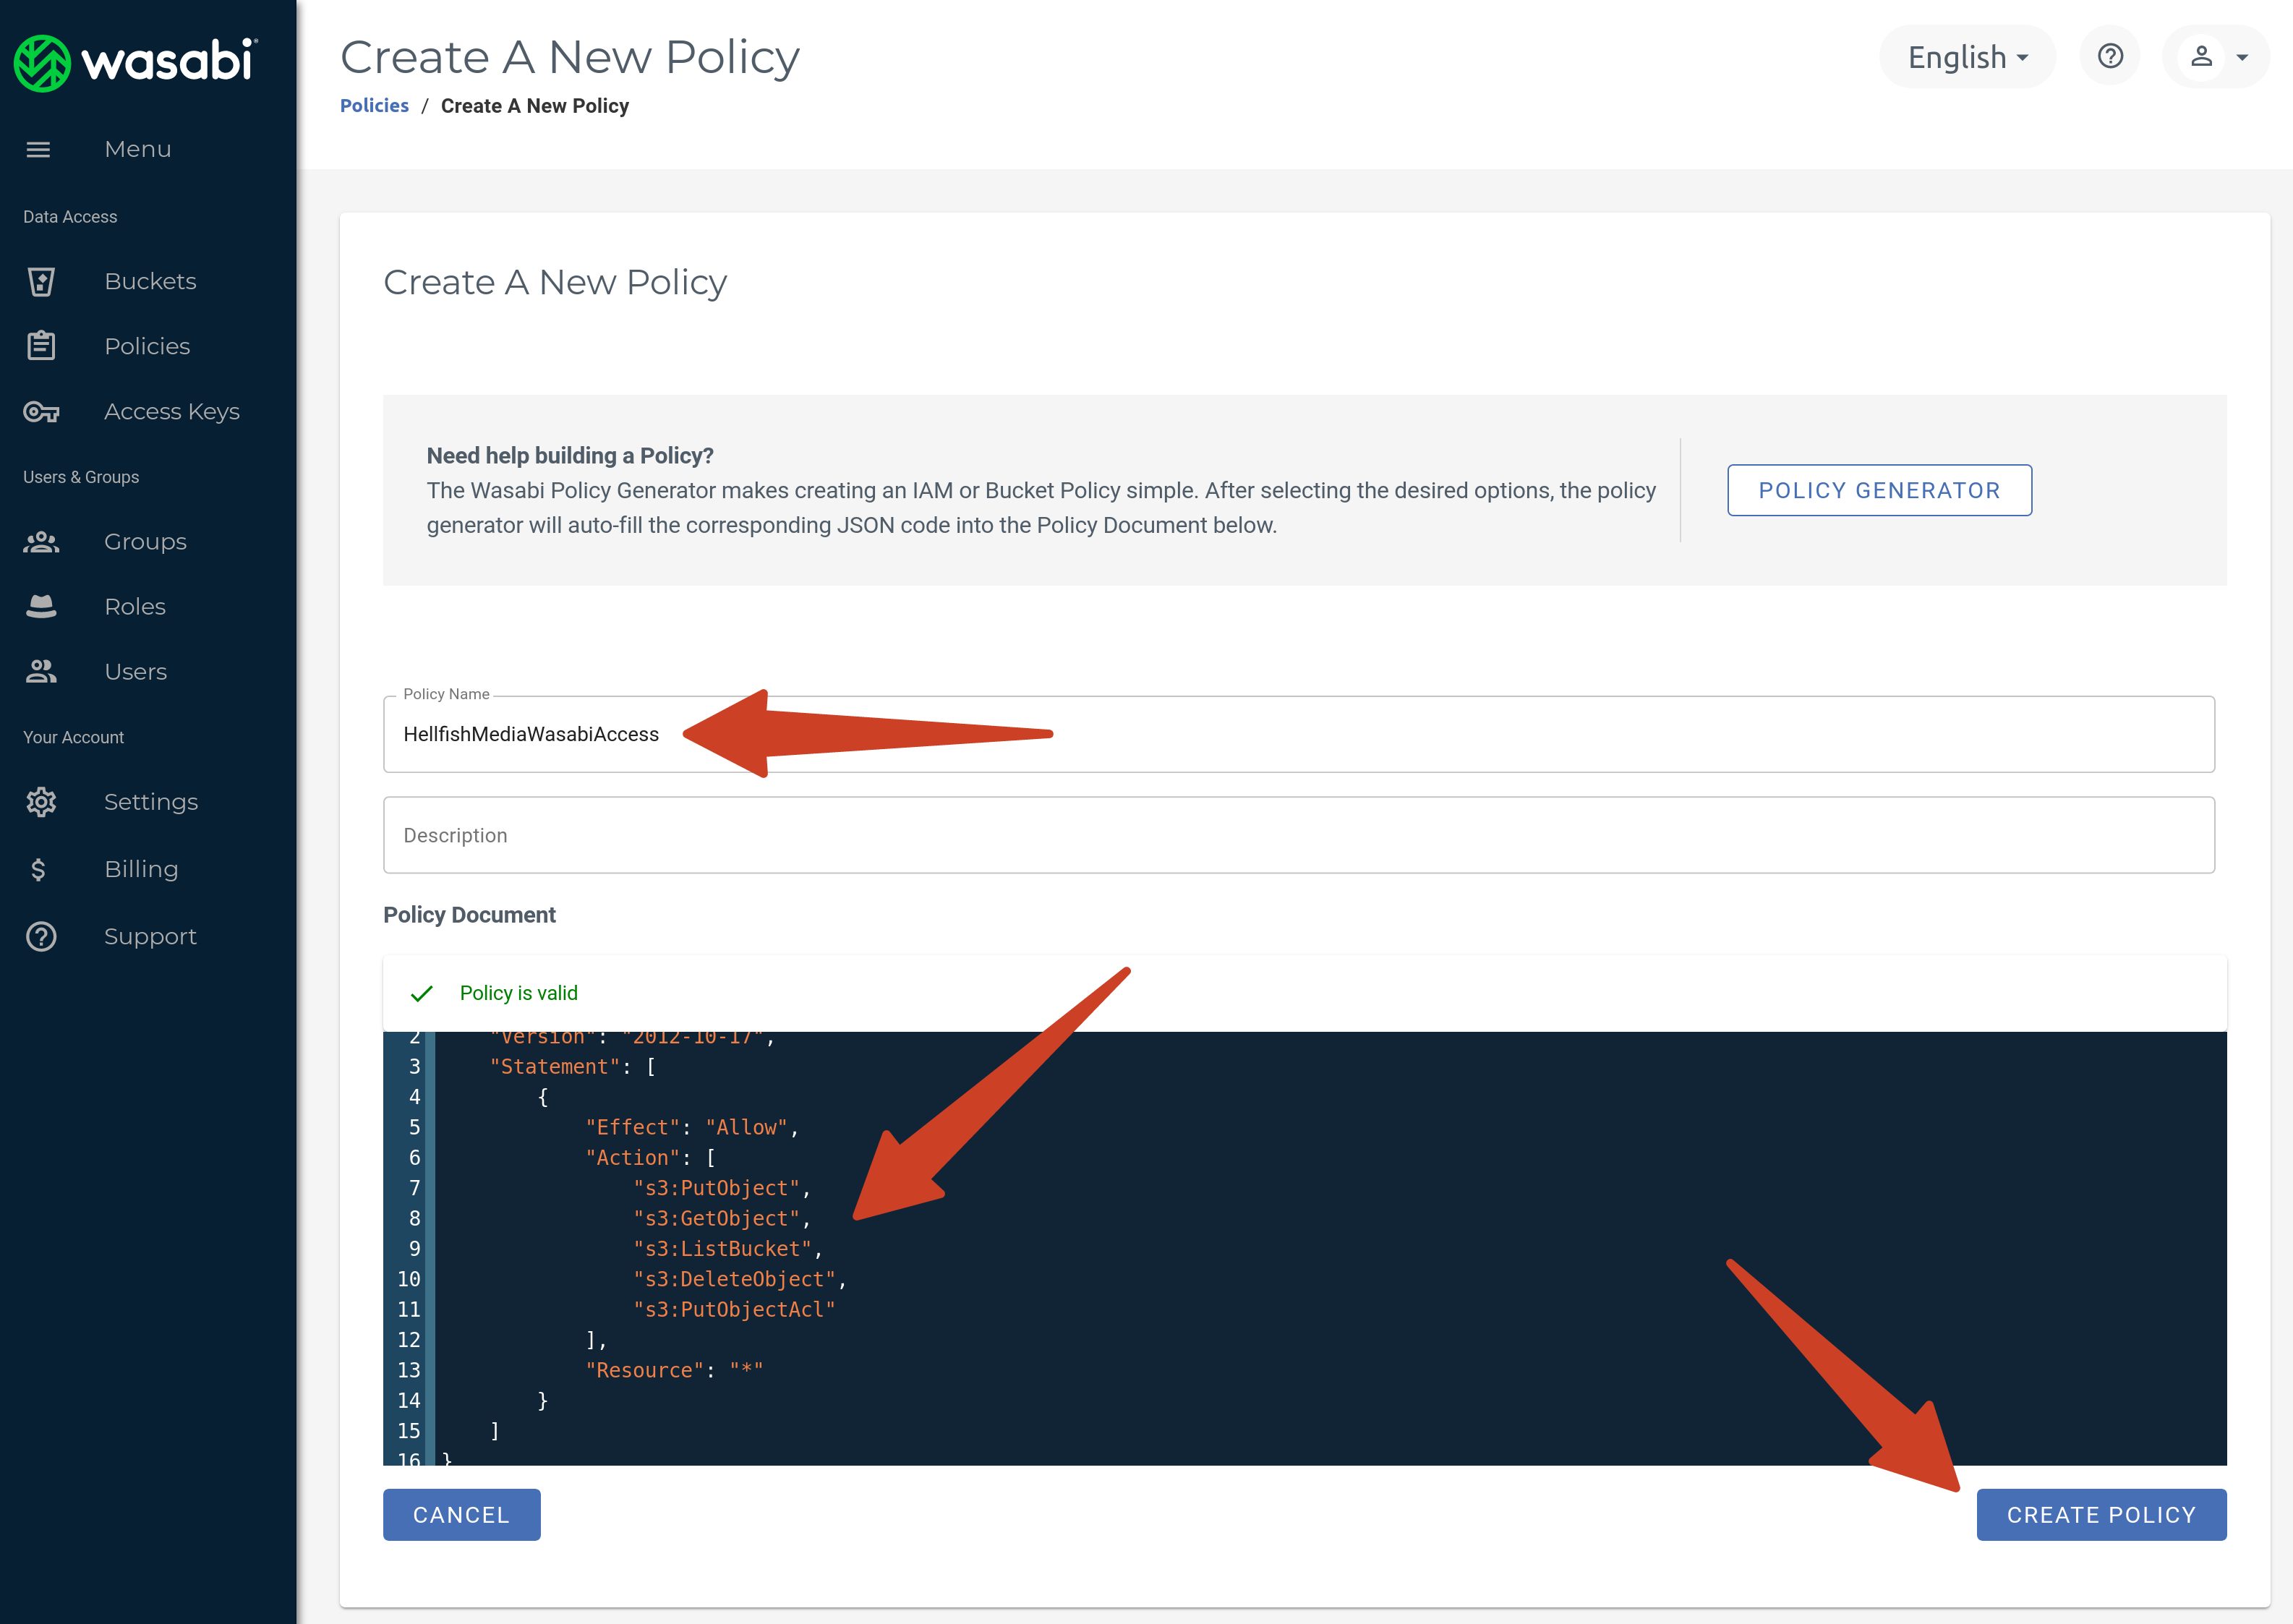
Before you create a user, you need to create a policy to generate access keys, determining which permissions the user has. To do this, click on Policies in the menu and then click Create Policy.
Give the user a unique name. It’s a good idea to follow the same naming pattern as the existing policies, so in this case, we’re using HellfishMediaWasabiAccess. Then, paste the following policy rules in the “Policy Document” text area.
{
  "Version": "2012-10-17",
  "Statement": [
    {
      "Action": [
        "s3:GetObject*",
        "s3:GetBucket*",
        "s3:List*",
        "s3:DeleteObject*",
        "s3:PutObject",
        "s3:Abort*"
      ],
      "Resource": "*",
      "Effect": "Allow"
    }
  ]
}
If you’ve added the rules correctly, you’ll see the green “Policy is valid” message above the rules. Click Create Policy to create the policy.
Create User
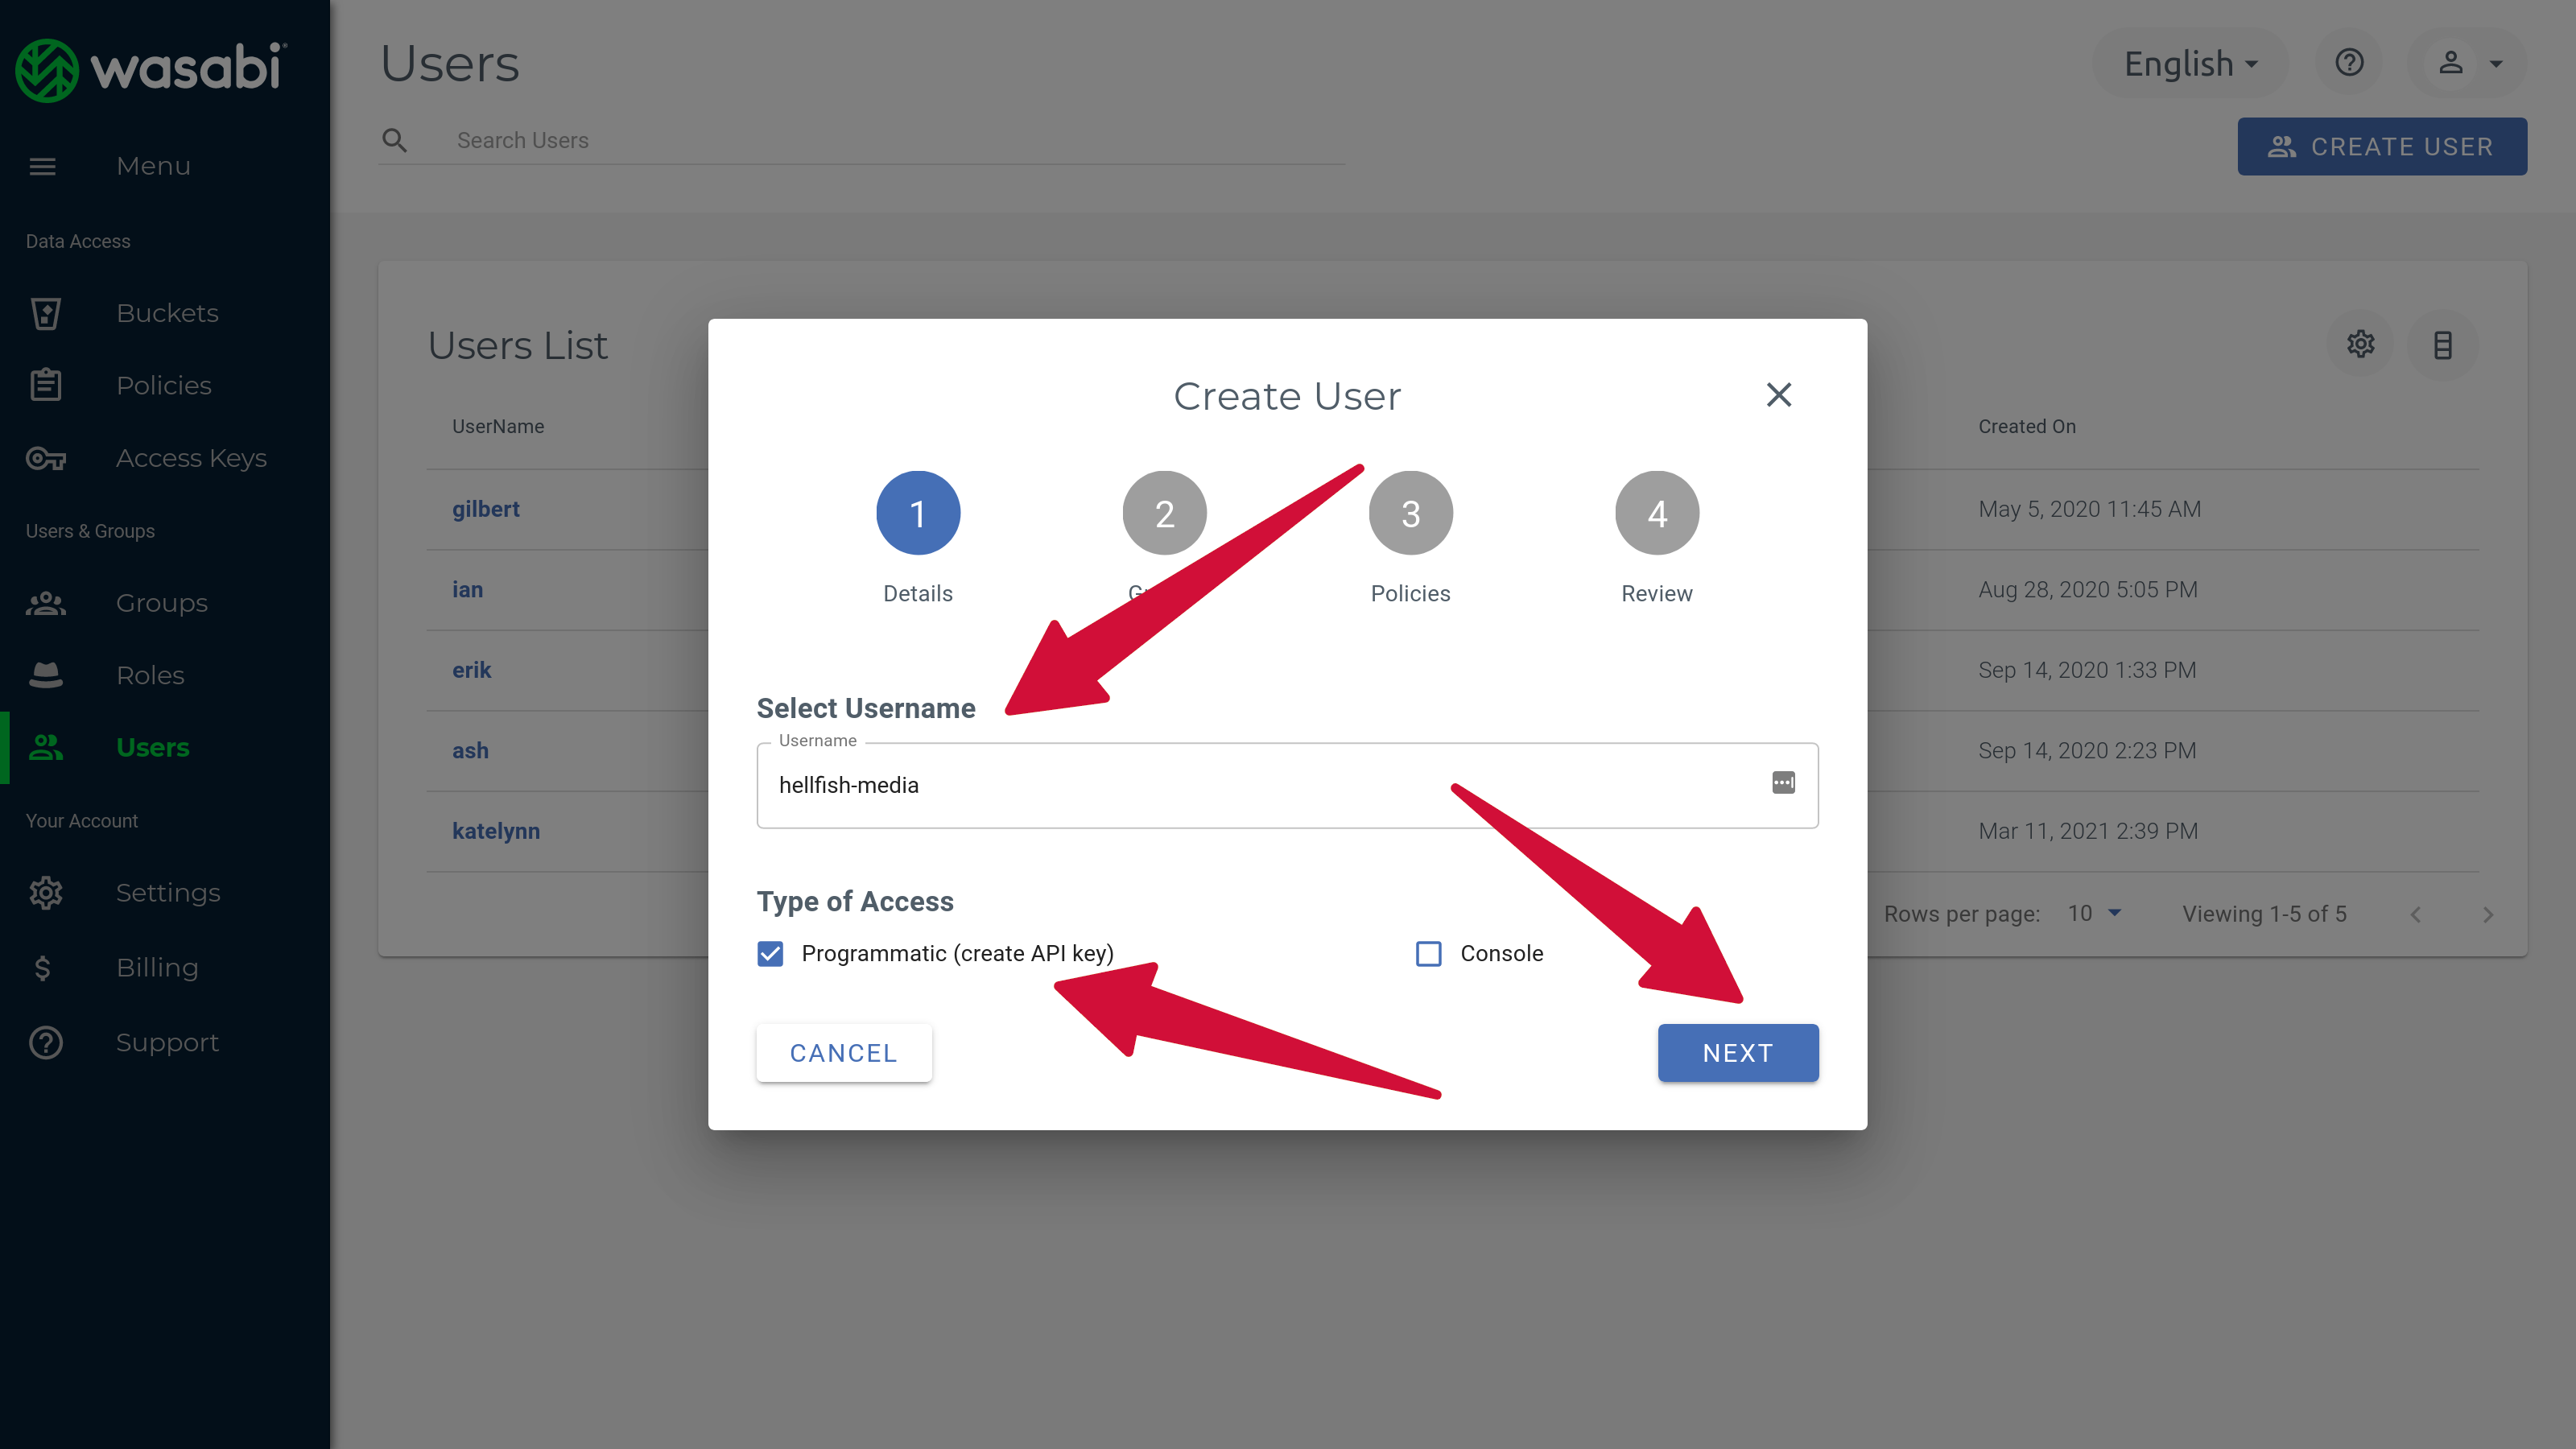
You can now create a Wasabi user, which will generate user-specific access keys. You’ll need these keys for SpinupWP to authenticate with Wasabi. Click Users in the menu and then click Create User.
Give the user a unique name. This can be the same as the bucket unique name or any other unique name you prefer. Make sure to check the “Programmatic (create API key)” Access option. Click Next.
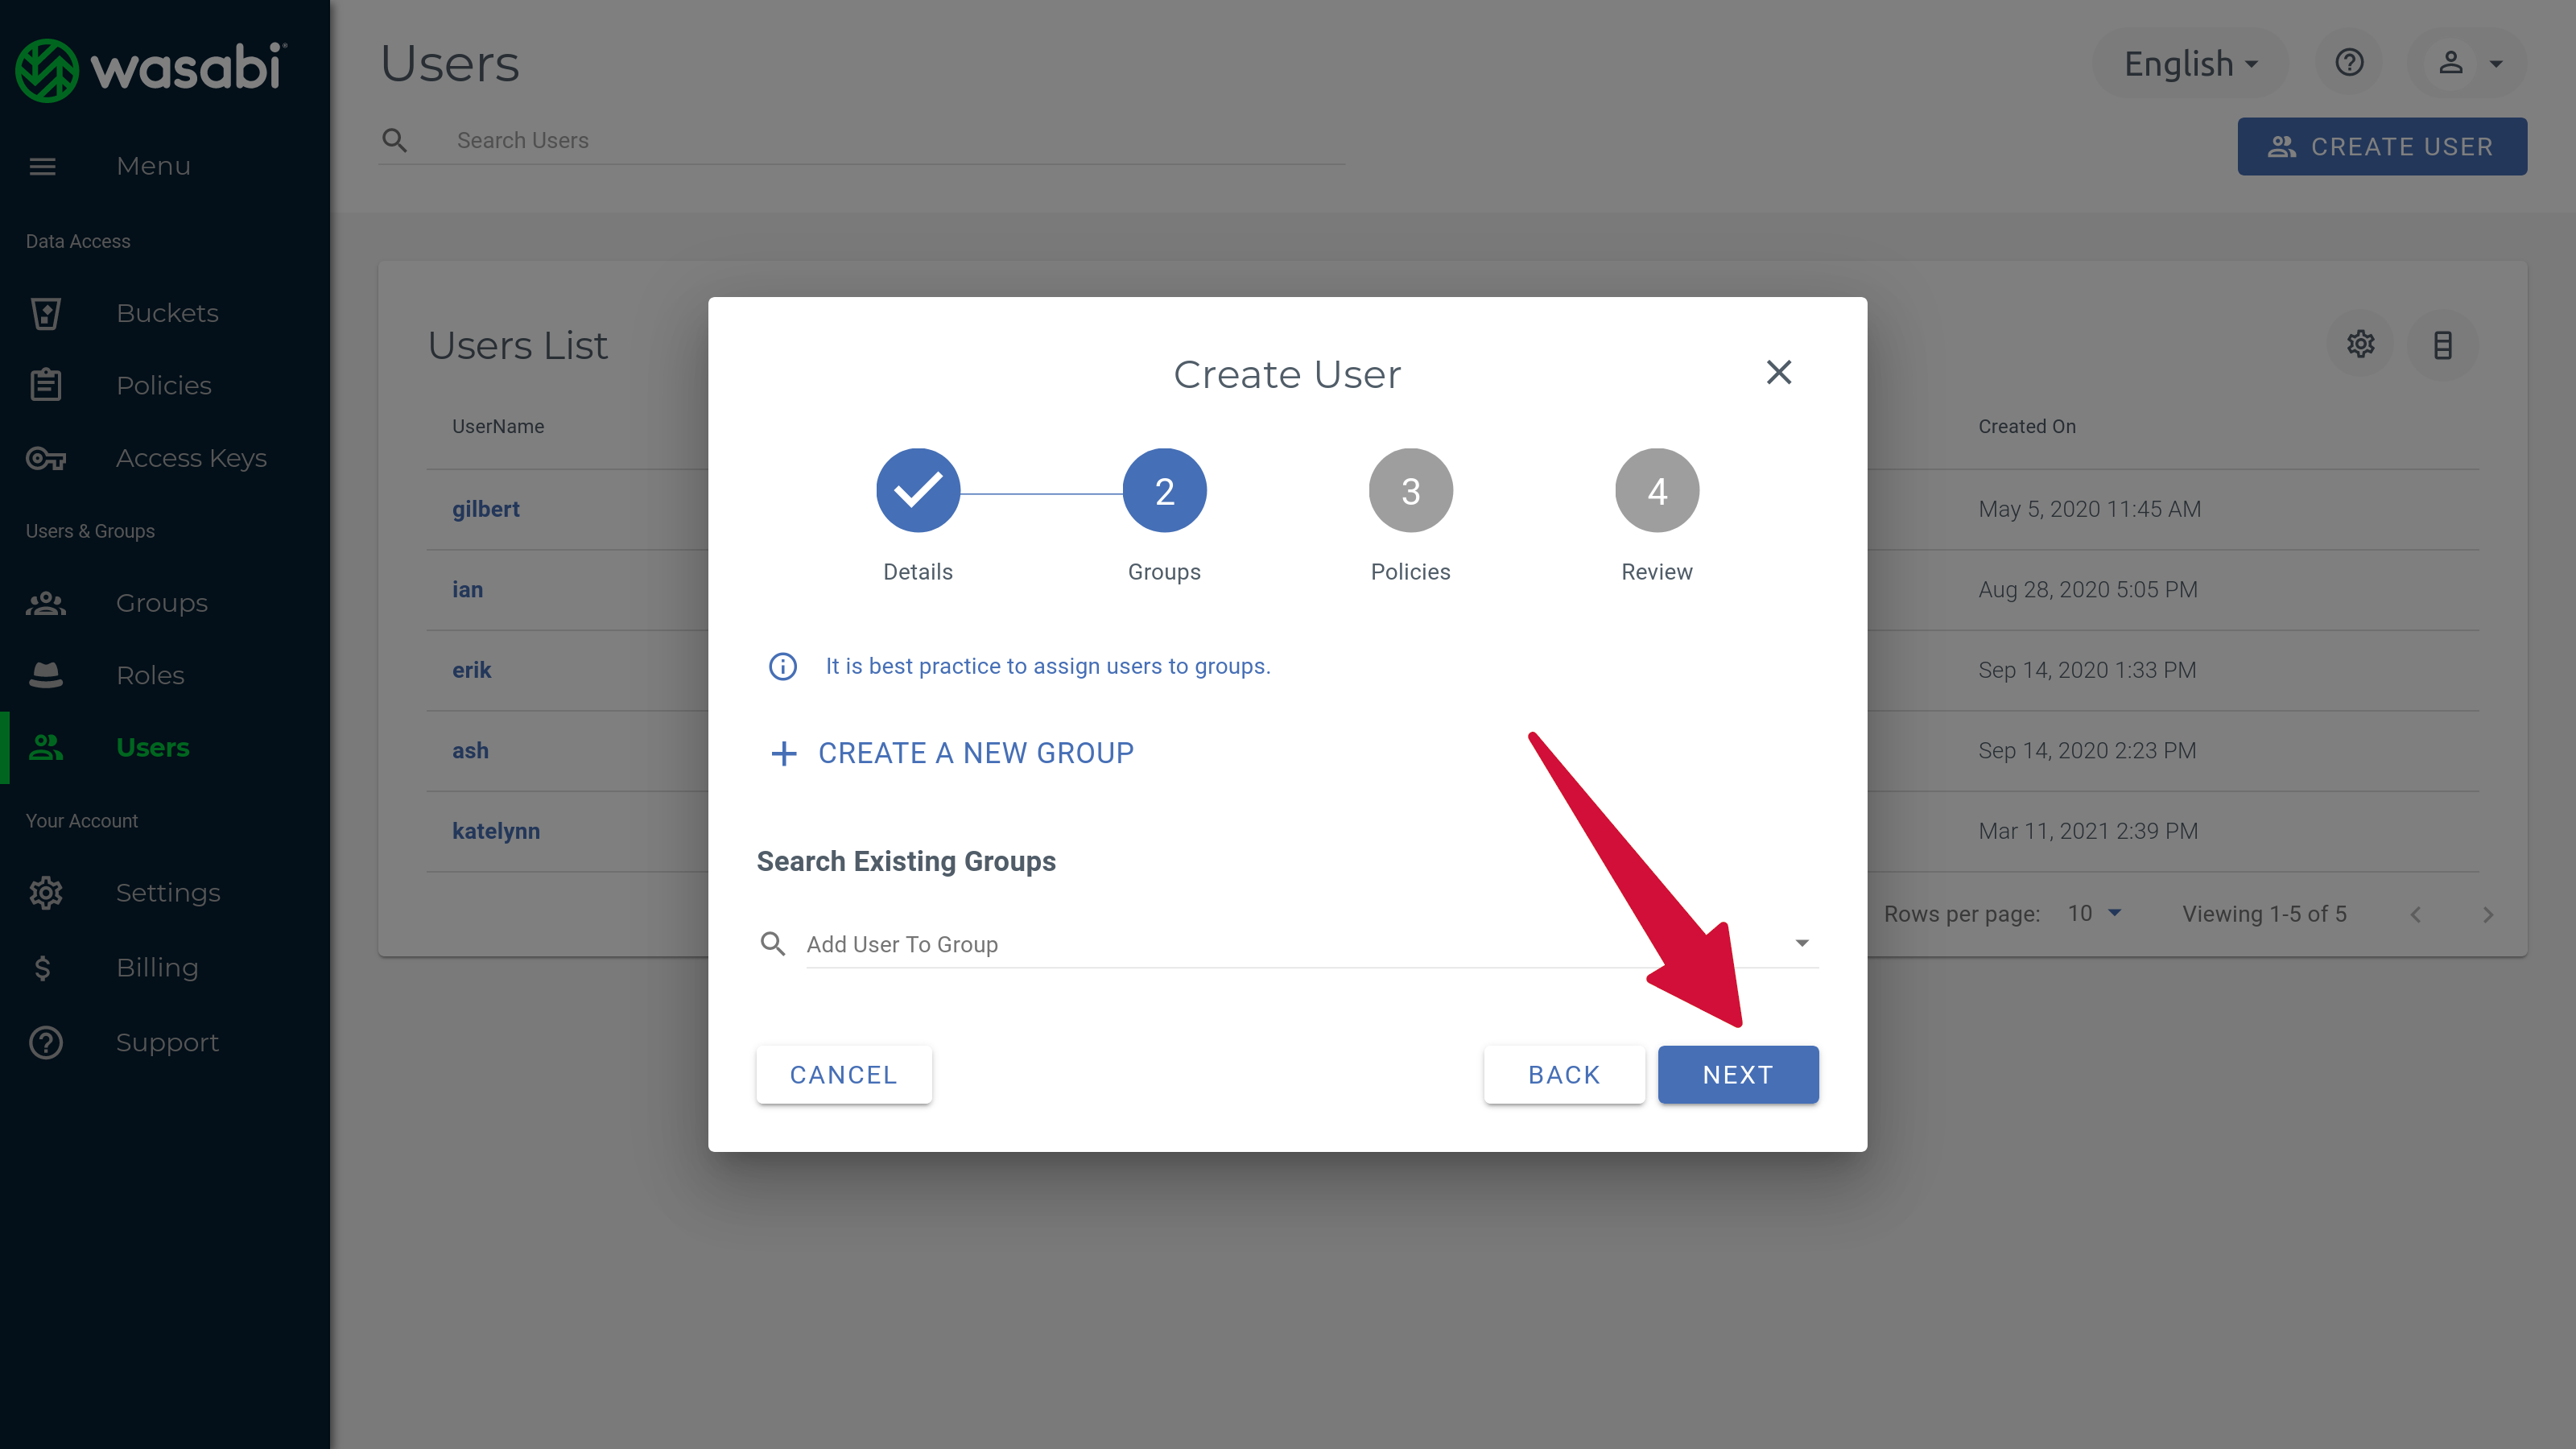
You don’t need to assign the user to a group, so click Next.
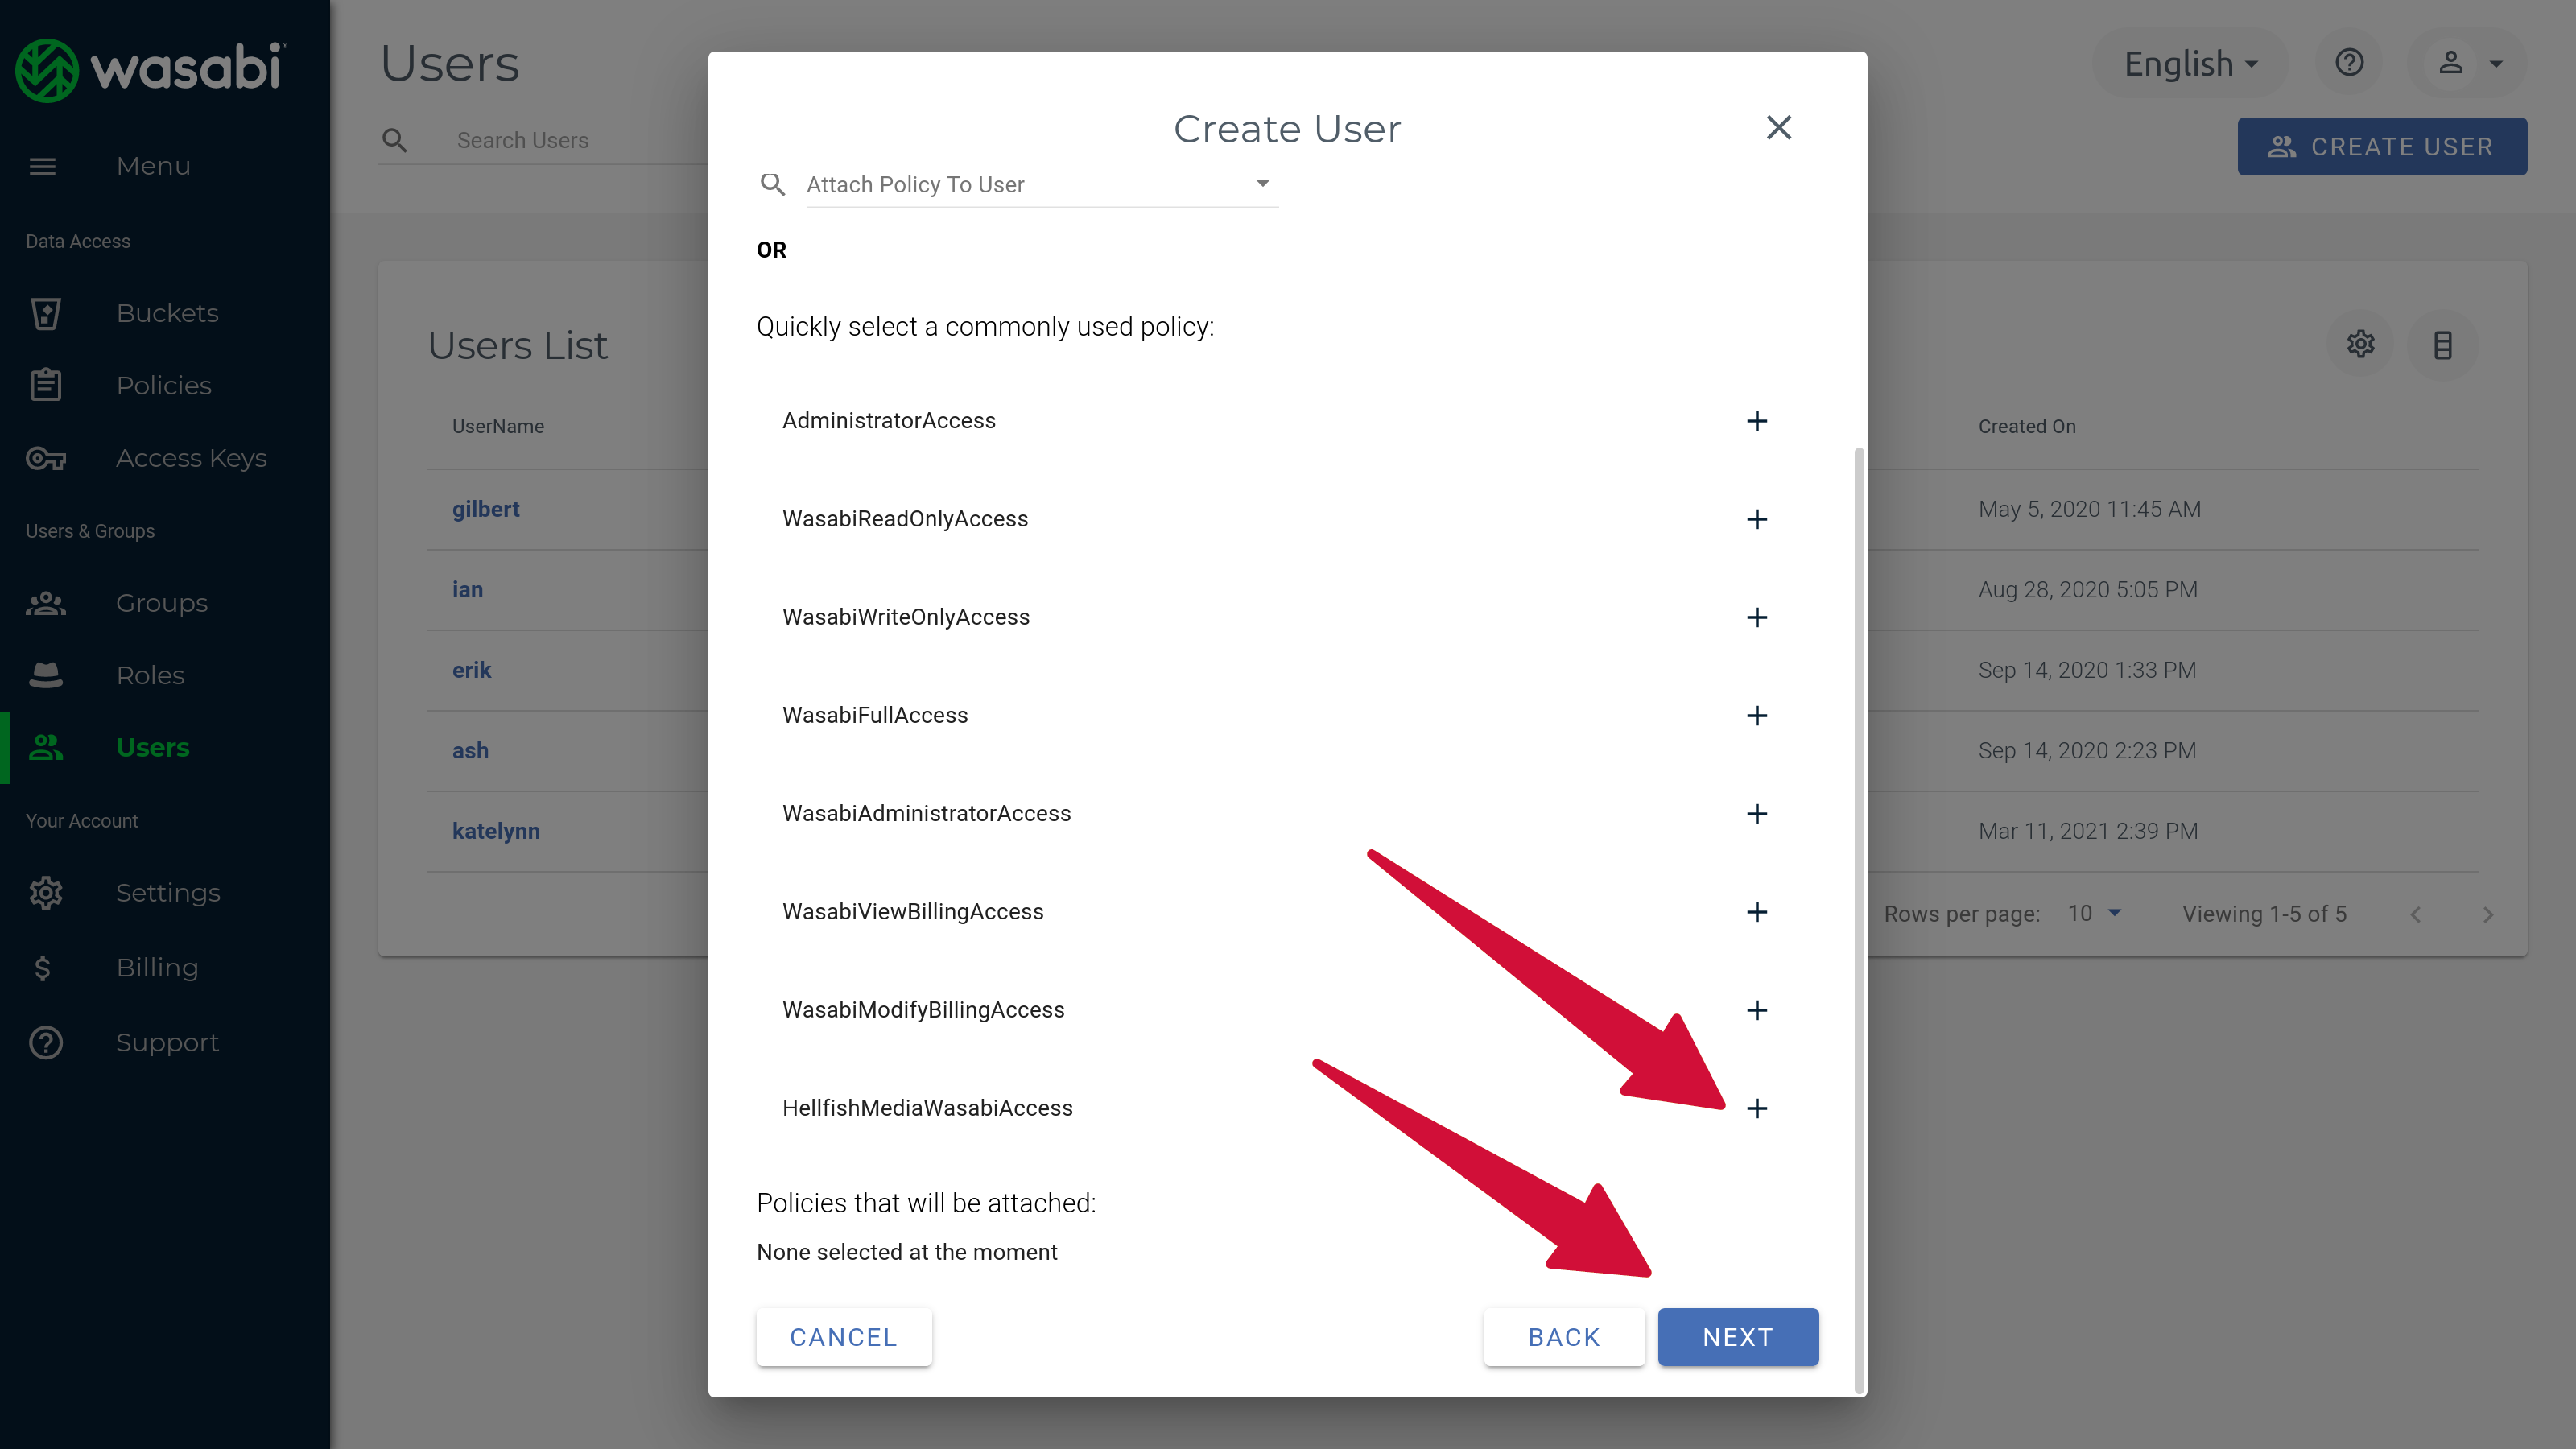
On the “Policies” screen, you can click on the “Attach Policy To User” search area and either start typing the name of the policy to attach or select it from the dropdown list that appears. You can also scroll down on the list of available policies and click on the + symbol next to the policy you created earlier to attach it. The policies attached to the user will appear in the “Policies that will be attached:” area at the bottom of this screen. Click Next once you have attached the policy.
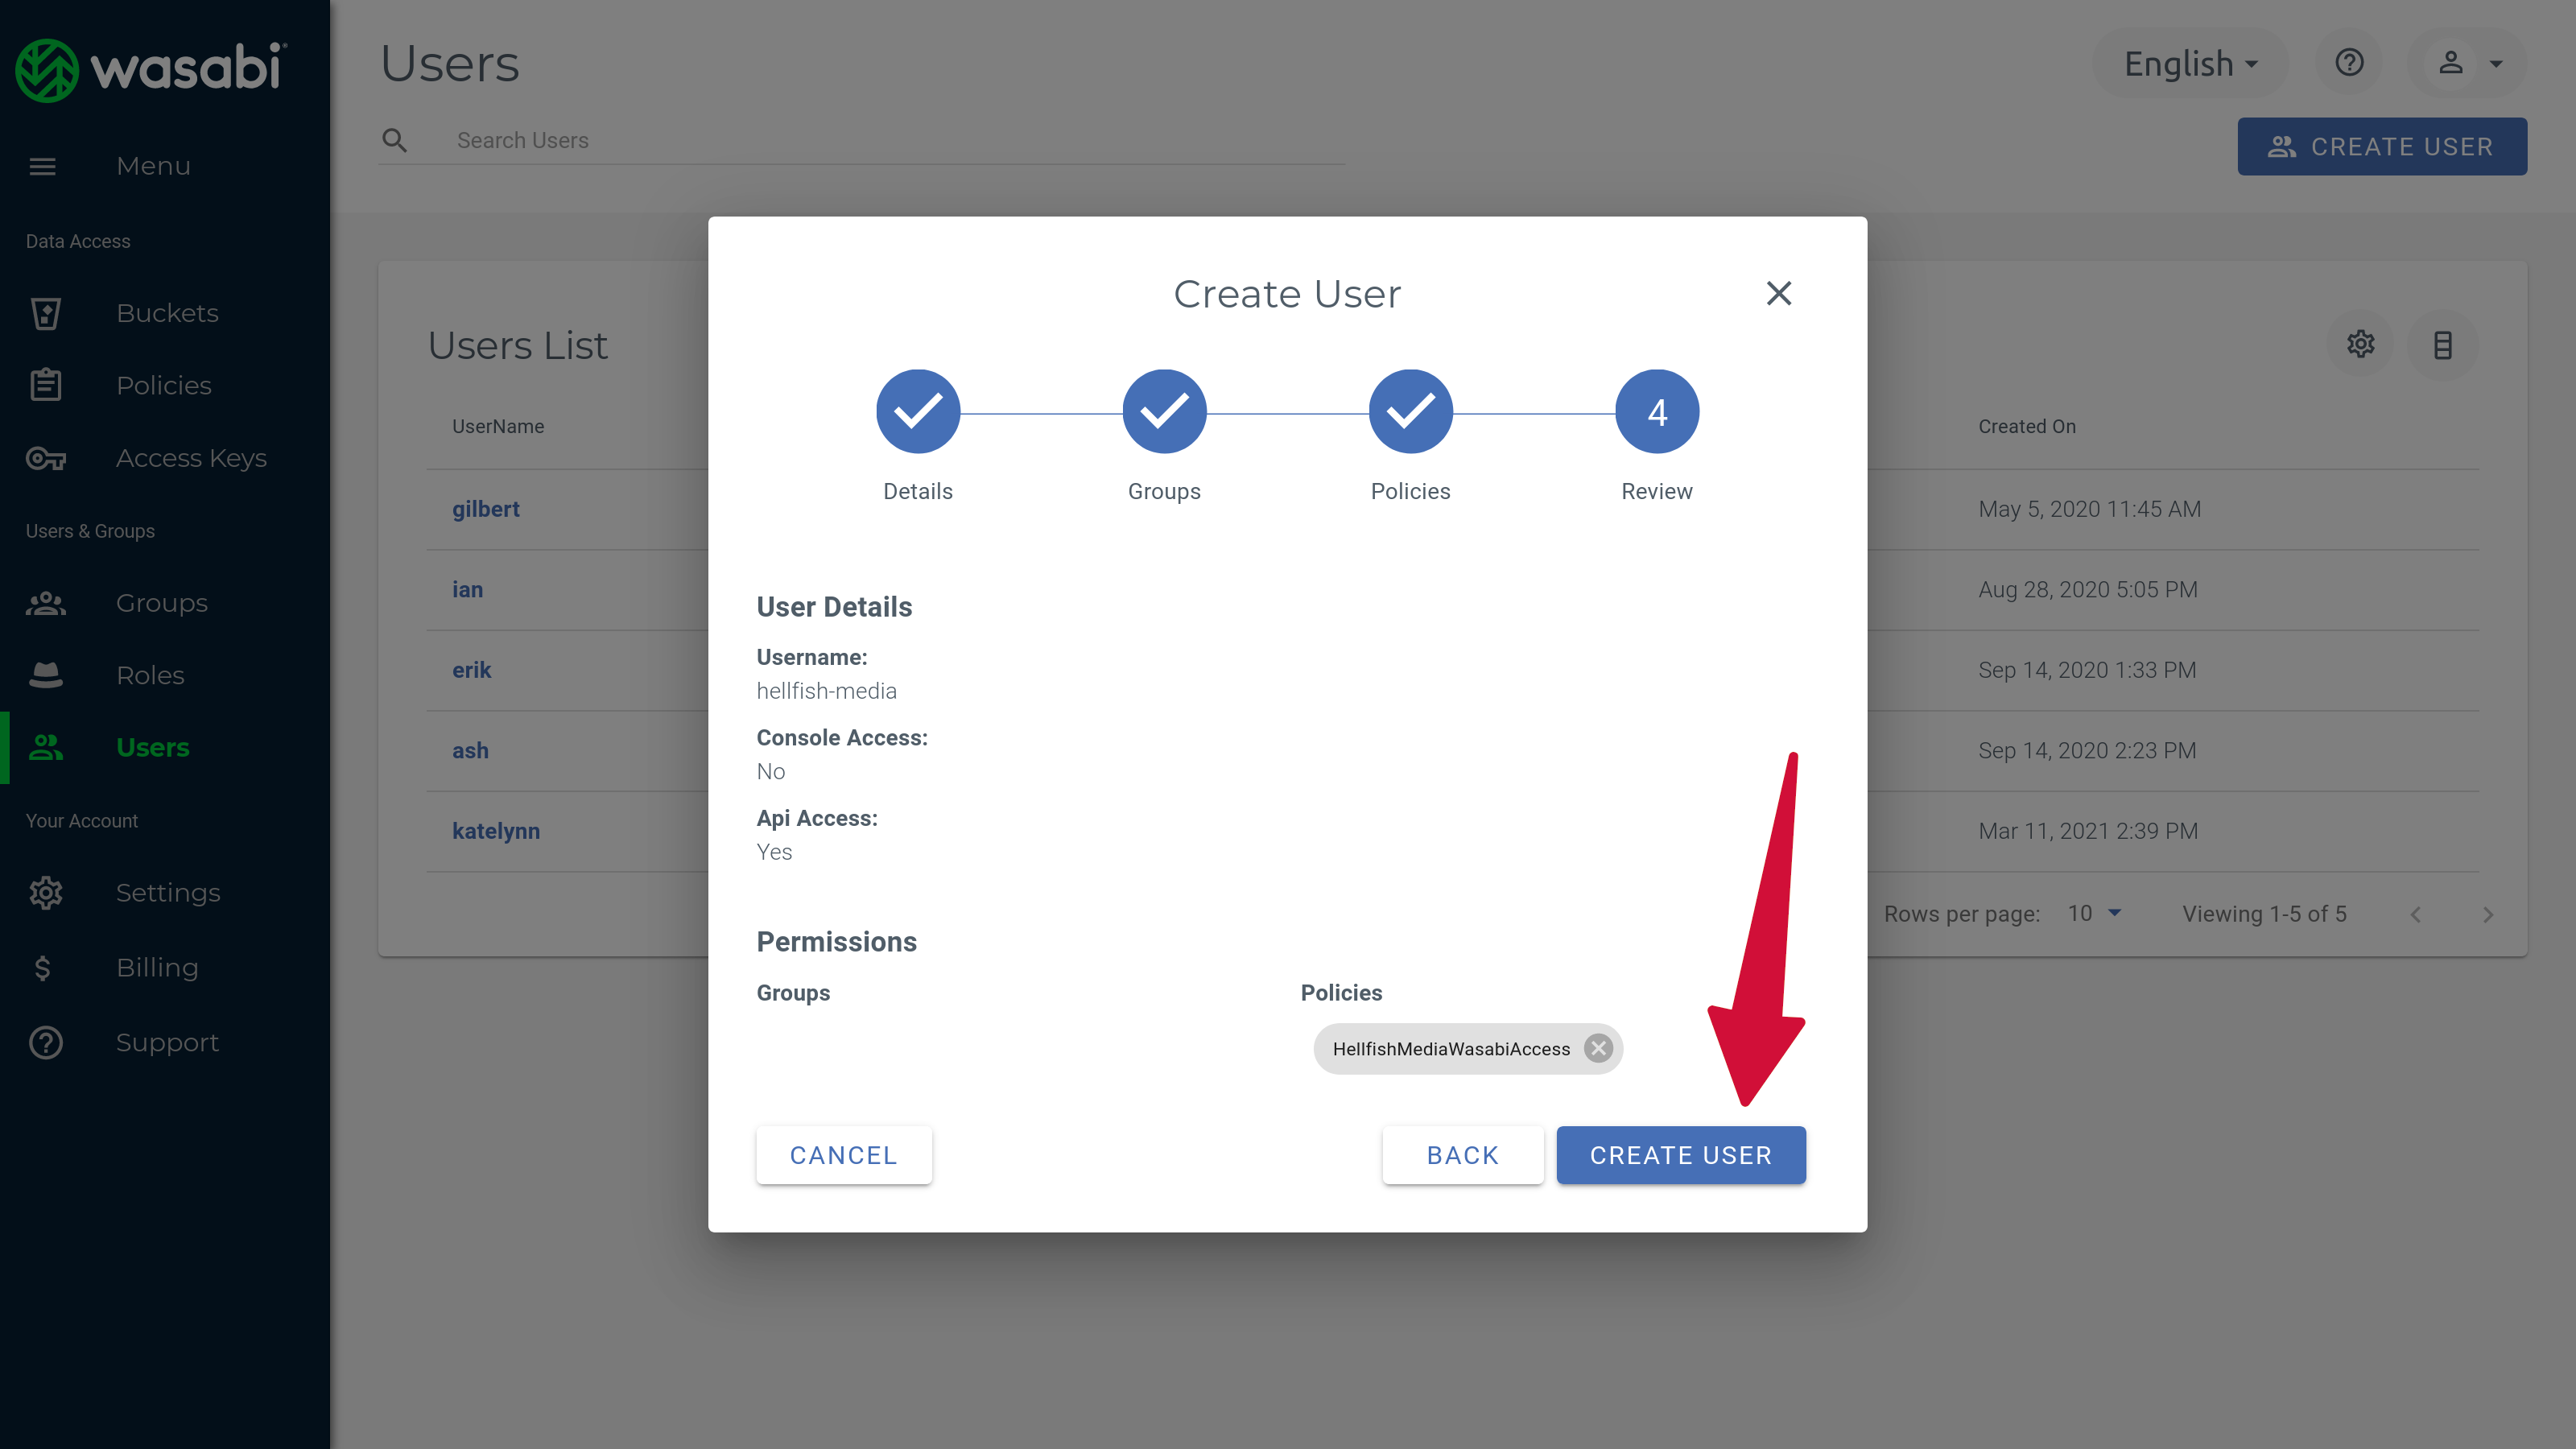
You’ll be presented with a “Review” screen to make sure the user details are correct. Click Create User to create the user.
Once the user is created, you will be presented with your access key credentials. Copy the “Access Key”, and click Show next to the Secret Key, to show and copy the secret key.
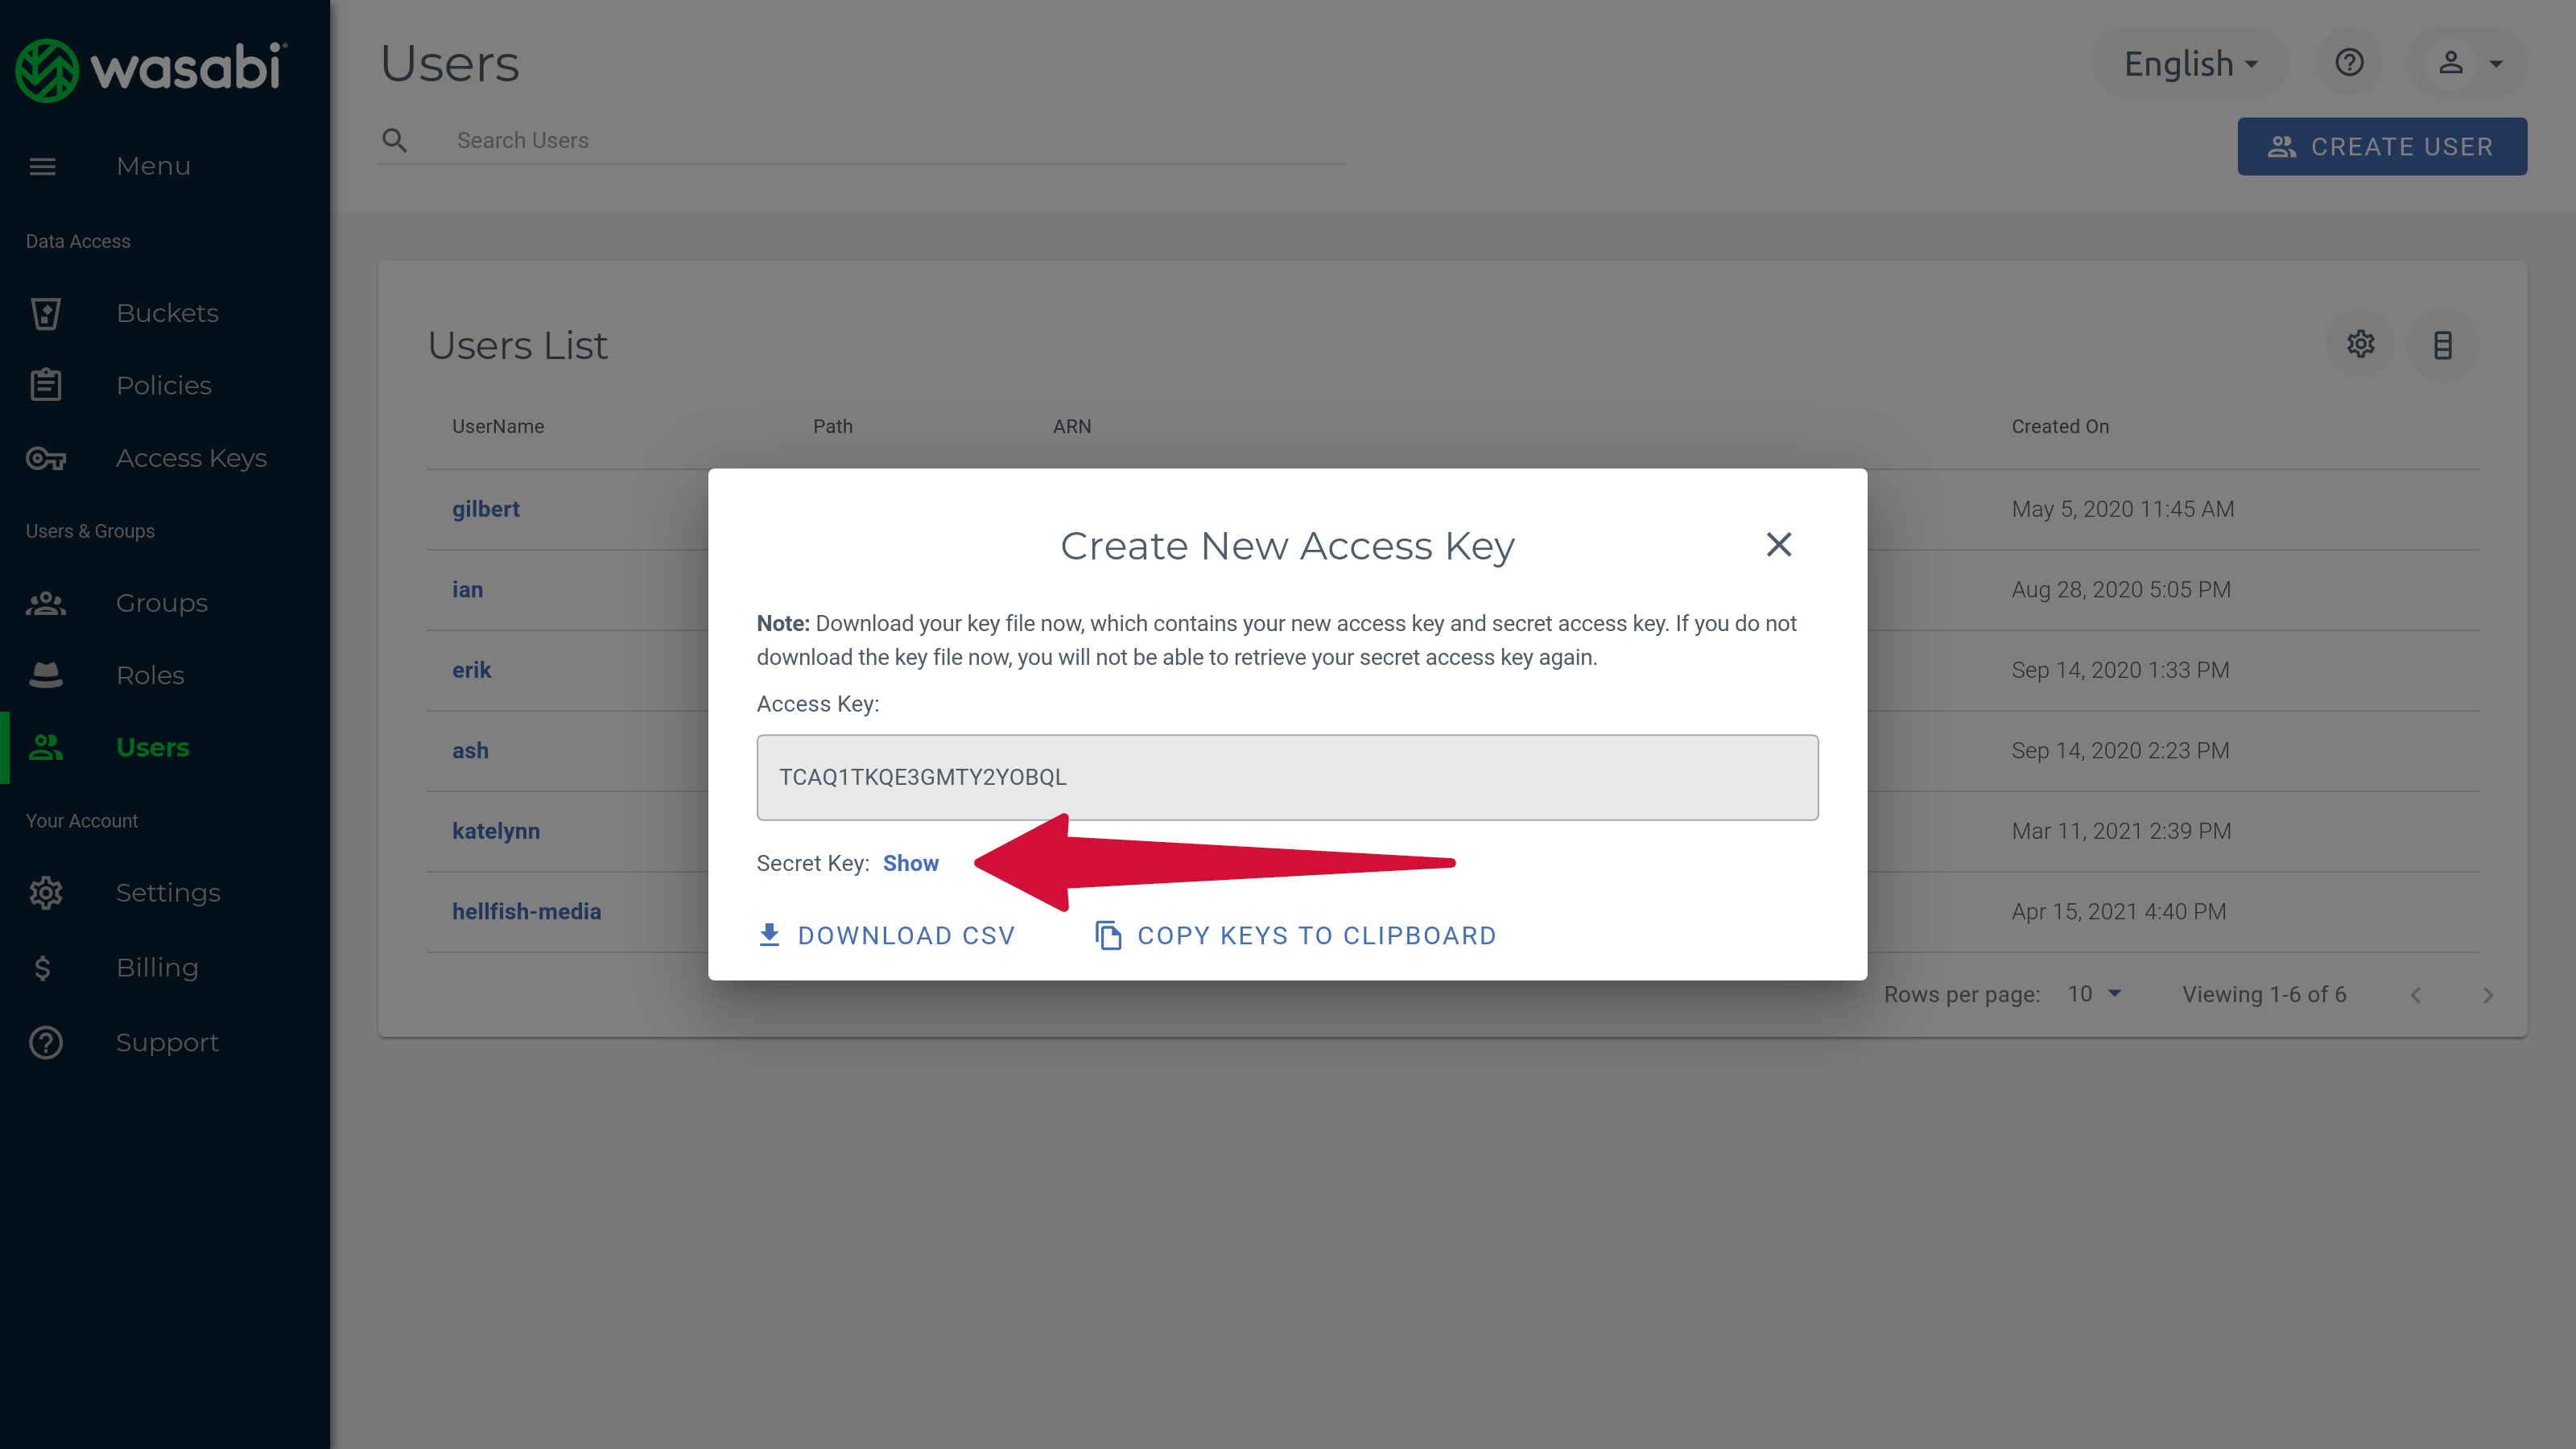
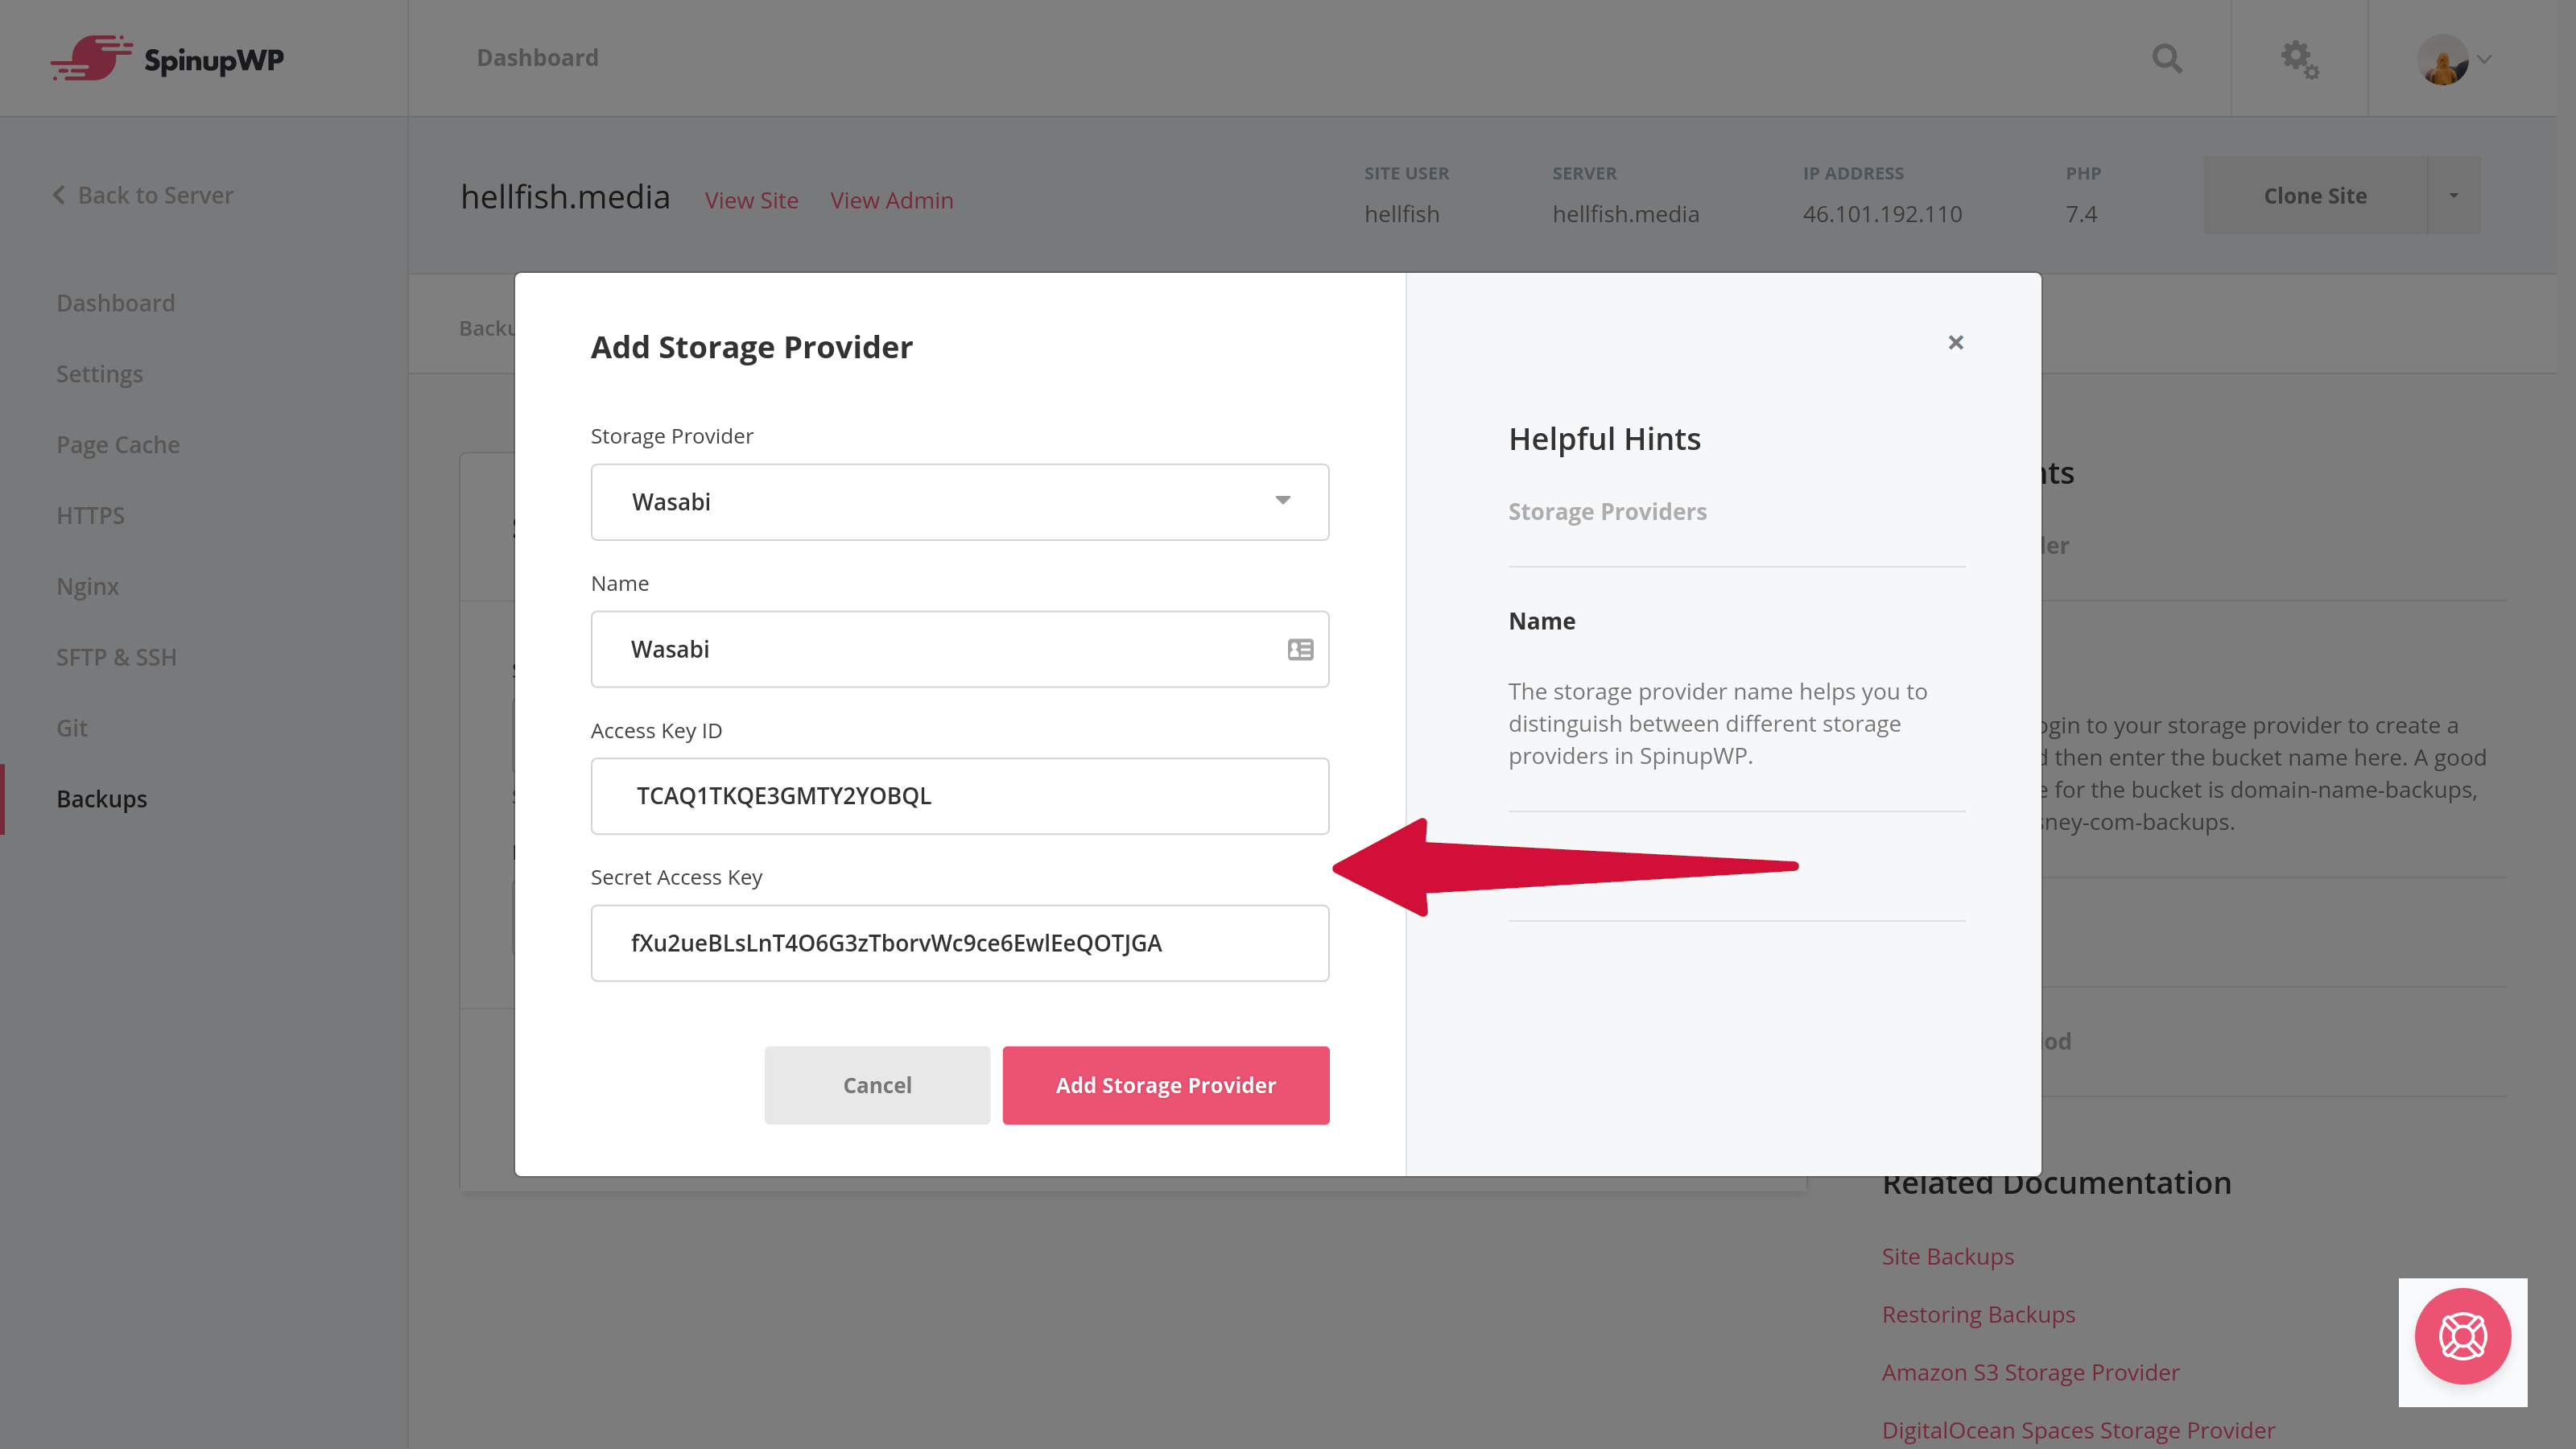
These keys can then be added to SpinupWP when asked for the “Access Key ID” and “Secret Access Key” to configure Wasabi as a backup option.
Restricting a User to a Specific Bucket
As with AWS IAM Users, you can also limit the Wasabi user to only have access to certain buckets by explicitly allowing specific bucket resource names (or ARN) in the policy rules. The bucket ARN follows the same pattern as an AWS bucket resource name:
arn:aws:s3:::unique-bucket-name
Replace unique-bucket-name with the unique name that you used when you created the bucket
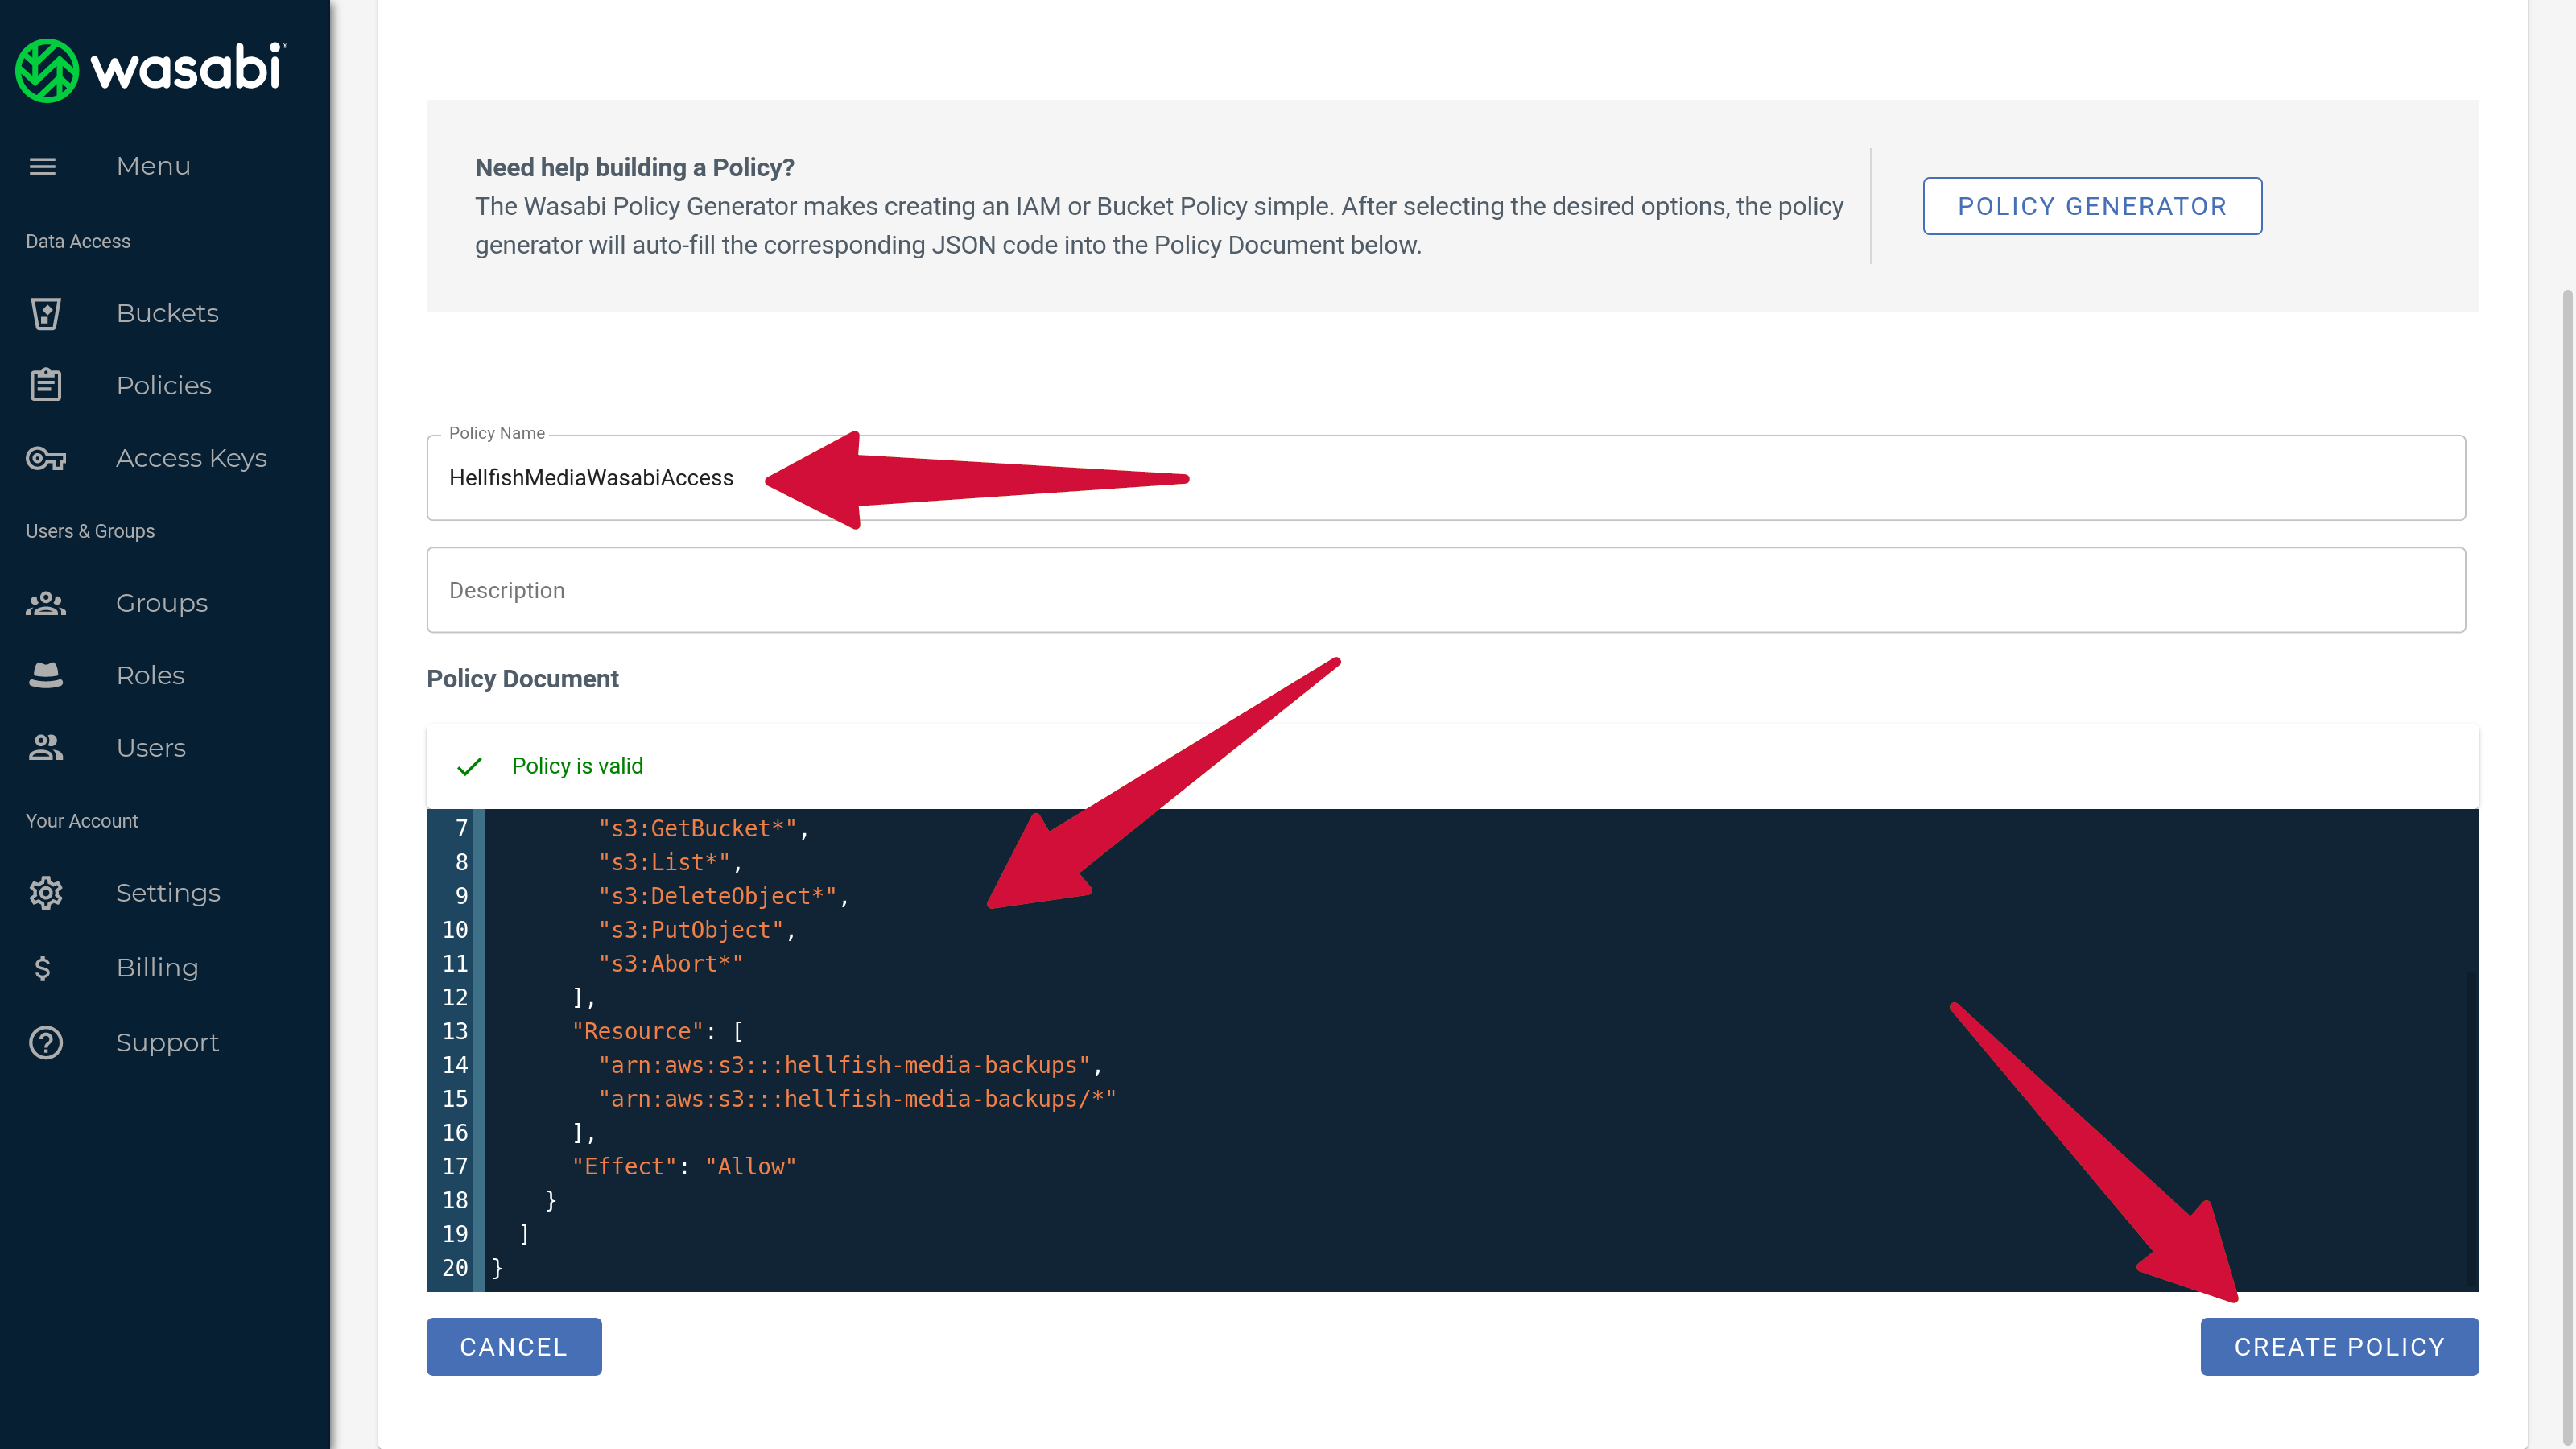
Then, when creating a new policy or editing an existing policy, you can update the policy JSON to include the resource names in the “Resource” node.
{
  "Version": "2012-10-17",
  "Statement": [
    {
      "Action": [
        "s3:GetObject*",
        "s3:GetBucket*",
        "s3:List*",
        "s3:DeleteObject*",
        "s3:PutObject",
        "s3:Abort*"
      ],
      "Resource": [
          "arn:aws:s3:::hellfish-media-backups",
          "arn:aws:s3:::hellfish-media-backups/*"
      ],
      "Effect": "Allow"
    }
  ]
}
