A reliable backup system is one of the most important features of any hosting solution. It’s so important that we have an entire Automated Remote Backups chapter in our Install WordPress on Ubuntu guide and built automated backups with offsite storage directly into SpinupWP.
I’m a big fan of the SpinupWP backup solution. For the majority of sites, it’s the perfect combination of regular full site backup, moving the backups offsite, and cleaning up old backups.
However, there are some instances where this type of backup solution is not ideal. Sites that process a large number of transactions every hour might need to consider an incremental backup solution, where each database transaction is recorded and backed up.
In this article, I’ll take you through the differences between full backups and incremental backups, how you would implement incremental backups manually on your own server, and how you can automate the process using a service called SqlBak.
- The Problem With Snapshot Backups
- Introducing Incremental Backups
- Create Your First Full Backup
- View the Binary Log Changes
- Backup Binary Logs
- Restore From Binary Logs
- Automated MySQL Incremental Backups
- Incremental Backups for Individual Databases
- Conclusion
The Problem With Snapshot Backups
Most database backup solutions take a “snapshot” of the database, a full copy of the structure and data at the time of the backup. These backups are fine for sites with small databases that don’t change very often. Sites with larger, more active databases need a better solution.
An ecommerce store is an example of this type of database, with the size of product, customer, and order data always growing. And as the number of active customers creating orders on the site increases, so does the rate at which data is read and written to the database.
If you have a large database, it’s going to affect server performance every time you have to run a backup. Whatever solution you use, it’s going to have to run some process on the server to back up the data. As the data increases, the resources required to complete a backup increase, and fewer resources are available for the rest of your website functionality. Eventually, you end up in a situation where you have to run backups when the server isn’t as busy, perhaps once a day at 5 am.
This in turn leads to the second problem: a larger risk of data loss. Backing up the data once a day means that if any new data in between backups is lost, it’s gone forever.
I’ve actually experienced this in a production environment. It’s not pleasant.
In my very first programming job, I was in charge of updating a client’s application software on their local Windows network. The client was a car repair workshop, and the application software managed their inventory and point of sale systems. The owner created regular backups every evening after the shop closed. Unfortunately, the only time I could update the software was at around midday, when they took their lunch break. Something went wrong, and they lost the entire morning’s transactions!
These types of failures are not commonplace, but they do happen. In my case, it was an error on my part. On a web server, it could be anything from a hardware failure to a security breach. When your website is also your ecommerce store, and therefore critical to your income generation, you need to know that you can recover from any possible failure.
Introducing Incremental Backups
An incremental backup—also known as a differential backup—includes only the database changes since the last snapshot. In my example of the auto shop, incremental backups could have saved the day. We could have recovered from the backup made the night before, applied all the incremental backups from that morning, and recovered all the data.
As incremental backups are small, they can be done more frequently without affecting server resources. A general rule is to run a full backup every day, copying that backup to offsite storage once it’s completed. You could do this once per week or even once per month if your site isn’t too busy. Then record every database transaction since the last backup to a log, and store these logs in the offsite location at set intervals.
Incremental Backups and MySQL
In the Automated Remote Backups chapter of our Install WordPress on Ubuntu guide, we used the mysqldump utility to back up the database to a file, known as a “dump file.” This utility allows you to create full backups of your MySQL database with options to include or exclude tables, data, and structure. What it does not offer is incremental backups.
MySQL Enterprise offers incremental backups among its many features, but it comes with a significant price tag. Luckily, there is a way to create incremental backups in the free version of MySQL.
First you need to enable the MySQL binary log. This is a log of all database changes that have occurred on the MySQL server, known as “events.” The binary log is off by default, but you can enable it by updating the right MySQL configuration file.
For the purposes of this article, I’m using our turnipjuice.media server, running Ubuntu 22.04 , MySQL 8.0.23, and set up by SpinupWP. I’m logging in as a sudo user with SSH public key authentication, but I’m switching to the root user to run all these commands. I’ll be working with different files owned by different users, so it’s just easier to do everything as the root user.
sudo -i
MySQL has two sets of configuration files, one for the client, and one for the server. To enable the binary logs, you need to edit your server configuration. The location of the relevant configuration file depends on your operating system. If you aren’t sure where the file is located, you can use the find command, which will output a possible list of MySQL configuration files.
find / -type f -name mysql*.cnf
root@turnipjuice:~$ find / -type f -name mysql.cnf
/etc/mysql/mysql.conf.d/mysqld.cnf
/etc/mysql/mysql.cnf
/etc/mysql/conf.d/mysql.cnf
/etc/mysql/conf.d/mysqldump.cnf
You can edit any of the files with nano:
nano /etc/mysql/mysql.conf.d/mysqld.cnf
The correct file will usually be named mysqld.cnf and have a [mysqld] section, which is the configuration for the MySQL server.
If you’re using MariaDB in place of MySQL, the configuration file structure will be similar, but there are differences. Start by looking at the /etc/mysql/ directory, and look at how the different configuration files are loaded from there. On a default Ubuntu 22.04 install, the correct file is /etc/mysql/mariadb.conf.d/50-server.cnf.
In my case, the file is located at /etc/mysql/mysql.conf.d/mysqld.cnf and looks like the following:
[mysqld]
#
# * Basic Settings
#
user        = mysql
# pid-file  = /var/run/mysqld/mysqld.pid
# socket    = /var/run/mysqld/mysqld.sock
# port      = 3306
# datadir   = /var/lib/mysql


# If MySQL is running as a replication slave, this should be
# changed. Ref https://dev.mysql.com/doc/refman/8.0/en/server-system-variables.html#sysvar_tmpdir
# tmpdir        = /tmp
#
# Instead of skip-networking the default is now to listen only on
# localhost which is more compatible and is not less secure.
bind-address        = 127.0.0.1
mysqlx-bind-address = 127.0.0.1
#
# * Fine Tuning
#
key_buffer_size     = 16M
# max_allowed_packet    = 64M
# thread_stack      = 256K

# thread_cache_size       = -1

# This replaces the startup script and checks MyISAM tables if needed
# the first time they are touched
myisam-recover-options  = BACKUP

# max_connections        = 151

# table_open_cache       = 4000

#
# * Logging and Replication
#
# Both location gets rotated by the cronjob.
#
# Log all queries
# Be aware that this log type is a performance killer.
# general_log_file        = /var/log/mysql/query.log
# general_log             = 1
#
# Error log - should be very few entries.
#
log_error = /var/log/mysql/error.log
#
# Here you can see queries with especially long duration
# slow_query_log        = 1
# slow_query_log_file   = /var/log/mysql/mysql-slow.log
# long_query_time = 2
# log-queries-not-using-indexes
#
# The following can be used as easy to replay backup logs or for replication.
# note: if you are setting up a replication slave, see README.Debian about
#       other settings you may need to change.
# server-id     = 1
# log_bin           = /var/log/mysql/mysql-bin.log
# binlog_expire_logs_seconds    = 2592000
max_binlog_size   = 100M
# binlog_do_db      = include_database_name
# binlog_ignore_db  = include_database_name
Once you find the right file, uncomment or add the following settings in the [mysqld] section so that the values match the settings below:
server-id        = 1
expire_logs_days = 10
binlog_format    = row
log_bin          = /var/log/mysql/mysql-bin
Hit Ctrl + X, Y, and then Enter to save the file. Now restart the MySQL server.
service mysql restart
To check if the settings have been applied, log in to your MySQL server with the root user, and run the following MySQL commands:
show binary logs;
show variables like 'server_id';
show variables like 'expire_logs_days';
show variables like 'binlog_format';
This is what the output should look like:
root@turnipjuice:~$ mysql -uroot -p
Enter password:
Welcome to the MySQL monitor. Commands end with ; or \g.
Your MySQL connection id is 12
Server version: 8.0.23 MySQL Community Server - GPL

Copyright (c) 2000, 2021, Oracle and/or its affiliates.

Oracle is a registered trademark of Oracle Corporation and/or its
affiliates. Other names may be trademarks of their respective
owners.

Type 'help;' or '\h' for help. Type '\c' to clear the current input statement.

mysql> show binary logs;
+------------------+-----------+-----------+
| Log_name         | File_size | Encrypted |
+------------------+-----------+-----------+
| mysql-bin.000001 |       156 | No        |
+------------------+-----------+-----------+
1 row in set (0.01 sec)

mysql> show variables like 'server_id';
+---------------+-------+
| Variable_name | Value |
+---------------+-------+
| server_id     | 1     |
+---------------+-------+
1 row in set (0.01 sec)

mysql> show variables like 'expire_logs_days';
+------------------+-------+
| Variable_name    | Value |
+------------------+-------+
| expire_logs_days | 10    |
+------------------+-------+
1 row in set (0.00 sec)

mysql> show variables like 'binlog_format';
+---------------+-------+
| Variable_name | Value |
+---------------+-------+
| binlog_format | ROW   |
+---------------+-------+
1 row in set (0.01 sec)

mysql>
The binary logs are created in the /var/log/mysql/ directory and have the prefix mysql-bin. You can use ls -lah or dir -lah to view the log files.
root@turnipjuice:/var/log/mysql# ls -lah
total 64K
drwxr-x---  2 mysql adm    4.0K Jan 26 08:29 .
drwxrwxr-x 13 root  syslog 4.0K Jan 26 07:58 ..
-rw-r-----  1 mysql adm     43K Jan 26 08:29 error.log
-rw-r-----  1 mysql mysql   156 Jan 26 08:29 mysql-bin.000001
-rw-r-----  1 mysql mysql    32 Jan 26 08:29 mysql-bin.index
Create Your First Full Backup
Now that you’ve enabled the binary logs, you first need to create a snapshot. As we mentioned earlier, incremental backups only save the changes since the last full backup, so we need a point to start from.
I’ve created a /sites/backups directory to store any backups created in this article. Using the mysqldump command I’ll create the first full backup file.
mysqldump --flush-logs --delete-source-logs --single-transaction --all-databases -uroot -p -hlocalhost > /sites/backups/$(date +%d-%m-%Y_%H-%M-%S)_databases.sql
I am creating the backup file using the same date format string we used in the automated backups script, so I’ll know when it was completed.
It’s important to understand what this command is doing.
- The
--flush-logsoption flushes the MySQL server log files and starts writing a new binary log file. - The
--delete-master-logsoption deletes any old binary log files. If you are using a version of MySQL after 8.0.26, you should use--delete-source-logsinstead, as--delete-master-logswas deprecated in MySQL 8.0.26. - The
--single-transactionoption is needed if you have tables that use the InnoDB storage engine. - The
--all-databasesoption tells the command to dump all databases.
You might be wondering why we’re backing up all databases, rather than a single database. I’ll explain this when we get to the section on viewing the binary logs.
If you look at the MySQL log directory after creating the first full backup, you’ll see that the binary logs have changed.
root@turnipjuice:/var/log/mysql# ls -lah
total 64K
drwxr-x---  2 mysql adm    4.0K Jan 26 10:28 .
drwxrwxr-x 13 root  syslog 4.0K Jan 26 07:58 ..
-rw-r-----  1 mysql adm     43K Jan 26 08:29 error.log
-rw-r-----  1 mysql mysql   156 Jan 26 10:28 mysql-bin.000002
-rw-r-----  1 mysql mysql    32 Jan 26 10:28 mysql-bin.index
The current binary log has changed from mysql-bin.000001 to mysql-bin.000002, after the mysqldump event with --flush-logs.
View the Binary Log Changes
Now might be a good time to see what’s inside the binary log file. You can do this using the mysqlbinlog utility:
mysqlbinlog --no-defaults /var/log/mysql/mysql-bin.000002
You should see a log of all the events that have taken place on the MySQL server:
root@turnipjuice:~$ sudo mysqlbinlog --no-defaults /var/log/mysql/mysql-bin.000002
/*!50530 SET @@SESSION.PSEUDO_SLAVE_MODE=1*/;
/*!50003 SET @OLD_COMPLETION_TYPE=@@COMPLETION_TYPE,COMPLETION_TYPE=0*/;
DELIMITER /*!*/;
# at 4
#220126 10:28:04 server id 1  end_log_pos 125 CRC32 0x48cbe0ee     Start: binlog v 4, server v 8.0.23 created 220126 10:28:04
# Warning: this binlog is either in use or was not closed properly.
BINLOG '
NCLxYQ8BAAAAeQAAAH0AAAABAAQAOC4wLjIzAAAAAAAAAAAAAAAAAAAAAAAAAAAAAAAAAAAAAAAA
AAAAAAAAAAAAAAAAAAAAAAAAEwANAAgAAAAABAAEAAAAYQAEGggAAAAICAgCAAAACgoKKioAEjQA
CigB7uDLSA==
'/*!*/;
# at 125
#220126 10:28:04 server id 1  end_log_pos 156 CRC32 0x9366ef7e     Previous-GTIDs
# [empty]
SET @@SESSION.GTID_NEXT= 'AUTOMATIC' /* added by mysqlbinlog */ /*!*/;
DELIMITER ;
# End of log file
/*!50003 SET COMPLETION_TYPE=@OLD_COMPLETION_TYPE*/;
/*!50530 SET @@SESSION.PSEUDO_SLAVE_MODE=0*/;
There’s one downside to the binary logs. They include all MySQL events, across all databases on the MySQL server. This is the reason we created a full backup of all databases in the earlier step. If you want to restore a single database from the binary logs, you need to limit the output to only show events related to a specific database. Fortunately, you can use the -d option for this, which allows you to specify which database events to list.
mysqlbinlog --no-defaults -dturnipjuice /var/log/mysql/mysql-bin.000002
Backup Binary Logs
You could copy the relevant files from the MySQL log directory, but you might end up with some issues if database changes are being logged while you are copying. It’s best to first flush the binary logs, which will force MySQL to close the current log file and start writing to a new one. Then you can copy all the log files except the current one.
To do this, log into the MySQL server and run the following MySQL command:
FLUSH BINARY LOGS;
If you inspect the contents of the log directory, you’ll see it’s created a new log file.
root@turnipjuice:/var/log/mysql# ls -lah
total 80K
drwxr-x---  2 mysql adm    4.0K Jan 26 14:43 .
drwxrwxr-x 13 root  syslog 4.0K Jan 26 07:58 ..
-rw-r-----  1 mysql adm     50K Jan 26 14:30 error.log
-rw-r-----  1 mysql mysql  6.8K Jan 26 14:43 mysql-bin.000002
-rw-r-----  1 mysql mysql   156 Jan 26 14:43 mysql-bin.000003
-rw-r-----  1 mysql mysql    64 Jan 26 14:43 mysql-bin.index
mysql-bin.000002 is a list of all events since the full backup, and mysql-bin.000003 is the current log file. If you make a change to the database, you’ll see the new events in mysql-bin.000003.
Now we can back up all the files that are not the current log file, in this case mysql-bin.000002. I’m going to manually copy it to a /sites/backups/ directory I’ve created, but prefix it with the current date and time, so I can easily identify it later. If you had more than one binary log file, you’d have to copy each one.
cp /var/log/mysql/mysql-bin.000002 /sites/backups/$(date +%d-%m-%Y_%H-%M-%S).mysql-bin
After copying the relevant binary log files, we need to delete them from the log directory. This is to ensure that we do not duplicate already backed up data the next time we copy the binary log files. We can use the PURGE BINARY LOGS statement, which deletes all the binary log files listed in the log index file prior to the specified log file name or date. In our case we want to delete all the binary log files except the current one, so we log into the MySQL server and run the following command:
PURGE BINARY LOGS TO 'mysql-bin.000003';
If we inspect the contents of the log directory, we’ll see that the log file we copied has been deleted.
root@turnipjuice:/var/log/mysql# ls -lah
total 72K
drwxr-x---  2 mysql adm    4.0K Jan 26 14:44 .
drwxrwxr-x 13 root  syslog 4.0K Jan 26 07:58 ..
-rw-r-----  1 mysql adm     50K Jan 26 14:30 error.log
-rw-r-----  1 mysql mysql   156 Jan 26 14:43 mysql-bin.000003
-rw-r-----  1 mysql mysql    32 Jan 26 14:44 mysql-bin.index
At this point, you could use a similar solution as the one we outlined in the Automated Remote Backups chapter of our guide to move the backups to an offsite storage location like Amazon S3.
Restore From Binary Logs
Now that we have a full backup, and a binary log backup, it would be useful to know how to restore from them.
Our backups directory currently looks like this:
root@turnipjuice:/sites/backups# ls -lah
total 7.9M
drwxr-xr-x  2 root root 4.0K Jan 26 14:44 .
drwxr-xr-x+ 9 root root 4.0K Jan 26 14:32 ..
-rw-r--r--  1 root root 7.9M Jan 26 14:37 26-01-2022_14-37-30_databases.sql
-rw-r-----  1 root root 6.8K Jan 26 14:44 26-01-2022_14-44-46.mysql-bin
We only have two files, as we have one full backup and one binary log backup, but if you run a full backup once a day and copy the binary logs at regular intervals, you’d have one sql file and multiple mysql-bin files per day.
To restore the binary logs from a specific point in time, we first need to restore the most recent full backup:
mysql -uroot -p {database_name} < /sites/backups/26-01-2022_14-37-30_databases.sql
Now we can restore the binary logs we copied after the last full backup. We do this by using the mysqlbinlog utility to view the log data for the specific database, and piping that output to the mysql utility for the database in question.
mysqlbinlog --no-defaults -dturnipjuice /sites/backups/26-01-2022_14-44-46.mysql-bin | mysql -uroot -p turnipjuice
If you have more than one binary log file, you can include them all in the same command, like so:
mysqlbinlog --no-defaults -dturnipjuice /sites/backups/26-01-2022_14-44-46.mysql-bin /sites/backups/26-01-2022_14-49-46.mysql-bin | mysql -uroot -p turnipjuice
Automated MySQL Incremental Backups
Given that these commands are run as the root user from the terminal, it’s also possible to automate all of this with a batch script. At the same time, we’d want to allow the script to back up multiple possible binary log files.
#!/bin/sh

# set up the date variable
NOW=$(date +%Y%m%d%H%M%S)
BINLOG_BACKUP=${NOW}_binlog.tar.gz

# set up the database credentials
DB_USER=root
DB_PASSWORD=root_password

# binary log files directory path
BINLOGS_PATH=/var/log/mysql/

# flush the current log and start writing to a new binary log file
mysql -u$DB_USER -p$DB_PASSWORD -E --execute='FLUSH BINARY LOGS;' mysql

# get a list of all binary log files
BINLOGS=$(mysql -u$DB_USER -p$DB_PASSWORD -E --execute='SHOW BINARY LOGS;' mysql | grep Log_name | sed -e 's/Log_name://g' -e 's/^[[:space:]]*//' -e 's/[[:space:]]*$//')

# get the most recent binary log file
BINLOG_CURRENT=`echo "${BINLOGS}" | tail -n -1`

# get list of binary logs to be backed up (everything except the most recent one)
BINLOGS_FOR_BACKUP=`echo "${BINLOGS}" | head -n -1`

# create a list of the full paths to the binary logs to be backed up
BINLOGS_FULL_PATH=`echo "${BINLOGS_FOR_BACKUP}" | xargs -I % echo $BINLOGS_PATH%`

# compress the list of binary logs to be backed up into an archive in the backup location
tar -czvf /sites/backups/$BINLOG_BACKUP $BINLOGS_FULL_PATH

# delete the binary logs that have been backed up
echo $BINLOG_CURRENT | xargs -I % mysql -u$DB_USER -p$DB_PASSWORD -E --execute='PURGE BINARY LOGS TO "%";' mysql
The last step would be to save this script somewhere and then automate the process using a server cron job. As we’re running all this as the root user, I’m saving the script as the ~/scripts/mysql_inc_backup.sh in the root user account, and creating a root user cron.
crontab -e
I then create a scheduled task to create the full backup once a day (at 5 am server time) and run the incremental backups every hour.
0 5 * * * mysqldump --flush-logs --delete-master-logs --all-databases -uroot -proot_password -hlocalhost > /sites/backups/$(date +%d-%m-%Y_%H-%M-%S)_databases.sql
*/60 * * * * bash ~/scripts/mysql_inc_backup.sh
Finally, it would be a good idea to periodically clean up the backup files in the /sites/backups directory. This could be achieved using the same clean up process we used in our Automated Remote Backups chapter.
Incremental Backups for Individual Databases
The process I’ve outlined above backs up all the MySQL data on the server. The reason for this is that the binary logs contain all events across the entire MySQL server. While it’s possible to configure MySQL to create separate binary logs per database, it’s a complex process that requires multiple MySQL services and the use of replication. This is a complicated procedure, so we recommend using a third-party service to back up your binary logs instead.
Backing Up With SqlBak
We recommend SqlBak if you choose to offload your backups to a service to take advantage of incremental backups. You can read more about what they offer on their website, but there are a few reasons we recommend them:
- They offer a 30-day free trial that allows you to test out all functionality.
- Using their service doesn’t require you to manually install any additional software on your server, besides the
sqlbakutility. - They have good documentation that is concise and understandable, even to someone with a limited understanding of how MySQL servers work.
- Their user interface is clear and guides you through each step of the process.
Getting Started With SqlBak
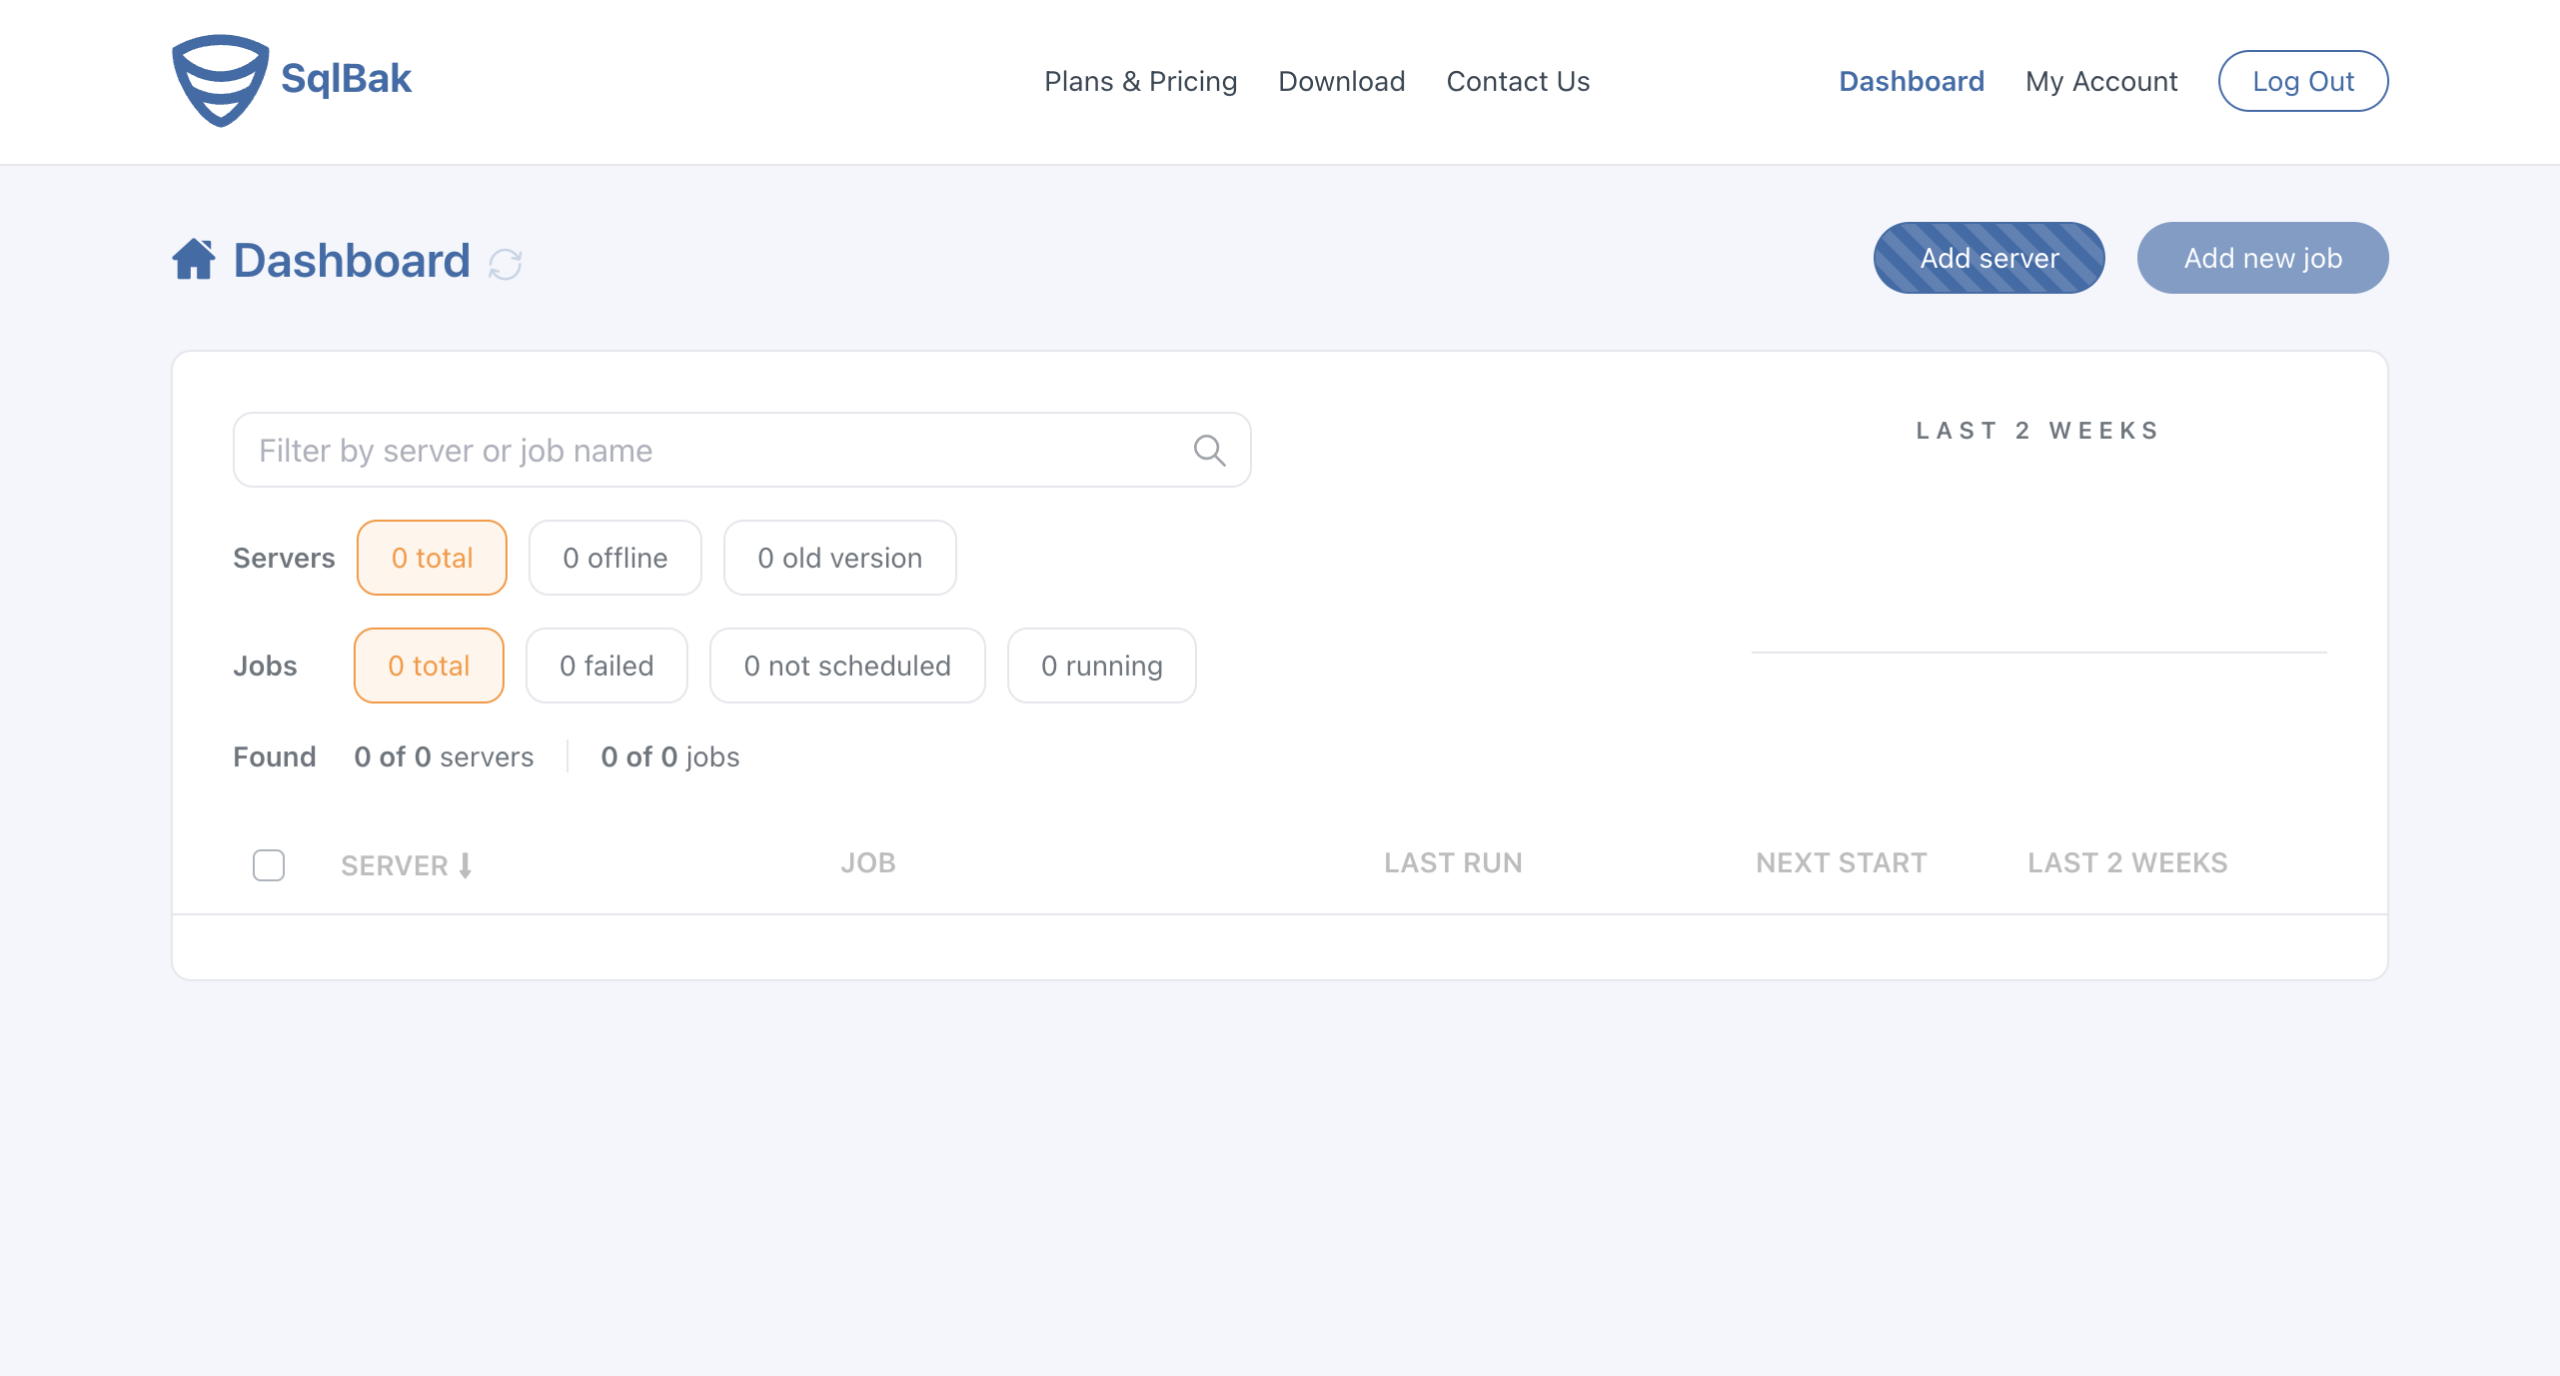
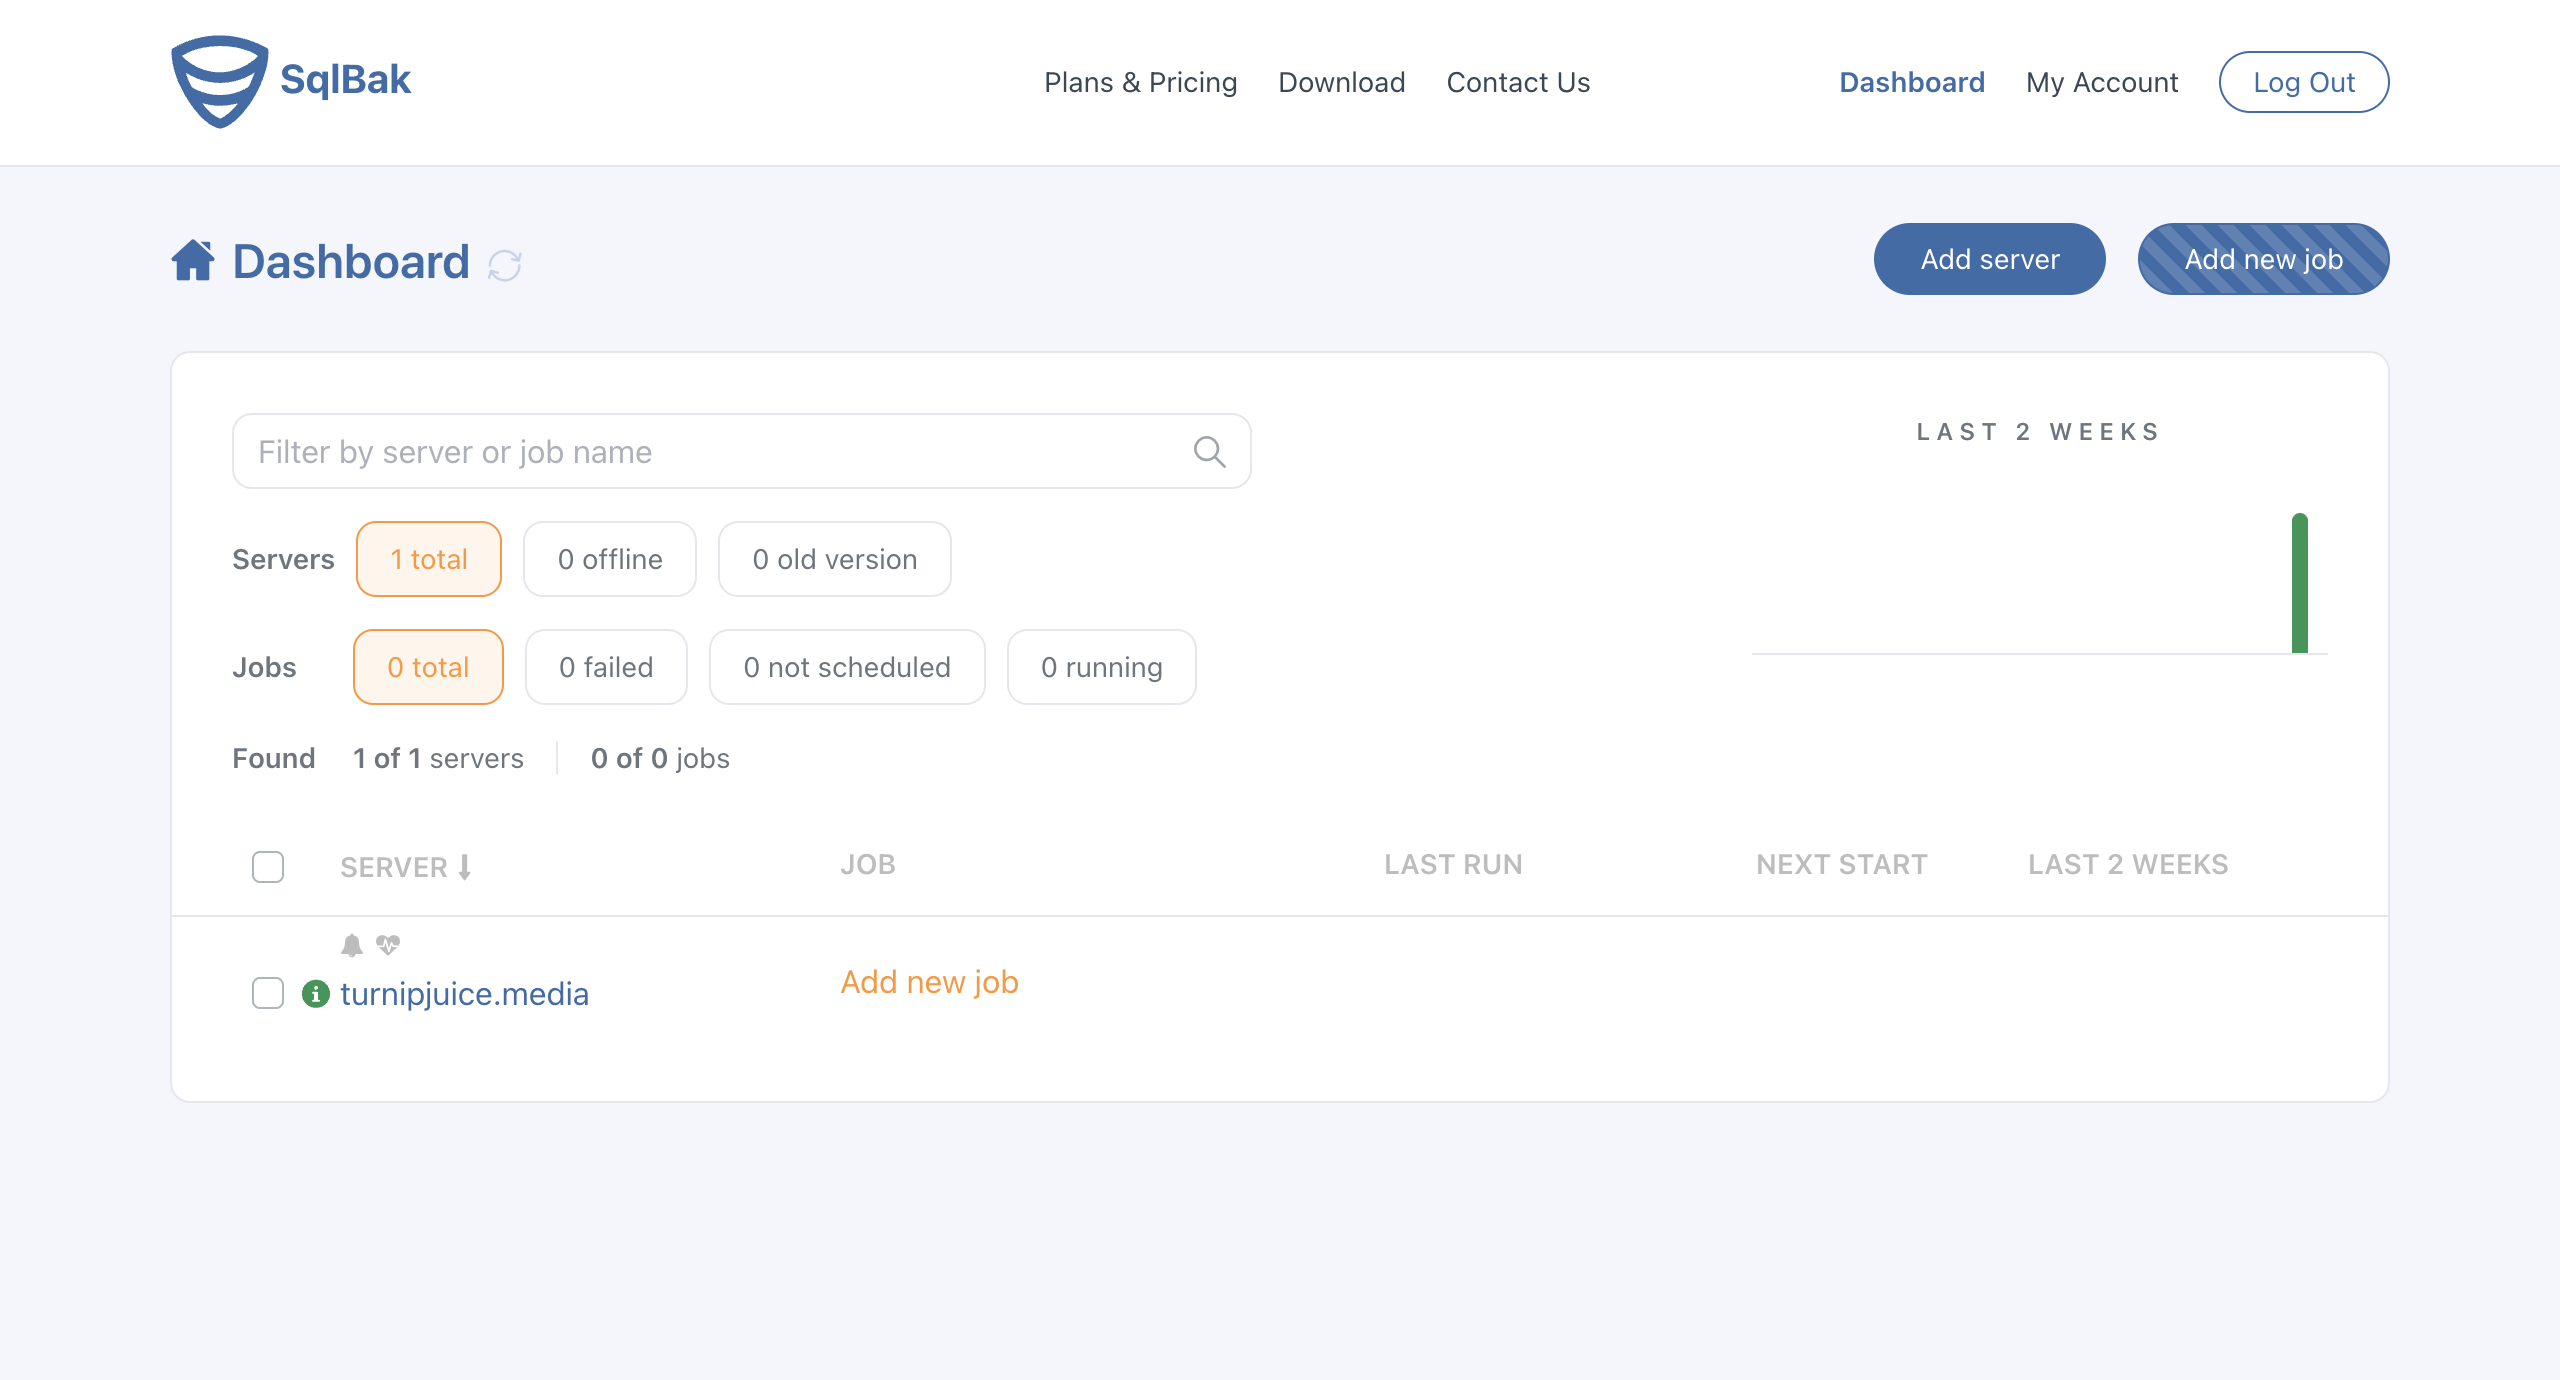
Once you register for a SqlBak account, your first step is to add a new server from the SqlBak dashboard.
SqlBak then provides instructions for your chosen operating system. The app allows you to copy the relevant commands to be run, including your personal secret key.
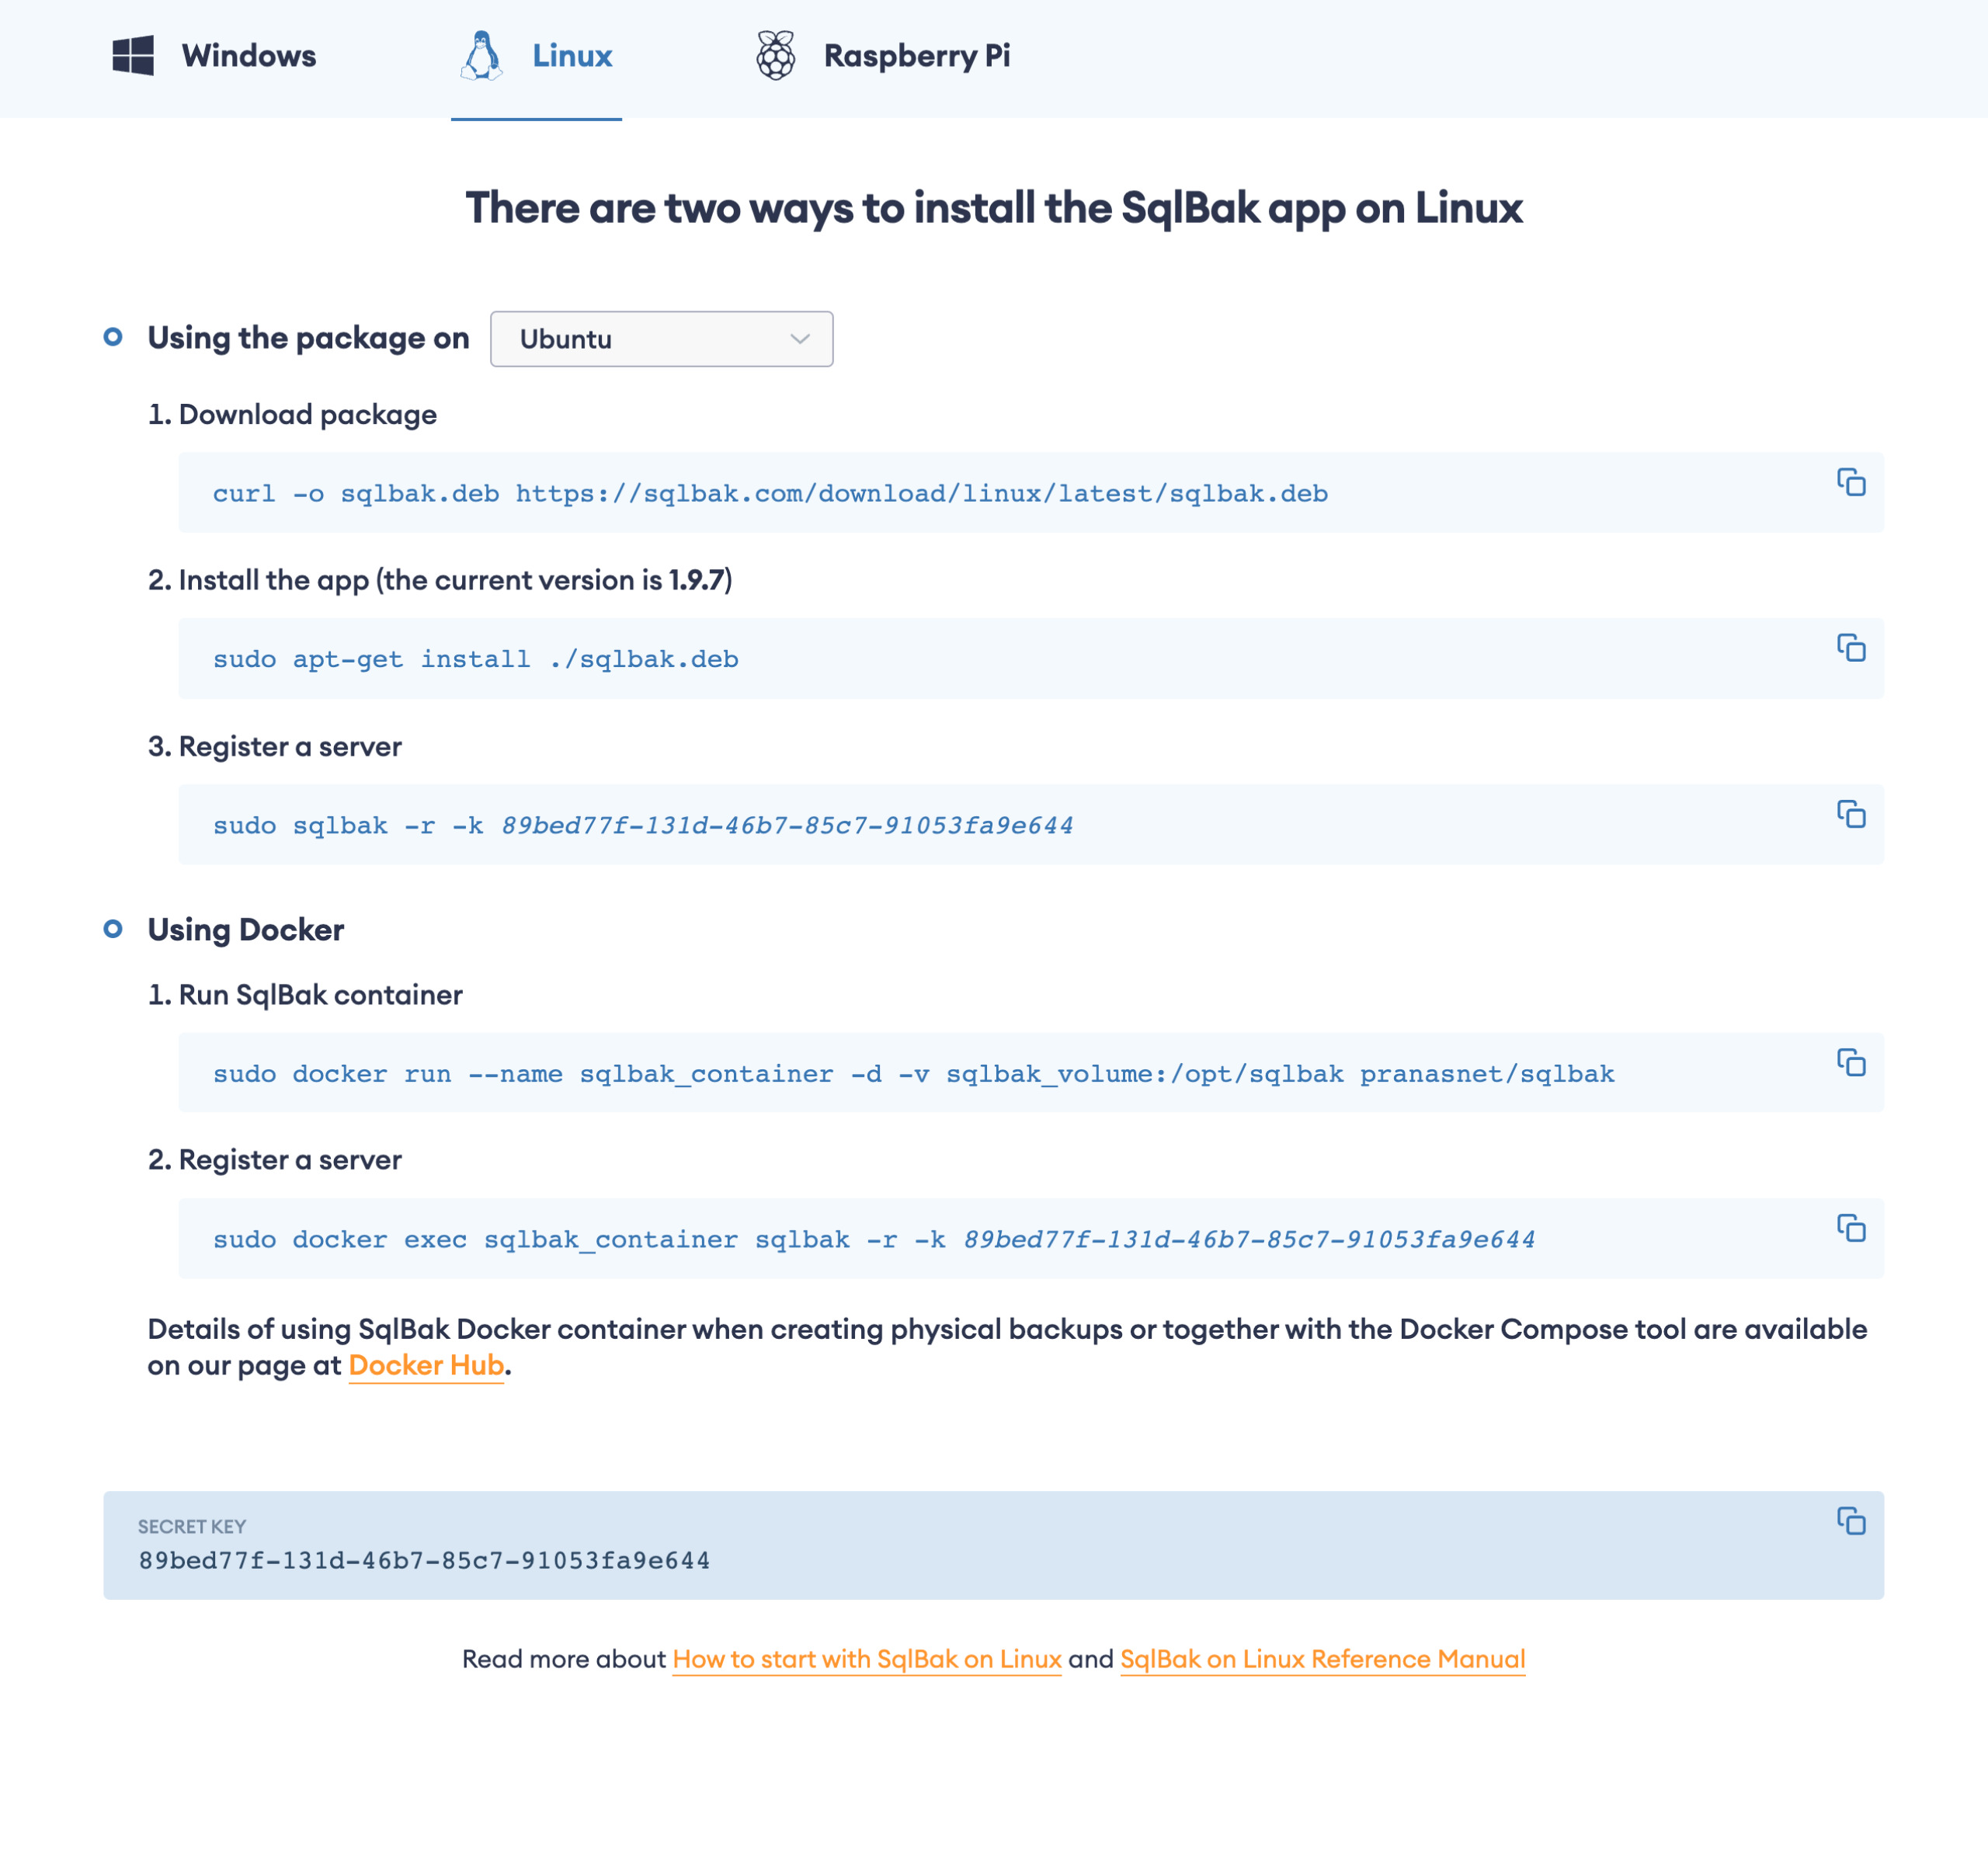
Here’s what the output looks like:
asimpson@turnipjuice:~$ sudo sqlbak -r -k <secret-key> -n turnipjuice.media
turnipjuice.media has been successfully registered in SqlBak.com (account Abraham Simpson).

Now you need to add a connection to DBMS (MySQL, PostgreSQL, MSSQL Server). Run:
sudo sqlbak -ac -dt <dbms_type> -h <host> -u <user_name> -p <password>

For example:
MySQL: sudo sqlbak -ac -dt mysql -h <host> -u <user> -p <user_password>
PostgreSQL: sudo sqlbak -ac -dt postgresql -h <host> -u <user> -p <user_password>
MS SQL SERVER: sudo sqlbak -ac -dt mssql -h <host> -u <user> -p <user_password>
MongoDB: sudo sqlbak -ac -dt mongo -h <host> -u <user> -p <user_password>

To find more details use: sudo sqlbak -h -c ac
It prompts you to add a connection to your database server, which in this case is MySQL. Because we want to make use of the incremental backup option, you need to run this with the root MySQL credentials. On SpinupWP you would have generated a root password when you provisioned the server, or you can get this from the “Databases” tab for your server.
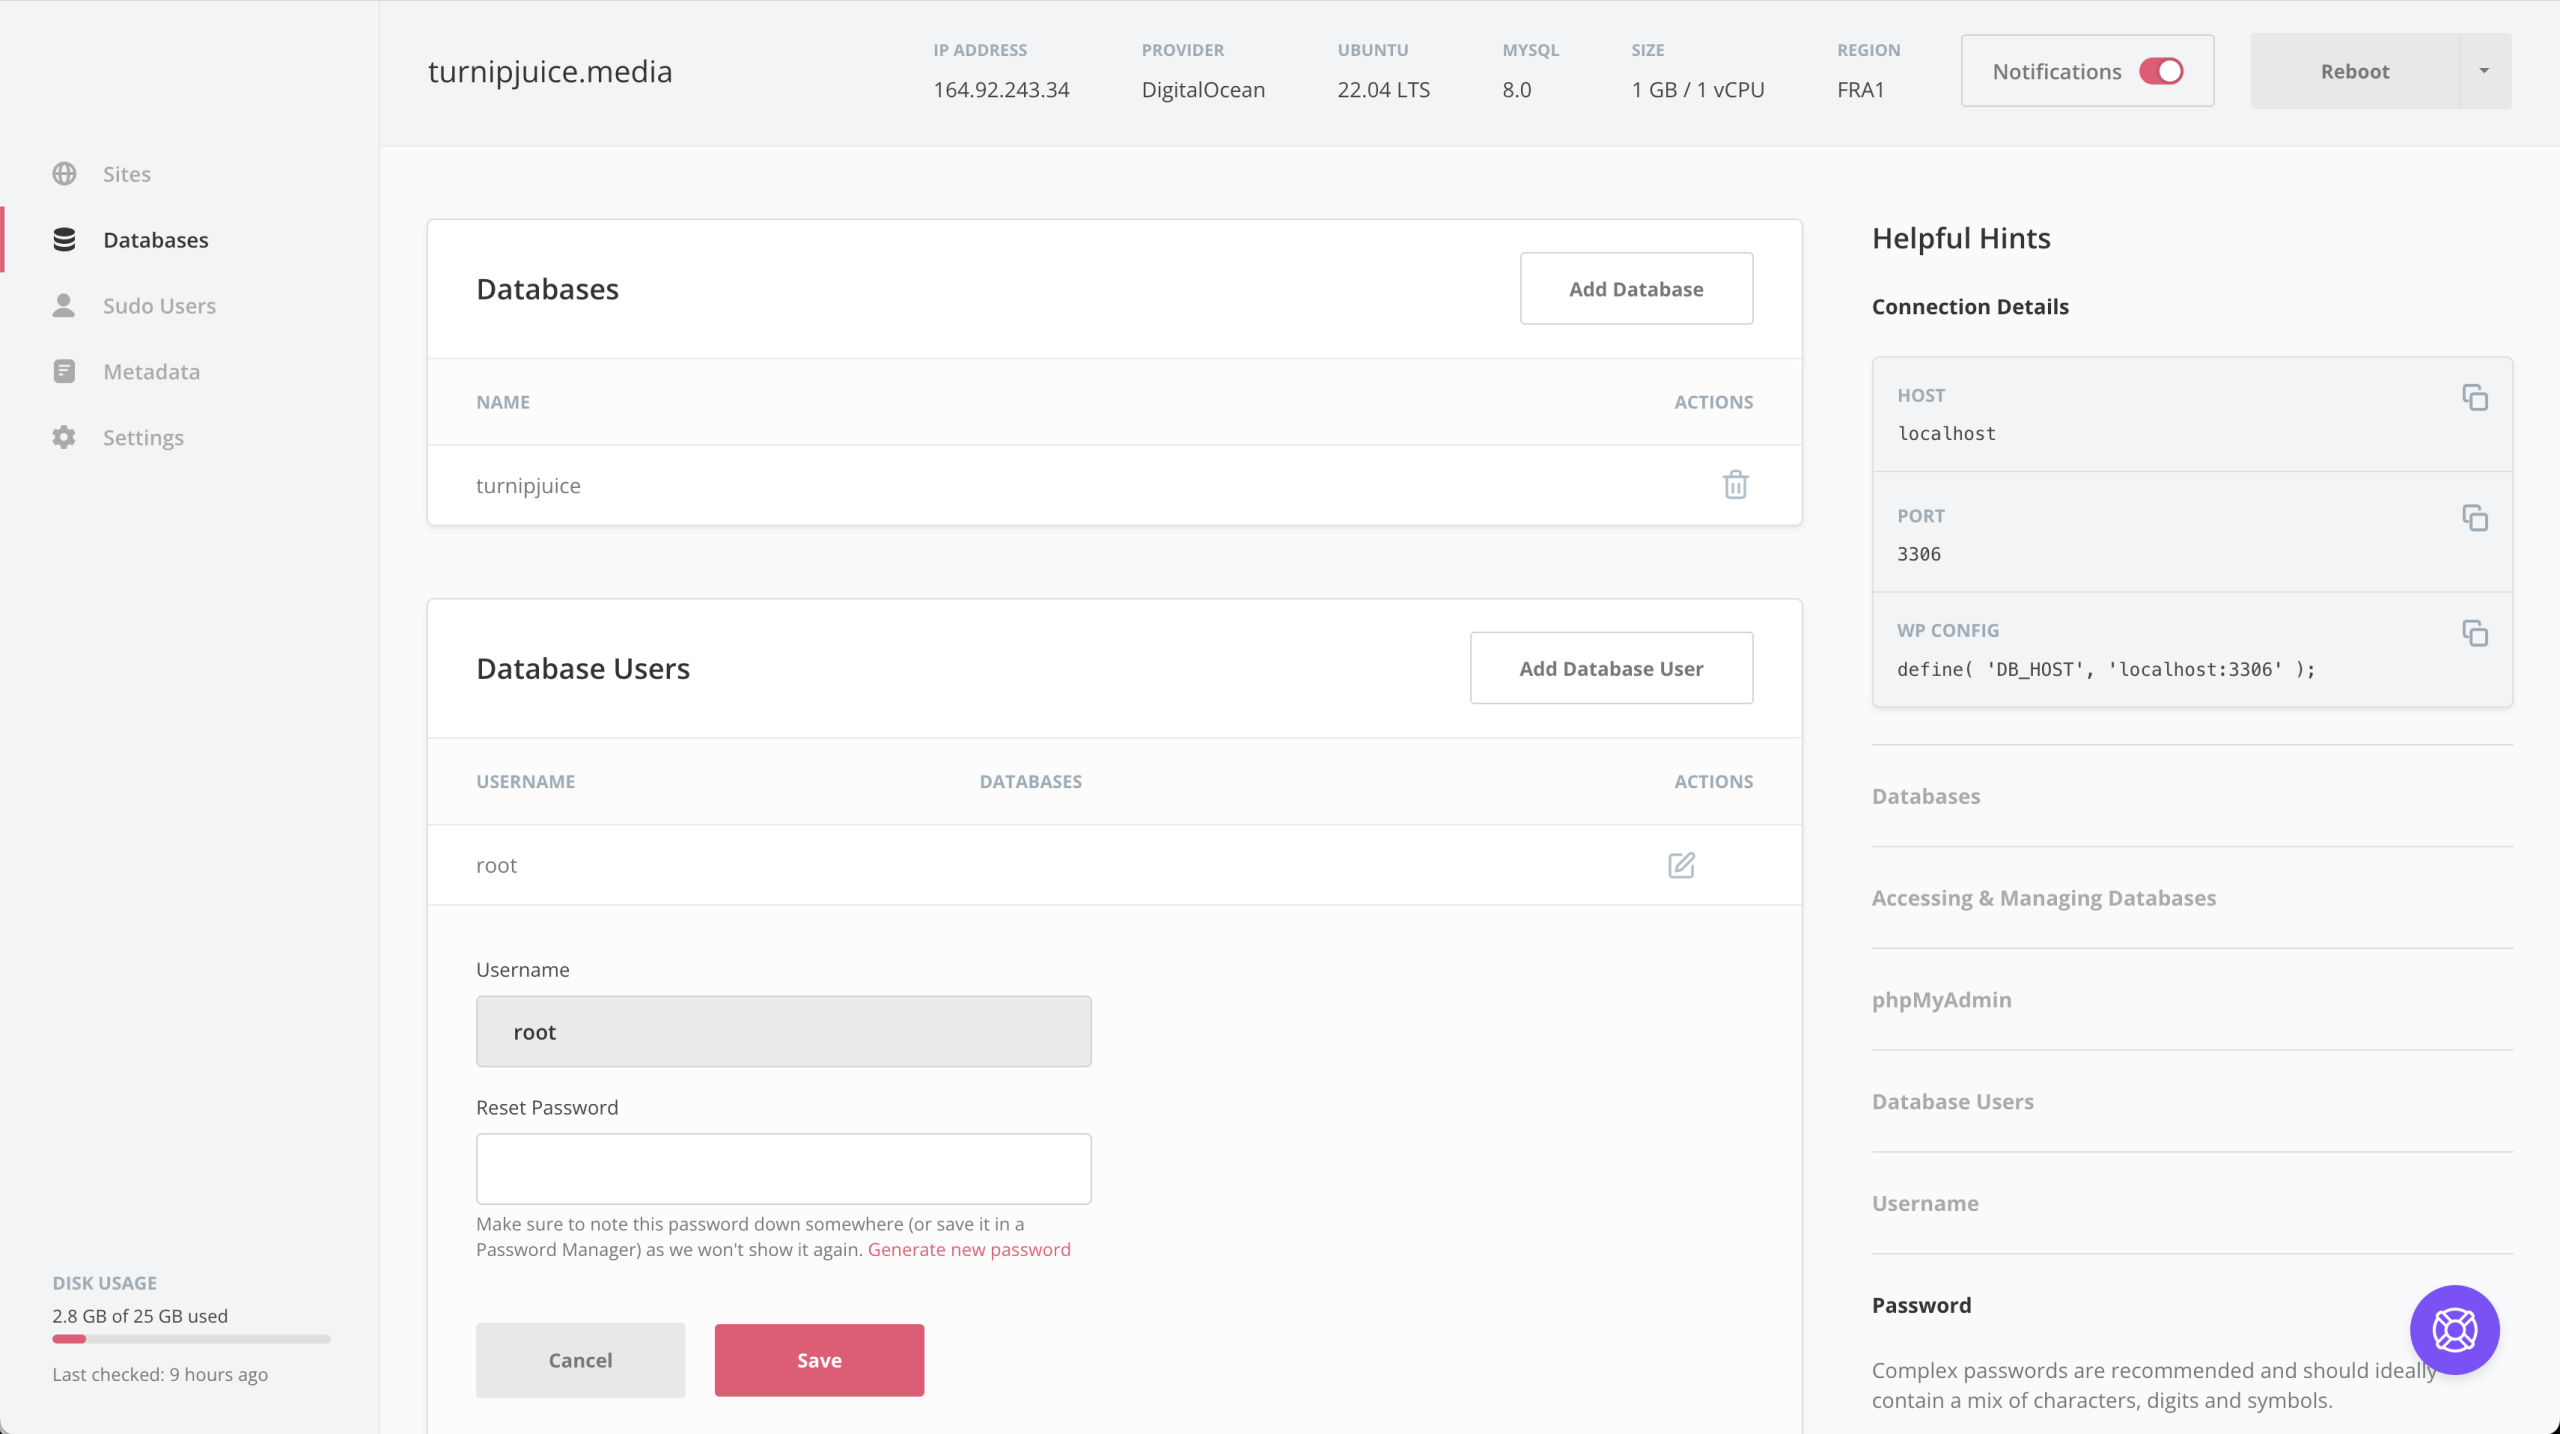
asimpson@turnipjuice:~$ sudo sqlbak -ac -dt mysql -h localhost -u root -p root_password
The connection has been successfully added.  Connection-Id: 1, DBMS-Type: mysql, Connection-Name: localhost:3306
To create a backup job, click the 'Add new Job' button at https://sqlbak.com/dashboard
Once the server is configured, you can create new backup jobs from the SqlBak dashboard.
Creating Your First Backup Job
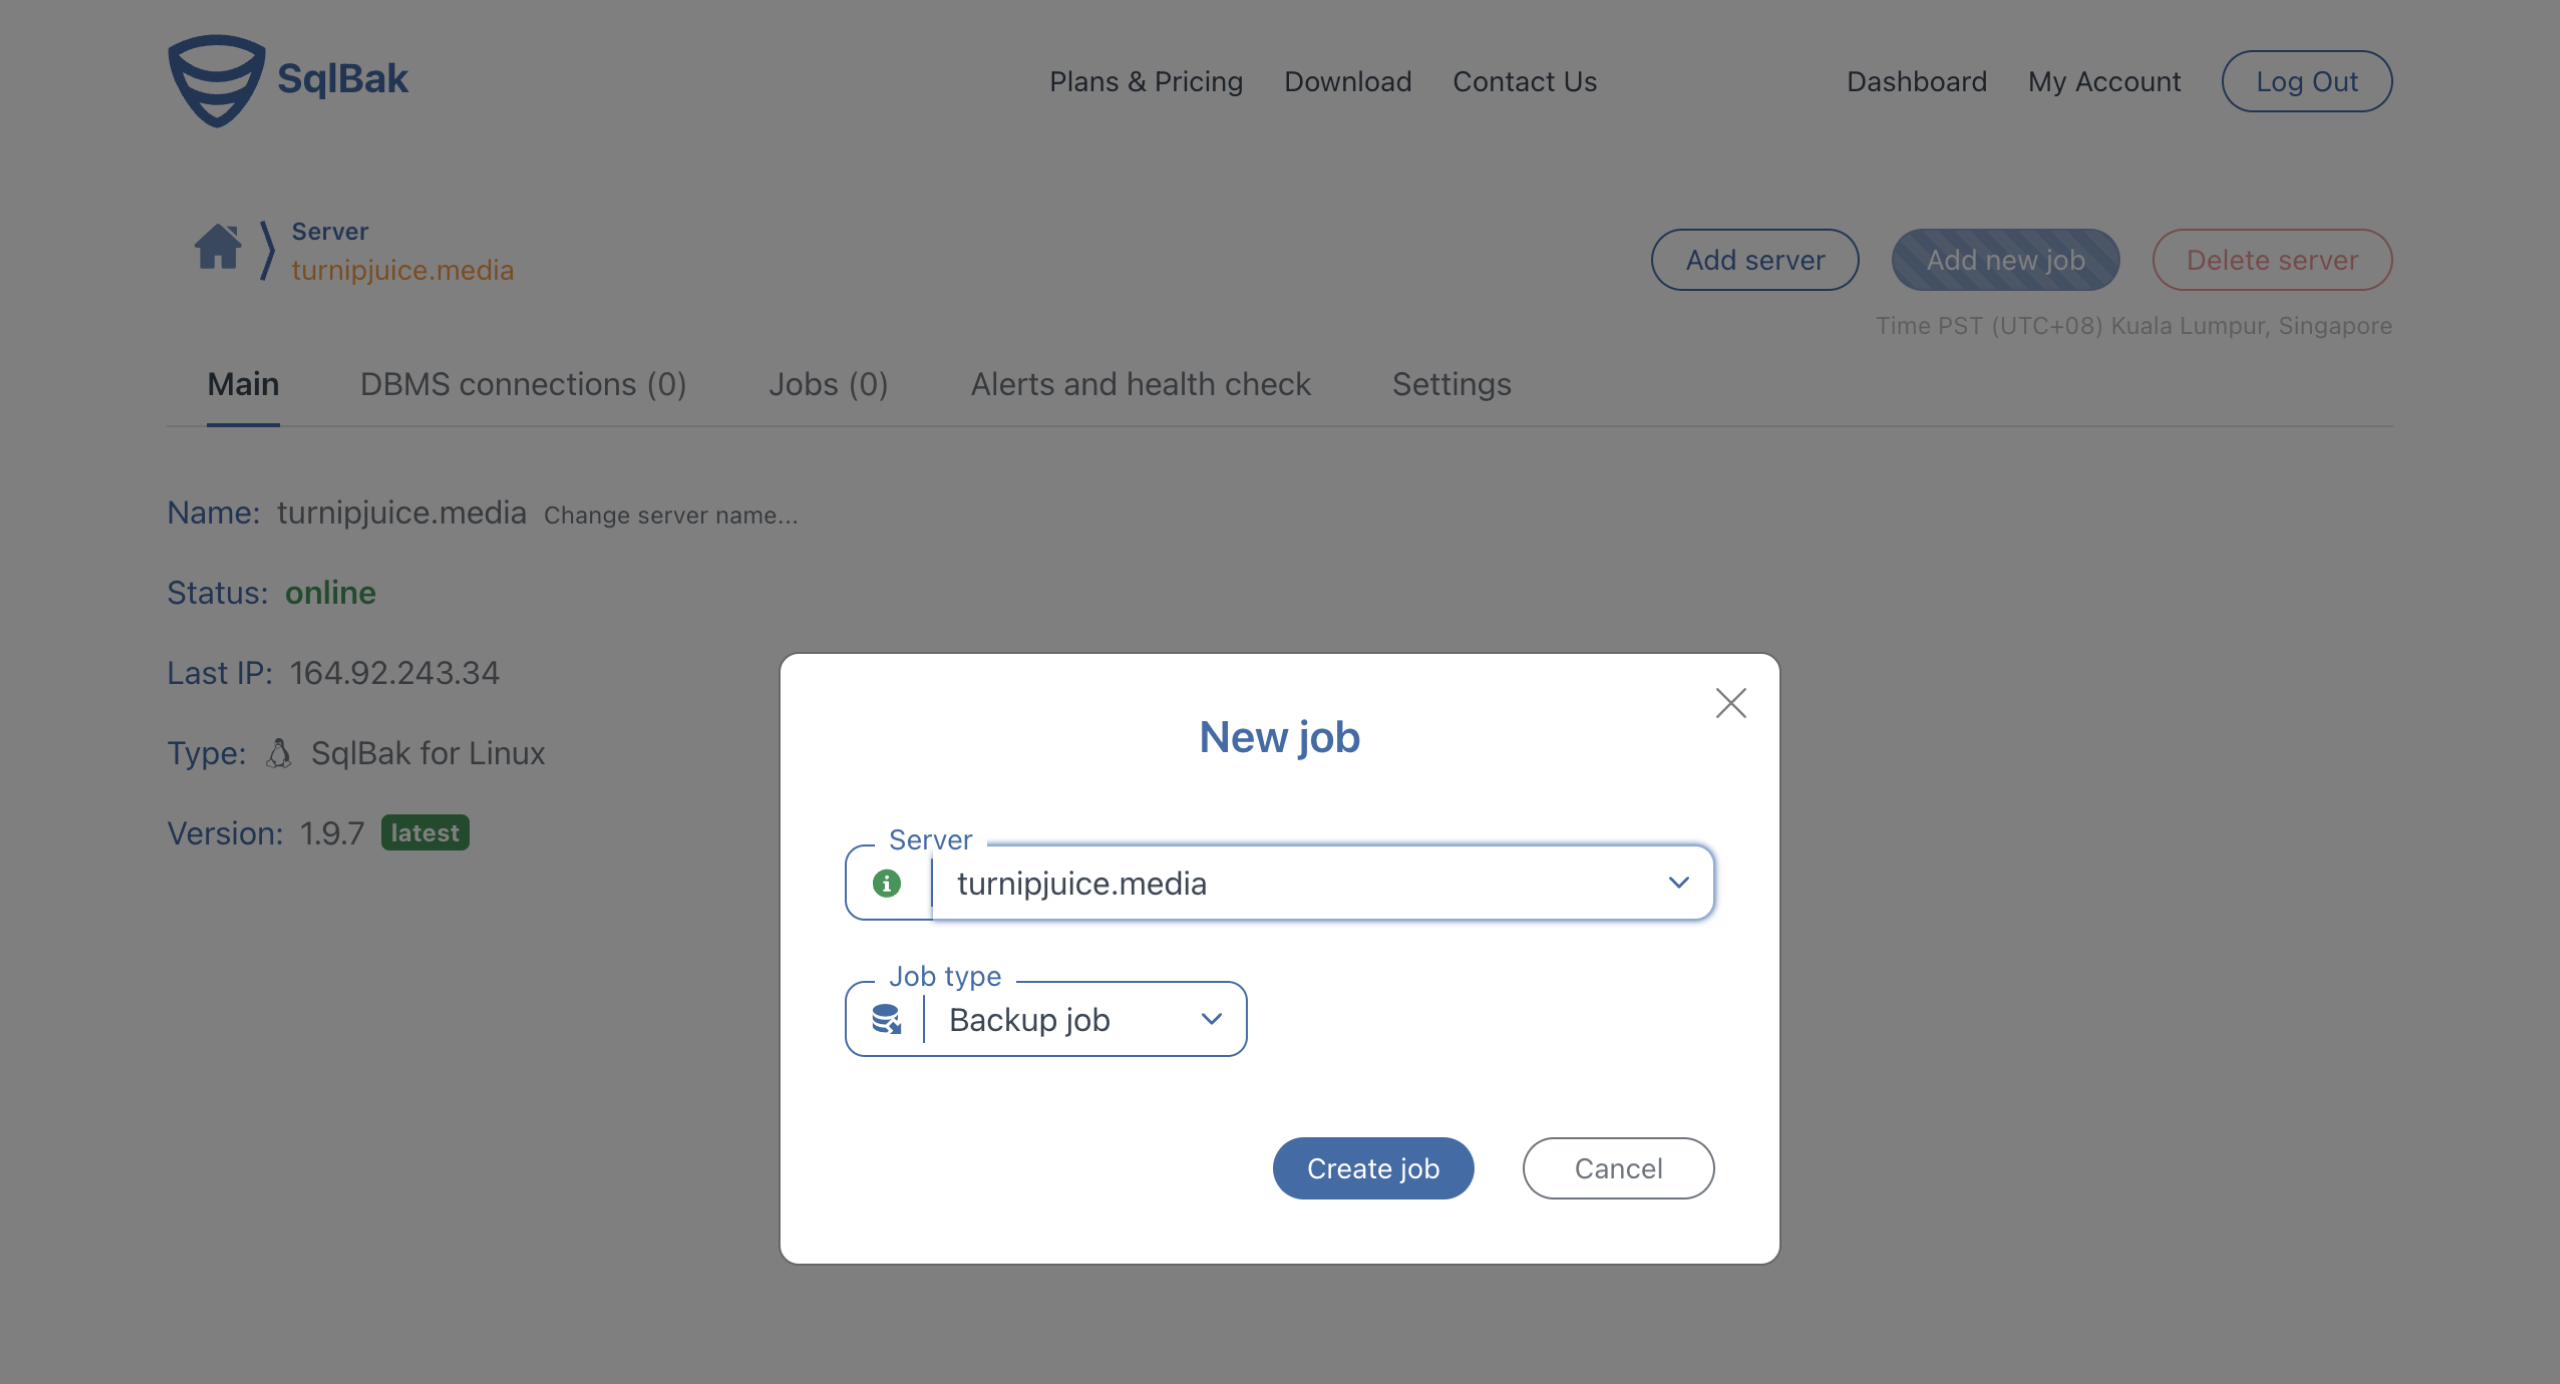
Creating a new backup job is a case of clicking the Add new job button, either on the top right of the dashboard or next to the server in the list.
You’re asked to select the server and the backup type.
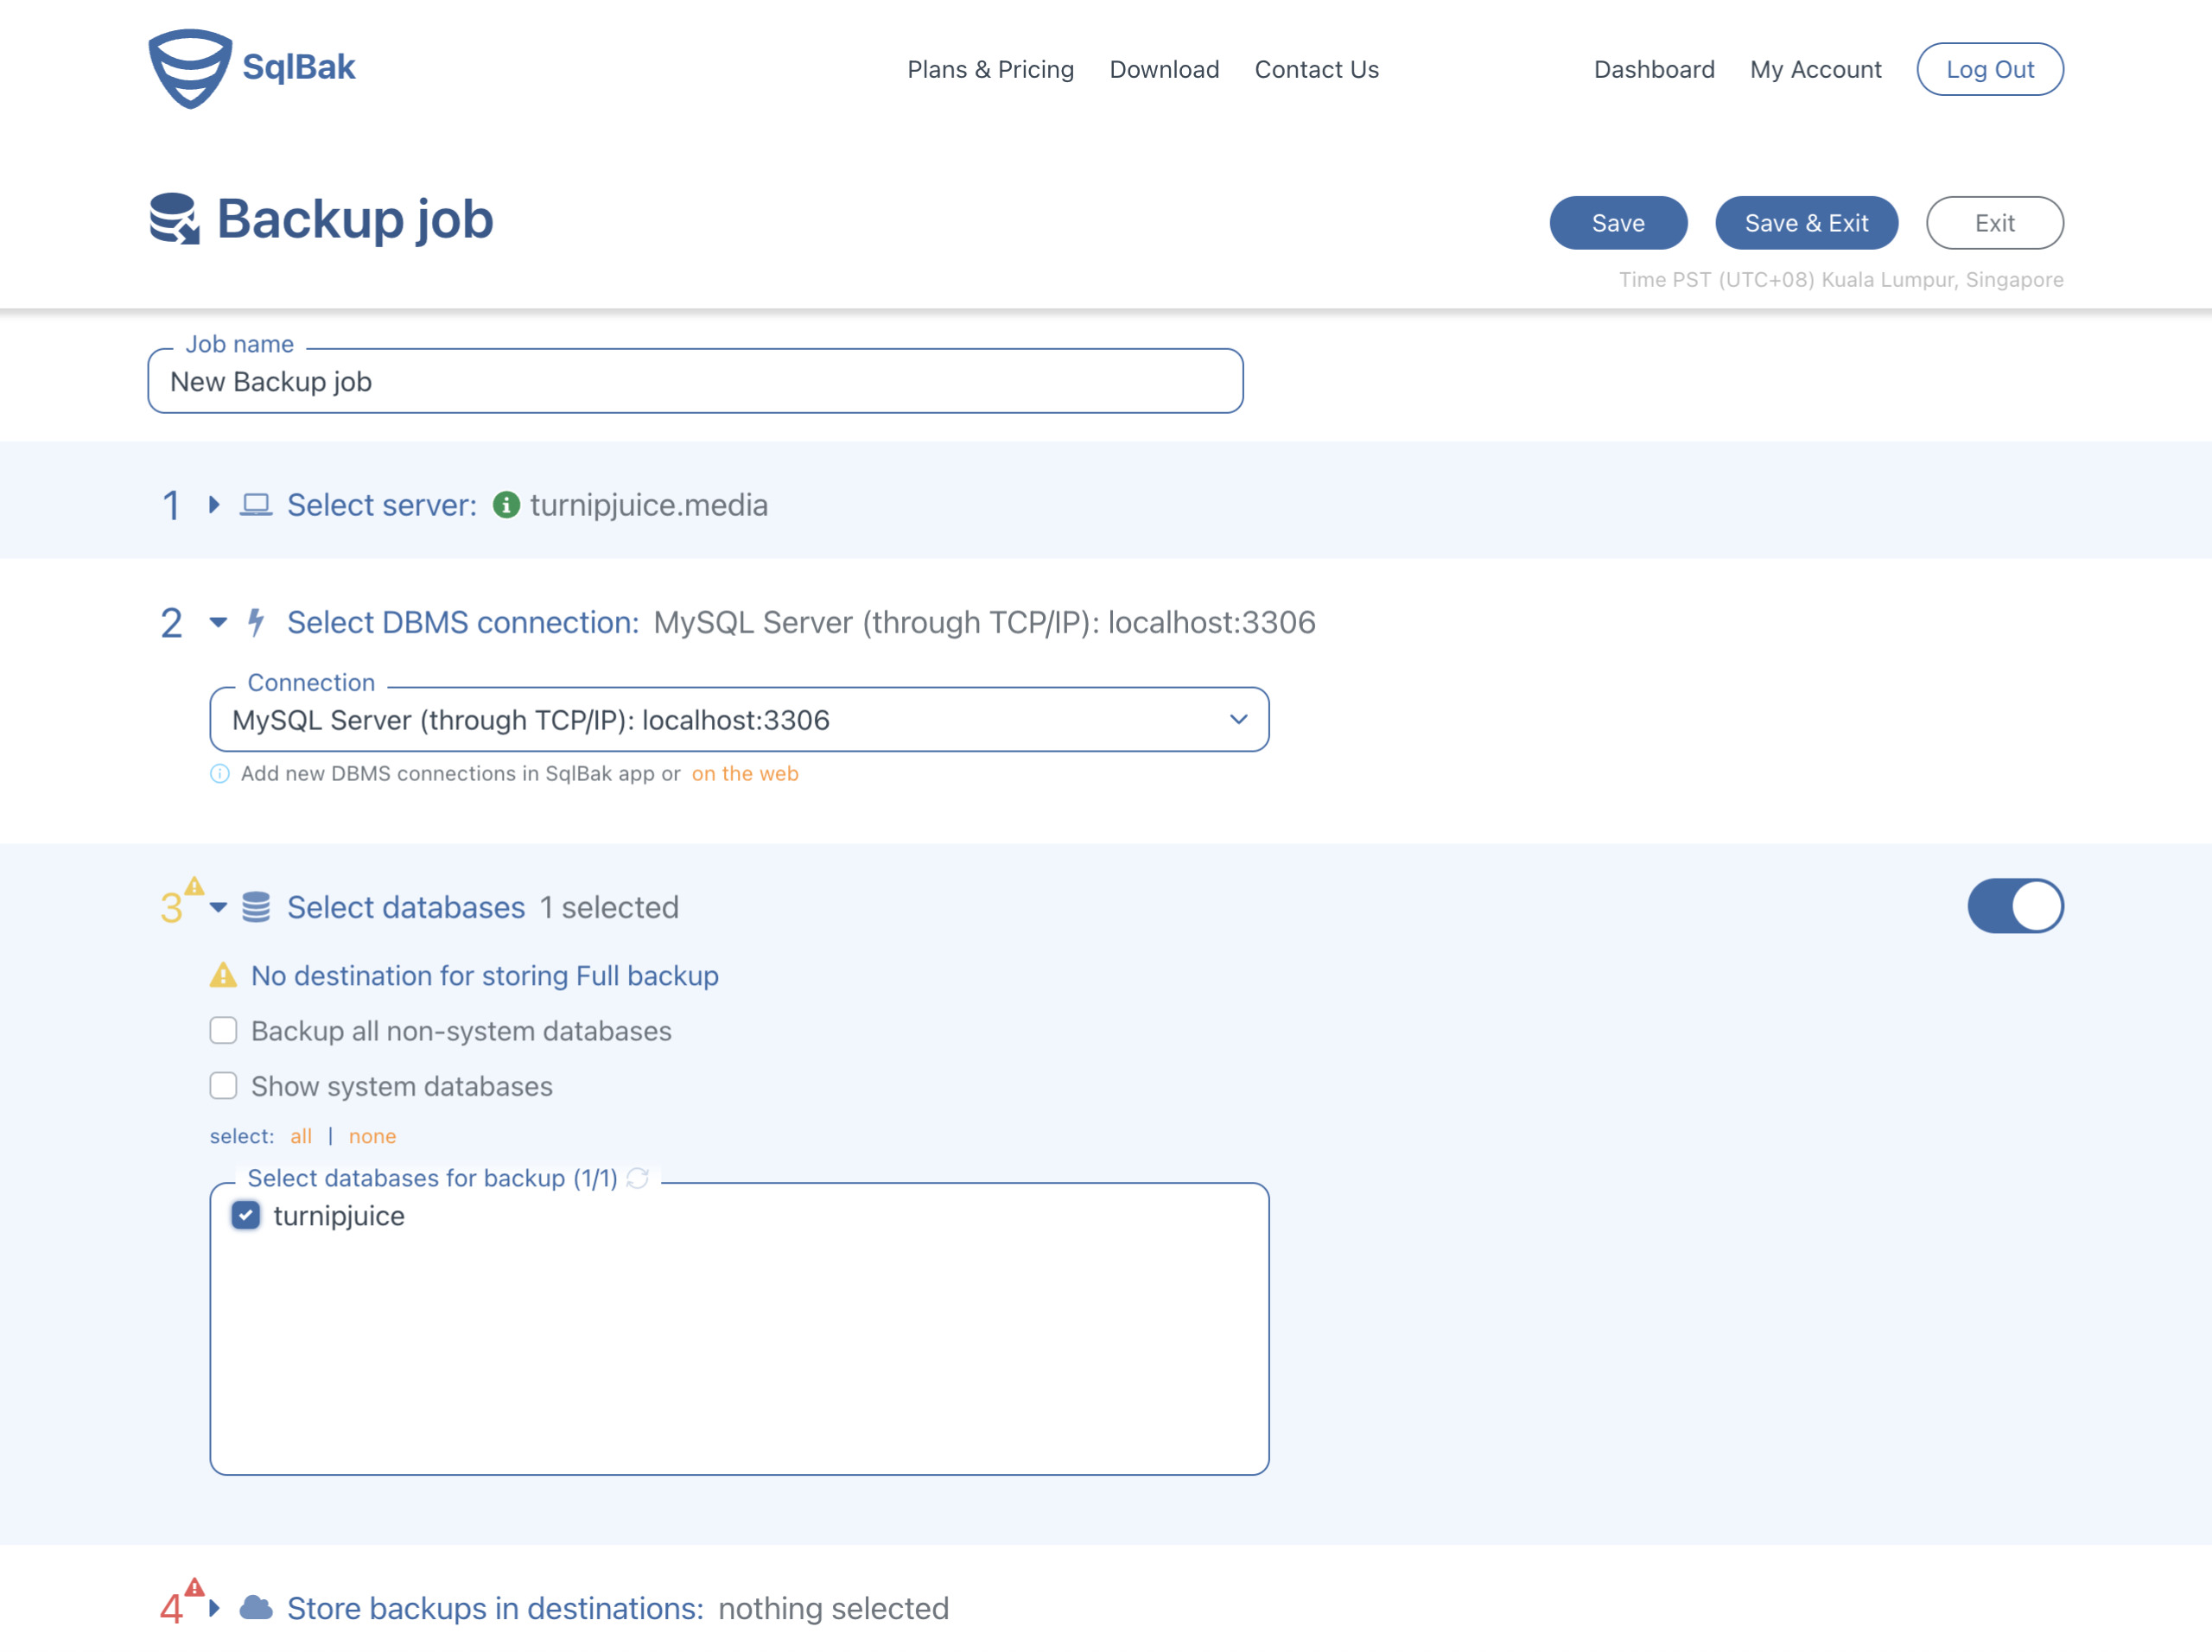
The most important backup settings are:
- the database to be backed up
- the destination to store the backups
- the backup schedule
Because we’ve configured SqlBak to use the MySQL root credentials, we can select from all the available databases.
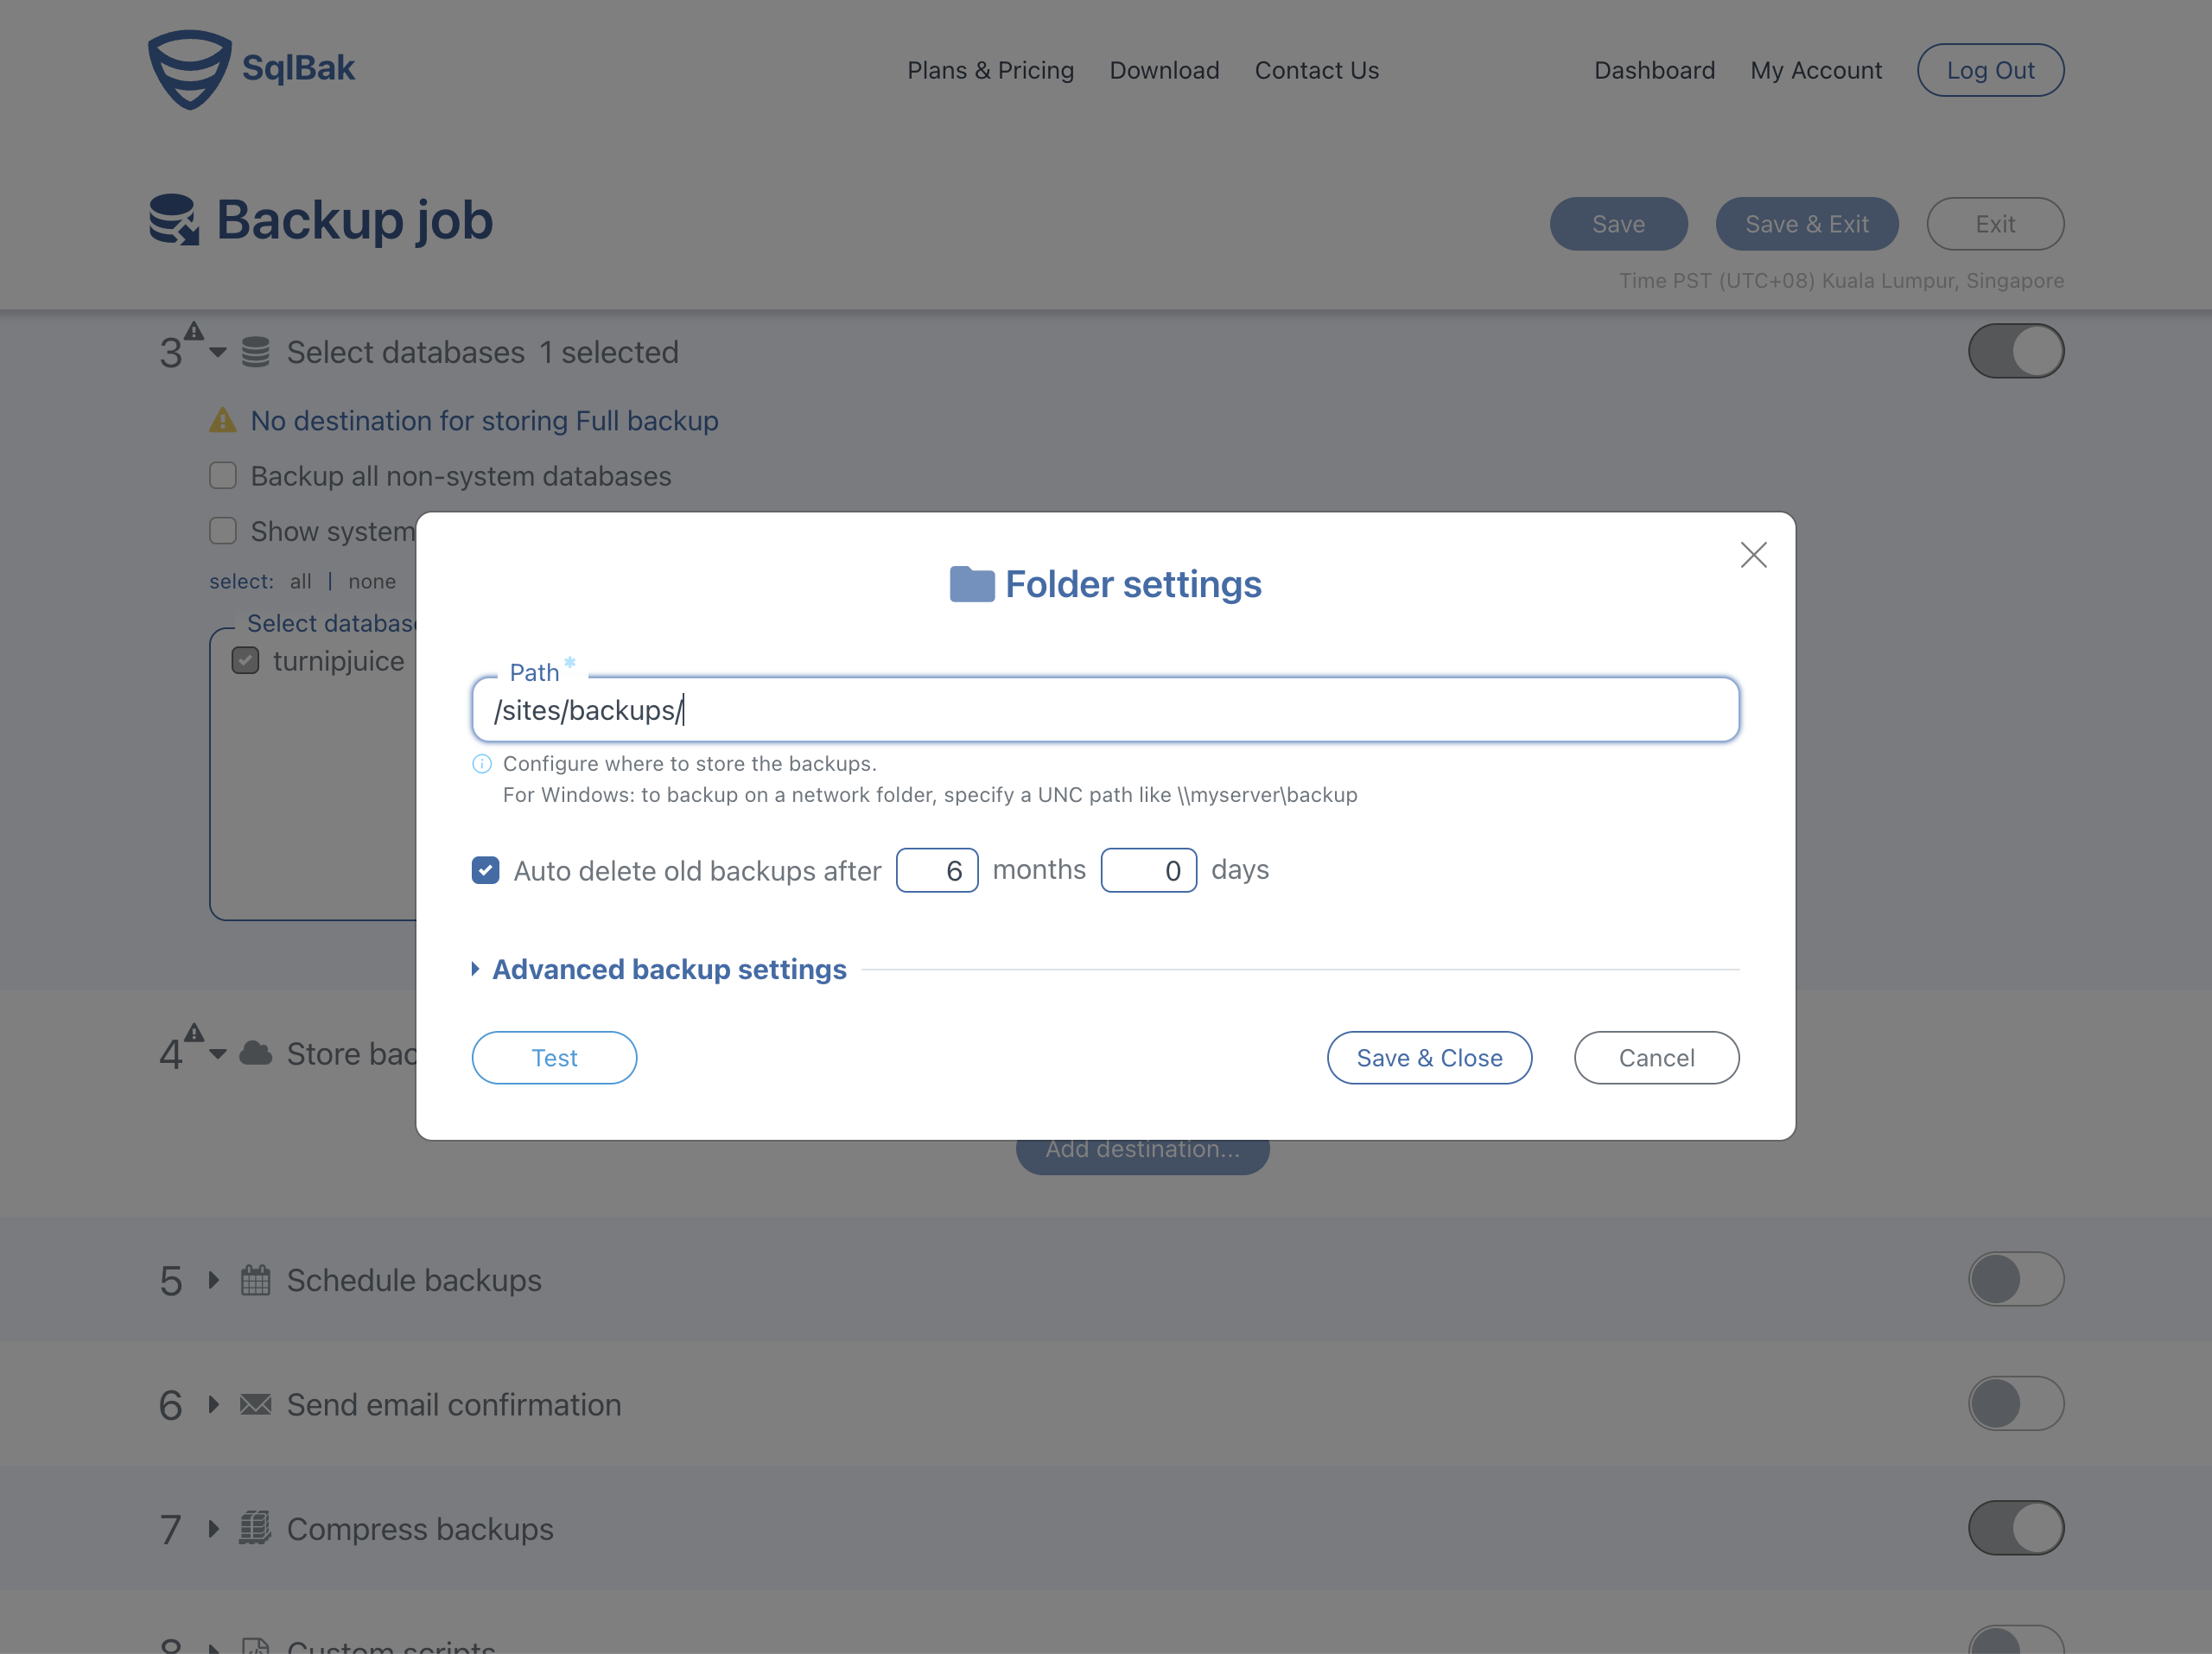
For the destination, I’ll use the same location directory I did earlier, so I click Add destination, select Local/Network folder, External HDD/NAS and enter the path on the server. I could also choose to use any of the offsite storage options SqlBak supports as my destination. This is another advantage of using a service like SqlBak. I don’t need additional configuration to send the backups off my server.
When configuring a local destination, SqlBak has a handy “Test” button, which ensures that the sqlbak utility I installed can write to that location.
For the schedule, you’ll need to click Advanced settings… to enable the incremental option.
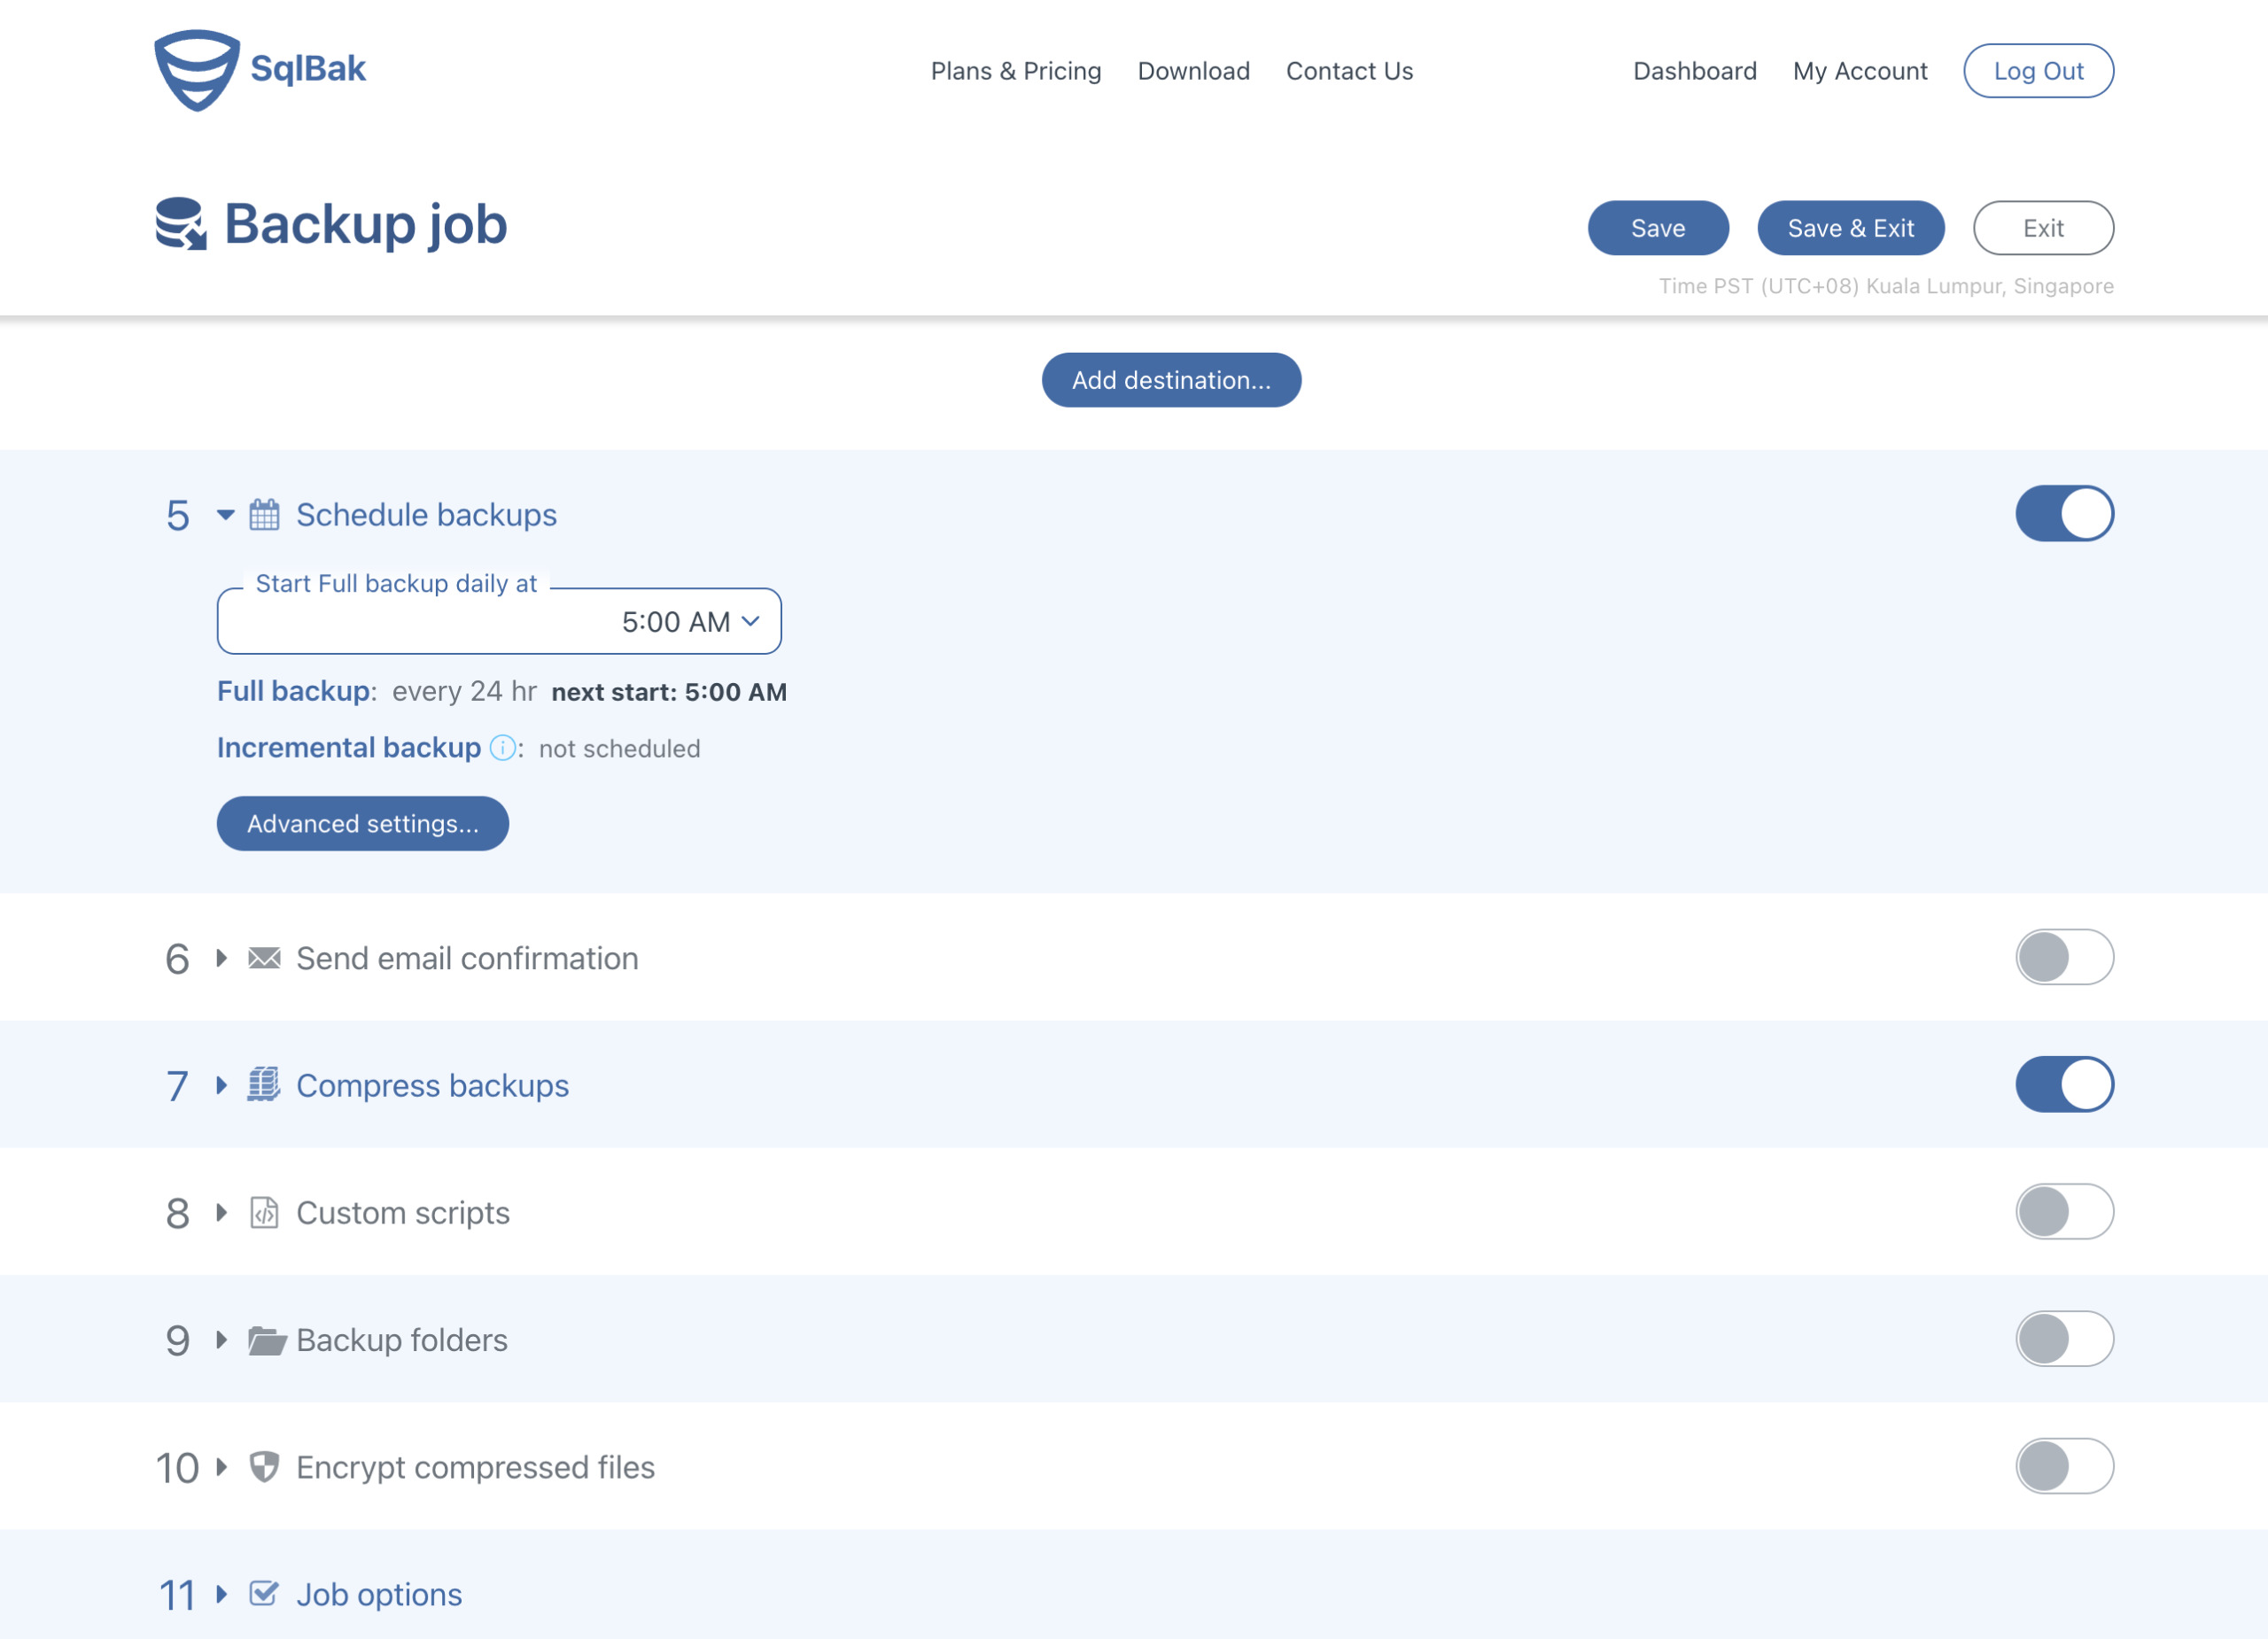
The one thing I really liked here is that the UI included a link in a tooltip next to the “Incremental backup” option, to a document on how to enable the binary logs. I found this article very helpful, and I was able to set up my binary logs without any issues.
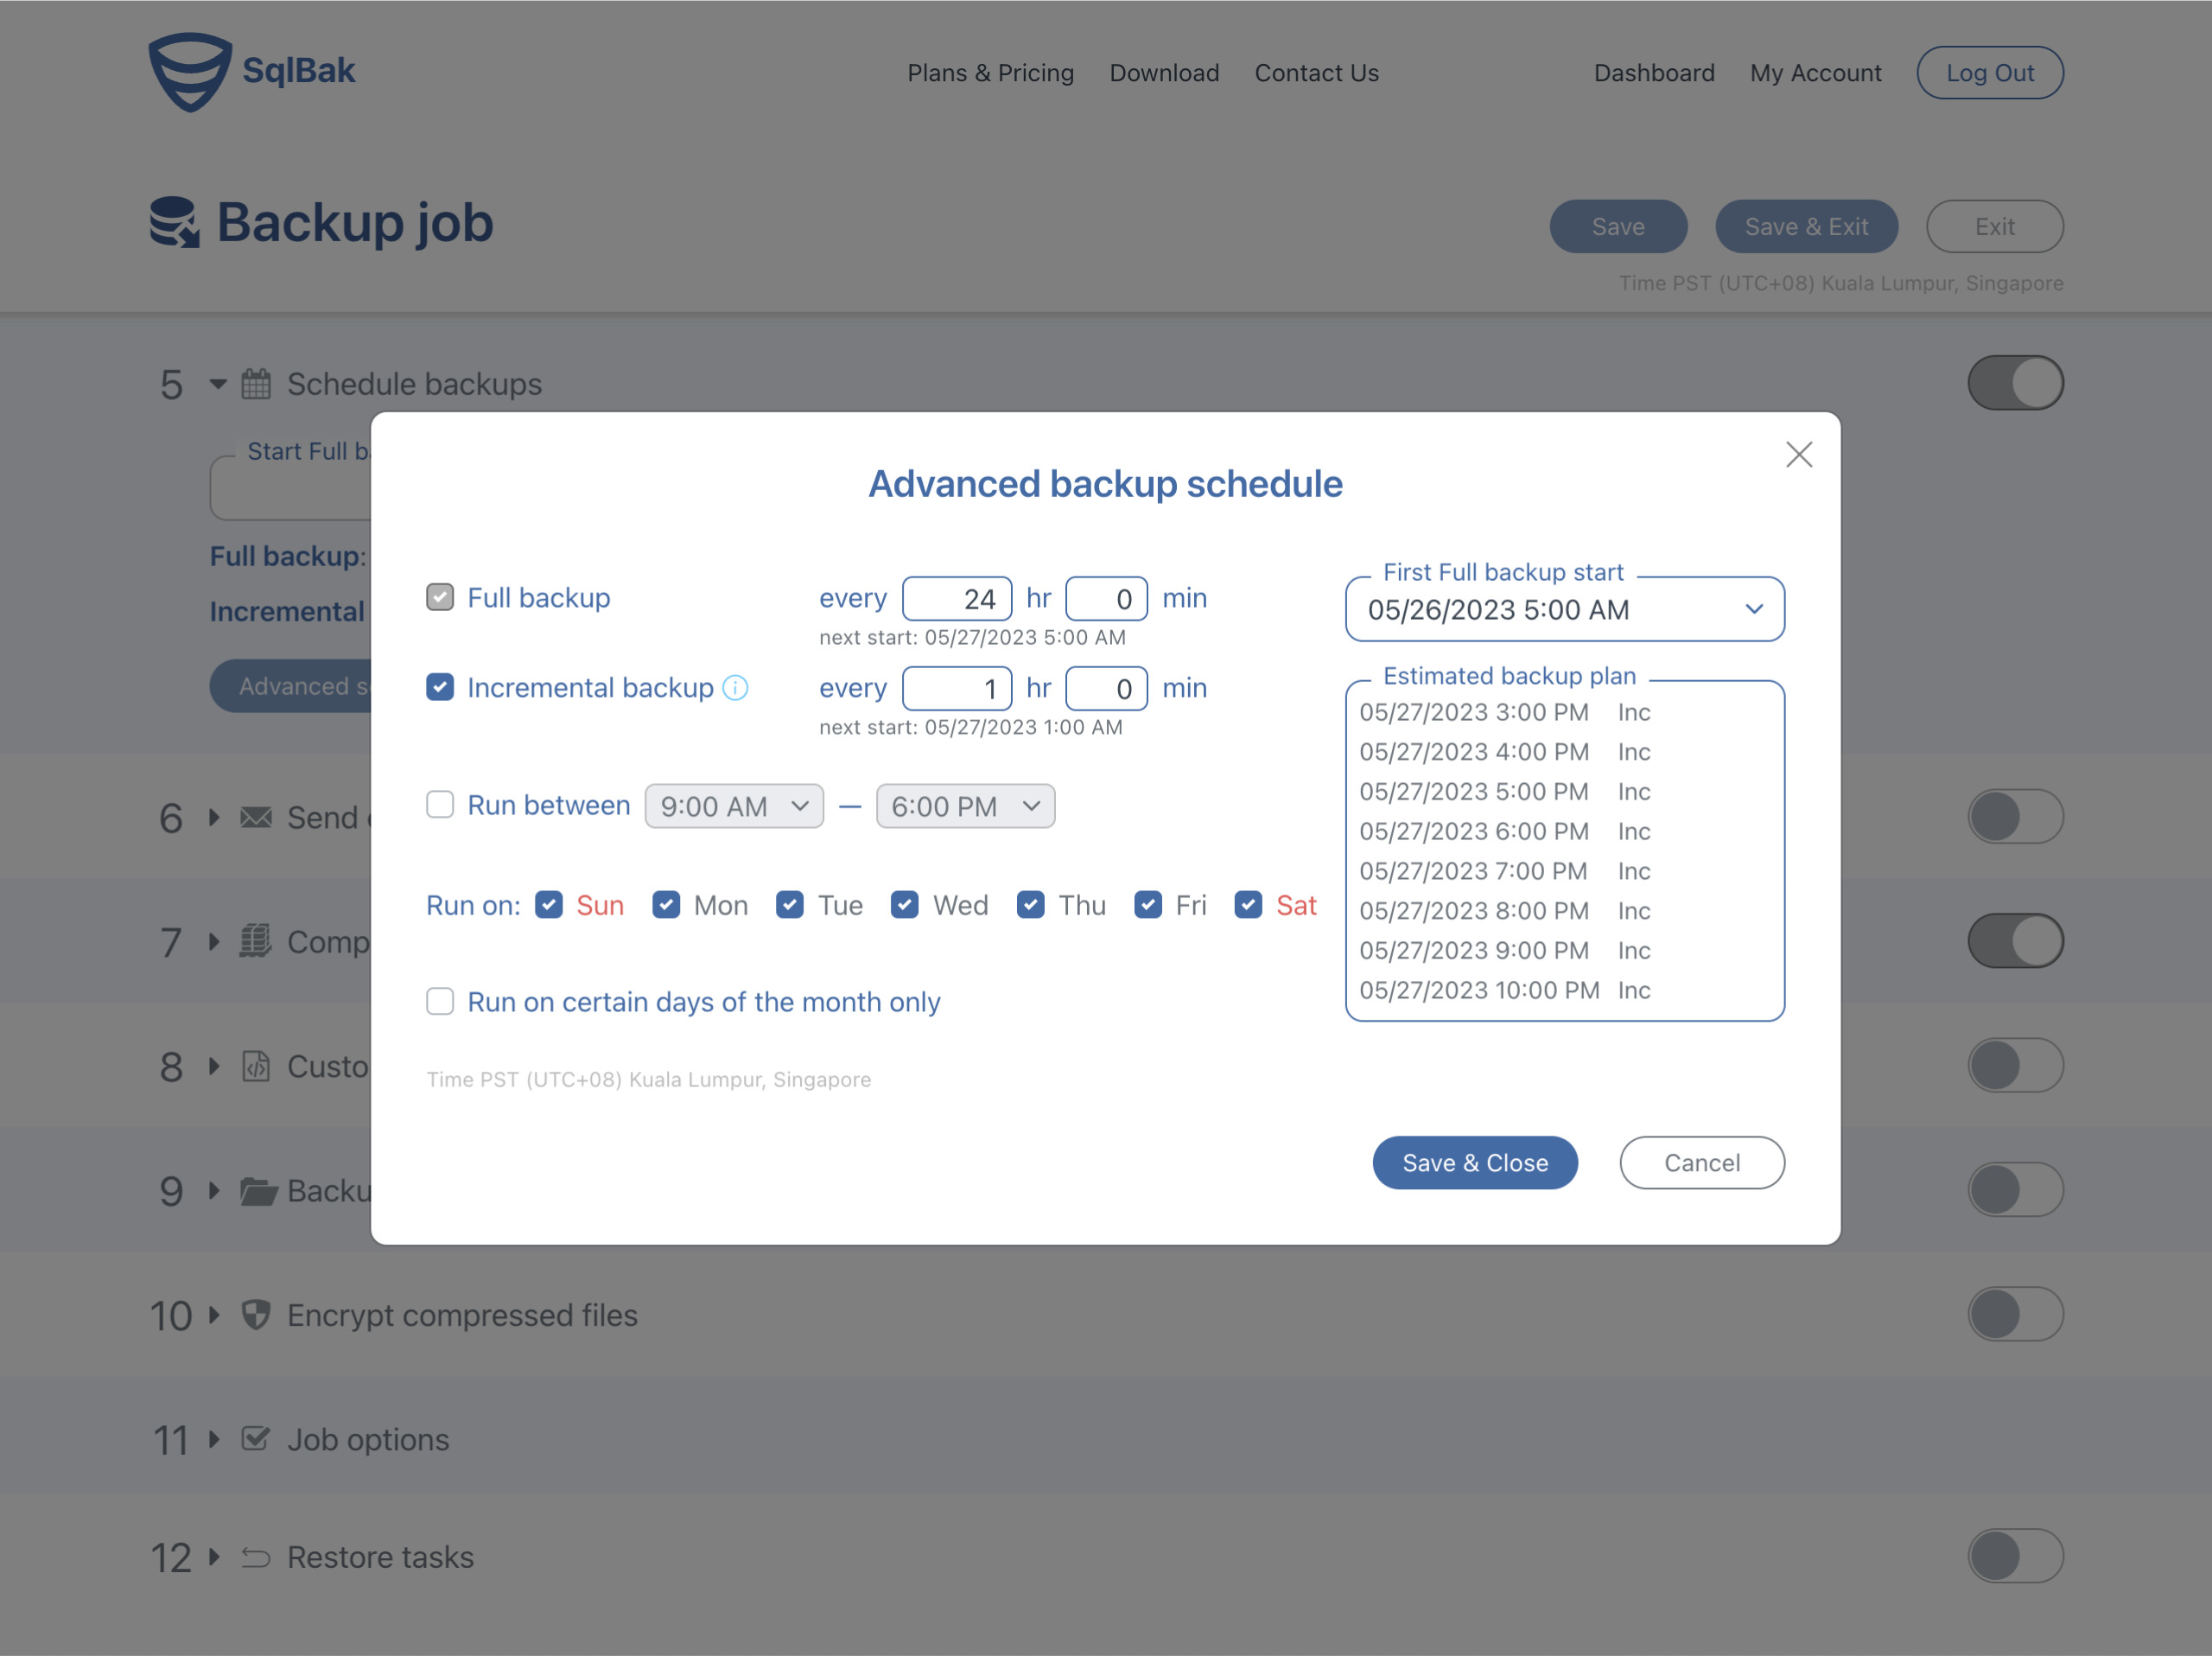
In the “Advanced Backup Schedule” settings for the backup schedule, you can check the Incremental backup option, and select your schedule.
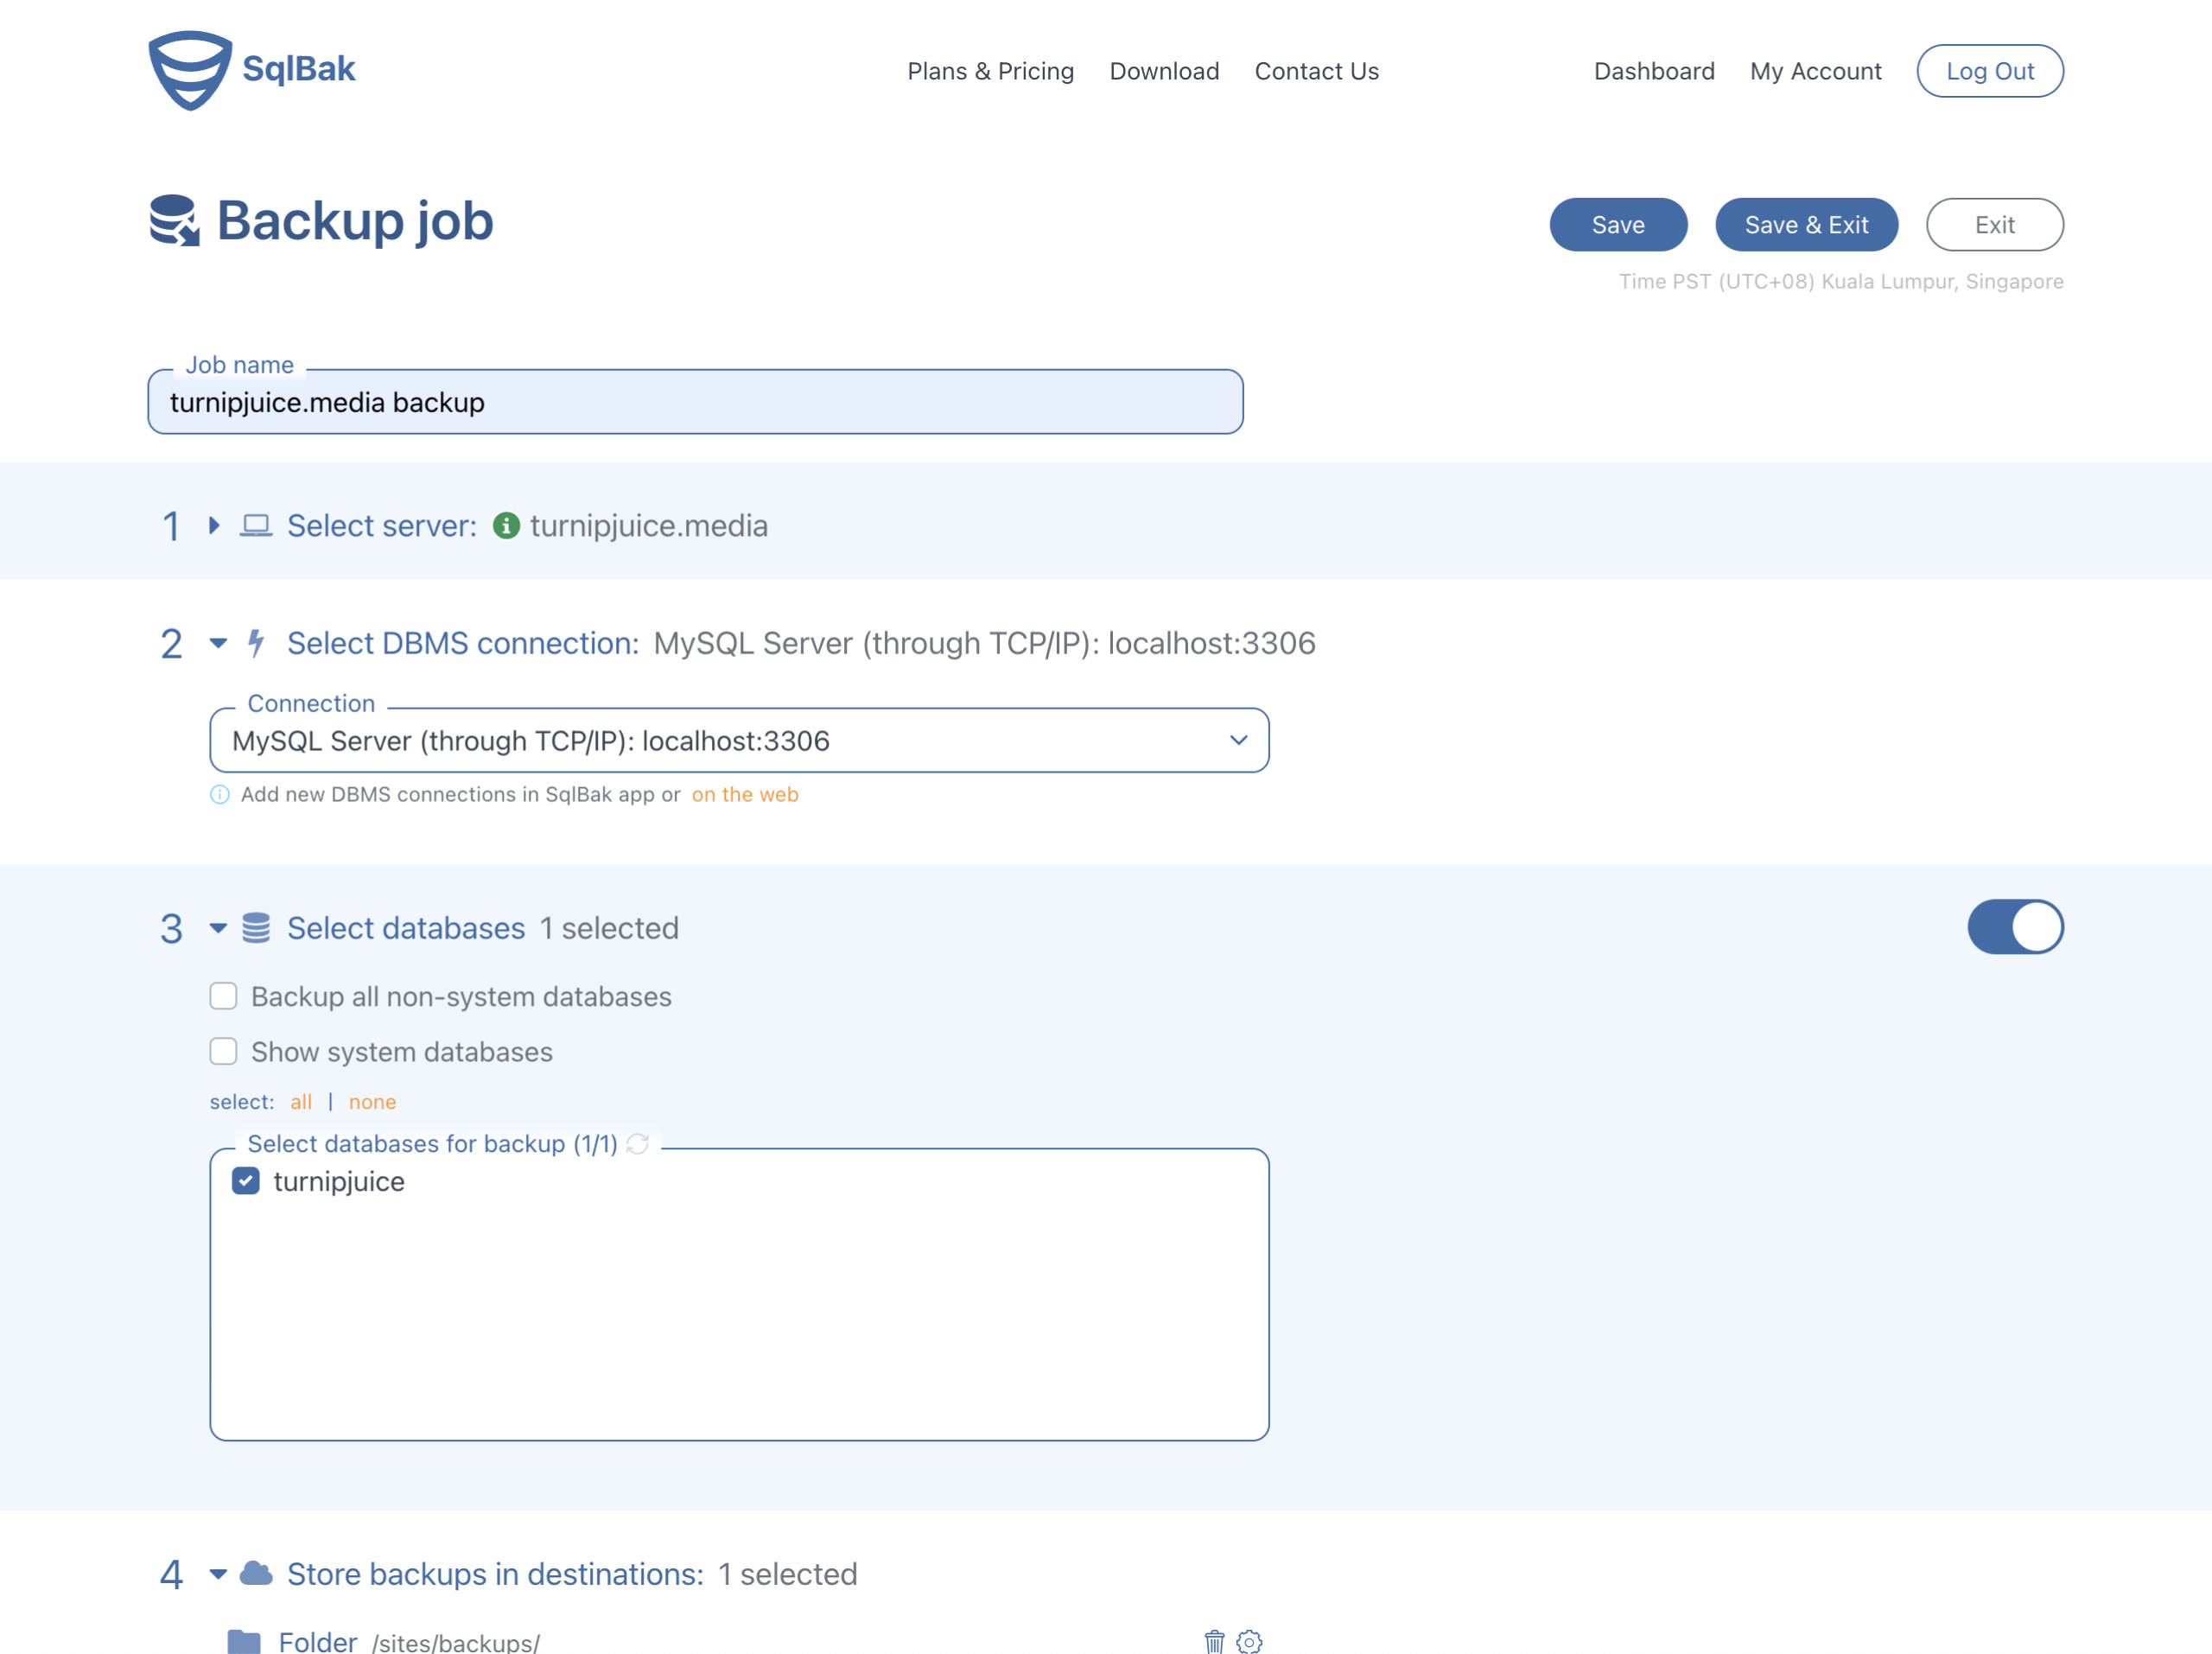
The last thing to do is to give your backup job a name, and click the Save button or Save & Exit to save and go back to the dashboard.
Once saved, you’ll be able to see an overview of all the backup job settings, as well as a list of all the backups that have been created. There’s also a Run now button to run the backup immediately.
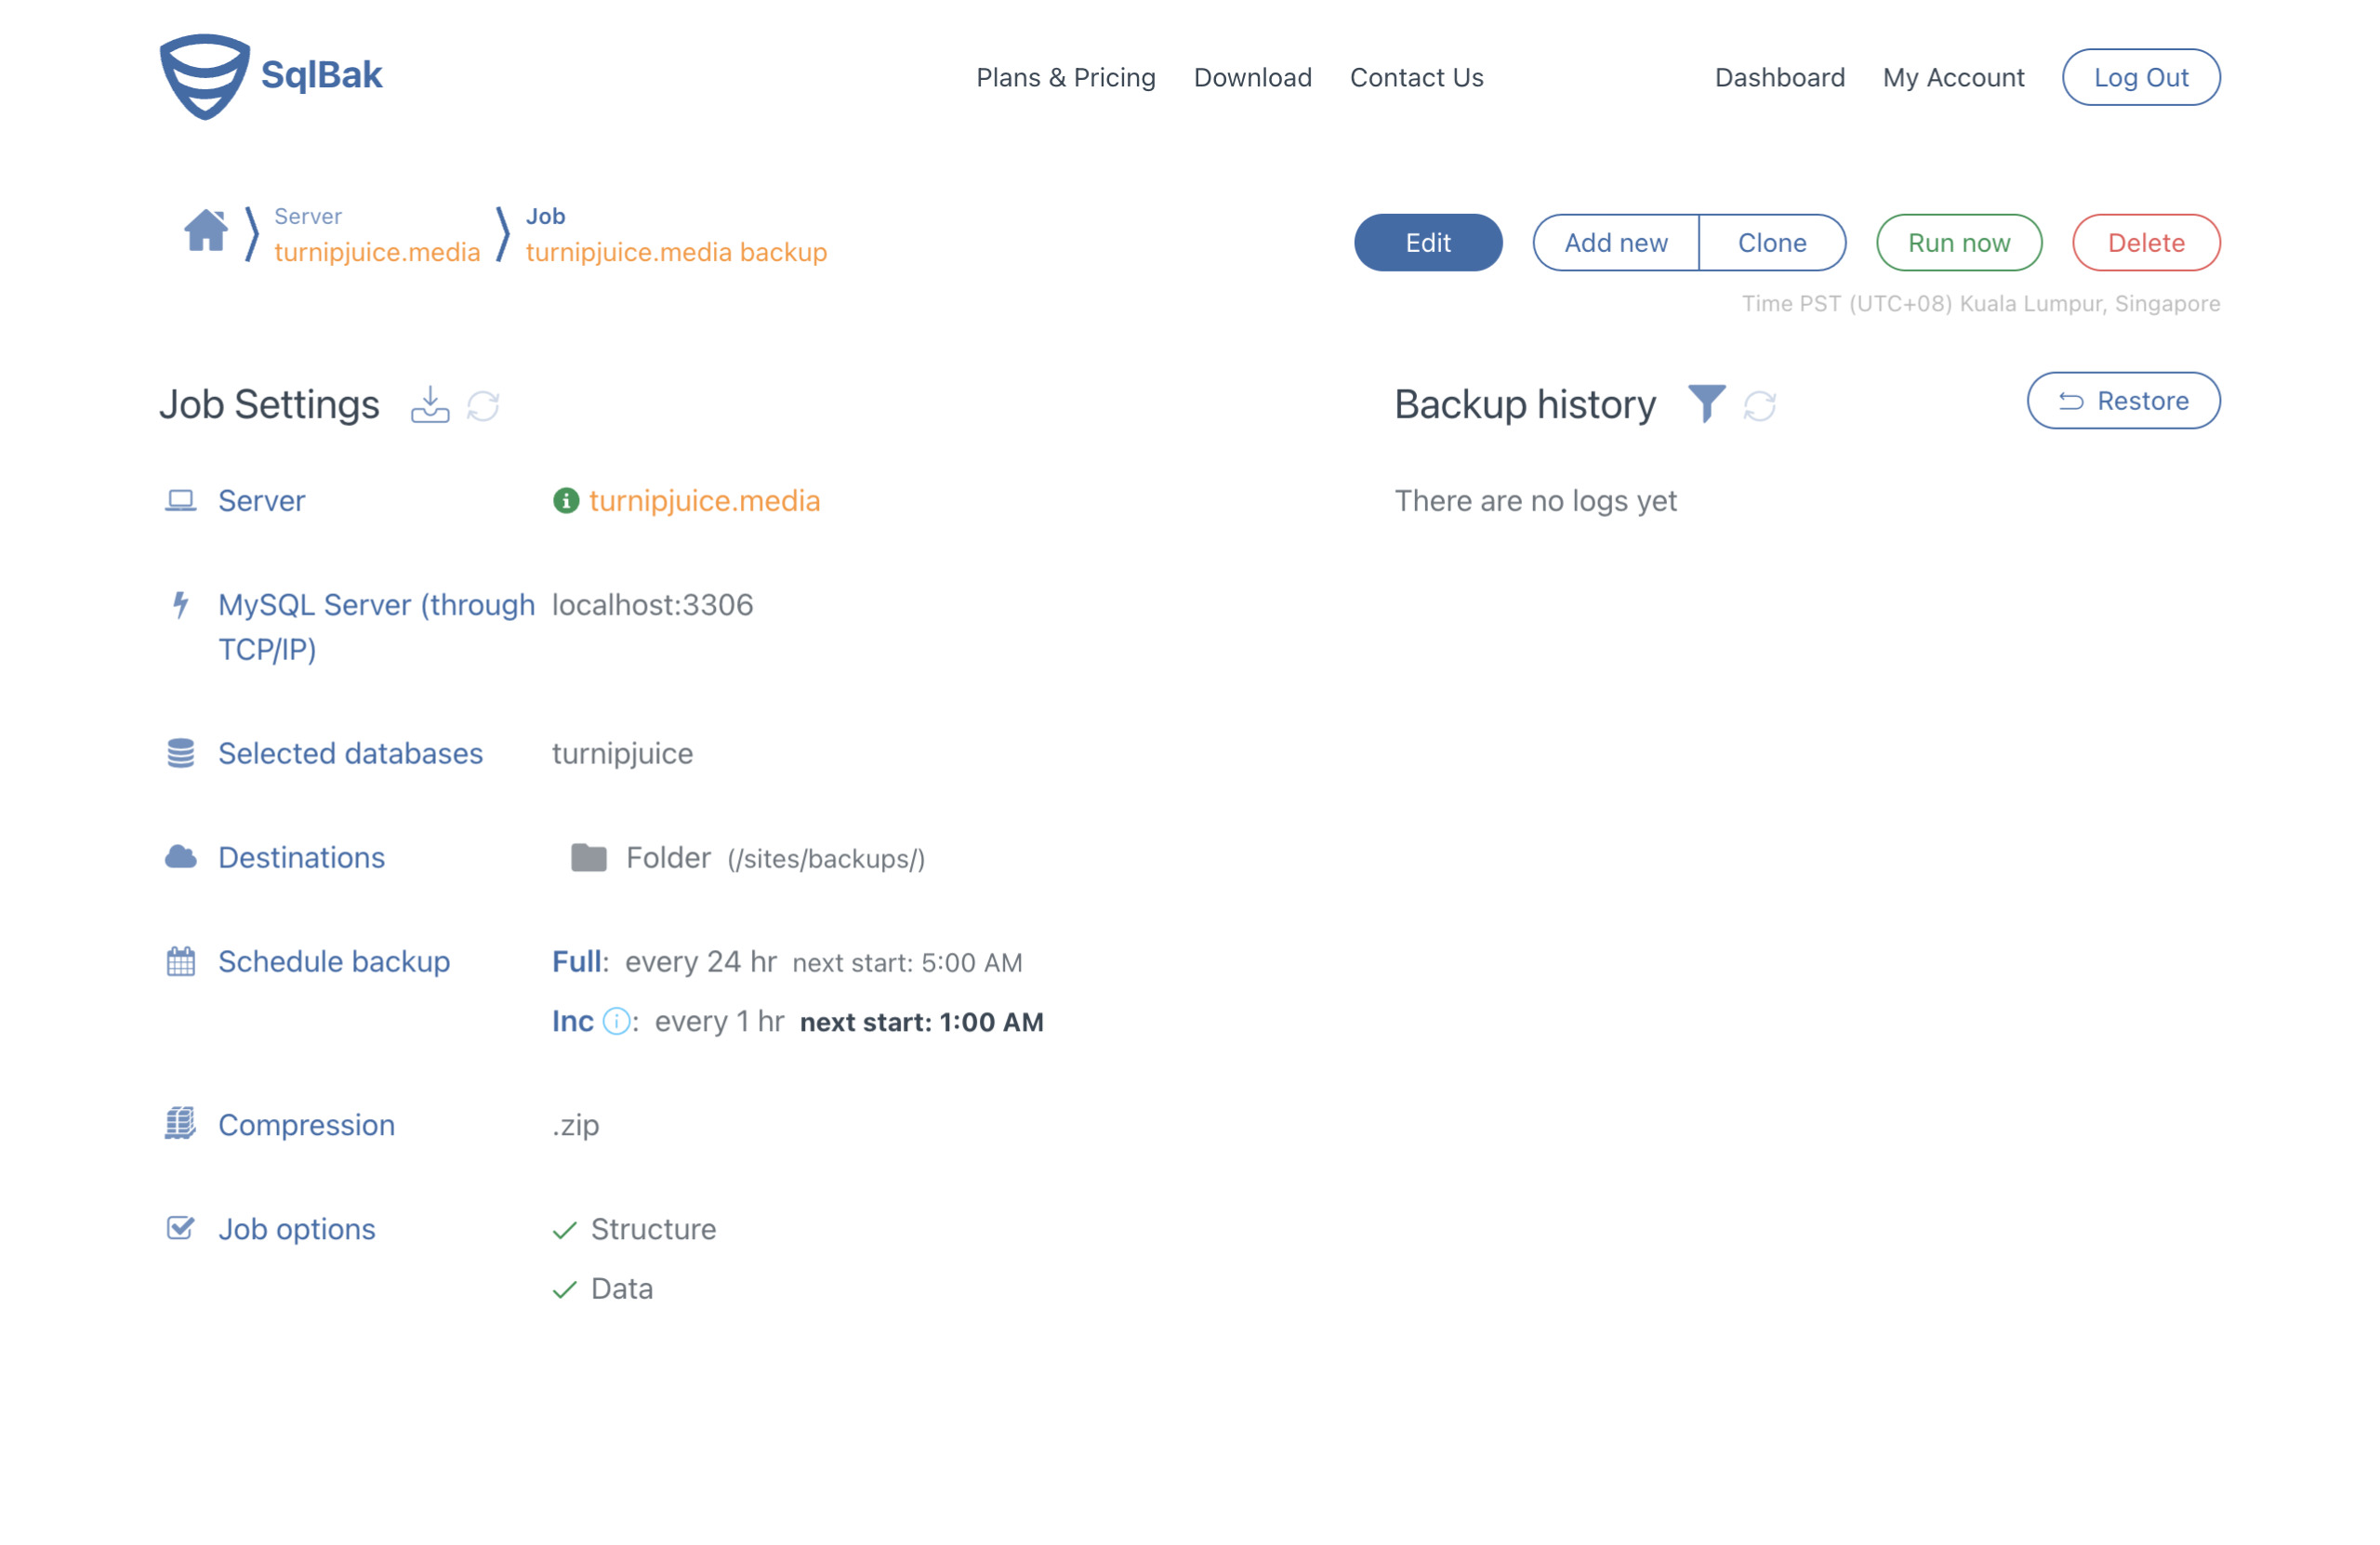
Once your first backups have been completed, they’ll be listed in the “Backup history” view. You can click on a backup to view the backup log, download the backup, or restore the previous backup. There’s also a Restore button above the Backup history, to restore the last successful backup.
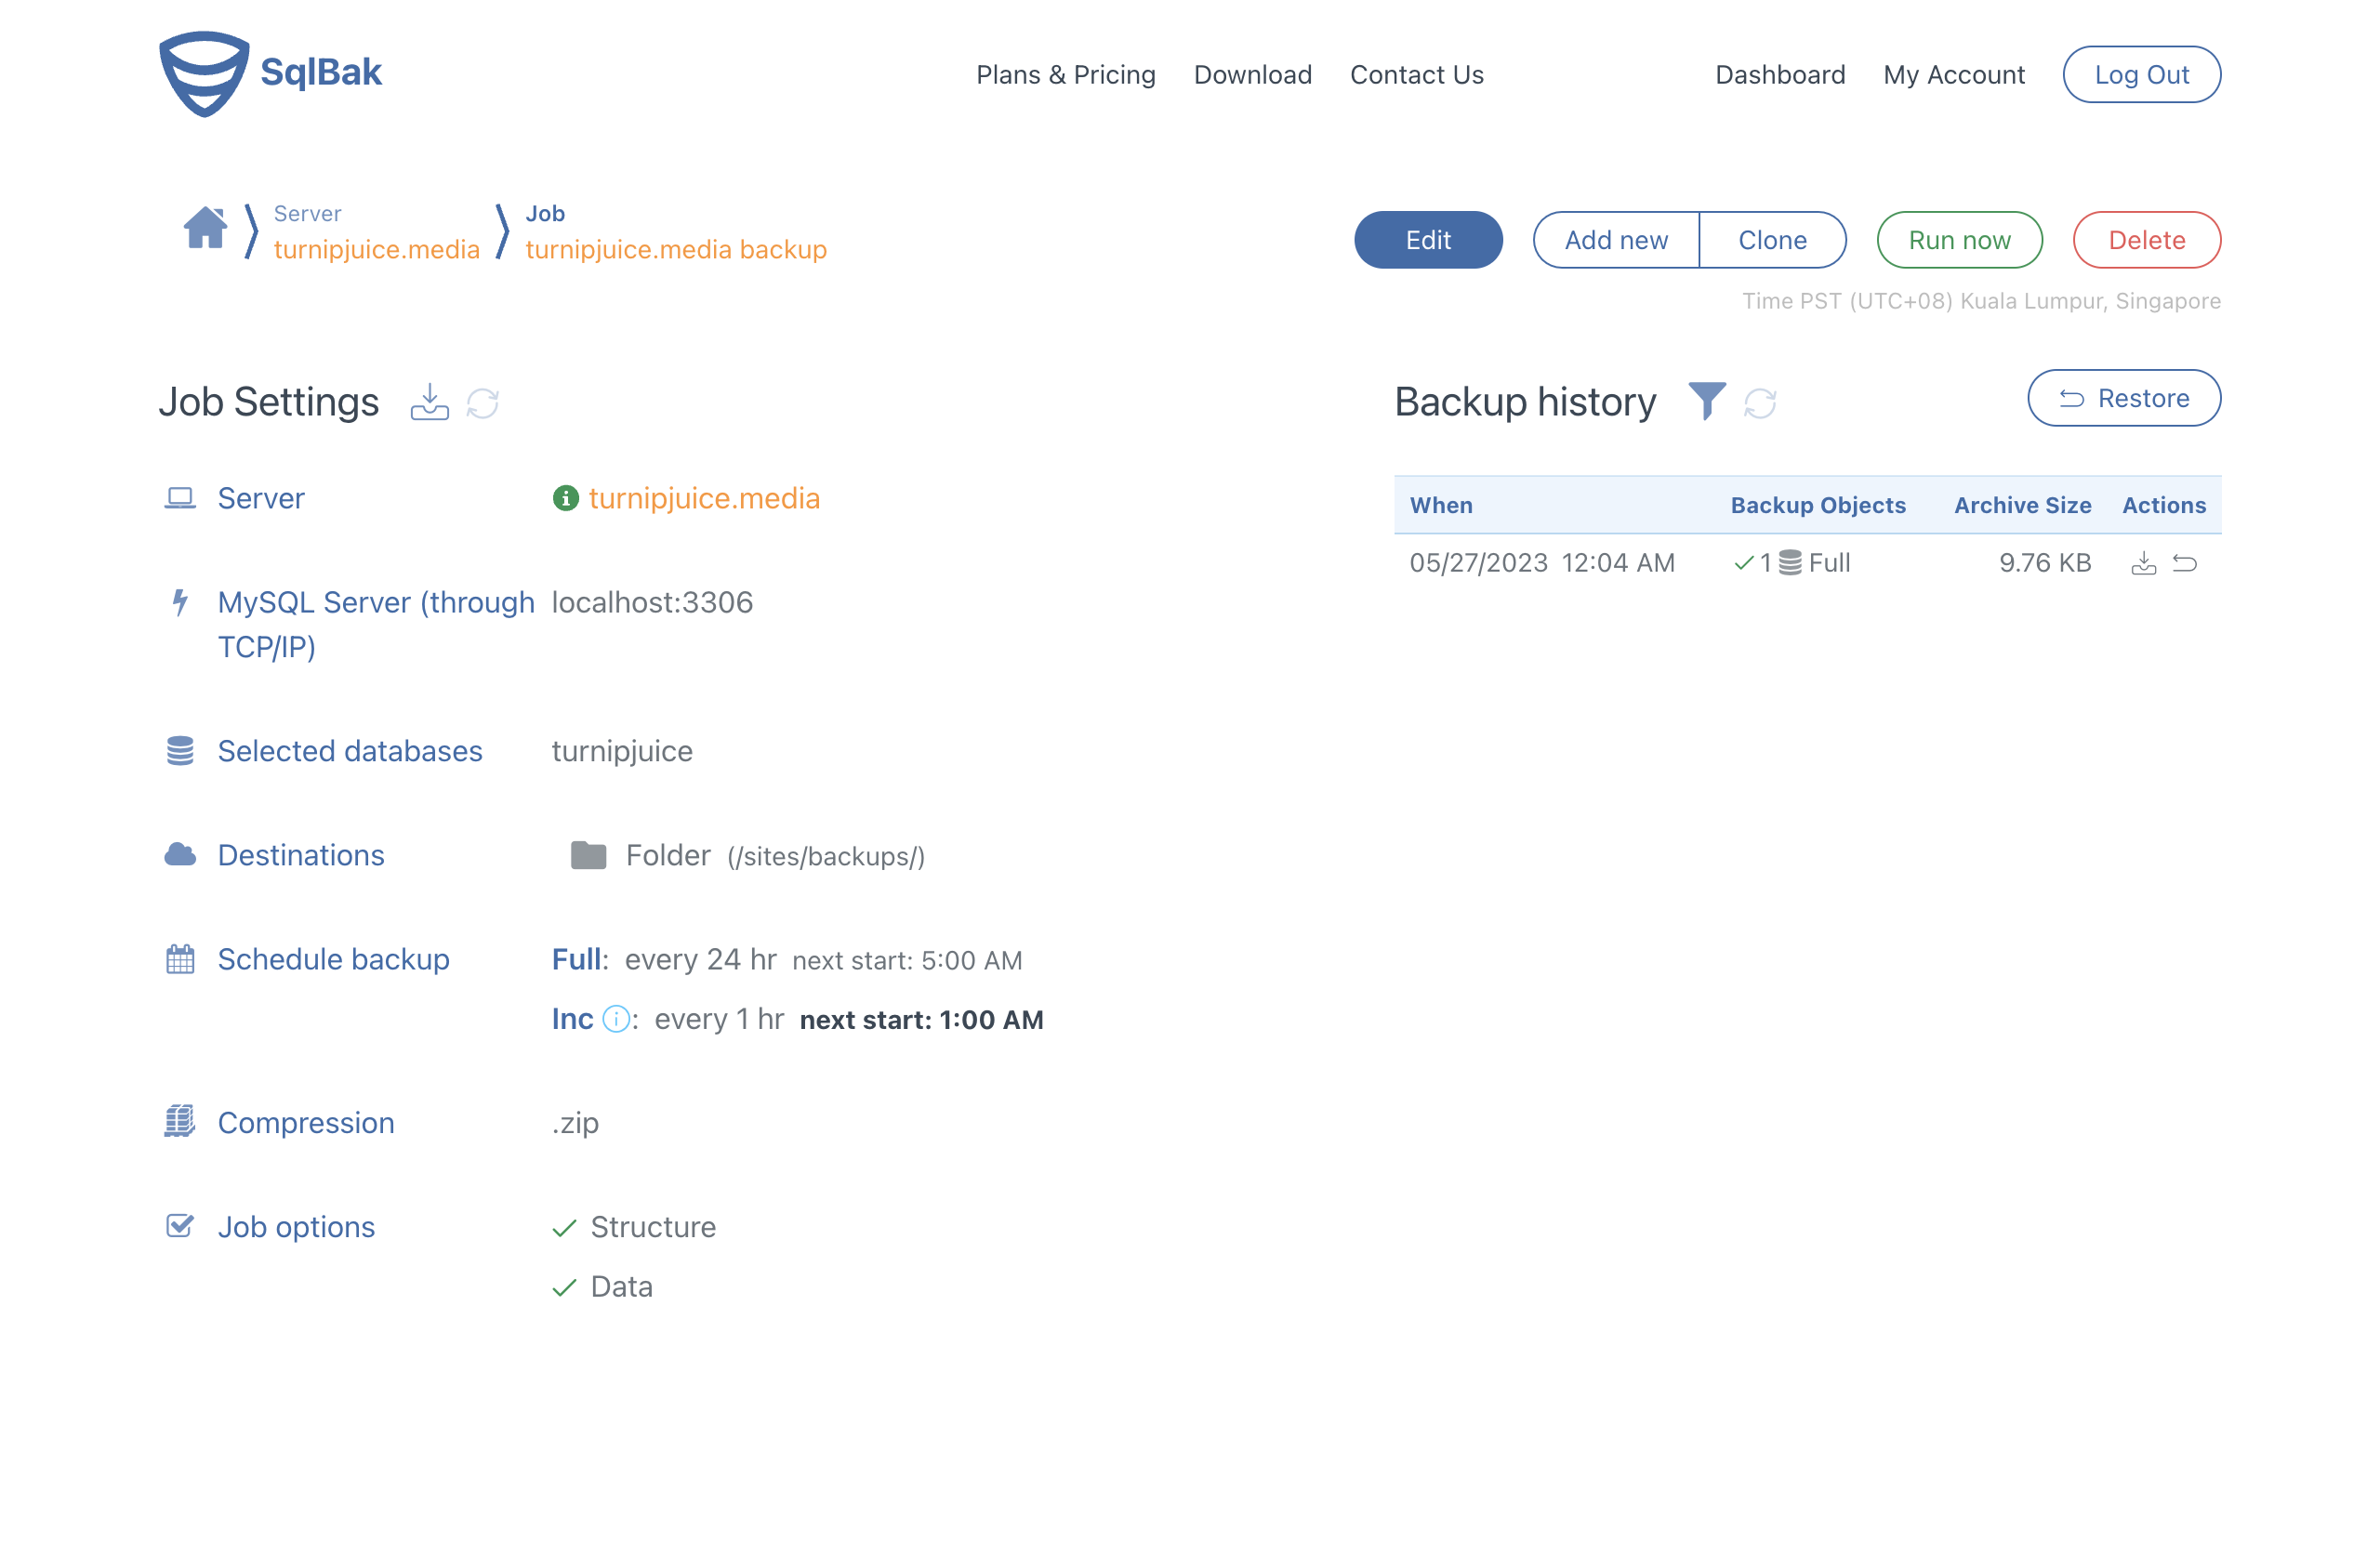
As I mentioned earlier, the 30-day free trial and the clear UI meant that I could get both full and incremental backups up and running quickly. I also like the fact that you can toggle backup settings on and off.
Backups With Ottomatik
If you search incremental MySQL backups, you might also find Ottomatik. Ottomatik provides similar functionality to SqlBak, but I found it more difficult to use.
If you’re like me, you prefer to install the required application yourself. Instead of offering it as an operating system package, you have to manually install a bunch of software to use Ottomatik.
I also generally found the documentation to be harder to understand. Finally, unlike SqlBak, you don’t have the option to fully test out all the features in your trial period, and the incremental backups require you to upgrade to a paid account.
Conclusion
Incremental backups are a must for high activity websites. As you can see from this article, it’s not something that’s easy to set up yourself. We might offer incremental backups in SpinupWP in the future, but for now, a service like SqlBak is a great complement to SpinupWP.
Do you have any horror stories where an incremental backup would have saved the day? Maybe you’re already using an incremental backup solution on your sites? Would you like to see this feature offered on SpinupWP servers in the future? Let us know in the comments.
