In chapter 1 of this guide, I took you through the initial steps of setting up and securing a VPS on DigitalOcean using Ubuntu 24.04. In this chapter I will guide you through the process of setting up Nginx, PHP-FPM, and MySQL — which on Linux is more commonly known as a LEMP stack — that will form the foundations of a working web application and server.
Before moving on with this tutorial, you will need to open a new SSH connection to the server, if you haven’t already:
ssh abe@pluto.turnipjuice.media
Welcome to Ubuntu 24.04.3 LTS (GNU/Linux 6.8.0-83-generic x86_64)

 * Documentation:  https://help.ubuntu.com
 * Management:     https://landscape.canonical.com
 * Support:        https://ubuntu.com/pro

 System information as of Wed Sep 17 13:56:57 UTC 2025

  System load:  0.0               Users logged in:       0
  Usage of /:   4.5% of 47.39GB   IPv4 address for eth0: 178.62.70.190
  Memory usage: 16%               IPv4 address for eth0: 10.50.0.5
  Swap usage:   0%                IPv6 address for eth0: 2604:a880:5:1::d04:0
  Processes:    99

Expanded Security Maintenance for Applications is not enabled.

0 updates can be applied immediately.

Enable ESM Apps to receive additional future security updates.
See https://ubuntu.com/esm or run: sudo pro status


Last login: Wed Sep 17 13:57:30 2025 from 190.140.118.55
abe@pluto:~$
Install Nginx
Nginx has become the most popular web server software used on Linux servers, so it makes sense to use it rather than Apache. Although the official Ubuntu package repository includes Nginx packages, they’re often very outdated. Instead, we use the package repository maintained by Ondřej Surý that includes the latest Nginx stable packages.
First, add the repository and update the package lists:
sudo add-apt-repository ppa:ondrej/nginx -y
sudo apt update
There may now be some packages that can be upgraded, let’s do that now:
sudo apt dist-upgrade -y
Then install Nginx:
sudo apt install nginx -y
Once complete, you can confirm that Nginx has been installed with the following command:
nginx -v
abe@pluto:~$ nginx -v
nginx version: nginx/1.28.0
Now you can try visiting the domain name pointing to your server’s IP address in your browser and you should see an Nginx welcome page. Make sure to type in http:// as browsers default to https:// now and that won’t work as we have yet to set up SSL.
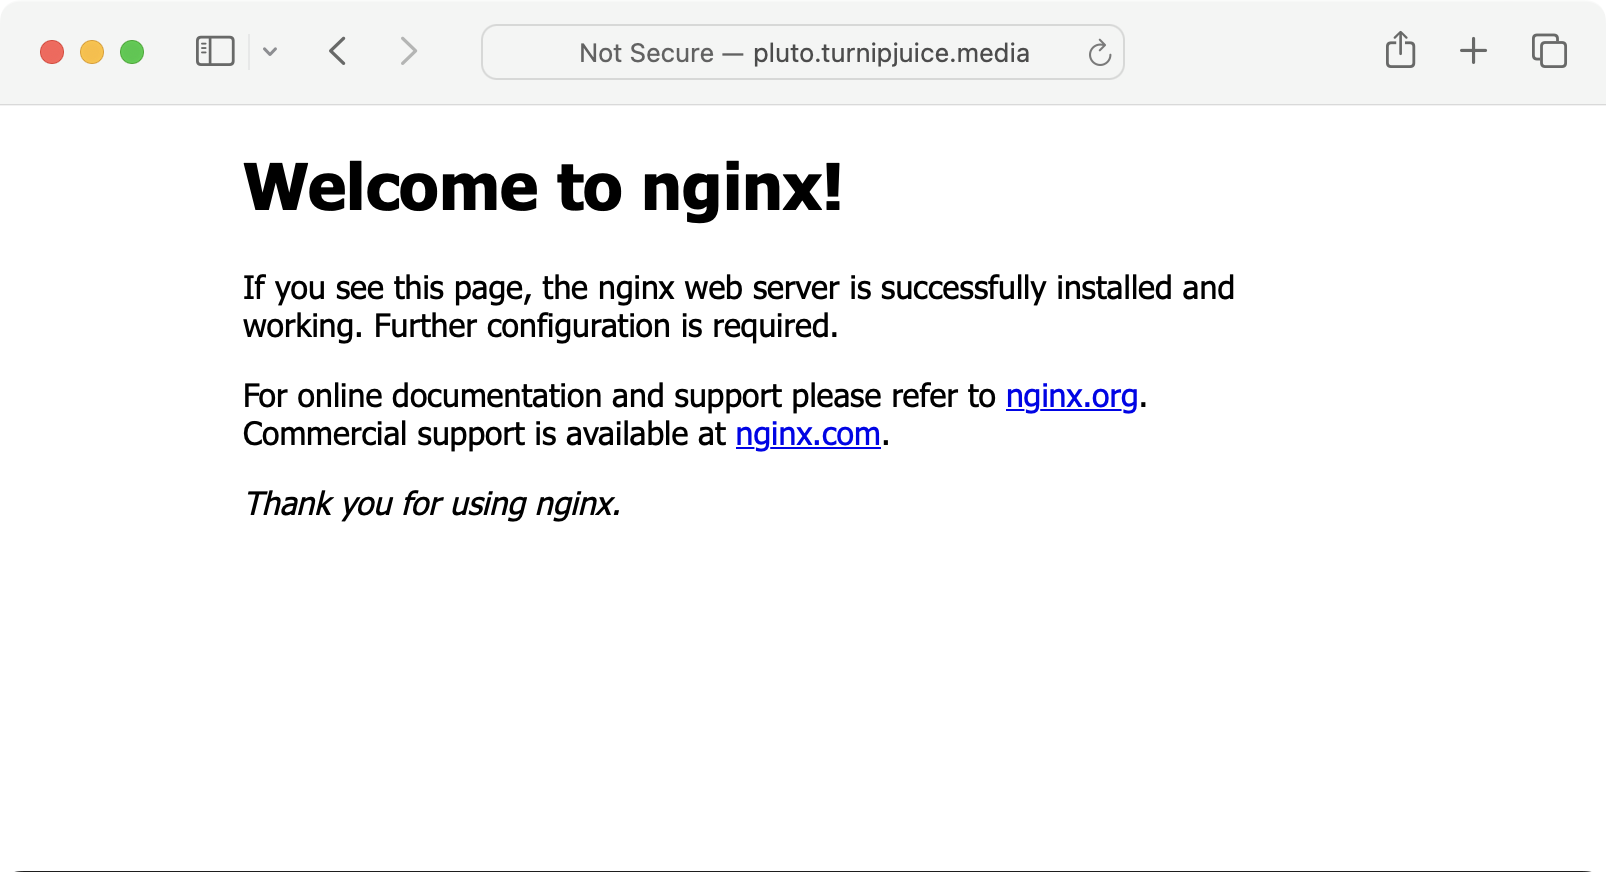
Now that Nginx has successfully been installed it’s time to perform some basic configuration. Out-of-the-box Nginx is pretty well optimized, but there are a few basic adjustments to make. However, before opening the configuration file, you need to determine your server’s open file limit.
Run the following to get your server’s open file limit and take note, as we’ll use it in a minute:
ulimit -n
Next, open the Nginx configuration file, which can be found at /etc/nginx/nginx.conf:
sudo nano /etc/nginx/nginx.conf
user www-data;
worker_processes auto;
pid /run/nginx.pid;
error_log /var/log/nginx/error.log;
include /etc/nginx/modules-enabled/*.conf;
events {
        worker_connections 768;
        # multi_accept on;
}

http {

        ##
        # Basic Settings
        ##
I’m not going to list every configuration directive but I am going to briefly mention those that you should change. If you would find it easier to see the whole thing at once, feel free to download the complete Nginx config kit now.
Start by setting the user to the username that you’re currently logged in with. This will make managing file permissions much easier in the future, but this is only acceptable security-wise when running a server where only a single user has access.
The events block contains two directives, the first worker_connections should be set to your server’s open file limit. This tells Nginx how many simultaneous connections can be opened by each worker_process. Therefore, if you have two CPU cores and an open file limit of 1024, your server can handle 2048 connections per second. However, the number of connections doesn’t directly equate to the number of users that can be handled by the server, as the majority of web pages and browsers open at least two connections per request. The multi_accept directive should be uncommented and set to on. This informs each worker_process to accept all new connections at a time, opposed to accepting one new connection at a time.
Moving down the file you will see the http block. The first directive to add is keepalive_timeout. The keepalive_timeout determines how many seconds a connection to the client should be kept open before it’s closed by Nginx. This directive should be lowered, as you don’t want idle connections sitting there for up to 75 seconds if they can be utilized by new clients. I have set mine to 15. You can add this directive just above the sendfile on; directive:
http {

        ##
        # Basic Settings
        ##

        keepalive_timeout 15;
        sendfile on;
For security reasons, you should uncomment the server_tokens directive and ensure it is set to off. This will disable emitting the Nginx version number in error messages and response headers.
Underneath server_tokens add the following line to set the maximum upload size you require in the WordPress Media Library.
client_max_body_size 64m;
I chose a value of 64m but you can increase it if you run into issues uploading large files.
Further down the http block, you will see a section dedicated to gzip compression. By default, gzip is enabled but you should tweak these values further for better handling of static files. First, you should uncomment the gzip_proxied directive and set it to any, which will ensure all proxied request responses are gzipped. Secondly, you should uncomment the gzip_comp_level and set it to a value of 5. This controls the compression level of a response and can have a value in the range of 1 – 9. Be careful not to set this value too high, as it can have a negative impact on CPU usage. Finally, you should uncomment the gzip_types directive, leaving the default values in place. This will ensure that JavaScript, CSS, and other file types are gzipped in addition to the HTML file type which is always compressed by the gzip module.
That’s the basic Nginx configuration dealt with. Hit CTRL + X followed by Y to save the changes.
You must restart Nginx for the changes to take effect. Before doing so, ensure that the configuration files contain no errors by issuing the following command:
sudo nginx -t
If everything looks OK, go ahead and restart Nginx:
sudo systemctl restart nginx.service
If it’s not already running, you can start Nginx with:
sudo systemctl enable --now nginx.service
abe@pluto:~$ sudo nginx -t
nginx: the configuration file /etc/nginx/nginx.conf syntax is ok
nginx: configuration file /etc/nginx/nginx.conf test is successful
abe@pluto:~$ sudo systemctl enable --now nginx.service
Synchronizing state of nginx.service with SysV service script with /usr/lib/systemd/systemd-sysv-install.
Executing: /usr/lib/systemd/systemd-sysv-install enable nginx
abe@pluto:~$
Configure Brotli Compression
Brotli is a modern, high-performance compression algorithm developed by Google. It offers significantly better compression ratios than gzip, resulting in smaller file sizes and faster load times for users. Brotli is supported by all major browsers and can be safely enabled for most web applications.
To enable Brotli support in Nginx, you’ll first need to install the Brotli dynamic modules:
sudo apt install libnginx-mod-http-brotli-filter libnginx-mod-http-brotli-static -y
Once installed, you can enable and configure Brotli in the Nginx configuration file. Open the main configuration file:
sudo nano /etc/nginx/nginx.conf
Then add the following lines right below the Gzip Settings section:
##
# Brotli Settings
##

brotli on;
brotli_comp_level 5;
brotli_types text/plain text/css application/json application/javascript text/xml application/xml application/xml+rss text/javascript;
It should end up looking like this:
    ##
    # Gzip Settings
    ##

    gzip on;

    # gzip_vary on;
    gzip_proxied any;
    gzip_comp_level 5;
    # gzip_buffers 16 8k;
    # gzip_http_version 1.1;
    gzip_types text/plain text/css application/json application/javascript text/xml application/xml application/xml+rss text/javascript;

    ##
    # Brotli Settings
    ##

    brotli on;
    brotli_comp_level 5;
    brotli_types text/plain text/css application/json application/javascript text/xml application/xml application/xml+rss text/javascript;
Once configured, test your Nginx configuration for syntax errors:
sudo nginx -t
If all goes well, reload the service:
sudo systemctl reload nginx.service
Brotli will now automatically compress eligible responses before they are sent to clients, further reducing bandwidth usage and improving page performance.
Install PHP 8.4
Just as with Nginx, the official Ubuntu package repository does contain PHP packages. However, they are not the most up-to-date. Again, I use one maintained by Ondřej Surý for installing PHP. Add the repository and update the package lists as you did for Nginx:
sudo add-apt-repository ppa:ondrej/php -y
sudo apt update
Then install PHP 8.4, as well as all the PHP packages you will require:
sudo apt install php8.4-fpm php8.4-common php8.4-mysql \
php8.4-xml php8.4-intl php8.4-curl php8.4-gd \
php8.4-imagick php8.4-cli php8.4-dev php8.4-imap \
php8.4-mbstring php8.4-opcache php8.4-redis \
php8.4-soap php8.4-zip -y
You’ll notice php-fpm in the list of packages being installed. FastCGI Process Manager (FPM) is an alternative PHP FastCGI implementation with some additional features that plays really well with Nginx. It’s the recommended process manager to use when installing PHP with Nginx.
After the installation has completed, test PHP and confirm that it has been installed correctly:
php-fpm8.4 -v
abe@pluto:~$ php-fpm8.4 -v
PHP 8.4.12 (fpm-fcgi) (built: Aug 29 2025 06:48:12) (NTS)
Copyright (c) The PHP Group
Built by Debian
Zend Engine v4.4.12, Copyright (c) Zend Technologies
    with Zend OPcache v8.4.12, Copyright (c), by Zend Technologies
Configure PHP 8.4 and PHP-FPM
Once Nginx and PHP are installed you need to configure the user and group that the service will run under. This setup does not provide security isolation between sites by configuring PHP pools, so we will run a single PHP pool under your user account. If security isolation between sites is required we do not recommend that you use this approach and instead use SpinupWP to provision your servers.
Open the default pool configuration file:
sudo nano /etc/php/8.4/fpm/pool.d/www.conf
Change the following lines, replacing www-data with your username:
user = abe
group = abe
listen.owner = abe
listen.group = abe
Hit CTRL + X and Y to save the configuration.
Next, you should adjust your php.ini file to increase the WordPress maximum upload size. Both this and the client_max_body_size directive within Nginx must be changed for the new maximum upload limit to take effect. Open your php.ini file:
sudo nano /etc/php/8.4/fpm/php.ini
Change the following lines to match the value you assigned to the client_max_body_size directive when configuring Nginx:
upload_max_filesize = 64M
post_max_size = 64M
While we’re editing the php.ini file, let’s also enable the OPcache file override setting. When this setting is enabled, OPcache will serve the cached version of PHP files without checking if the file has been modified on the file system, resulting in improved PHP performance.
Hit CTRL + W and type file_override to locate the line we need to update. Now uncomment it (remove the semicolon) and change the value from zero to one:
opcache.enable_file_override = 1
Hit CTRL + X and Y to save the configuration. Before restarting PHP, check that the configuration file syntax is correct:
sudo php-fpm8.4 -t
abe@pluto:~$ sudo php-fpm8.4 -t
[21-Sep-2025 03:58:04] NOTICE: configuration file /etc/php/8.4/fpm/php-fpm.conf test is successful
If the configuration test was successful, restart PHP using the following command:
sudo systemctl restart php8.4-fpm.service
Now that Nginx and PHP have been installed, you can confirm that they are both running under the correct user by issuing the htop command:
htop
If you hit SHIFT + M, the output will be arranged by memory usage which should bring the php-fpm processes into view. If you scroll to the bottom, you’ll also find a couple of nginx processes.
Both processes will have one instance running under the root user. This is the main process that spawns each worker. The remainder should be running under the username you specified.
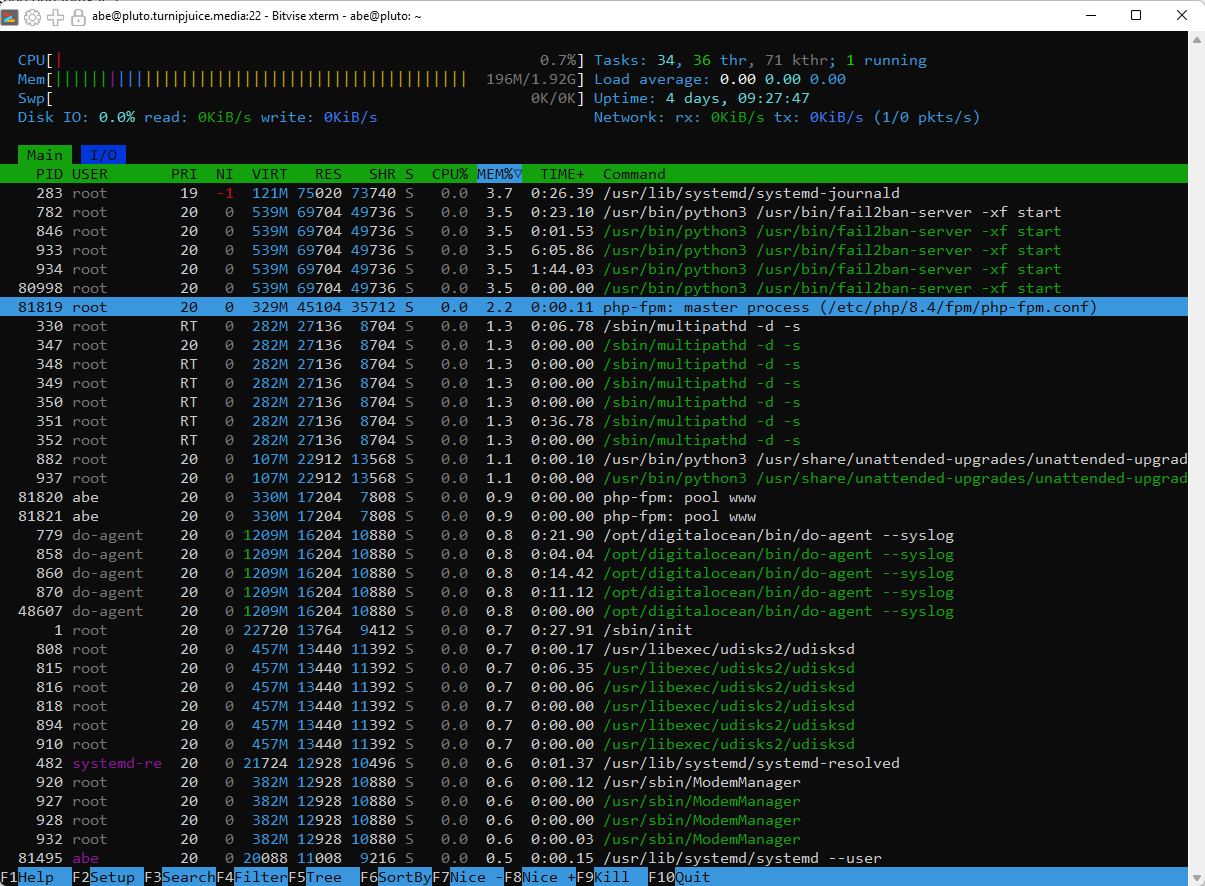
If not, go back and check the configuration, and ensure that you have restarted both the Nginx and PHP-FPM services.
Test Nginx and PHP
To check that Nginx and PHP are working together properly, enable PHP in the default Nginx site configuration and create a PHP info file to view in your browser. You are welcome to skip this step, but it’s often handy to check that PHP files can be correctly processed by the Nginx web server.
First, you need to uncomment a section in the default Nginx site configuration which was created when you installed Nginx:
sudo nano /etc/nginx/sites-available/default
Find the section which controls the PHP scripts.
# pass PHP scripts to FastCGI server
#
#location ~ \.php$ {
#       include snippets/fastcgi-php.conf;
#
#       # With php-fpm (or other unix sockets):
#       fastcgi_pass unix:/run/php/php8.4-fpm.sock;
#       # With php-cgi (or other tcp sockets):
#       fastcgi_pass 127.0.0.1:9000;
#}
As we’re using php-fpm, we can change that section to look like this:
# pass PHP scripts to FastCGI server

location ~ \.php$ {
       include snippets/fastcgi-php.conf;

       # With php-fpm (or other unix sockets):
       fastcgi_pass unix:/run/php/php8.4-fpm.sock;
}
Save the file by using CTRL + X followed by Y. Then, as before, test to make sure the configuration file was edited correctly.
sudo nginx -t
If everything looks okay, go ahead and restart Nginx:
sudo systemctl restart nginx.service
Next, create an info.php file in the default web root, which is /var/www/html.
cd /var/www/html
sudo nano info.php
Add the following PHP code to that info.php file, and save it by using the same CTRL + X, Y combination.
<?php phpinfo();
Lastly, because you set the user directive in your nginx.conf file to the user you’re currently logged in with, give that user permissions on the info.php file.
sudo chown abe info.php
Now, if you visit the info.php file in your browser, using the domain name you set up in chapter 1, you should see the PHP info screen, which means Nginx can process PHP files correctly.
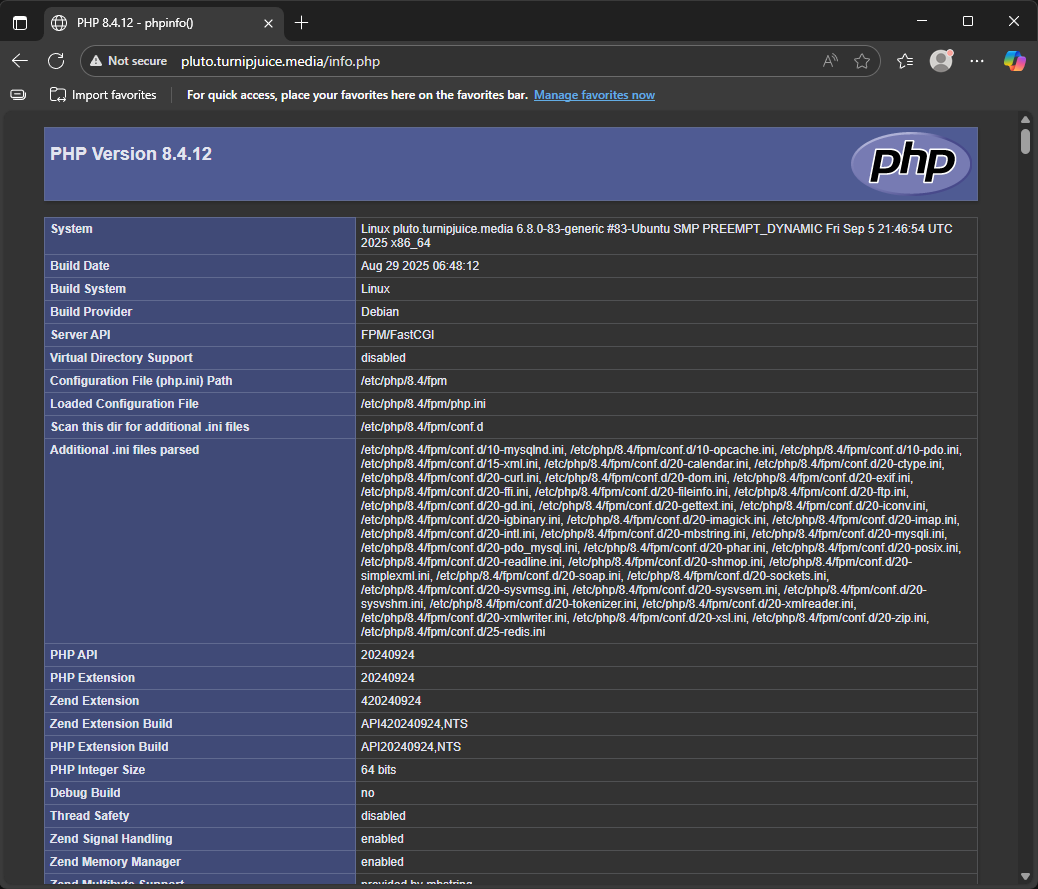
Once you’ve tested this, you can go ahead and delete the info.php file.
sudo rm /var/www/html/info.php
Configure a Catch-All Server Block
Currently, when you visit the server’s domain name in a web browser you will see the Nginx welcome page. However, it would be better if the server returned an empty response for domain names that have not been configured in Nginx.
Begin by removing the following two default site configuration files:
sudo rm /etc/nginx/sites-available/default
sudo rm /etc/nginx/sites-enabled/default
Now you need to add a catch-all block to the Nginx configuration. Edit the nginx.conf file:
sudo nano /etc/nginx/nginx.conf
Towards the bottom of the file you’ll find a line that reads:
include /etc/nginx/sites-enabled/*;
Underneath that, add the following block:
server {
    listen 80 default_server;
    listen [::]:80 default_server;

    server_name _;

    return 444;
}
Hit CTRL + X followed by Y to save the changes and then test the Nginx configuration:
sudo nginx -t
If everything looks good, restart Nginx:
sudo systemctl restart nginx.service
Now when you visit your domain name you should receive an error:
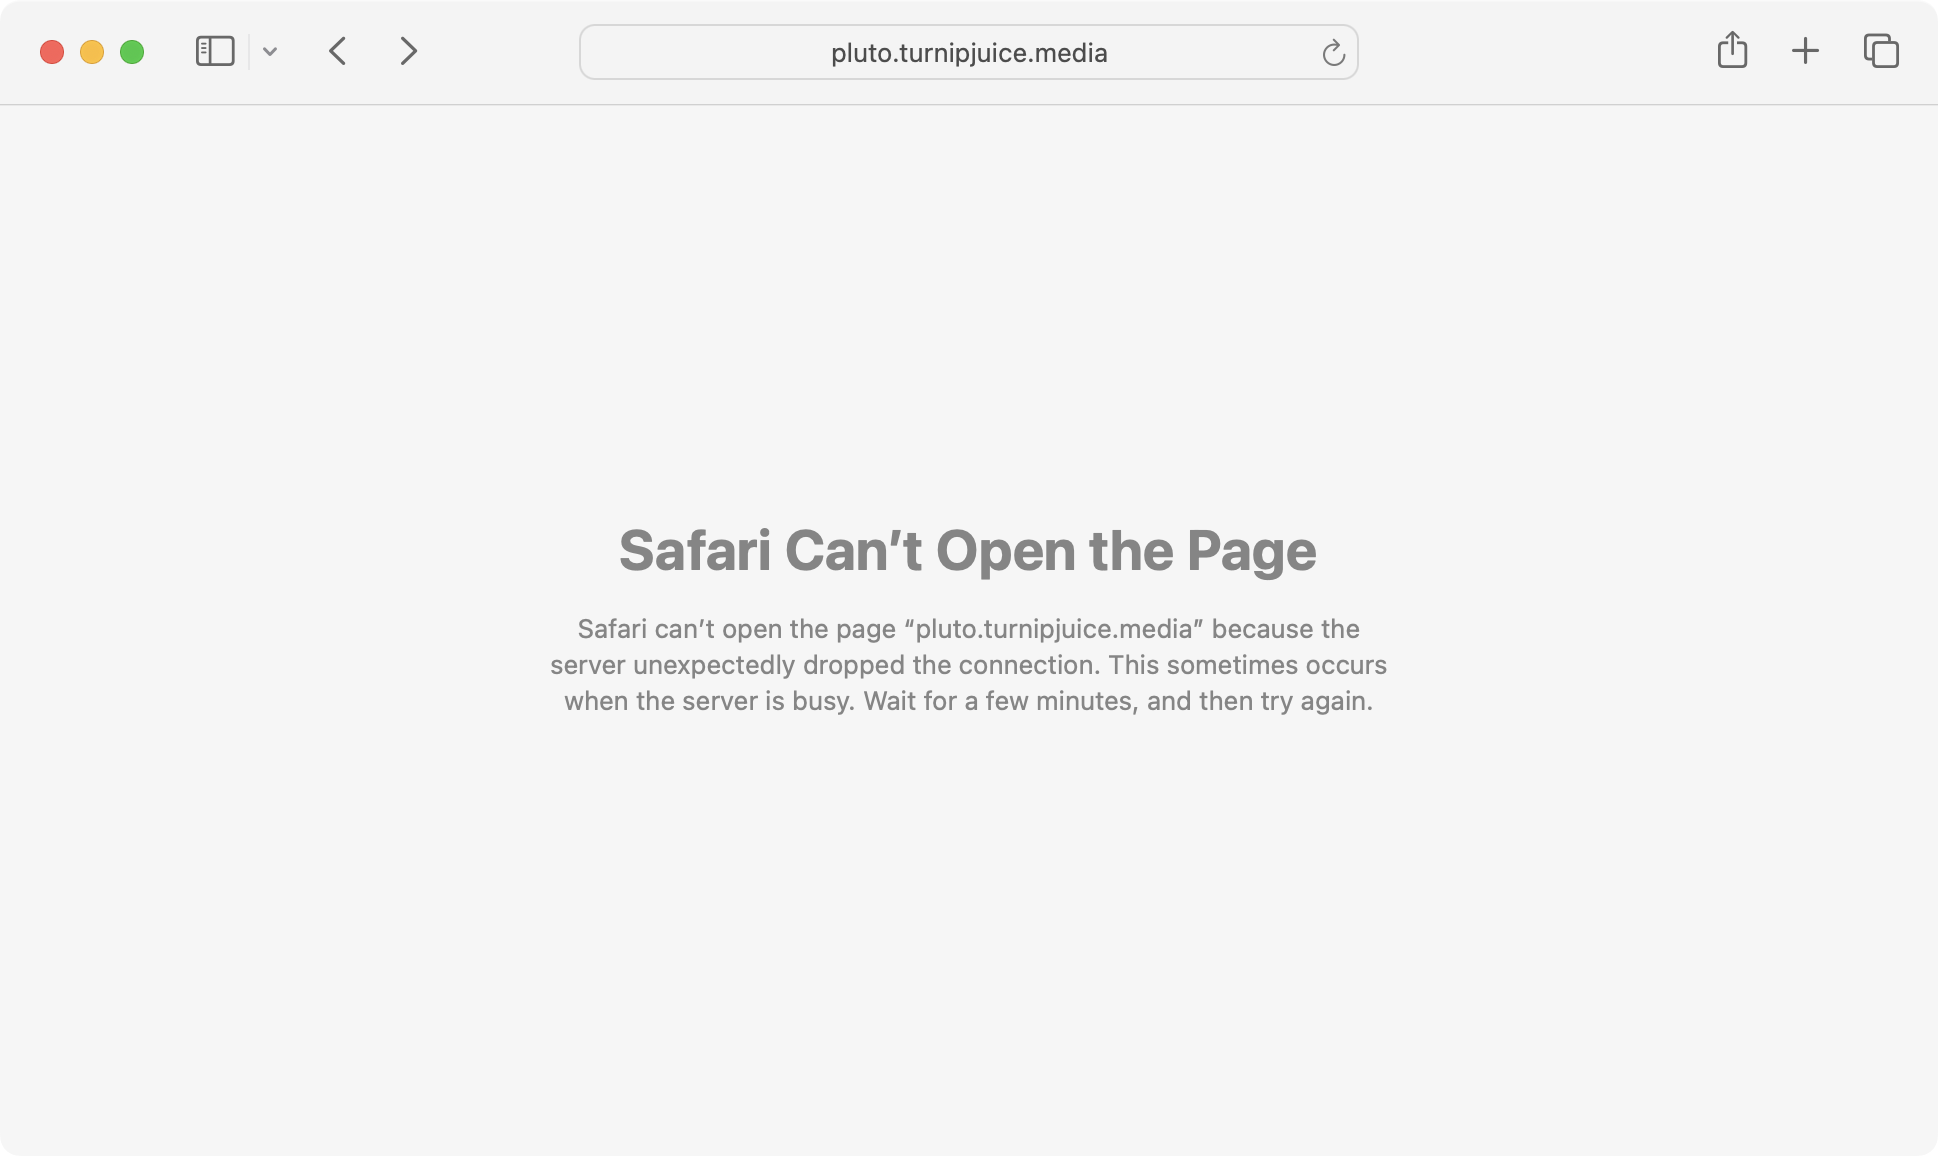
Here’s my final nginx.conf file, after applying all of the above changes. I have removed the mail block, as this isn’t something that’s commonly used.
user abe;
worker_processes auto;
pid /run/nginx.pid;
error_log /var/log/nginx/error.log;
include /etc/nginx/modules-enabled/*.conf;

events {
    worker_connections 1024;
    multi_accept on;
}

http {

    ##
    # Basic Settings
    ##

    keepalive_timeout 15;
    sendfile on;
    tcp_nopush on;
    types_hash_max_size 2048;
    server_tokens off;
    client_max_body_size 64m;

    # server_names_hash_bucket_size 64;
    # server_name_in_redirect off;

    include /etc/nginx/mime.types;
    default_type application/octet-stream;

    ##
    # SSL Settings
    ##

    ssl_protocols TLSv1 TLSv1.1 TLSv1.2 TLSv1.3; # Dropping SSLv3, ref: POODLE
    ssl_prefer_server_ciphers on;

    ##
    # Logging Settings
    ##

    access_log /var/log/nginx/access.log;

    ##
    # Gzip Settings
    ##

    gzip on;

    # gzip_vary on;
    gzip_proxied any;
    gzip_comp_level 5;
    # gzip_buffers 16 8k;
    # gzip_http_version 1.1;
    gzip_types text/plain text/css application/json application/javascript text/xml application/xml application/xml+rss text/javascript;

    ##
    # Brotli Settings
    ##

    brotli on;
    brotli_comp_level 5;
    brotli_types text/plain text/css application/json application/javascript text/xml application/xml application/xml+rss text/javascript;

    ##
    # Virtual Host Configs
    ##

    include /etc/nginx/conf.d/*.conf;
    include /etc/nginx/sites-enabled/*;

    server {
        listen 80 default_server;
        listen [::]:80 default_server;

        server_name _;

        return 444;
    }
}
Download the complete set of Nginx config files
Install WP-CLI
If you have never used WP-CLI before, it’s a command-line tool for managing WordPress installations, and greatly simplifies the process of downloading and installing WordPress (plus many other tasks).
Navigate to your home directory:
cd ~/
Using cURL, download WP-CLI:
curl -O https://raw.githubusercontent.com/wp-cli/builds/gh-pages/phar/wp-cli.phar
You can then check that it works by issuing:
php wp-cli.phar --info
The command should output information about your current PHP version and a few other details.
To access the command-line tool by simply typing wp, you need to move it into your server’s PATH and ensure that it has execute permissions:
chmod +x wp-cli.phar
sudo mv wp-cli.phar /usr/local/bin/wp
You can now access the WP-CLI tool by typing wp.
NAME wp DESCRIPTION Manage WordPress through the command-line. SYNOPSIS wpSUBCOMMANDS cache Adds, removes, fetches, and flushes the WP Object Cache object. cap Adds, removes, and lists capabilities of a user role. cli Reviews current WP-CLI info, checks for updates, or views defined aliases. comment Creates, updates, deletes, and moderates comments. config Generates and reads the wp-config.php file. core Downloads, installs, updates, and manages a WordPress installation.
Install MySQL 8.4
The final package to install is MySQL. By default, Ubuntu provides MySQL packages through its own repository, but these are often one or more major versions behind the official MySQL releases. To ensure access to the latest stable and long-term supported (LTS) versions, we’ll configure Ubuntu to use MySQL’s official APT repository instead. This approach guarantees timely security patches, newer features, and better alignment with upstream support.
To access MySQL’s repository, we’ll first need to download MySQL’s apt configuration release package:
wget https://dev.mysql.com/get/mysql-apt-config_0.8.36-1_all.deb
Once downloaded, we can go ahead and install it with:
sudo dpkg -i mysql-apt-config_0.8.36-1_all.deb
Next, select Ok to complete the installation:
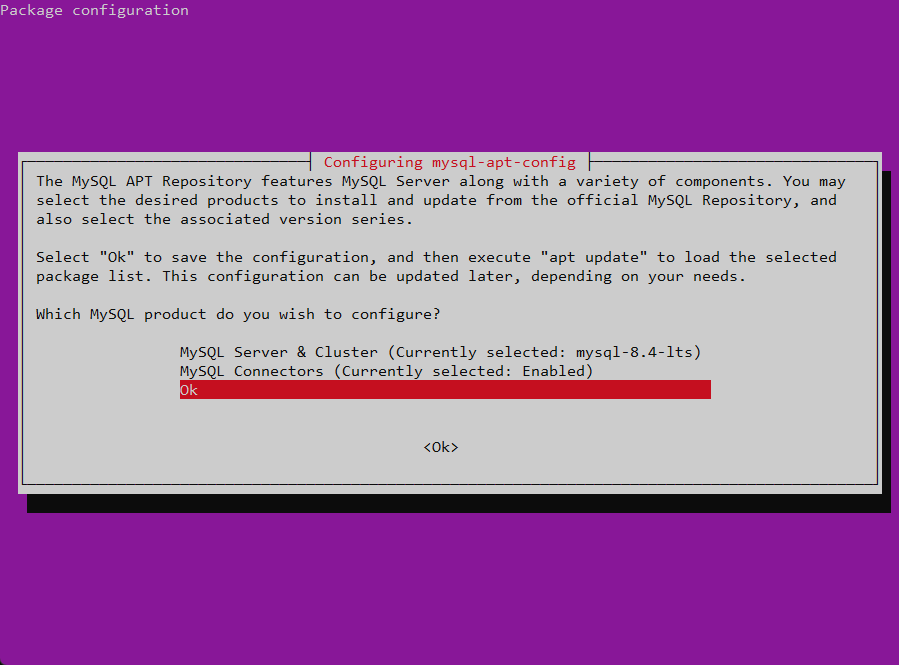
Lastly, proceed to update the repository with the following command:
sudo apt update
We’re now ready to install MySQL on the server. Simply run the following command:
sudo apt install mysql-server -y
sudo apt install mysql-server -y will automatically select packages from the Ubuntu repository instead.
You’ll be prompted to set a password for MySQL’s root user:
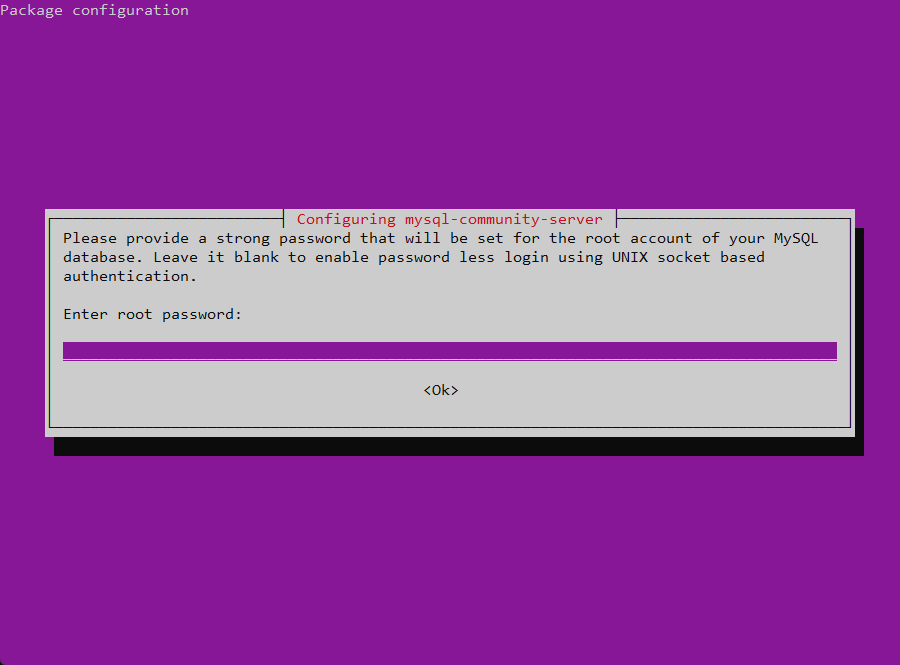
Enter a password and select Ok.
Finally, to complete the setup process, we’ll go ahead and run MySQL’s secure installation script:
sudo mysql_secure_installation
Follow the instructions and answer the questions. You’ll enter the password that you just set. Here are my answers:
abe@pluto:~$ sudo mysql_secure_installation

Securing the MySQL server deployment.

Enter password for user root:

VALIDATE PASSWORD COMPONENT can be used to test passwords
and improve security. It checks the strength of password
and allows the users to set only those passwords which are
secure enough. Would you like to setup VALIDATE PASSWORD component?

Press y|Y for Yes, any other key for No: y

There are three levels of password validation policy:

LOW    Length >= 8
MEDIUM Length >= 8, numeric, mixed case, and special characters
STRONG Length >= 8, numeric, mixed case, special characters and dictionary file

Please enter 0 = LOW, 1 = MEDIUM and 2 = STRONG: 2
Using existing password for root.

Estimated strength of the password: 100
Change the password for root ? ((Press y|Y for Yes, any other key for No) : n

 ... skipping.
By default, a MySQL installation has an anonymous user,
allowing anyone to log into MySQL without having to have
a user account created for them. This is intended only for
testing, and to make the installation go a bit smoother.
You should remove them before moving into a production
environment.

Remove anonymous users? (Press y|Y for Yes, any other key for No) : y
Success.


Normally, root should only be allowed to connect from
'localhost'. This ensures that someone cannot guess at
the root password from the network.

Disallow root login remotely? (Press y|Y for Yes, any other key for No) : y
Success.

By default, MySQL comes with a database named 'test' that
anyone can access. This is also intended only for testing,
and should be removed before moving into a production
environment.


Remove test database and access to it? (Press y|Y for Yes, any other key for No) : y
 - Dropping test database...
Success.

 - Removing privileges on test database...
Success.

Reloading the privilege tables will ensure that all changes
made so far will take effect immediately.

Reload privilege tables now? (Press y|Y for Yes, any other key for No) : y
Success.

All done!
abe@pluto:~$
That’s all for this chapter. In the next chapter I will guide you through the process of setting up your first WordPress site and how to manage multiple WordPress installs.


