Moving Sites Between SpinupWP Servers
There may come a time when you wish to move a site to a new server. Maybe a site has outgrown its current server, shared amongst several sites, and it’s time to move it to its own server. Or, your site is running on an outdated version of Ubuntu, and you’d like to migrate it to new hardware. While you can use the instructions in our migration guide to manually move your site, our move tool greatly simplifies the process.
The move tool will perform the following actions:
- Copy the site SFTP user
- Copy PHP pool config
- Copy Nginx configs
- Copy HTTPS certificates
- Copy site files
- Copy crontab
- Copy logrotate config
- Copy git repos
- Copy database and database user
- Copy site backup settings
- Restart Nginx
- Restart PHP-FPM
This will give you an exact clone of the source site on the new server, including server configs, HTTPS certificates, files, and database. To complete the move, switch DNS to the new server, and you’re good to go. Of course, that’s a high-level description and it actually involves a few more individual steps. Let’s dive into the entire process in more detail.
1. Verify access to change DNS
Moving a site to a new server almost always* involves changing the IP address that the site’s domain name is pointing to. Before you do anything to move your site, you should verify that you can login to your DNS provider and add/update DNS records for the domain name of the site you’re about to move.
Even if you’re pretty sure you have a login for this, it doesn’t hurt to test it. What if you’ve shared it with someone on your team and they’ve reset the password. Better to find that out now than when you’re ready to point your domain name at the new server.
And while you’re in there, have a look at the TTL of the DNS record for your site’s domain name. If the TTL is 5 minutes, it means a change in IP address should take effect within 5 minutes, which should work fine for your migration. If the TTL is 24 hours, that’s going to be a problem and you should update it to something shorter then wait 24 hours before starting your migration. If you can’t update your TTL to 5 minutes, we recommend switching your DNS to Cloudflare’s free DNS service.
If you don’t know who your DNS provider is or how to update your DNS, you’ll need to do some Googling and learning. Start with your domain name registrar’s documentation.
* If you’re using a floating IP address then you don’t have to update your DNS, but hey, you’re already ahead of the game and already knew that ???? If you don’t know what a floating IP is, you’re probably not using one and will need to update your DNS.
2. Plan for downtime
For dynamic sites (think e-commerce and membership sites) migrating a site to a new server almost always involves at least a few minutes of downtime. During the DNS propagation period, visitors could be routed to either the new or old server (depending on DNS caches). Therefore, you have to prevent WordPress from handling traffic on the old server so that the databases don’t become out-of-sync. The easiest way to do this is to prepare a simple HTML page named index.html for when you need to put the site on your old server in maintenance mode. Something like this:
<!doctype html>
<html>
    <head>
        <title>Back Soon</title>
        <style>
          body { text-align: center; padding: 150px; }
          h1 { font-size: 50px; }
          body { background-color: #e13067; font: 20px Helvetica, sans-serif; color: #fff; line-height: 1.5 }
          article { display: block; width: 650px; margin: 0 auto; }
        </style>
    </head>

    <body>
        <article>
            <h1>Back Soon!</h1>
            <p>
                We're currently performing server maintenance.<br>
                We'll be back soon!
            </p>
        </article>
    </body>
</html>
Sites that aren’t dynamic (typically sites that are fully page cached) don’t need to worry about putting the site on the old server into maintenance mode, and the migration will be seamless.
3. Perform the move
Now we’ll use the ‘Move Site’ tool to create a clone of your site on the destination server. If you’ve ever used the ‘Clone Site’ tool, it works the same way behind the scenes but it doesn’t prompt you for a domain or any other options. It just copies everything in the list above over to the new server without the need to step through options.
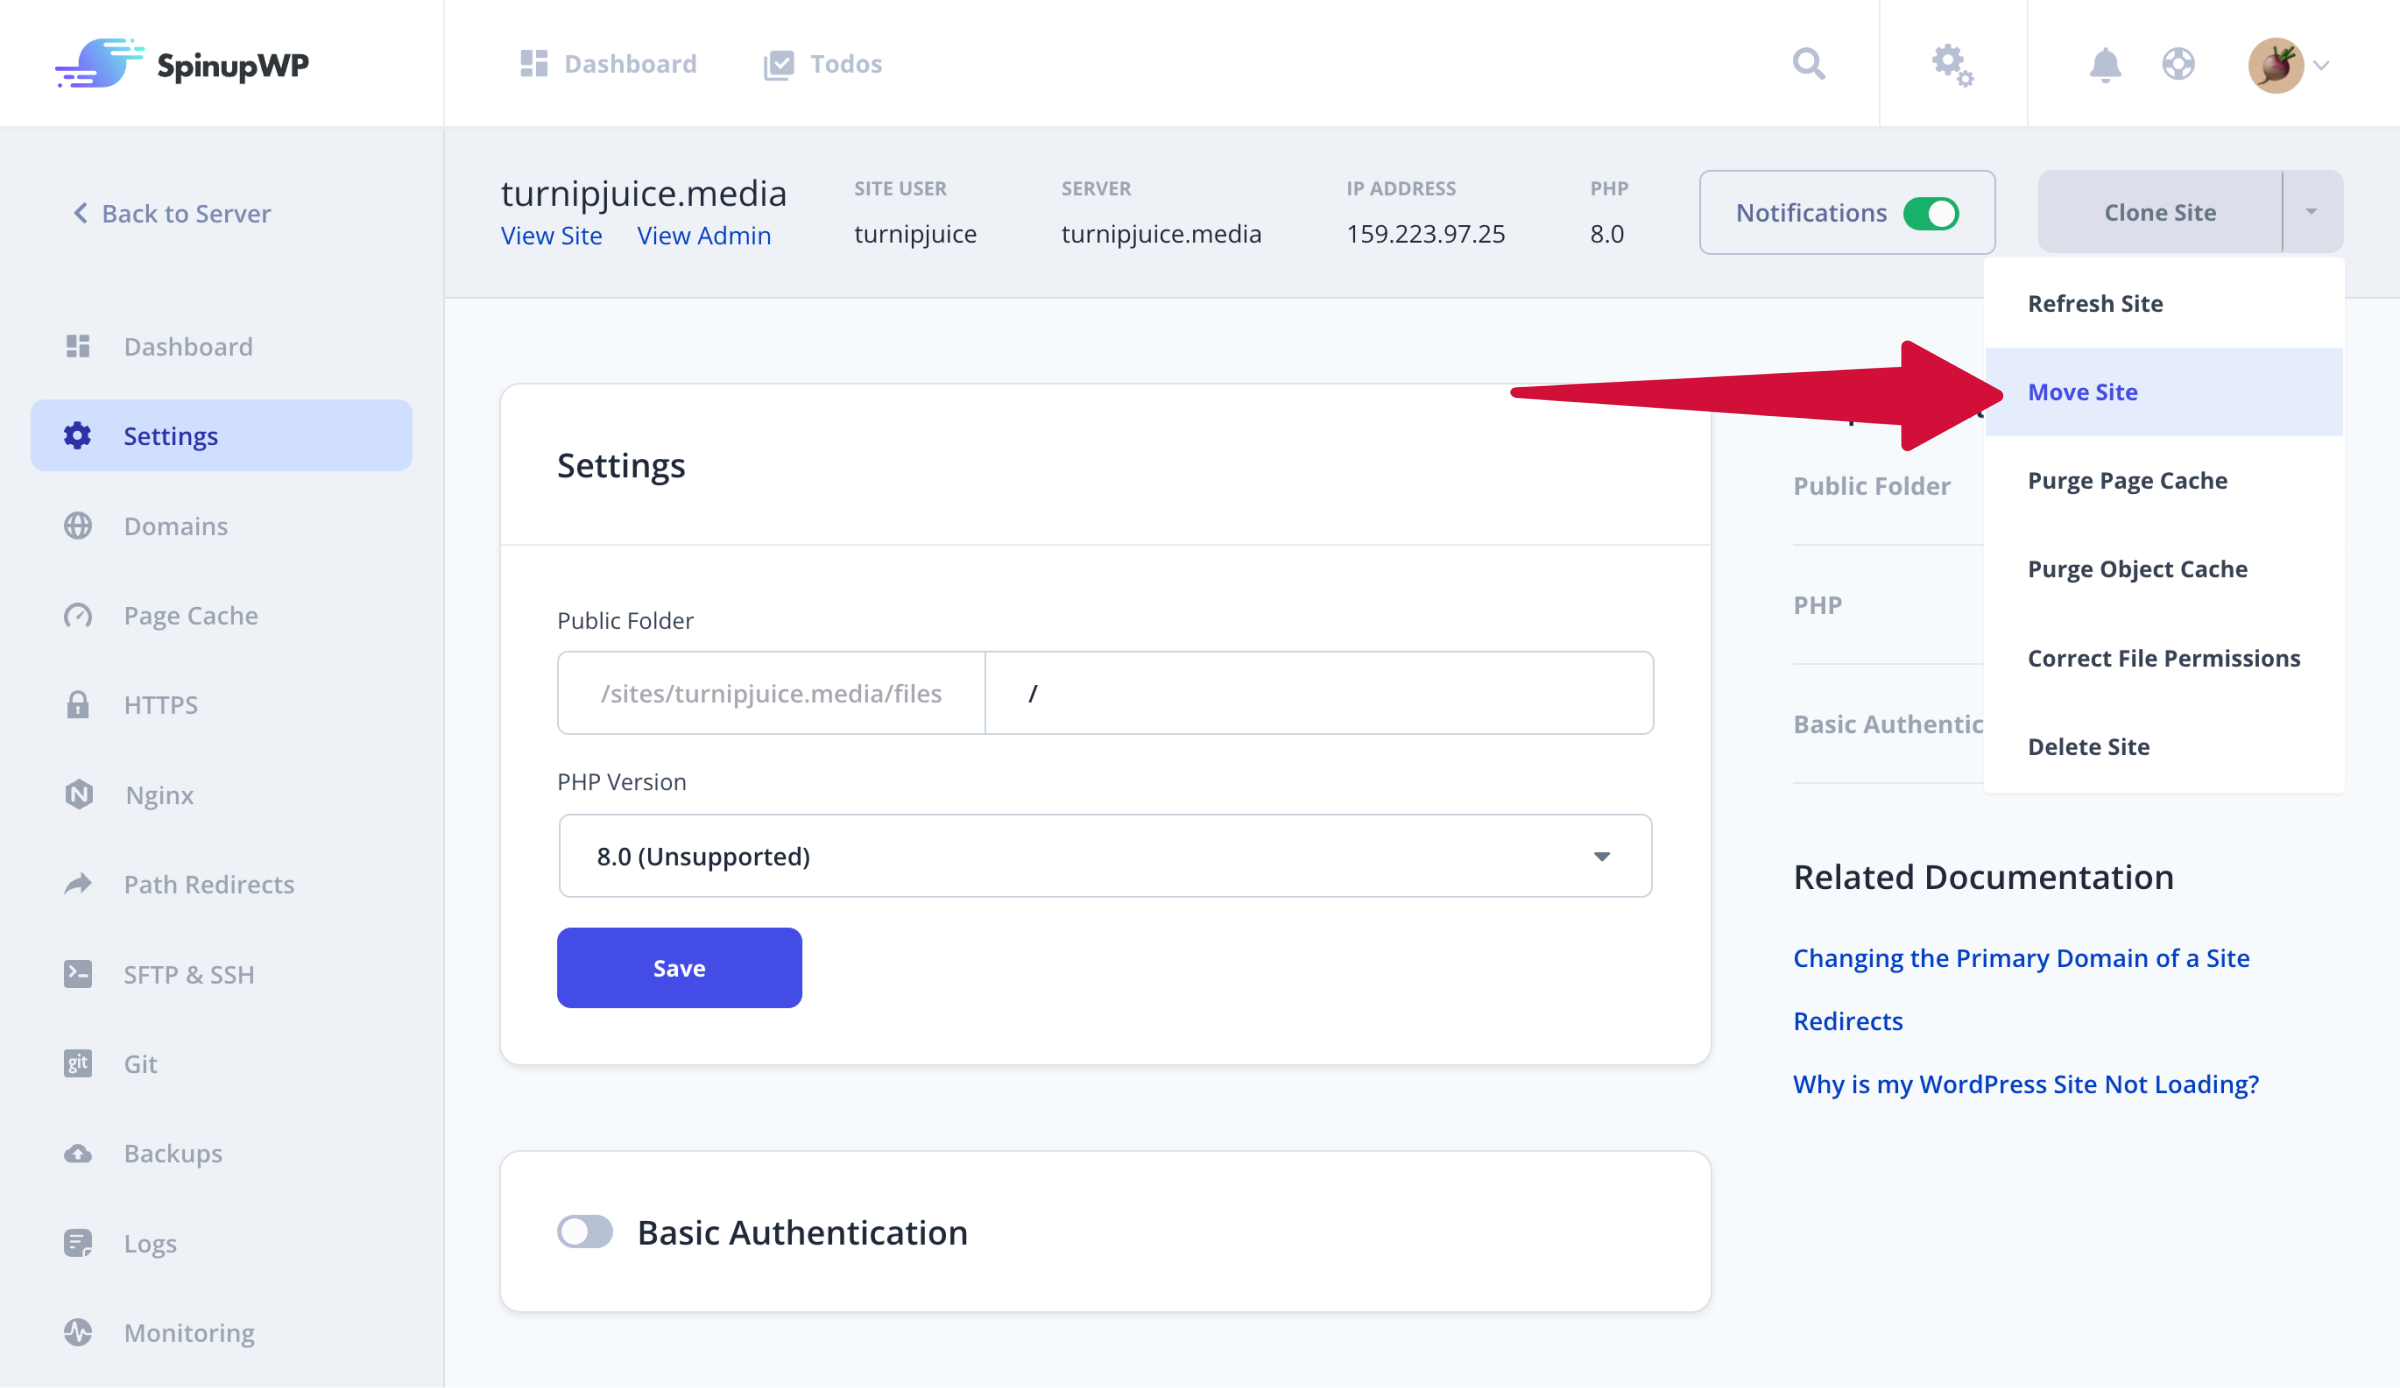
Within SpinupWP, head over to the site that you wish to move, and hit the move button.

You’ll be asked to select a destination server. Hit ‘Move Site’ to start the move process. If you’re adding a git site, you’ll be prompted to authenticate with your git provider if this is the first git site you’ve added to the server. Once complete, you’ll now have an exact clone of the site running on the new server.
4. Testing
It’s a good idea to test your site on the new server. You can do this by spoofing your local DNS, which will ensure your visitors are still using the site on the old server while you test the site on the new server.
On your local machine, add an entry to your /etc/hosts file that points your domain name at the new server’s IP address:
216.3.128.12 turnipjuice.media
Once your hosts file is updated, you’ll be accessing the new server when you navigate to your site.
5. Maintenance window
Now that we have the site running smoothly on the new server, we need to put up the maintenance page we prepared in step 2 while we copy the latest files and database over to the new server.
* As mentioned earlier, if the site is static you can skip this step. Just be aware that you should wait until DNS propagation has completed before accessing WP Admin.
Upload the index.html file to the site’s /sites/{domain}/files folder on the old server.
On your old server using a sudo user, open the site’s Nginx config file:
sudo vi /etc/nginx/sites-available/turnipjuice.media/turnipjuice.media
Ensure that the index directive looks like the following:
index index.html index.php;
This will ensure that our maintenance page handles all requests instead of WordPress. Once you’re done editing the configuration, be sure to reload Nginx.
6. Refresh files and database
* You can skip this step if no changes were made to the live site.
Now that you’re sure all requests to your live site are being served by the maintenance page (or a cached page) you can copy the latest site files and database to your new server again. This will ensure that any changes to the site that were made during the testing window are copied to the new site.
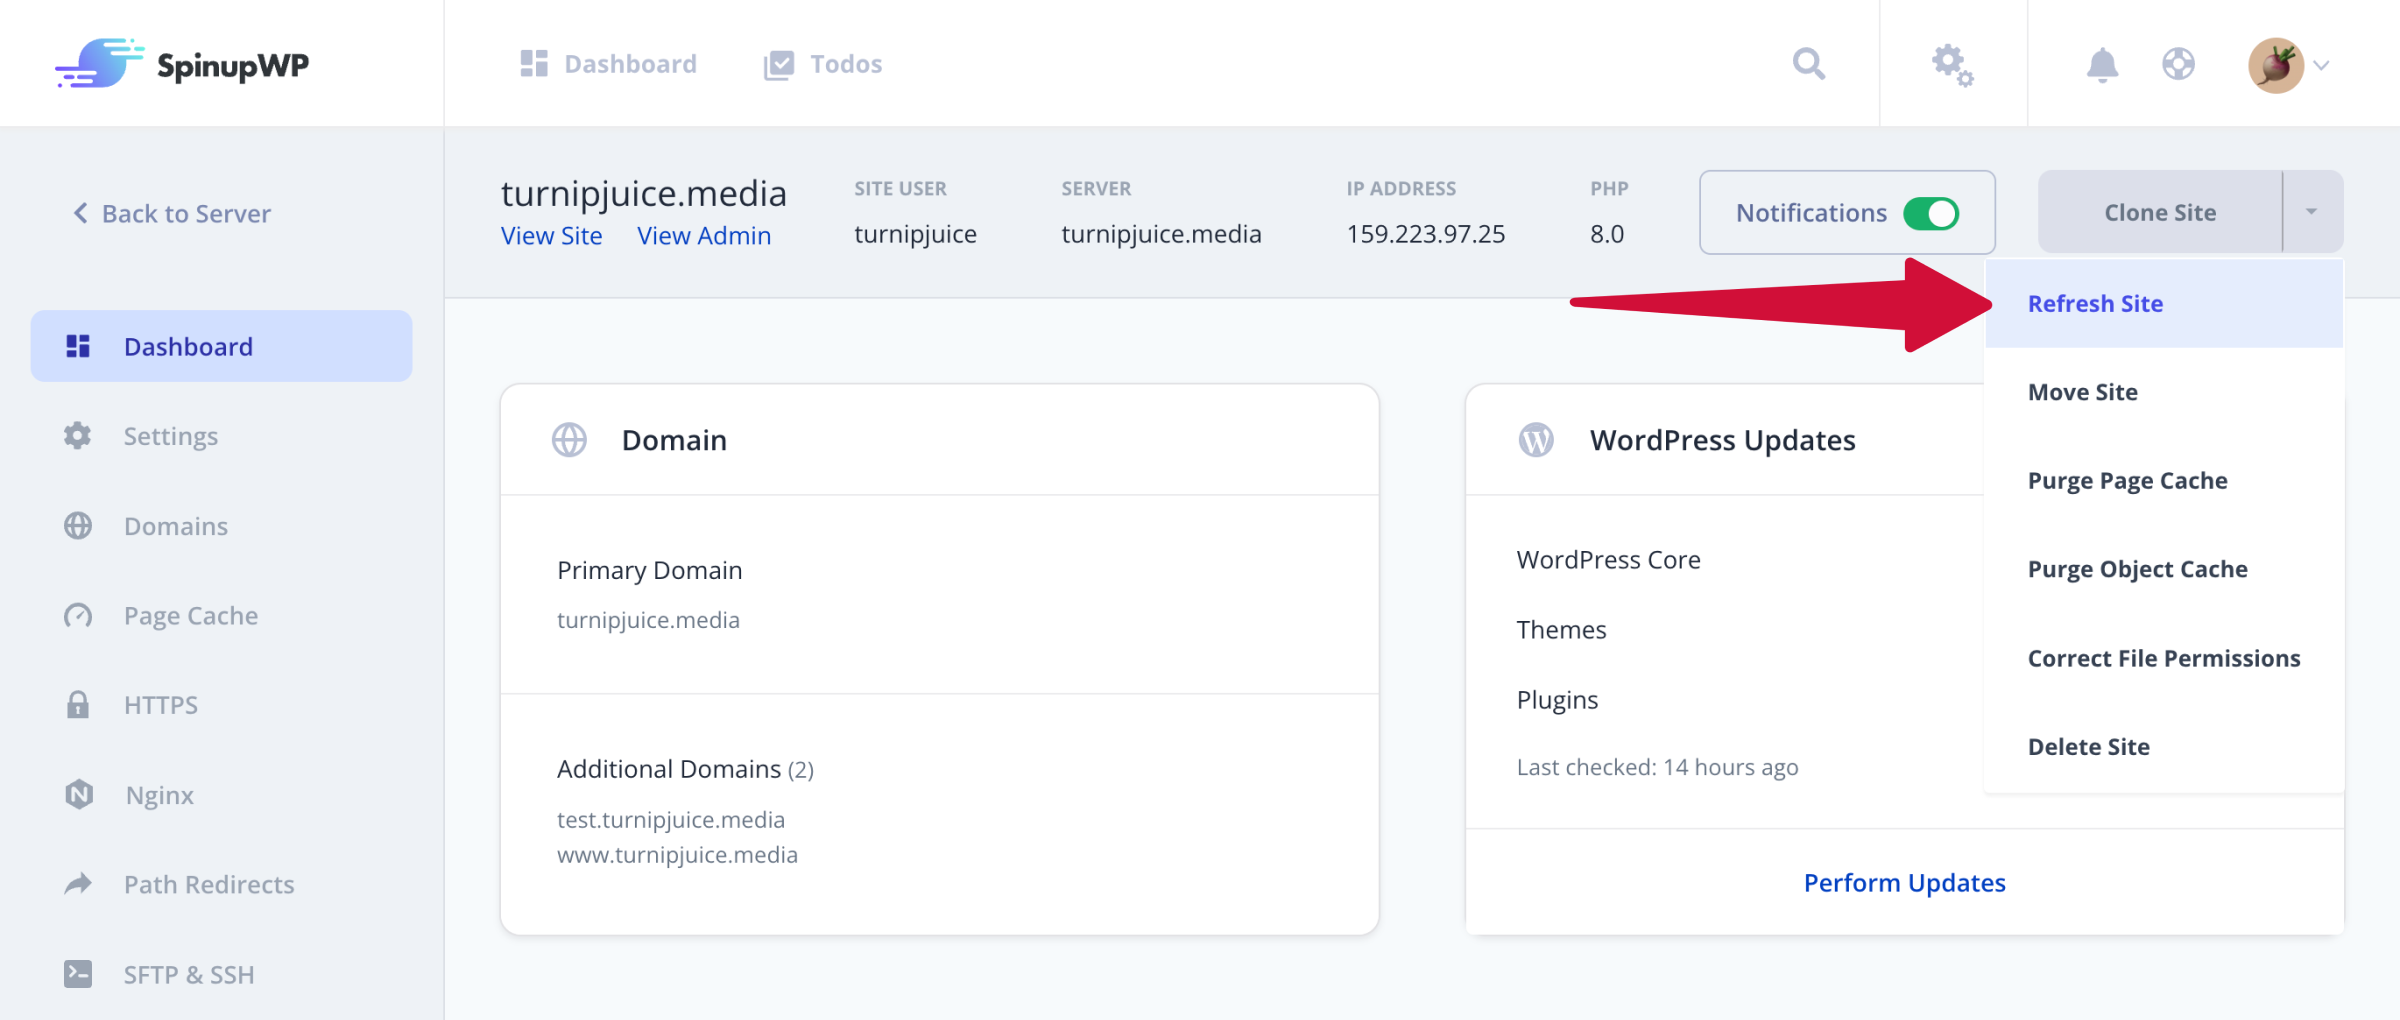
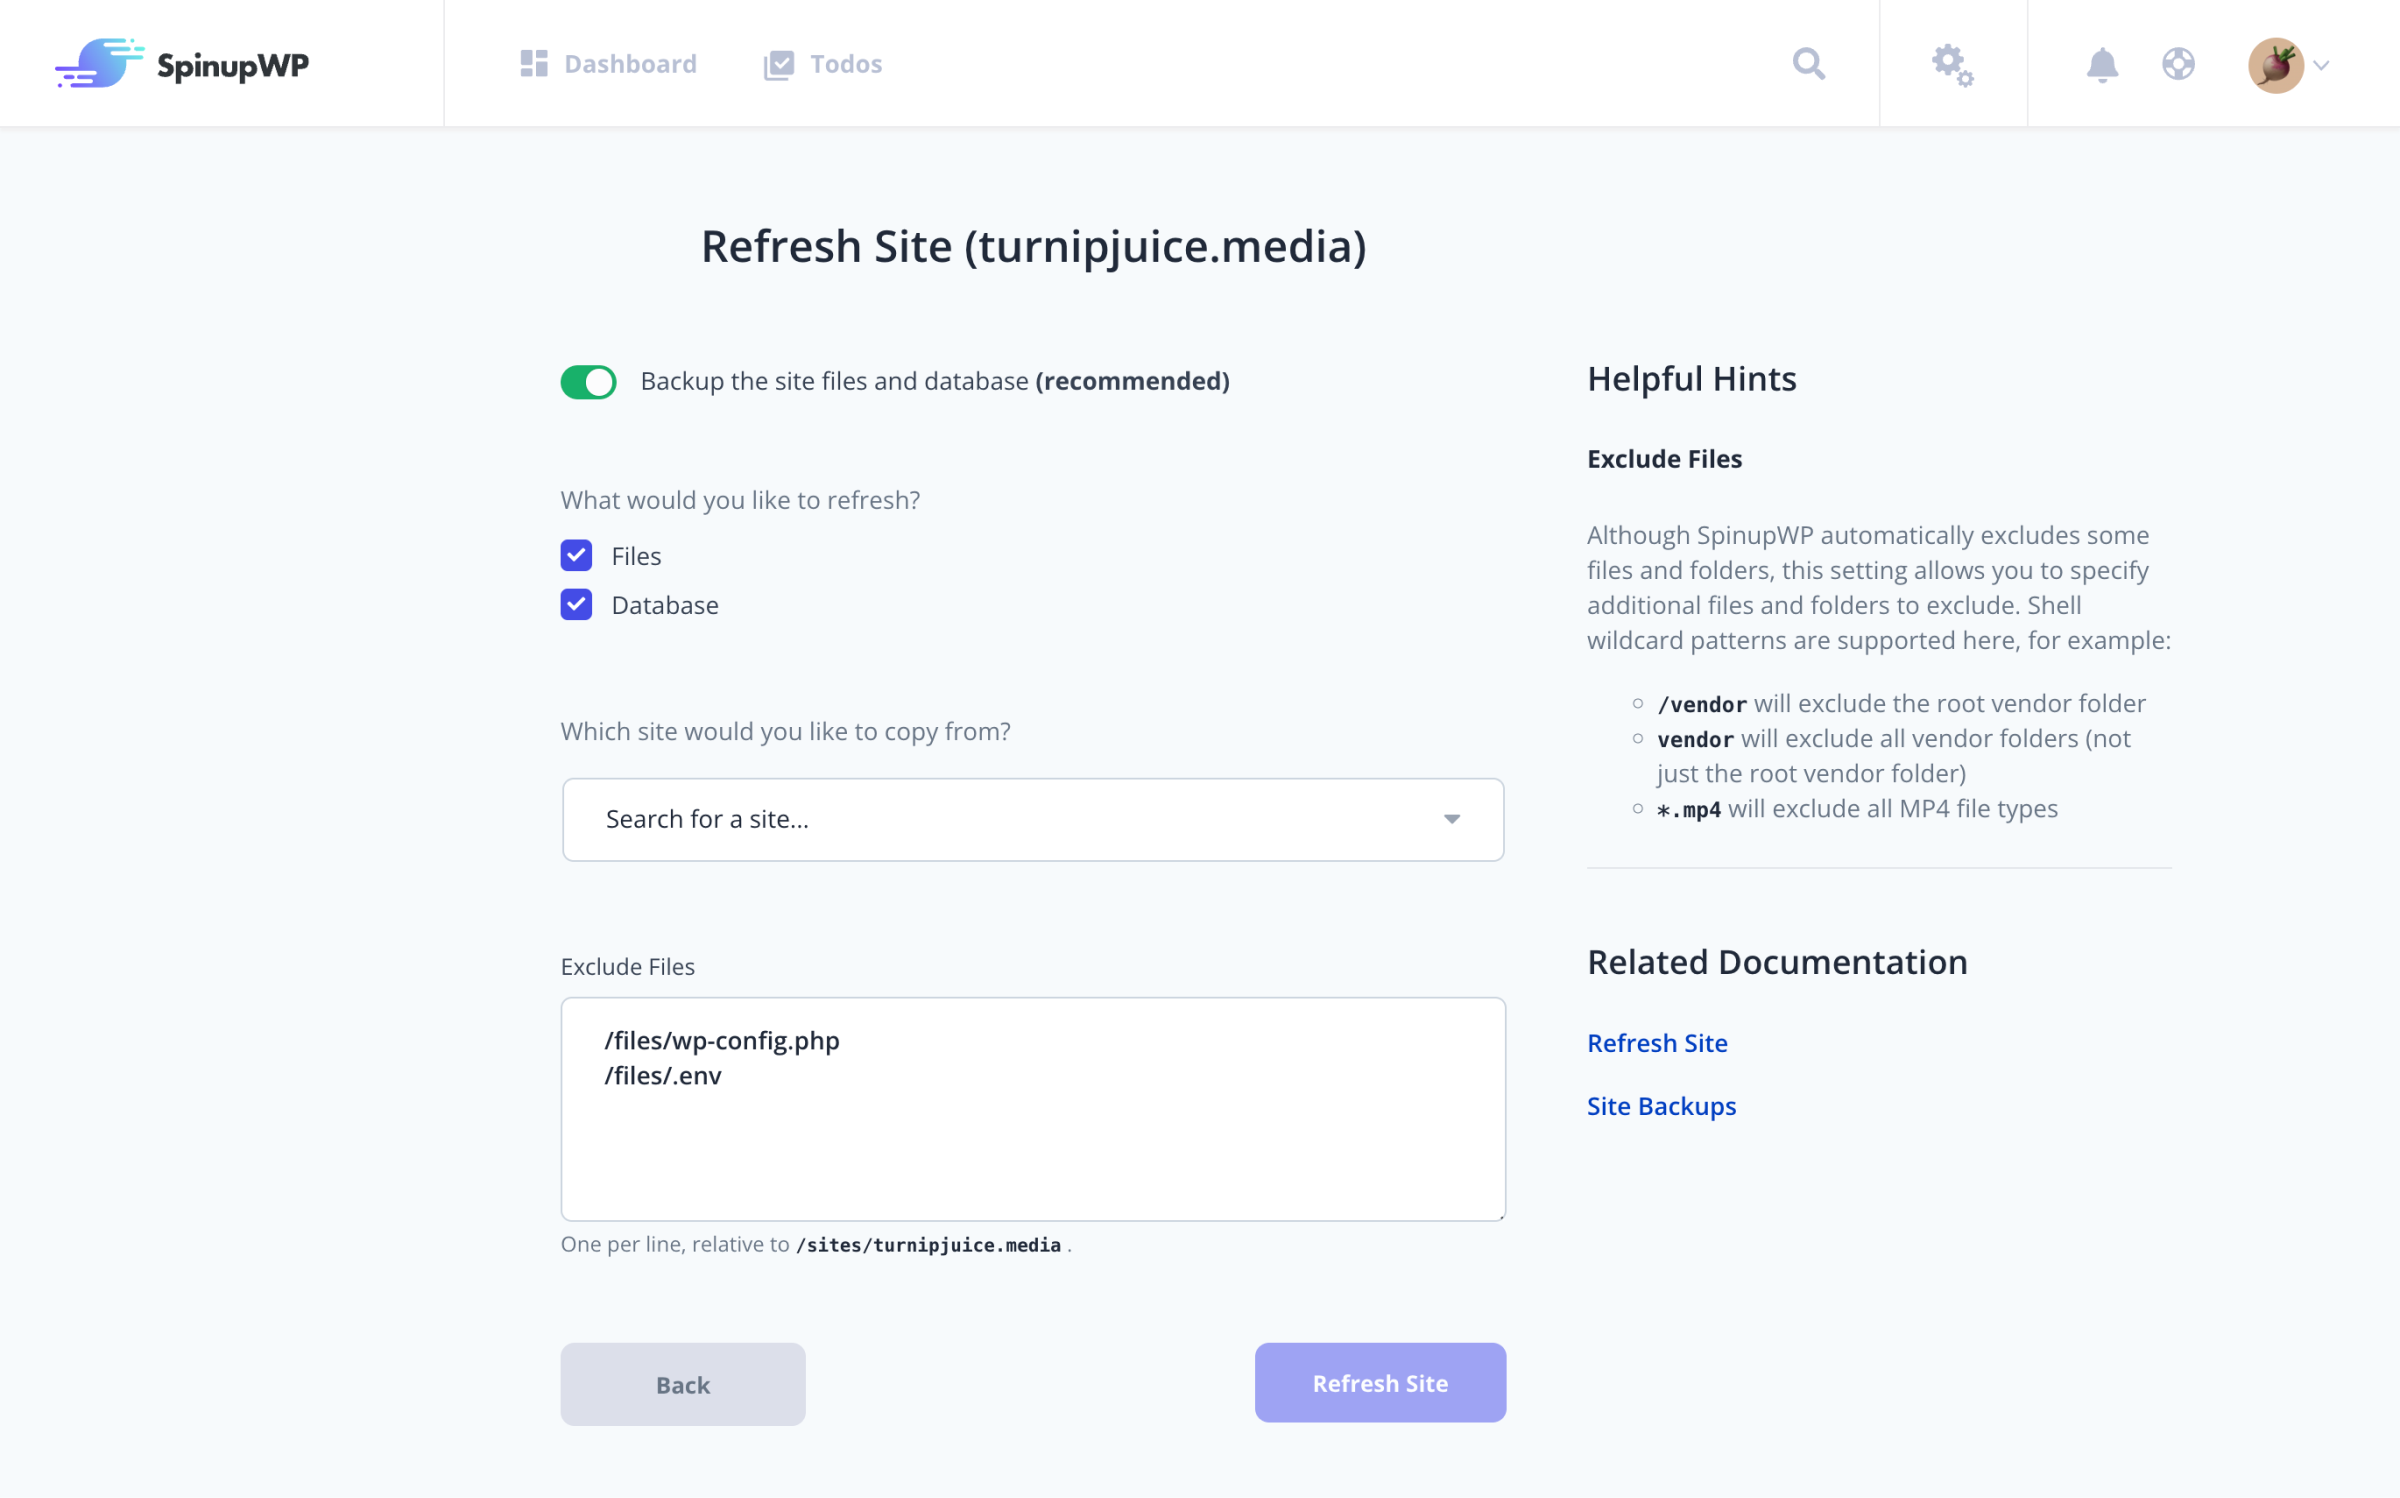
Navigate to the new site and click Refresh Site.


For specifics on the updates the Refresh Site tool will make, check out our Refresh Site documentation.
Once you’ve copied the latest site files and database from your old server to your new server, do a quick skim test to make sure everything is still working. If you have a critical path (e.g. the checkout of an ecommerce site), be sure to test that.
7. Update DNS to point at the SpinupWP server
Once you’re confident that everything is working as expected, log into your DNS control panel and update your A record(s) to point to the new server. This should start routing traffic to your new server, but remember the TTL we discussed in step 1. Anyone who has visited your site recently may still be routed to the old server and see the maintenance page. It will take the length of your TTL before all traffic is routed to your new server.
8. Final testing
While you’re waiting for all traffic to be routed, you might as well do some more testing. Once you’ve fully tested the site and are satisfied, remove the entry from your /etc/hosts file that we added earlier and load the site in your browser.
If you still see the maintenance page, your DNS cache has still not expired and your domain name is still pointing at your old server. If that keeps up, you should double-check your DNS to make sure that your A record update has taken effect. Then you could use a site like dnschecker.org to see what IP address other DNS systems are reading for your domain name. If it’s showing your new IP, chances are most of your traffic is seeing your new site even though you are still seeing your old site.
9. Verify Backups
Site Backup settings are also migrated as part of the Move Site process. Scheduled backups are disabled on the new site but the rest of the backup settings remain unchanged. Be sure to verify backups are working as expected by initiating a manual backup and verifying it completes successfully. You should also download and review the backup files to ensure everything looks right. Once you have completed the move process, you will want to enable scheduled backups.
10. Verify Monitoring
If you make use of SpinupWP’s Site Monitoring, you will want to toggle this off for the old site and on for the new site via the Monitoring tab in your site dashboard.
Finishing up
Now that your site is live on your new server, you’re good to go. Remember, that you’ll want to delete the old site from SpinupWP once enough time has elapsed for DNS propagation to complete.